Every summer resident, after purchasing a plot of land and building a house, asks himself the question “where to start landscaping a summer cottage”? Of course, the first thing you need to do is arrange a parking lot for cars, but what material should be used, because today there are many different types of material for paving a car area in a country house.
Cost of laying paving stones for a parking lot on a concrete base.
| Types of jobs | Price for 1m2 | The work includes: | |
| Cost of laying paving slabs on a finished concrete base. (All customer materials) | From 950 RUR per 1 m2 | 1) visiting for measurements 2) drawing up an estimate 3) laying paving slabs or paving stones on a dry mixture. 4) grouting joints. installation of curbs and gutters 500 rub. per linear meter. | |
| Laying paving slabs, paving stones on a concrete base. with full turnkey preparation. (The price includes all materials and work.) | From 5000r for 1m2 | 1) Excavation of soil 2) Installation of formwork 3) Backfilling of sand with compaction 10 cm thick. 4) backfilling of crushed stone with compaction. 10 cm thick. 5) Reinforcement with road mesh. 6) pouring concrete M300, 10 cm thick 7) laying paving slabs
| |
 grouting
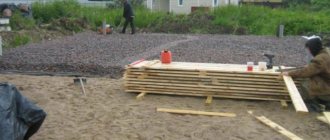
Stages of work on arranging a site at the dacha made of concrete and paving slabs.
- Territory marking
- Installation of wooden formwork
- Excavation 20-30 cm
- Crushed stone cushion 10 cm thick
- Compacting crushed stone cushions
- Sand cushion 10 cm thick
- Compacting a sand cushion
- Reinforcement of the site with road mesh or 10mm reinforcement, cells 20*20mm
- Pouring concrete grade M300, 10-12 cm thick.
- Dismantling of formwork.
Concrete gains 100% strength within 21 days, but it will gain the first 80% within 3-5 days. This means that after 3-5 days we can start paving the parking lot for cars.
- Installing curb stones with cement mortar
- Laying a layer of dry mixture up to 2 cm.
- Leveling the dry mixture layer
- Laying paving slabs
- Grouting joints.
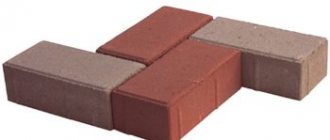
The main advantage of paving slabs on a concrete base is its strength, stability and durability. This type of parking for cars on a summer cottage does not sag under mechanical and weight loads, which means that the car parking will serve not only you, but also your children and grandchildren. You can order pouring a concrete pad by calling the number listed on the website, or leaving a request by email.
No. 174 - Paving stones break off during compaction
Tamping paving stones of paving clinker slabs
Leveling paving stones of sidewalks with a vibrating plate.
Paving slabs split and break off during compaction.
Why do paving stones burst when compacted with a vibrating plate?
Compacting paving stones with a vibrating plate, consequences and violations.
Why do marks remain on the paving stones after compaction?
Any type of laying paving stones using any type of paving technology using heavy equipment for vibropressing paving stones is strictly prohibited . Any paving stone cannot withstand the impacts of a multi-kilogram machine at the corners. Paving stones quickly burst, and in addition to this, numerous chips and deformation defects appear on the paving surface, which are eliminated by replacing the paving stones and additional paving costs, even if you use a silicone cushion, the quality of the paving will not change. Any professional paving using a dry mixture or adhesive composition (except for the technology of laying on a sand base using washed sand) does not require mechanisms such as vibrating plates, since they violate the paving technology and spoil the aesthetic appearance. This type of work “using a vibrating plate for compacting paving stones” is a veiled, far-fetched, useless work that came from urban technologies through unprofessional workers, for which we have full justification for never using it. Let us describe to you everything in detail and what you may encounter in the process of vibropressing paving stones
If you have laid vibropressed or cast paving stones on a dry mix using a concrete base, but have not yet spilled the paving stones and decide to compact them with a shrinkage mechanism, this will lead to splitting of the paving stones and partial deformation. In a dry mixture of brands such as M-300, there are granite pebbles or small stones of another type. After pressing with hammers and paving over paving stones, stones and dry mixture have formed the correct compression and a dense cushion. Next, workers repeat the second work process of pressing with a vibrating plate, from which the paving stones vibrate on a dense base and press the dry mixture, and the dry mixture rests against a concrete base or a gravel pad, which was already vibrated before paving and does not shrink. What happens is that the paving stones, under pressure, rest against a dense cushion of the dry mixture in which the stones are located, and since the stones do not have the ability to settle and rest against a common cushion (pie) , then in this case the paving stones immediately burst when hit by a vibropressed slab, since the paving stones rest against the stone and a turning point occurs, it’s the same as taking a paving stone and hitting an acute angle along its entire plane in the center and it will break. Paving stones also burst when the level of dry mixture underneath fails. And when the paving stones come under the physical resistance of a pillow of dry mixture on one side against the other side, which received a strong blow from the vibrating plate, the paving stones instantly burst. Also, in the process of vibration with a vibrating plate, numerous deformation chips remain on the paving stones because it vibrates on the stone or does not lie tightly on the dry mixture, since it has a full plane under the paving stones. The vibrating plate does not fit perfectly on the paving and knocks on different places of the paving stones wherever possible, accompanying the paving stones with cracks, cuts, various types of chips and abrasions. This type of work is simply a physical process that has constant physical deviations that are not established by the parameters of the machine or man. And physics will solve the process that it establishes through physical influence. Therefore, you will not be able to build a machine so that it works on the feelings of penetration into technology and distributes point loads on one or another paving stone and can change the impact force in time if it feels that if the physics is not correct, the paving stone will break and the machine, regardless of the person, will quickly rebuild impact parameters and plane so as not to break the paving stones. And for such a pressing apparatus to exist, it requires hundreds of millions of investments and not really colossal engineering developments. So you should think about what is happening to your paving now when you read this article.
Additional defects that may occur during compaction with a vibrating plate
- chips
- different types of abrasions on paving stones, scratches
- cracks in paving stones, broken paving stones
- failures of piece paving stones (drowned) term.AMB-bruslandshaft
- separation of paving stones from the dry mixture
- cracking of the hardened dry mixture under the paving stones
- discrepancies in paving stones at the edges adjoining the landscape
- change in slopes
- departure from the walls of the paving stones of the hardened dry mixture in the joints
- failures of the dry mixture in the seams if it has not yet hardened (re-grouting and cleaning will be required)
- departure of the dry mixture from the concrete base under the paving stones, if there is a concrete base
If you did paving with a dry mixture and during this period of paving it was raining, but your specialists, unknowingly, began to tamp, then in this case your paving stones will simply not work. And everything that was spilled with water, all the work was done in vain. Let us tell you why. For example, when moisture gets into the dry mixture, it is concreted with vibro-pressed paving stones and with the concrete base structure itself. So, you got a monolithic pillow and began to vibrate it. This will lead to the fact that from constant strong blows to the paving stones, which have gripped the dry mixture, the paving stones will begin to move away from the dry mixture, and the dry mixture itself will crush under the paving stones and move away from the base of the concrete. In this way, you completely collapse the paving and leave the concrete unprotected. Since the dry mixture will have cracks, water will simply pour under the base of the dry mixture through the seams of the paving stones and spread throughout the entire base of the concrete, and the paving stones themselves will not lie tightly and dangle. And when the temperature changes, the trapped moisture will begin to work at full strength, thus creating constant movement on the paving. In three years, you will have to come to terms with a complete violation of the aesthetics of the paving, with many deformation defects, and, of course, you will get a psychological defect. And to eliminate it, you will need to completely revive the paving. And the more you endure and look at it, the greater the risk of inflammation of the concrete base, which, while you think, is rotting.
In the present technology of laying paving stones on a dry mixture, there is no veiled style of work using vibrocompression using a vibrating plate. Before laying, the dry mixture is scattered to the level and then the paving stones are pressed with hammers, not just laid, but well hammered with strong blows with heavy mallets, and if the paving stones sank lower than the other due to the blows, it is removed and the dry mixture is added and the paving stones are hammered in again after a certain stage of work , before heavy rains, it should be poured evenly and concreted. Even the next day, large vehicles can already drive onto paving stones with this style of paving, and since the correct paving technology is followed, there will be no deformation, and fictitious work such as vibratory pressing of laid paving stones with machines will not be required. In practice, we have never used vibrocompression for paving, since we do not consider it necessary. It happened to us that in the process of paving with dry mix (a technology that we have not used for a long time), the paving stones also burst under pressing with heavy mallets, and when we removed them individually and replaced them with a new one, we pulled out small pebbles from under them, as they played key role in breaking paving stones when struck with a hammer. Therefore, it’s worth thinking about what happens when your vibrating plate rolls around. Sometimes when vibrating paving stones, even silicone pads installed on the machine do not help. If you are interested in other issues related to laying paving stones and making a base, you can read other reliable articles with many videos on our website. You can find more detailed information on laying paving stones and using tampers for it by clicking on link No. 490. Is it necessary? vibrator for laying paving stones.
With great respect AMB-bruslandshaft
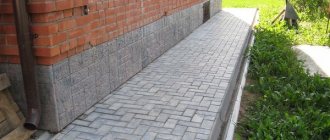
Car parking at the dacha made of paving slabs on a crushed stone-sand base.
As we said above, the technology for laying paving slabs on crushed stone and sand is different from that on concrete. One of the main advantages of this option is the cost of laying paving stones on crushed stone and sand. This option will be much cheaper, since concrete work is quite labor-intensive and requires professional knowledge.
Scope of application of paving slabs
The main purpose of paving slabs is to create hard road surfaces. More often it is used for pedestrian paths, less often for automobile driveways. This building material is needed for the design of local areas and city streets, parks, and recreation areas.
The popular bookmaker has launched a mobile application for Android, you can follow the link absolutely free and without registration.
Tile coating is used in the following areas:
- landscape design;
- landscape architecture;
- road construction industry;
- Department of Housing and Utilities.
The tiles are suitable for creating paths, boulevards, squares, driveways, intra-block streets, wide pedestrian areas, sidewalks and alleys. It is also indispensable for paving city squares, beautifying areas near cafes and shops, constructing terraces and exposed roofs.
Laying paving stones on crushed stone and sand price
| Types of jobs | Price for 1m2 | The work includes: |
| Turnkey laying of paving stones or paving slabs for car parking | from 2500 rubles per 1 m2 all materials are customer's materials | 1).excavation of soil 20 cm 2) backfilling of crushed stone 10 cm with compaction 3) backfilling of sand 10 cm with compaction 4) laying paving slabs 5) Grouting joints |
| Price for laying paving slabs with full preparation of the base on crushed stone and sand base, (customer materials) | from 1500 rub. per square meter (m2) Depending on the size of the tile and texture. | 1).excavation 2) backfilling of crushed stone with compaction 3) backfilling of sand with compaction 4) laying paving slabs 5) Grouting joints |
| Installation of curbstones and gutters, taking into account materials and work. | From 750 rubles per 1 m.p., depending on the thickness and color of the curb stone. | Installation on cement mortar |
| Price for dismantling old paving stones, asphalt or concrete base. | from 480 rubles per 1 m2 | all waste is stored up to 30 m from the dismantling site. |
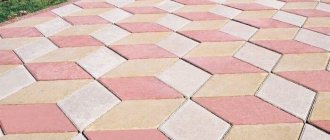
Laying paving slabs, advice from professional masons
Paving slabs are a modern material that has a number of advantages over asphalt or concrete. The service life depends on proper laying and soil preparation. Let's listen to the experts in this matter!
14 Paving slabs and paving stones are an indispensable element of landscape design.
Initially, when designing the entire site, we ask ourselves the question of where to locate the house, utility rooms, bathhouse, and garden. Perhaps you will invite a landscape designer who will competently select and schematically present to you the organization of the entire space. It is at this moment that it is decided where, how, what shape, and from what the paths will be laid throughout the area. The load and functional mode are taken into account. Either you will just walk along them, or ride a bicycle and, of course, park your car. Therefore, the requirements for the choice of material are high; design, environmental friendliness of the material, and its strength are taken into account. Let's consult Lesobaza.RF specialists on this issue.
11
Paving stones at the Picnic site
Let's start with planning all the work. Let's look at the important points;
8
Such paths fit very nicely into the overall picture of the site.
1. The most important directions and patterns of movement around the site. The key rule can be formulated as follows: “The central path leads from the entrance to the house.” If there are additional buildings on the site, such as a garage, utility room or gazebo, then main paths are needed to them. This way, you can ensure the zoning of the site, ensuring unobstructed access to each building and determine the main directions.
10
9
Main paths on the site.
2. The width of the tracks. The main paths must be of sufficient width (to provide passage for two) and equal load, because
they are the main ones. On average, the normal width is considered to be from 1 to 1.5 meters. Paths that are not used very often, for example, those leading to flower beds or beds, can be made 0.5 to 0.8 meters wide.
Landscape improvement specialist Pavel Vladimirovich Seleninov:
For myself, I clearly divide paths into decorative ones, for example, leading to a gazebo, and functional ones, which are subject to heavy loads and lead to a house or garage. Paths that experience heavy loads require more thorough soil preparation than paths that are not used as often. You also need to consider how you will care for your garden path in winter and autumn. Unlike bulk (you can use crushed stone, gravel, mulch), it is easier to maintain a path made of paving slabs.
When removing snow and fallen leaves, you will not discard the base. The second, important part of choosing a tile is its design, material, surface, on which you will probably walk barefoot. Your perception. And in order to understand this, you can use the secret of landscape designers.
Director of the company Bulygin Dmitry Vyacheslavovich
: I always advise you to first walk along pre-marked paths and make sure that everything is comfortable and that it is convenient for all household members to move along them.
I can say that after such a “walk” you almost always have to make adjustments to the original plan for marking the path. There is a choice of tile thickness.
Expert answer Konstantin Merzlyakov: - For garden paths and local areas where passenger vehicles do not enter, a sufficient tile thickness of 40-50 mm is sufficient.
And for a path providing passage for passenger cars and parking, the thickness of the tiles must be at least 60 mm. Specialist Pavel Shelkov:
Initial preparation for laying garden paths, as a rule, involves excavation, and this must be linked to the geoplasticity of your site. For example, with large differences in heights, slopes, etc., because moving and removing large masses of land is a very costly undertaking that requires the use of construction equipment.
9
Paving stones at the entrance to the site.
Shelkov Pavel:
Modern building products are made of concrete. The shape can be absolutely any, which allows you to successfully fit garden paths into the landscape design of any site. The service life of vibropressed concrete tiles is on average 15 years, provided that the base is properly prepared. And, like any coating, paving slabs require maintenance during operation (cleaning, use of water-repellent coatings, etc.).
The first stage of preparatory work for laying is breaking down the contour of the area to be laid and setting up control “beacons”.
Everything is taken into account here, the corners of the territory, the connection to the existing areas, as well as the slope for water drainage. After the work on laying out the contour has been completed, they begin to prepare the base and soil. This includes: planning and installation of the load-bearing layer, installation of curbs, installation of a leveling sand layer under the tiles. The work is carried out in the following sequence: 1. Earthen boxes are dug under the side stone. 2. A side stone is installed around the perimeter of the site. Curb stone is necessary for strong fixation of paving slabs.
3. The underlying layer is poured. 4. The base is being laid. 5. The tile covering is laid. 6. The tile joints are filled. It is also necessary to remember that when laying tiles, the following standards should be followed.
Director of the Novmosstroy
Dmitry Bulygin: Work on the installation of sidewalk coverings must be carried out in accordance with SNiP 3.06.03-85 “Highways” and SNiP III-10-75 “Improvement of territories”.
11
Laying tiles is an art.
And the independent installation process can be divided into a number of successive stages. 1. The same goes for planning and designing a garden path. It is necessary to determine the type of soil on the site. Then develop the layout of the garden paths, choose the tile layout and its design.
2. Calculate the cost of the necessary materials. 3. Carrying out work on laying garden paths. Let's take a closer look at each of the points.
7
Planning and designing a garden path.
Shelkov Pavel:
The choice of method of laying tiles depends on the condition and preparation of the soil. Subsequent operational conditions are taken into account, for example: the blind area of the building, pedestrian zone, area for travel and parking of cars. It should be remembered that the result of your work, first of all, will depend on the thoroughness of the preliminary marking and preparation of the base for laying the tiles.
Place markings on the site.
Walk along all future paths. Calculate the volume of material, add 8-10% in case you need more. Always pay attention to the shape and size, this can either complicate or simplify the installation process. First of all, determine the direction of water flow. Please note that water should flow along the blind area of the building or along the path into drainage wells or onto lawns. The slope can be made longitudinal, transverse, longitudinal-transverse, but not less than 5%, that is, 5 mm per meter. The direction of the slope should be such that water flows from the paving into drainage systems or onto the lawn, diverting water away from the main structures.
Next, hammer in the pegs and stretch the fishing line or rope to make the boundaries clear. Next, proceed to excavation.
7
Living trees decorate landscape design.
Recommendations: The excavation is carried out so that after laying the front surface of the tiles reaches the specified level of your site. · The area formed after excavation is leveled and compacted. · If the soil is soft, it needs to be moistened (sprayed with water from a hose) and compacted.
6
Seleninov Pavel:
Drainage and water disposal, for example, into a storm drain or storage well, must be thought out and installed at the preparatory stage of laying garden paths.
6
Path made of paving slabs.
Shelkov Pavel:
When laying paving slabs on a complex curved surface and with a large difference in heights, it is necessary when planning to include a larger percentage for the consumption of tiles (trimming, fitting, etc.).
Preparing the base
The most important and difficult stage is preparing the foundation. A well-prepared base will not allow the tiles to “sag” in the future, thereby ensuring a smooth surface and service life of the path. Please note that despite the tight seams between the tiles, water still gets into the base. Therefore, it is necessary to lay a permeable drainage bearing layer (crushed stone or gravel). Then water from the surface will flow well into the lower layers under the tile. It is also important to understand what layers the correct base pie for laying tiles consists of.
7
8
Paving stones near the house
Mason Babiar Mikhail: The pie consists of several layers: a natural soil base, a subbase, an underlying layer, a “bed” and, in fact, paving slabs.
The “bed” is a layer of sand or small gravel.
The sub-base is a bulk layer of soil, and the underlying layer consists of gravel or crushed stone. Seleninov Pavel
:
The thickness of the “bed” for any type of soil base is on average 3-5 cm. The thickness of the remaining layers should be formed based on indicators of the soil base such as humidity, density and composition.
Shelkov Pavel:
For the main load-bearing layer, frost-resistant material with a uniform grain composition (crushed stone, gravel) is used. This material must be laid evenly in height and with the required slopes. When arranging ordinary pedestrian paths, the load-bearing layer is made 10-20 cm thick. When constructing areas for travel and parking of passenger cars, a layer of 20-30 cm is used. For heavy loads, the load-bearing layer is increased and placed in 2-3 layers, with each layer being compacted with a vibrating plate or a vibrating roller.
As already mentioned, it is necessary to take into account the bearing capacity of the soil, and the degree of preparation of the foundation depends on the expected load.
Mason Mikhail recommends this pie for laying paving slabs in difficult soil: If there is so-called heavy or clayey soil under the base, or you have a wetland, then the thickness of the crushed stone base must be made at least 10 cm.
Then geotextiles are laid. Geotextiles allow water to pass through well and do not allow materials to mix (mixing materials leads to the formation of voids and gaps in the coatings).
Shelkov Pavel
:
The use of geotextiles is appropriate when the natural soil base is located in a swampy area and has high humidity.
A layer of geotextile is placed above the natural soil base. The next layer of our “pie” is based on a geotextile base.
Seleninov Pavel
:
We fill the area with screenings (or sand). The screening layer must be at least 10 cm. It is important to compact well. At this stage, it is necessary to accurately level the entire foundation for laying using a rule or other tool. Screenings do not have very good caking properties. This means that over time the base becomes almost monolithic, and then, due to its low strength, it cracks, and cracks and cavities form in the coating. To avoid such a nuisance, use a vibrating tool for compaction and do not carry out work in rainy weather. The best screening for such work is dry.
5
Paving slabs
Next, we follow the following algorithm and begin to create the foundation level: · The boundaries and center lines of the site are marked with a rope. · Loose sand can be leveled just below the edges of the curb. · Compact the resulting cushion with a vibrating plate.
Bricklayer Babiar Mikhail :
An electric or gasoline vibratory ramming machine with a rubber sole is well suited for compacting a layer of sand. With its help, you can not only prepare a high-quality gravel-sand cushion, but also avoid further subsidence and collapse of the soil under the laid tiles.
5
Autumn paths at the Picnic site
Shelkov Pavel:
It must be remembered that all layers of the base are poured, leveled and compacted, taking into account a 5% slope!
The final stage will be filling with sand or a cement-sand mixture 1-2 cm thick, leaving the layer loose.
CPS (cement-sand mixture) is taken in a ratio of 1:8-1:10, because
cement is needed to bind the sand so that it can be washed away by water. Bricklayer
Mikhail Babyar
:
The use of a cement-sand mixture as a “bed” is justified only in the case where intensive traffic movement along the surface of the tile is expected. The garage and pedestrian zone of a private house do not belong here, because the movement and load here are not so intense.
6
Paving stones, work on site.
Laying paving slabs:
In order for the garden path to last a long time, and for the tiles to lie flat on it, its installation must also be divided into several successive stages.
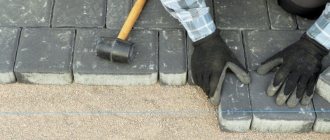
Laying begins: · from the bottom point; · from optically important boundaries; · from conspicuous elements: porch, front entrance to the house; · manual laying of tiles is done diagonally in the direction “away from you”, so as not to disturb the prepared top layer. While holding onto the cord, begin laying the first row of tiles. It is recommended to check the location and straightness of the seams every three rows of laid paving slabs. Laying is done using a rubber hammer (mallet) with light blows on the tiles. Every 3-5 square meters of laid but not yet compacted paving slabs, its surface is controlled using a two-meter rule or a building level.
7
Very beautiful pattern on the paving stones.
Seleninov Pavel:
Curb stones should be used to frame paths.
These guards are installed before laying the outer part of the path to prevent lateral movement and settlement of the tiles. Along the edges of the marked area, along a stretched cord, dig a trench of small size and depth (so that the curb enters this trench to the required level).
The base of the trench must be compacted, backfilled, and the curb installed on concrete. The border can be visible or hidden, it depends on the desire.
If the border is hidden, then the top of the tile should exceed the top of the border by the height of the chamfer. Mason Babiar Michael :
To reduce the number of tiles to cut, start the longest row from the curb, laying entire tiles directly towards it.
The resulting voids make up exactly half of the tile. When cutting from one whole, you will get two desired halves. In some cases, waste can be completely avoided. This technique can be used for figured symmetrical tiles. Under no circumstances should paving slabs be laid on waterproof, monolithic bases; the main enemy of tiles is freezing water.
6
Granite paving stones
Sealing and vibrating ramming
After you have laid the path, then proceed to compact the tiles with vibrating tiles. After each pass, sprinkle sifted sand onto the surface to fill any gaps. This is done so that the sand binds together the entire structure of the sidewalk.
6
The final stage of work with paving stones on site.
Shelkov Pavel:
The gap between the tiles is provided by the so-called convex joint formers on the side surfaces of each tile.
Seleninov Pavel:
Remember that when sweeping seams, under no circumstances should you use a cement-sand mixture, because... It will be very difficult to wash it off the surface of the tile after the composition has dried. Sand placed on the surface and in joints must be clean and free of salts, organic materials and clay, which can cause efflorescence and growth.
8
Beautiful paths made of paving slabs.
And in order for your coating to be durable, you must adhere to the following recommendations when working:
· Do not lay tiles in rainy weather without a special canopy.
· Do not spill the seams with a mixture of sand and cement. If the area has “complex”, heaving soil, it must be taken into account that its displacement can deform the tile. Then a more complex installation is performed with the preparation of a concrete pad as a base, which guarantees durability. Thus, when laying garden paths yourself, you need to take into account every little detail and carefully plan all stages of the work. After all, the path to your home begins with a DIY garden path!
Laying paving slabs under a car 07/07/2019 12:34
To organize parking in suburban areas, most of their owners use tiles or paving stones. High-quality paving stones or paving slabs for parking a car in a country house are distinguished by their attractive appearance, long service life, and ease of repair in the event of any mechanical damage to the material. True, before making a platform for a car from paving slabs, you should read tips and recommendations for choosing it, and also study the rules for laying the base.
Preparatory work
Work on preparing paving slabs for parking a car at the dacha is divided into several stages:
- Selection of tiles - there are many options and forms of paving slabs and paving stones sold on the market: the first option is suitable for vehicles whose weight does not exceed 2 tons, and the second - for cars weighing more than 2000 kilograms;
- Choice of thickness - the thickness of the building material for the parking lot should not be less than 60 mm (as an option, you can lay 200x100x60 mm paving stones under the car);
- Color selection - the shade of the coating should organically fit into the overall design of the site;
- Choosing a base - it is optimal to choose a base made of sand and crushed stone or fill the site with a concrete mixture.
Features of choosing a base
The base for tiles or paving stones can be laid on the basis of a sand-crushed stone mixture or concrete.
- Before making a concrete screed, it is necessary to lay the curbs in advance. They are installed on the sides of the driveway and along the entire perimeter of the parking lot. To prevent water from rain and snow from accumulating on the site, it must be poured at a slope towards the gate. Concreting is carried out in several stages:
- It is necessary to remove debris and weeds from the site;
- then remove the soil layer (the depth should be at least 30 centimeters);
- the soil is leveled, geotextiles are laid evenly on it and an 8-10 cm layer of sand is poured onto the bottom (after which it is also leveled and compacted);
- mid-fraction crushed stone (fraction 5-20) is poured in a layer of approximately 10 cm;
- After this, you can start pouring a concrete mixture, which consists of river sand, M500 cement and medium-fraction crushed stone;
- Then let the concrete dry;
- The next layer is the dry mixture and paving stones on top of it.
- A sand-crushed stone base is also optimal for laying paving stones under a car . At the same time, to create a supporting layer, it is advisable to take crushed gravel or limestone, the fraction of which varies between 5-20 millimeters. The bearing layer is covered with crushed stone of a fraction of 7 centimeters. Additionally, you will need to purchase geotextiles.
Features of the final stage of work
After the paving slabs for parking a car at the dacha have been laid, its seams are filled with a dry mixture or sand, and then it needs to be allowed to “rest” for about 3 days so that the bonding solution is completely hardened. It is necessary to park the car only 5 - 6 days after its installation.
Such work is best left to experienced specialists. Only if all the nuances of the laying technology are observed, the site will not be washed away by water, and it will serve for several decades. In addition, you need to contact professionals when choosing paving slabs.