Why is geotextile used under paving slabs?
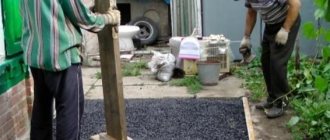
Figure 1. Geotextile under tiles
The main task of the substrate is to drain moisture into the soil: rain, groundwater. Geotextiles for laying paving slabs also perform other functions:
- protects the lower layers of soil from erosion during winter heaving;
- prevents the occurrence of soil erosion;
- acts as a separating layer that separates the soil from the sand, and it from the crushed stone (this allows each layer to retain its properties and performance data);
- allows you to maintain soil structure in the presence of heavy rainfall;
- does not allow the soil itself and layers of sand and crushed stone to be washed away;
- serves as a barrier to the growth of weeds, which can destroy any foundation in a short period of time.
The option of using a backing for paving slabs is suitable for different situations:
- design of local areas;
- improvement of the recreation area;
- construction of a sidewalk or road.
Such material participates in the process of creating drainage, thereby ensuring the removal of moisture accumulated in the upper layers of the soil. The event (moisture removal into the soil) occurs naturally. The use of geotextiles is also relevant in the construction of dams and other hydraulic structures, and the strengthening of earthen slopes.
Material for crushed stone against grass growth
Now we need to consider the materials used to create paths between the rows of the beds.
Several different materials can be selected as a layer that will cover the soil from the sun's rays - geotextiles of a certain thickness, black plastic film, roofing felt, as well as sheets of cardboard or even old newspapers laid in several layers.
Prices for geotextiles
geotextiles
Black geotextile was used as an opaque covering.
- Geotextiles are the best option, since they are intended specifically for laying on the ground under the main top covering and have all the qualities necessary for this function.
- Polyethylene film is used more often because it has a more affordable price. But this material is still characterized by a number of disadvantages. Firstly, the film does not allow water to pass through and this will have to be taken into account when forming the path, making it so that water does not linger on its surface. Secondly, the film is not a “breathable” material, which means that the moisture accumulated under it will not evaporate normally, which can lead to the formation of fungal colonies under it that can seriously harm the crop.
Roofing felt can also be used as a base light-proof layer.
- Ruberoid can also be used for flooring under walkway coverings, but it has the same disadvantages as plastic film. But compared to it, its durability is higher, it has greater density and thickness, and can withstand mechanical loads better. True, it is also much more expensive than polyethylene.
If there is a surplus of corrugated cardboard packaging in the house, then you can use it too
- Paper or cardboard litter is perfect for all the above criteria, but it is, of course, short-lived and will have to be changed several times a season, especially if the summer turns out to be rainy. By the way, experts do not particularly recommend getting carried away with newspaper layers, since printing ink cannot be called environmentally friendly.
Path covering
Bulk building materials, such as shavings, sand and fine crushed stone, can be laid on the substrate as a protective layer. It is practiced to lay stone or concrete tiles, which, however, are not permanently installed, that is, the seams are not sealed with concrete mortar, but are simply covered with sand.
Simple, but still not the best option when the paths are simply covered with a layer of sand
- Sand poured onto the substrate perfectly protects the path from the germination of weeds, does not retain water on the surface and allows the soil to “breathe” freely. There are two disadvantages of this material. The first is its pronounced flowability, especially in a dry state, so it is recommended to lay it in a space enclosed on all sides by walls. And the second is that it sticks to shoes and bare feet, which means that sand will be spread throughout the yard and will certainly get into the house. Therefore, sand is rarely used as an independent path surface. It is often used as a leveling and shock-absorbing bedding under stone or tile laying, and it is also used to fill the seams between these products. The layer of sand under the masonry is usually at least 50 mm.
Paths between beds covered with a layer of wood shavings
- Wood shavings, sawdust or small wood chips are also good for filling rows. They allow air and water to pass through perfectly, so the paths are always kept dry and comfortable to walk on. In addition, rotted natural wood over the years of use can also serve as fertilizer. The disadvantages of such backfill include the fact that it will be necessary to build wooden boxes for it so that it is in one place and is not particularly blown away by the rising wind. The best bedding for it is geotextile, which is also water-permeable and strong enough that, if necessary, it can be rolled up along with the shavings and moved to another area of the garden.
Paths covered with stone chips, gravel or fine crushed stone look very neat, and there is practically no dirt on them
- Crushed stone or stone chips can be called the best option for bulk materials, since these materials are durable, allow water and air to pass through, do not stick to shoes and are not blown around the area by the wind. Paths designed in this way look neat and always clean. However, to prevent crushed stone from mixing with the soil underneath, a reliable base is required, for which it is recommended to use geotextiles with a thickness of at least 2.5÷3 mm with a high density, otherwise the sharp edges of the stone can damage the litter. You can also lay thick cardboard under the crumbs, but there is no guarantee that the paper will not become soggy from rainwater and the stone will not fall into the ground.
We suggest you familiarize yourself with Preservation of Boiled Mushrooms
When making covers from plastic bottle caps, some owners use their imagination to the fullest...
- Covering with plastic bottle caps is another option for arranging row-spacing beds. Such a “carpet” can be removable, that is, portable, or installed on a permanent basis. In the latter case, the covers are installed in a layer of uncured concrete mortar poured onto the path. However, this area of the garden can no longer be used as a garden bed. The “mobile” version of the cover made from lids, one might say, will cost practically nothing, but its production will require a lot of time, since all the prepared elements must be fastened together with thick fishing line or a durable thread that is resistant to moisture, ultraviolet radiation and temperature changes. Moreover, for the connection, four holes must be made in each of the covers - they are usually melted using a heated awl.
This is how plastic bottle caps are usually connected to each other.
Caps can be connected to create a specific design or pattern - for this, parts of the required color are specially selected and an ornament is made from them according to the sketch. If there is no artistic streak, then nothing prevents you from fastening them together chaotically - the result will also be a very entertaining picture. The lids should not be tightly pulled together, but they should not hang loosely either. If they are fastened relatively loosely, then the resulting “carpet” can be easily rolled up and moved to another place.
This covering is laid on a geotextile backing, which will prevent the germination of weeds, and the covers will create an outwardly interesting and convenient path. It should be noted that it is pleasant to walk on such a surface barefoot, so some craftsmen make massage mats for feet from the covers. If you like this idea of arranging paths, then you need to start collecting covers without delay, since you will need a very large number of them.
Paths lined with paving slabs are reliable, but somewhat “heavy”
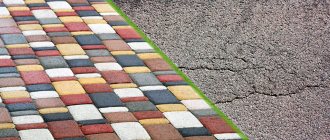
- Stone or concrete paving slabs will make the paths strong and rigid, and this surface will be comfortable to walk on. But if cement is used to lay them, then this area cannot be used for planting in the future. Therefore, if you want to lay out the paths with any kind of similar tiles, then you should make a bedding of sand under them on the substrate, and fill the seams with it. In this case, water from the surface will easily drain into the ground, and if it is necessary to move the path to another place, the tiles from such a base can be easily dismantled.
paving slabs
A very good solution for any garden or vegetable garden - rubber tiles "REZIPLIT-20"
- Rubber tiles are also often used to cover paths between beds. It can be laid on well-compacted and leveled soil, even without a backing. The tiles are easy to install and dismantle, they are durable and will serve as a path for many years. Thus, manufacturers give it a guarantee for operation, subject to recommendations, for 10–20 years. The range of permissible temperatures is very wide - it varies from -40 to 90 degrees, so the material does not even need to be dismantled for the winter.
Rubber tile coating is used not only for garden paths - it is intended for arranging car areas, floors in garages and industrial workshops, and based on these factors we can draw a conclusion about how durable and reliable the material is. The tile does not slip, as there is a relief pattern on its surface.
It is made from environmentally friendly ingredients, so it does not emit harmful substances and will not negatively affect the quality of vegetables. In addition, the rubber does not transmit light to the ground, so weeds will not grow on the path. However, rubber tiles do not allow moisture to pass through, so they must be laid in such a way that water flows off the surface to the sides.
The standard dimensions of the tiles shown as an example in the illustration above are 550x550 mm, the thickness may vary, but it is best to choose options at least 20 mm thick. Rubber tiles are usually equipped with locking joints, which is very convenient - after installation, even under load, the coating will not spread.
Rolled rubber crumb coating
- Rolled, modular coverings, as well as tiles made from crumb rubber - all these products have approximately similar characteristics and are intended specifically for the design of garden paths, as well as various areas, including automobile ones. This material is made from rubber that is crushed and compressed into various forms. Thanks to this manufacturing technology, the rubber coating becomes water- and breathable, and therefore does not create a “greenhouse effect” for the soil. The material does not allow sunlight to pass through, so weeds will not grow on the path. Such tiles do not slip, as they have a distinctly rough surface, and this makes paths paved with them completely safe for use in any weather. Rubber crumb coating is easy to care for, as it can be easily washed with water from a hose, and this process can be done immediately while watering the beds.
Types of geotextiles
In order for the structure to serve for a long time, it is important to know what specific geotextiles are needed for high-quality laying of paving slabs. Products come in two types: woven or non-woven.
A non-woven specimen is considered the best due to its high strength and affordability. On the construction market you can see three types of geotextile fabrics. Products differ in structure, manufacturing technology, as well as technical parameters.
Knitting stitching
In structural section, the woven material consists of longitudinal polymer fibers. They are stitched in the transverse direction with a special thread. The model is a budget product, but with the right installation technology it can efficiently perform the main tasks of strengthening the base for the path. The main disadvantage of this type of fabric is the lack of a fixed fiber connection. Because of this, individual fibers fall out of the fabric. Also, reliable fixation of the material to the ground is not ensured if it is laid between different layers of the base.
Needlepunched
This type of substrate is made of two materials. It can be polypropylene or polyester base. The film is punched in such a way that the penetration of water or any moisture through the needle-punched fabric is possible only in one direction. Moreover, soil particles do not pass through the material. They remain fixed in their original position. The product is best used when constructing platforms and walkways near the house. The advantages of needle-punched fabric include its availability, durability and quality of production.
Heat set
Geotextiles of this type are durable and quite strong material. Although its cost is higher than that of other analogues. Fixation of polymer threads occurs due to their fusion with each other due to exposure to high temperature. Heat-set fabric is appropriate when there are heavy loads on the road surface. The product is used for the construction of foundations, as well as to enhance waterproofing. The material is not without its negative aspects:
- price;
- increased thickness of the rolled web;
- low filtration rate of transmitted moisture.
general description
Geotextiles are a type of woven and non-woven material for technical purposes. For its production, synthetic threads from polyester, polypropylene are used, sometimes with the addition of natural fibers of cotton or wool. Polyester fabric is the result of processing recycled plastic materials. It is not subject to rotting and does not decompose for several decades. The threads from which the fabric is assembled are short, and the surface of the material has a fleecy texture. The color can be any. For polypropylene material, specially produced thread (primary raw material) is used. The material has several layers securely connected to each other. It is made from 1 continuous thread, and its strength allows geotextiles to be used even for constructing the basis for buildings or runways. It can be distinguished from polyester fabric by its lack of lint and dense structure. Any type of geofabric has an elastic structure that allows it to stretch slightly according to the relief and tightly cover the surface without leaving air bubbles. For different purposes, materials with a thickness of 0.5-5 mm are produced, which allows you to choose the right base for paths with different loads. When constructing paths, geotextiles perform an important function as a drainage layer. Geotextiles allow moisture to pass in only one direction, so it quickly leaves the pit. Even when the supporting layer of the path freezes, it does not swell and does not break the coating.
Laying technology
Figure 2. Laying geotextiles
Regardless of the choice of material, it is important to know how to properly lay geotextiles under paving slabs. The event for the arrangement of garden paths, park alleys, playgrounds next to a residential building involves the classic use of two-layer technology:
- The first level of the canvas should be at the bottom of the trench.
- The second layer is laid on the drainage. Moreover, high-quality drainage is certainly carried out with a slight slope in the direction where it is necessary to organize the outflow of water. This helps prevent fluid from stagnating.
Preparatory work
Let's figure out what initial steps are necessary when laying geotextiles under paving slabs. Work begins with removing the soil to a certain depth. It depends on the total size of the layers created. Basically, the thickness should be about 25–30 cm. Having leveled the bottom of the hole, you need to sprinkle it with sand in a layer of 2–3 cm, with further compaction. After this, the main activities for the formation of the sidewalk path begin:
- Geo-coating is spread along the trench on both sides. It doesn’t matter which side to lay under the tiles, since manufacturers do not offer any recommendations on this matter.
- The use of material when arranging paving slabs involves overlap on the sides of the trench. The width should vary between 15–35 cm.
- The connection of the canvases is carried out transversely and longitudinally with an overlap (from 10 cm in the presence of stable soil, up to 50 cm in other cases). The non-woven material is fixed to each other using steel staples with mandatory gluing of the joints. For this purpose, heated bitumen can be used. It is recommended to solder polymers with a blowtorch or a hair dryer.
- After joining on top of the canvas fixed to the bottom, it is necessary to pour sand 2-3 cm thick. Such an event will help to avoid mechanical damage to the material by the sharp corners of crushed stone, which is a mandatory layer when equipping a drainage system.
- You need to pour sand on top of the crushed stone to protect the second geofabric ball. Geotexile is laid out after installing the curb stone.
- The non-woven fabric at the top is secured in the same way as the bottom layer, securing it with metal staples. In this case, their length should be greater.
When a person understands the purpose of such a procedure as laying geotextiles, he will never ask a stupid question about the necessity of the event. Before laying the tiles on the geotextile, the recommended technology involves performing a leveling and coupling ball. It securely fastens the tiles, guarantees strong adhesion to them, and takes significant loads from pedestrians or vehicles.
Asphalt laying in Moscow and the region from 360 rubles. per m2
Our own fleet of equipment allows us to offer you the lowest prices for asphalt laying, as well as super deadlines for order fulfillment!
We carry out all work using our own equipment in Moscow and any city in the Moscow region.
We have a truly individual approach to working with each client - laying new asphalt on roads, local areas, areas near office centers, shopping centers, sidewalks, as well as roadways for trucks or cars, is carried out by us in any required time frame.
You can find out how much asphalt costs from the price table.
- Asphalt laying technology
- Cost of laying asphalt
Stage 1. Removing existing coverage (click to expand text)
Laying asphalt - the stage of removing the old coating
The installation of the coating will only be as good as the foundation underneath it is done correctly.
Laying over soft ground or damaged pavement will cause fracture or catastrophic failure. The gravel base that we fill and compact provides the base on which the asphalt layer will be laid, the precise preparation necessary for the long service life of the future road. This is what distinguishes us as contractors from many other companies.
Accordingly, all unsuitable materials, be it old pavement, concrete or organic matter (if this is a new road) will be dug up and removed from the work site.
In many cases we need to dig down to 30-40cm if we are removing loam, stumps or other soft materials.
Additionally, in most cases, laying over existing pavement is not always a good idea because it does not allow us to correct subfloor problems.
If you have significant cracks or failures, they will most likely make themselves felt on the new layer and continue destructive processes if the stability of the base is not eliminated.
Concrete can never be paved with asphalt. We are well equipped with excavators, cutters, dump trucks to remove this precarious layer of material.
laying asphalt - preparing the base
Stage 2. Installation of a base layer of gravel and compaction
Laying asphalt - the stage of installing the base layer
Correct installation of the base of the material before starting to lay the material guarantees long-term use of the entire structure.
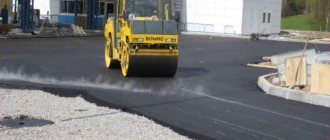
We use on average from 4 to 6 different fractions of materials depending on the conditions and the existing base. The right gravel base pie makes it easier to lay the asphalt surface later. If necessary, we will use a laser level to prepare the slope of the future road in the most suitable direction. The gravel is then rolled using a vibrating roller. Stage 3. Laying hot asphalt mixture
Laying asphalt - stage of laying the surface
Once the surface is properly prepared, our company will send its fleet of dump trucks to the nearest asphalt plant to purchase fresh hot asphalt.
If necessary, for larger projects we hire additional dump trucks to ensure we always have hot material on site. Having the proper lifting capacity allows us to remain operational and productive, while also minimizing asphalt cooling time and paving equipment downtime. Asphalt pavement is laid in two or more layers. The first layer is called the binder and consists of coarse asphalt with greater strength. The second coat, or top coat, is less grainy and provides a clean, finished look. ADORA uses construction equipment to ensure high quality finishes. Having the best equipment is another guarantee that your new ADORA paved driveway will be your best choice. Stage 4. Asphalt compaction - finished road
Laying asphalt - the stage of compacting the top layers of asphalt
The most important and final step in the work is the compaction process.
Without proper compaction, layers of asphalt will not last long and withstand Russian weather conditions season after season. As each layer is laid, as with the gravel base layers, the surface is rolled using a vibrating roller. All pavement ends are machined to ensure a 45° angle. This will provide the necessary strength to support the weight of the vehicle. When your driveway meets an asphalt street, the junction is always milled - so the two surfaces will be joined perfectly. You can destroy the edge of the laid canvas by making a smooth transition into a thin layer on top of the adjacent surface. The cover will be too thin at this point to support enough weight and will also allow the snow blower to cut it off in the winter. Once the entire ADORA asphalt paving process is completed, your driveway will be durable, attractive and will greatly increase the value of your property.
Price for laying asphalt The cost of laying asphalt at almost every facility is tied to such data as:
- type of asphalt to be laid
- quality of the base on which asphalt is laid
- asphalt laying area
| Types of work and products | Unit change | price, rub. |
| Construction of an earth trough with all preparatory work (mechanized excavation of soil with loading onto vehicles, manual modification of soil, leveling of the area to the mark) (thickness 25 cm) | m2 | 330 |
| Construction of a sand base (thickness 10 cm) | m2 | 120 |
| Laying geotextiles | m2 | 75 |
| Construction of a base made of crushed limestone (thickness 10 cm) | m2 | 280 |
| Construction of a base made of recycled crushed stone (thickness 10 cm) | m2 | 220 |
| Construction of a base made of asphalt chips (thickness 10 cm) | m2 | 160 |
| Construction of a base made of crushed gravel (thickness 10 cm) | m2 | 240 |
| Pouring the base with bitumen emulsion | m2 | 20 |
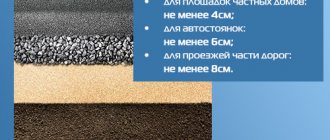
| Laying asphalt concrete pavement (thickness 5 cm) | m2 | 500 |
| Repair and raising of the necks of existing wells with reinforced concrete rings up to 20 cm. | PC. | 2300 |
| Installation of road side stones, including the cost of materials | m.p. | 530 |
| Road markings (paint) GOST 51256-99, R 52289-2004 | m2 | 450 |
| Construction of lawns with leveling of fertile soil, adding vegetable soil and sowing grass seeds | m2 | 280 |
| Installation of fences | m2 | Great Dane |
| Removal of soil and debris by dump trucks, including loading | m3 | 400 |
Laying asphalt on city streets or driveways to summer cottages in Russia takes place according to special building codes, using modern technologies, as well as special equipment.
Who does the asphalt laying?
There are many paving companies in the Moscow region. But there are those who prefer to do all the work on their own, for example, in dacha SNT. But such savings lead to the opposite result; soon the owners come to the understanding that they need to entrust this work to builders.
If you need to lay asphalt, you should not save money, try to do everything yourself, the quality of the coating will be low and will lead to rapid destruction, cracks, or subsidence of the coating.
Before starting work, engineers prepare the soil, compact it, and create a drainage layer. During installation, engineers rely on a carefully developed design.
Company machines for asphalt paving in the Moscow region
Rules for laying geotextiles
Geotextiles for paving slabs are rolled fabrics. The material appeared relatively recently, but managed to establish itself with many advantages. Using geotextiles, you can prevent the appearance of weeds that contribute to the destruction of the foundation structure under the path due to the growth of their root system. The product can protect the path from ants, beetles and other insects. The material is used very simply - you need to lay the canvas overlapping the previous section directly on the soil in the place where you plan to install the tiles (up to 10cm). Immediately after this, you can sprinkle a little sand.
Base for laying crumb rubber tiles:
The reason may be:
- Compacted sand
- Crushed stone and sand compacted in layers
The better and more reliable the base is prepared, the longer the service life of the coating will be.
Basic requirements for the base for rubber tiles:
- The soil can withstand quite a lot of pressure. That is why the base should be represented by sand and small crushed stone.
- The base must be well compacted. This is necessary so that when the tile is in use, it does not move from its installed location.
- In some cases, a slight slope of the base is provided, which is necessary to organize drainage.
