Garden plot
Technological progress has a beneficial effect on all areas of activity of modern man. The production of building materials is no exception, and the development of completely new types of construction products today has an ever-increasing dynamic.
Drywall, laminate, Lego brick, plastic windows, LED lighting - this is not a complete list of innovative products, without which it is difficult to imagine the construction industry today.
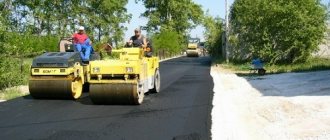
Similar developments include cold asphalt - a modern building material designed to cover road surfaces without the use of expensive preparatory equipment.
Photos of crafts made from disks
Note!
Just a few years ago, CDs were actively used for data transfer, but today they are almost completely a thing of the past. Nevertheless, with the help of ingenuity and simple engineering skills, you can create fantastic things, including household lamps made from disks with your own hands.
There is nothing difficult to complete all stages yourself. The discs are extremely easy to process, since the material is flexible and pliable. Moreover, on the Internet you can find a huge number of ready-made schemes that can be easily supplemented and create a truly unique work of art. Building your own lamp has never been so much fun.
What is cold asphalt?
If we talk about the design of cold asphalt, it should be noted that this building material is a traditional mixture of asphalt concrete, in which slow or medium-thickening petroleum bitumen is used as a binder. In addition, modifying additives and plasticizers can be additionally introduced into the design of cold asphalt, allowing this material to be used even for the manufacture of road surfaces with low traffic volumes.
If we talk about the method of producing cold asphalt, it can be implemented in two ways: with heating of the components and without it.
So, in the first case, the main components of asphalt concrete (crushed stone, gravel, sand) are first dried by heating to a temperature of +80...+110⁰С, and only then heated binding ingredients are added to the composition. After which, the prepared substance is slowly cooled by stirring in a natural environment. The resulting cold asphalt is packaged in sealed bags (usually 25, 50 kg) and sent to the consumer.
In the second case, due to the introduction of modifying additives and plasticizers into the composition, there is no need to heat up the components. And the presence of surface active components allows this product to be applied even to damp areas and used at low ambient temperatures. An additional advantage of such cold asphalt is its increased shelf life (up to 8 months), provided that all recommendations of the manufacturer are followed.
Speaking about the main differences between cold asphalt and its traditional analogue, it should be noted that it gains strength not in the process of cooling the heated material, but as a result of the evaporation of the hydrocarbon found in its binding compounds.
It should be noted that the main purpose of cold asphalt is to quickly restore the technical characteristics of the roadway, which is why this type of material is most often used for the following cases:
- Pothole restoration of roads;
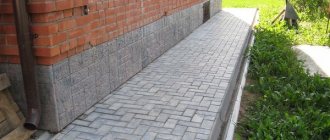
- Making a blind area;
- Production of garden paths;
- Asphalting of a personal plot and entrances to it;
- Carrying out preventive and routine maintenance.
Moreover, all of the above work can be carried out even in bad weather conditions, in the presence of snow, rain, and low temperatures.
Asphalt without a solid foundation is a waste of money
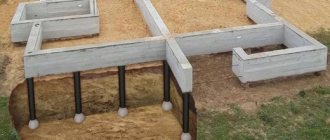
The next stage is the foundation. It can be of two types:
- Hard type. This refers to reinforced concrete slabs. They are expensive, so they are not recommended for home use.
- Non-rigid. The so-called "pillow". Consists of stones and sand.
You can take any stones. Ideally, of course, it is recommended to purchase granite crushed stone. He is the most resilient. But ordinary crushed stone, gravel and even broken brick are also durable materials. The main thing is to compact them thoroughly. First, large stones are poured. They are compacting. Then smaller. Remember to compact each layer using a vibrating plate or vibrating foot.
The stone layer does not need to be too thick. Where they walk – 5 cm, where they drive – 15. Sand is sprinkled on top, moistening it generously with water. Wet sand sinks and compacts much better.
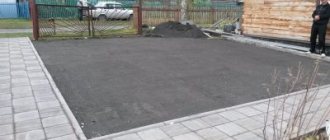
At the same stage, borders are installed - purchased ready-made or made from decorative stones. Do you think borders are just about beauty? No, it is needed so that the asphalt road surface “sticks.” Otherwise, it will spread to the sides over time.
Cold asphalt: pros and cons
Considering the main technical characteristics of cold asphalt, one should highlight the main advantages and disadvantages of this building material.
| Advantages | Flaws |
| Possibility of laying at low temperatures (limit value depends on the type of material) | Higher cost of the material (exceeds the price of traditional asphalt by 2 - 3 times) |
| Laying the material is permissible without the use of heavy road mechanisms | Low mechanical strength of cold asphalt (justified for low traffic areas) |
| High speed (efficiency) of material placement | Low resistance to moisture |
| Ease of purchase (sold in sealed containers up to 50 kg) and transportation | Shorter service life compared to hot asphalt |
| Relatively long shelf life in warehouses without loss of quality | Low resistance to longitudinal (shear) loads |
| Wide range of applications | High requirements for restored surfaces (must be clean) |
| Relevant for local (small) elimination of road surface defects |
Flower
If you've been sorting out old boxes at your dacha and found a lot of unnecessary discs, there is a great way to use them to benefit the beauty of your yard. Crafts made from disks for the garden look very original and interesting, in addition, they are incredibly easy to make.
In this mini-lesson, I suggest making small flowers from discs to decorate a garden, vegetable garden or yard at the dacha.
Note!
The tools for this craft do not require anything unusual: the right number of disks (it all depends on how many flowers you are going to make), a candle, scissors and paints to make the flowers more vibrant.
The manufacturing process does not require special skills, it is very fast, but at the same time it will captivate you from the first second.
All you need to do is carefully melt the disks over a candle (remember safety precautions: it is best to do this indoors and have some water nearby to put out the fire in case of danger) so that the plastic goes into beautiful waves, similar to flower petals.
I offer step-by-step instructions for making a beautiful rose from disks:
So, today you learned how to make some simple crafts from old CDs. I hope you found this lesson useful and learned a lot from it.
Note!
Do-it-yourself cold asphalt laying technology
For the convenience of users, we consider it appropriate to consider in detail the algorithm for pothole restoration of the road surface through the use of cold asphalt.
So, at the first stage of work, it is necessary to mark the area to be restored and dismantle the old asphalt. For these purposes, the defective area of the road is simply marked with straight lines, taking into account the capture of the undeformed layer (+50mm on each side).
Afterwards, using a grinder or a special tool, the seams are cut. When carrying out this procedure, it is necessary to achieve such a condition that the cutting depth is carried out to a depth no less than the thickness of the existing road surface. In addition, the edges of the resulting recess must have a vertical structure.
Next, using a jackhammer or a hammer drill with a chisel, you should thoroughly remove all damaged elements of the old asphalt. For this purpose, large fractions of asphalt are first removed, and then all small particles and crumbs remaining after the work are swept away. In addition, the resulting depression should be cleaned of dust and moisture.
In order to extend the durability of cold asphalt, as well as ensure its resistance to longitudinal loads, manufacturers of this material recommend priming the bottom and side vertical walls of the prepared recess during restoration work. For these purposes, it is justified to use bitumen or bitumen emulsion in a volume of up to ½ liter per 1 m2 of treated surface.
A very important technological step is laying cold asphalt. Here you should pay attention to the fact that a layer with a thickness of no more than 50 mm can be laid at a time. If the dimensions of the prepared recess are large, then crushed stone or gravel can be added to the bottom of the hole. Or lay the cold mixture in several layers, achieving such a condition that each subsequent layer is laid on the previous one only after it has been thoroughly compacted.
As for the laying itself, cold asphalt should be distributed in a uniform layer in the pothole, ensuring that the material protrudes above the surface of the base asphalt to a height of 15 - 20 mm. This excess is necessary for subsequent shrinkage of the material. If road restoration operations are supposed to be carried out in the cold season, then before direct use, it is recommended to place cold asphalt in a warm room for 48 hours, this will ensure the elasticity of the material during installation. And immediately before use, it is recommended to loosen the composition and heat it thoroughly with a gas burner; the same should be done with the pothole. This procedure will allow the binder to fill all cavities and adhere well to the base.
No less important is the compaction of cold asphalt mixture, which can be done using a vibrating plate or a manual tamper (for small volumes of work). In general, compacting cold asphalt should be done in a spiral, moving from the ends of the recess to the center. An indicator that signals the quality of work is the absence of traces from tamping (optimal is up to 10 tamping cycles). Particular care should be taken when forming the coating at the junction of the existing and new asphalt layers (the transition should not have differences in height).
The final part of the work when laying cold asphalt with your own hands is to cover the already compacted area with dry cement or a cement-sand composition. This procedure will further protect the material from moisture and prevent cold asphalt from sticking to vehicle wheels.
If cold asphalt with modifying additives and plasticizers is used, then the operation of such a coating can begin only after the end of the chemical reaction with the release of hydrocarbons (usually 5–6 hours).
Thus, we can safely say that although cold asphalt is a fairly new technology, laying it with your own hands is a very real action.
LED lamp
If you urgently need a new original lighting device, old disks will come to the rescue. This craft can be used both in the home interior and in the country.
You don’t need any special materials for this work: the main condition is just to use a little imagination and patience.
Be sure to follow our detailed step-by-step instructions:
You will need 12 scrap disks, a protractor, metal staples or paper clips, a lamp socket and a thin drill bit.
First, we divide one of the disks into five identical segments. For these purposes, use a protractor: the angle between the segments should be approximately 72 degrees. This disk will serve as a stencil for the rest.
On the segment line, approximately 3-4 millimeters from the edge, drill five small holes. Next step: put the remaining disks in a stack and using the first disk (placing it at the very top of the stack) make exactly the same holes in the others.
In order for the craft to be strong and hold well, you will need support rods. Ballpoint pen rods are ideal for this: insert the rods needed to act as guides into the holes you just made.
If you used a really thin, proper drill bit, you won't even need to fix the holes: they'll fit perfectly.
The lamp is almost ready, now we attach the remaining disks to the structure with brackets.
Now all that remains is to work with the light: the last step is to screw the desired lamp into the socket.
