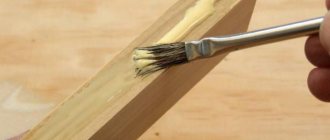
The fast pace of life requires a person to evaluate not only the cost of purchased materials for construction or repair, but also the time required to perform work with this material. The widespread use of modern penoplex insulation, which has a special shape that facilitates the installation of slabs, requires the use of additional means of strengthening them to the wall, roof, and floor. In this regard, you should choose penoplex and glue at the same time, taking into account whether the work is intended to be external or internal.
We glue penoplex - quickly and conveniently
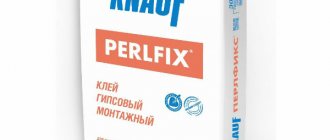
To ensure that the work on insulating the room does not take up much time, you should decide how to glue the penoplex to the wall. This can be a final mounting option (on the floor) or temporary, in order to be able to fix the insulation with traditional means (dowels). In this case, it all depends on what adhesive mixtures are used for penoplex. For example, substances with astringent properties, the world-famous brands Ceresit or Knauf or Isofix, can provide reliable and durable fixation of insulation boards to any surface.
Based on where the insulation is planned, you choose what to glue the penoplex with. Thermal adhesive for penoplex - allows you not only to securely fix the insulation boards, but also to glue ceramic tiles to the penoplex. This is also facilitated by the rough surface of the insulation, which ensures better adhesion of the adhesive mixture to the surface. In this case, a prerequisite is to reinforce the insulation with a mounting mesh before attaching the facing tiles to it.
Relevance of the question: “How to glue penoplex?” is explained by the buyer’s desire to quickly and efficiently carry out insulation work, without hiring installers for these purposes. After all, a number of jobs are quite capable of being done by yourself. Moreover, the process of fixing insulation boards with mechanical fastening means violates the insulating layer of the insulation used. The metal fastening, being an excellent conductor of heat, creates a “cold bridge”, which can reduce the level of thermal protection of the room. That’s why mounting adhesive for penoplex is necessary, as an excellent alternative to the noise of a drill and the dust that appears when drilling walls.
Installation methods and materials used
Installation of polystyrene foam slabs can be done without the use of any additional fasteners, however, the concrete surface should be carefully prepared:
- clear;
- plaster;
- treat with primer.
Advice: if the protrusions interfere with your preparation, use cutting reinforced concrete with diamond wheels to dismantle them.
In the photo - foam boards
Materials
Before gluing penoplex to concrete, you need to prepare the following materials:
- cement mortar;
- primers;
- adhesives for polystyrene foam;
- drills for mixing glue components;
- containers in which the components will be mixed;
- serrated spatulas.
If installation is planned to be carried out using additional fasteners, the set of materials will be even smaller:
- insulation;
- glue;
- seam sealant;
- dowels
- The method of attaching insulation using liquid nails is widely popular. Its advantage is that this substance does not need to be applied to the entire surface of the sheet - it is enough to apply it pointwise.
Application of liquid nails
Advice: keep in mind that its use is not possible with every type of insulation, moreover, it contains toxic substances. To carry out work using this method, in addition to polystyrene foam and liquid nails, you will also need protective gloves.
- Another option that answers the question of how to glue penoplex to concrete is the use of special foam . However, it is advisable to resort to this method only when working with floors, since the foam has rather low adhesive properties. There are several types of foam:
- for fastening foam block structures;
- for foam sheets;
- for polystyrene foam boards.
Foam application
Below we will talk in detail about how to glue penoplex to concrete and the characteristics of these materials.
Properties of various types of glue and options for its use
- Bituminous. Its key advantages include:
- pronounced waterproofing properties;
- resistance to low temperatures.
It does not require any special preliminary preparation, however, if work is carried out at an air temperature below + 5 ˚С, it is recommended to warm the glue to + 18-20 ˚С.
The instructions are as follows:
- Clean and prime the concrete surface to be installed.
- Apply a thin layer of the product to the expanded polystyrene sheet using a solid or notched trowel.
- To ensure reliable fixation of the plates, they should be pressed for 20 minutes so that the adhesion becomes more stable.
The disadvantages of this material include toxicity and a tendency to ignite when exposed to high temperatures.
Bitumen adhesive for EPPS
- Bitumen-latex emulsion mastic. It is widely used primarily because of its excellent properties, in particular, the possibility of application even on a damp base and the absence of the need to warm up before use.
Mastic for gluing penoplex
This is a composite material of fine bitumen, synthetic rubber and a number of special additives. Due to its resistance to low temperatures and humidity, mastic can also play the role of a waterproofing coating.
- Silicone glue "Master". It is equally good when used to insulate both internal and external walls. It is a viscous liquid based on a special type of rubber, which vulcanizes in air for about a day. A distinctive feature of this glue is the ability to use it in a wide temperature range - from - 60 ˚С to + 300 ˚С.
- Polyurethane foam CT 84 from Ceresit. An excellent material for installing expanded polystyrene, which does not have secondary expansion and therefore does not lead to divergence of seams between sheets.
Polyurethane foam CT 84 Ceresit
The foam is applied to the concrete surface using a mounting gun, after which the insulation is pressed against this surface. The substance sets within ten minutes, even under conditions of high humidity and low temperature (up to - 10 ˚C). Please note that foam is toxic and flammable.
Tip: using diamond drilling of holes in concrete, you can make the necessary communication channels before insulating the facade.
Features of the preparation and use of dry mixtures
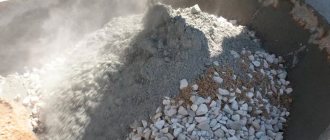
The use of cement-polymer mixtures is advisable when attaching insulation to foundations made of brick, concrete or plasterboard. The main components of these mixtures are Portland cement, a plasticizer, as well as various additives that enhance their properties.
Dry mixture for gluing EPS to concrete
Dry mixes, both universal and specialized, produced by Ceresit, have become especially popular in recent years. Universal adhesive includes ST-85 adhesive, which contains a large number of different polymers that provide high strength and ductility of the mixture.
Glue ST-85 Seresit
However, due to the use of expensive additives, the cost of the glue turns out to be quite significant, therefore, to install insulation on concrete, they most often resort to using dry glue ST-83, the price of which is approximately one and a half times less.
Tip: when preparing the adhesive mixture, you should keep in mind that it hardens within 2 hours, so it is best to mix it in small portions.
An undeniable advantage of dry cement-polymer mixtures is the possibility of their use even if the base on which polystyrene foam is installed has an uneven surface. Applying glue to the insulation board should be done in intermittent strips with a 2 cm indentation from the edge.
In this case, after pressing the slab to the base, the air will come out absolutely unhindered, and air pockets will not form.
Tip: if the surface has slight unevenness, the mixture can be applied using a notched trowel.
The mixture for installing polystyrene foam boards must be thoroughly mixed by hand before application so that it is as uniform as possible, without lumps and water. It is best to mix using a drill with a specially designed attachment, which will make the process simpler and easier.
However, it is necessary to ensure that the nozzle is completely covered with the mixture and does not capture air, otherwise air bubbles will remain in the solution.
After kneading, it is recommended to leave the mixture for 5 hours, then mix again and use immediately. Holding for the specified time is necessary in order to achieve complete homogeneity of the mixture and eliminate water from it, which interferes with high-quality adhesion.
Choosing glue for insulation
Which adhesive to choose for penoplex depends on the buyer’s desires and his financial capabilities. The main requirement is that the adhesive for penoplex - the price of which depends on the chosen brand - should not contain substances that destroy extruded polystyrene foam:
- toluene, xylene and benzene;
- formalin and formaldehyde;
- acetone and other ketones;
- esters and ethers;
- gasoline, kerosene and diesel fuel;
- coal tar;
- polyester resins, which are used to harden epoxy adhesives;
- various oil paints.
When deciding which glue to glue penoplex with, you need to carefully read the manufacturer’s recommendations regarding its suitability for reliable and durable fixation of this insulating material.
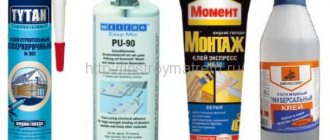
Modern adhesive compositions for penoplex can be divided into the following groups:
- On a mineral (cement) basis:
- "Terracotta" from;
- “Teplokley” from the group from “Ceresit”;
- quick-hardening adhesive mixtures “Sarmat”;
- a number of other cement adhesives.
- Polyurethane based:
- glue "Titan" for penoplex;
- "Izolemfi" and "Zenit 36" from .
- On mixed polymers:
- glue "Emphikol 225" from "Emfi";
- glue "Moment".
- Waterproofing adhesives include:
- Uniflex glue;
- bitumen mastic, which can also be used as facade adhesive.
- For fixing insulation in a dry room, gypsum assembly adhesive is also quite suitable.
According to experts, it is possible to glue penoplex with liquid nails, but the high cost of the glue and the need to apply it to a large surface make this option not cost-effective.
The choice of astringent, no matter whether it is a ready-to-use mixture or dry glue, largely depends on the individual sensitivity of the person performing the installation work. Many people don’t like the smell of polyurethane glue, and the smell of bitumen glue can discourage any desire to continue work, and even cause complaints from household members about the unpleasant smell that remains long after the work is completed.
Mineral adhesives
Mineral-based adhesives contain cement, gypsum, and alabaster. They harden very quickly and must be applied immediately. The adhesives are mixed in small portions. Only cement compositions are usually used outside the room; products with gypsum components are suitable for interior work. The setting time is long, up to 1.5-4 hours, so it is possible to correct flaws.
The disadvantage of the compositions is that the base must first be well primed and wait until it dries completely, otherwise the connection will not be strong. Another disadvantage is the need for dilution; to obtain a high-quality homogeneous mixture, you need a construction mixer.
The most popular brands of mineral adhesives:
- Ceresit CT 83 - used directly for gluing penoplex, suitable for any substrate, pull-off force - 500 kPa, high frost resistance class.
- “Atlas Stopter K-20” – has an increased tearing force (600 kPa), is viable for 4 hours, consumption – 4.4 kg/sq.m. m, contains special reinforcing fibers.
Products of this type are sold in bags of 5-25 kg and cost about 300-500 rubles. for 25 kg. If the frost resistance class F50 is indicated on the bag, the product is suitable for interior work. Class F100 means that the boards can be glued outside.
Preparing the surface for fixing penoplex
If you ask the question: “How to glue penoplex together?” It is more or less clear that preparing the base for reliable and durable fixation of insulation is a special issue. Despite the excellent technical characteristics of the insulation, a poorly prepared surface can cause the money spent and the large amount of work done to not produce the expected result. Regardless of what the penoplex is glued to, the surface should be:
- dry and free of debris and dust;
- It may be necessary to prime the surface before applying the adhesive - in accordance with the manufacturer's recommendations;
- When starting to fix insulation boards, you need to pay attention to the temperature conditions at which it is recommended to use an adhesive - a number of mineral mixtures can be used at subzero temperatures.
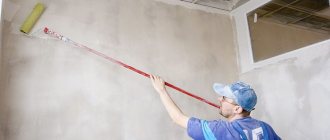
After the penoplex is securely fixed on the insulated surface, you should begin finishing it using the selected material. Modern ceramic tiles are the optimal solution in this matter, and tile adhesive for penoplex, which can be frost-resistant, allows you to reliably and quickly lay this finishing material on both horizontal (floors) and vertical surfaces. If you strictly follow all the manufacturer’s requirements, then there will be no problems with how to glue the tiles to the penoplex.
Glue for penoplex - how and with what to glue, tips for choosing
Penoplex is a modern finishing material characterized by ease of installation. To attach the panels, a special composition is used - foam glue. The glued material is secured with dowels, for which holes are pre-drilled. The glue is selected based on the specifics of the work and external atmospheric factors .
Finishing can be external and internal. If the room humidity is high, it is necessary to use a special adhesive with waterproofing properties. The base on which the penoplex is glued also matters. Buildings can be constructed from brick, foam concrete, reinforced concrete, etc. and have additional finishing (for example, plaster).
Types of glue
All types of glue intended for attaching penoplex differ in adhesion. The strength of the finishing depends on the quality of the adhesion of the adhesive composition and the surface that is insulated . All materials that are presented on the modern market are accompanied by detailed instructions describing the technical characteristics of the glue:
- operating and operating temperature parameters;
- air humidity indicators;
- type of insulated surface.
The variety of adhesives for penoplex is divided into several groups:
1) mineral (cement);
5) polymer composites.
When deciding what to use for gluing penoplex, it is necessary to proceed from the characteristics of the material being glued. Extruded polystyrene foam is quite capricious; the adhesive composition can destroy the structure of the insulation.
The drying speed of the glue plays an important role, especially during interior work. Therefore, interior finishing is not planned for the winter, when it is difficult to ventilate the corrosive smell of the glue used.
Read more about interior decoration of loggias with your own hands in our article. You will learn how to choose the right material and perform all the work correctly.
Step-by-step instructions for insulating balconies and loggias using penoplex can be found here.
And if you are interested in the issue of subsequent arrangement and landscaping of your insulated additional area, then we have an article about choosing flower boxes https://balkonsami.ru/interer/ozelenenie/kak-pravilno-vyibrat-balkonnyie-yashhiki-dlya-tsvetov. html
Prohibited components for glue
The adhesive composition applied to extruded polystyrene foam should not include the following components:
- Group of combustibles and lubricants – kerosene, diesel fuel, gasoline;
- A group of aromatic compounds – toluene and benzene;
- Two types of resins: coal, polyester;
- All types of solvents;
- Formaldehyde and formaldehyde.
Product price characteristics
When purchasing adhesive for penoplex, it is necessary to take into account all environmental factors and the characteristics of the upcoming work. Sometimes buying a high-priced adhesive does not mean quality and reliable results.
Important: The most important thing when buying glue for extruded polystyrene foam is the stock of goods, because in the absence of gluing skills for this material, the glue consumption will be much higher than the value indicated by the manufacturer.
Glue brands with their approximate consumption and price characteristics are listed in the table below.
Adhesives that can be used on any surface are called universal. They can be applied to any facade, the cost of work is much lower than when using a highly specialized product.
Compositions that harden quickly require even more economical use. In addition to monitoring the hardening speed, the master must simultaneously level the insulation boards.
How to glue penoplex
Before insulating the facade or walls of a loggia or balcony with penoplex, it is necessary to prepare the surface:
1) Clean from dirt;
2) Dry well;
3) Think over the installation scheme in advance.
Various methods of applying glue to penoplex
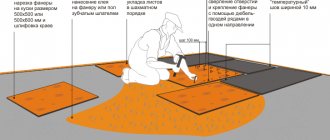
The extruded material is coated with adhesive strips, the step is no more than 30 cm. The coated slabs are pressed tightly against the surface that needs insulation. If joints form, they are filled either with scraps of material or with special polyurethane foam.
The guaranteed shelf life of adhesive for panels made of extruded polystyrene foam is one year. It does not lose its consumer properties for a longer time; you should only avoid sub-zero temperatures.
More information about extruded polystyrene foam in our article “Penoplex: technical characteristics”.
On our website there is also an article about a cheaper analogue of penoplex, called “Foam plastic: technical characteristics”. You might be interested in comparing these two materials with each other.
The choice of glue and what is better not to use
Before purchasing, you need to consider the following points:
- acceptable price;
- suitability for indoor or outdoor use;
- adhesion strength;
- consumption;
- harmlessness (for interior decoration).
Typically, any polyurethane or polymer adhesives are purchased for interior work. It is prohibited to use waterproofing products indoors; they can be harmful to health. Cement-based mineral mixtures are often used outside the house. For exterior work - balconies and plinths - acrylic mixtures are ideal.
Compositions containing benzene, toluene, acetone, formaldehyde, and xylene should not be used for penoplex. Kerosene and gasoline, coal tar and polyesters, and formaldehyde will also spoil the material. Otherwise, you can easily glue the material with your own hands without extra costs.
Types of glue for penoplex
Based on composition characteristics, installation adhesive materials for penoplex are divided into four groups.
- Polyurethane.
- Mineral, cement.
- Polymer.
- Waterproofing.
Adhesives from the fourth group are not recommended for interior use. They contain various solvents and petroleum derivatives, which are very harmful to humans.
Penoplex adhesive for exterior use.
To insulate walls from the outside, cement-mineral compositions should be used. They are characterized by a high rate of adhesion (gluing, adhesion) to concrete surfaces.
For penoplex for interior work.
Installation of insulation on the ceiling and walls inside the building is carried out using glue from the polyurethane or polymer group. This is explained by their technical characteristics and safety for humans.
The most common adhesives for penoplex
Atlas Stopter K-20. Characteristics:
- for external work, including for insulation of facades;
- sold in 25 kg containers;
- consumption 4 kg per 1 m2;
- preparation time for the mixture is at least 4 hours.
- ready mix;
- Sold in a 750 ml bottle;
- there is a special nozzle for application;
- consumption – one bottle per 2 m2.
AtlasPlus. Characteristics:
- versatility;
- good adhesion and elasticity;
- suitable for wet surfaces;
- sold in bags of 5, 10 and 25 kg;
- consumption – 1.5 kg per 1 m2.
- from the group of polymer adhesives;
- Drying time – 24 hours;
- resistance to humidity and low temperature;
- Available in 250, 500 and 1000 ml cans;
- consumption – 250 ml per 5 m2.
- suitable for external and internal work;
- comes in aerosol form;
- prevents the appearance and spread of fungus;
- no noticeable odor, safe to use;
- consumption – one cylinder per 10 m2.
Price range of glue zones
| Apply glue. |
| Strip option. The glue is applied in strips along the contour and in the center.
|
| Solid ball. Here, take a notched trowel with a tooth of 10 mm or more and apply the composition in a continuous layer.
|
| Fastening . After applying the glue, apply the slab to the surface and level the plane relative to the adjacent slabs. It is advisable to lay the slabs in a checkerboard pattern. |
| Fixation with dowels. When the glue has set a little, drill a through hole through the insulation and drive a dowel with an umbrella into it, about 5 dowels per 1 m². The video in this article shows everything in detail. |
| Name | Volume | Packing | Average cost, rub |
| AtlasStopterK-20 | 25 kg | Bag | 320 |
| Insta-stick | 750 ml | Balloon | 550 |
| AtlasPlus | 25 kg | Bag | 600 |
| CeresitCT83 | 25 kg | Bag | 400 |
| Titanium | 750 ml | Balloon | 270 |
| Moment | 1000 ml | Jar | 300 |
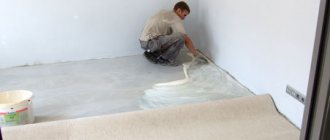
How to glue penoplex - instructions
Before starting work, prepare the necessary tools and materials:
- foam boards;
- primer;
- roller or brush;
- degreaser;
- spray;
Use step-by-step instructions for gluing insulation.
- Clean the working surface from paint and varnish materials, primer, and dirt. Use a spray bottle to degrease the surface.
- Apply an even layer of primer to the walls/floor/ceiling and allow it to dry completely.
- Prepare glue if required by the instructions. Apply it to the surface, as well as to the insulation board.
- Apply the penoplex to the surface: from bottom to top if it is a wall, or from left to right if it is a floor or ceiling. Hold the stove for so long until it no longer lags behind the work surface at random.
- Proceed to gluing the next slab.
Methods of applying glue depending on the nature of the work:
- Spot. Dense drops at a distance of 30 cm from each other.
- Stripes. Four L-shaped stripes in the corners and two long ones in the center.
- Solid. Evenly over the entire area of the slab, departing from the edges by 3-4 cm.
Please note important tips:
- an assistant will be needed when performing this work;
- read the manufacturer's instructions and glue consumption;
- if you are installing penoplex for the first time, use aerosol glue;
- treat the surface with a primer to prevent the appearance of fungus;
- apply glue evenly over the entire surface in a layer of no more than 2-3 mm;
- level the slabs immediately after contact with the work surface;
- remember the safety measures.
Stamps
Let's consider the most famous brands of adhesives for penoplex.
Titanium is a universal adhesive produced in Poland by Selena.
To work with insulation, it is better to use the Professional Styro 753 series. The composition is resistant to the influence of precipitation and is heat-resistant, so thermal insulation can be carried out outside. The product ensures maximum adherence of the insulation to the base.
Ceresit
Using Ceresit products you can attach insulation to walls, ceilings and other surfaces.
- Ceresit ST 84. Foam for insulation. Can be used for outdoor work. Withstands temperature changes from -10 to 40 °C. Hardens quickly. In summer it hardens in 2-4 hours. Can be applied with a mounting gun.
- Ceresit ST 83. Available in bulk form. The complete drying time for the material is 3 days at positive air temperatures. Easy to apply with a notched trowel. Consumption – 6 kg per sq. m. Non-frost resistant.
- Ceresit ST 85. Composition for gluing and reinforcing penoplex. Operating temperature 5… 30 °C. Available in bulk form. After diluting with water, the composition should sit for 2 hours. When gluing in the usual way, the consumption is 6 kg per sq. m., when reinforced - 5 kg per sq. m.
We suggest you familiarize yourself with what paint can be used to paint a gas stove
Moment
Fixes penoplex to any base. The moment is also used to create a reinforcing mesh. The composition has good adhesive characteristics, is frost- and moisture-resistant, elastic, does not require shrinkage, and can withstand changes in temperature.
Master termol
- It has a cement-sand composition, which makes it easy to attach penoplex to concrete, cement and lime bases.
- Provides good adhesion to polystyrene foam.
- Very elastic composition.
- Immune to frost.
- Environmentally friendly composition.
Profline 3K-45
The adhesive contains components that increase the level of adhesion of penoplex to any base. Can be used on plastered, cement and concrete substrates.
Penoplex Fastfix
Penoplex Fastfix is an adhesive foam for penoplex, which is used during thermal insulation work. You can use foam to attach insulation boards to concrete ceilings, ceramic tiles, plasterboard, aerated concrete and brick. Penoplex Fastfix 750 ml is available in the form of an aerosol of the appropriate volume. Color – light blue.
The glue has good adhesive characteristics in relation to most building materials, including wood, plaster, expanded clay concrete blocks, cork, cellulose, and metal.
The mixture adheres to the plane in 10-12 minutes, within half an hour it is still possible to cut the structure, and complete hardening occurs within a day. Can be used indoors and outdoors. Often used for thermal insulation of loggias and balconies.