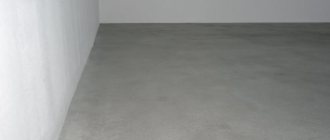
Floor screeding on a balcony is done in two cases: when it is planned to insulate it and to extend the life of the concrete base. The balcony slab is located in the open air and is therefore exposed to the sun and moisture. Over time, cracks begin to appear in it, and the concrete begins to crumble. It is dangerous to go out onto such a loggia or balcony, so it is necessary to screed the floor. Some people believe that screeding on the balcony will only increase the load on the slab. This is true, but there are several ways to give your balcony a second life. The technology for pouring screed is quite simple, so you can do all the work yourself without hiring expensive specialists.
How to determine whether a screed is needed?
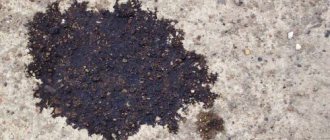
To answer this question, it is enough to visually assess the condition of the floor on the loggia. If there are swellings on the concrete slab, rust spots appear, or cracks are present, this indicates that urgent restoration of the floor is necessary. In addition, a screed is made on the loggia to insulate the base. This usually happens when glazing a balcony or loggia is planned. A screed is necessary for installing any floor covering or installing a heated floor system.
Most people make the loggia an extension of the apartment. Some even set up small rooms there. In order for the balcony to be warm and durable, floor screed is simply necessary, otherwise all finishing work will go to waste. How to do it yourself, and which option to strengthen the slab to choose? We will consider all possible methods of screeding floors on a loggia, and you will choose the best option for yourself.
Advantages of screed on the balcony
What are the advantages of having a screed on the balcony? The following positive points can be highlighted here:
- the ability to perfectly level the floor surface, forming a high-quality base for the finishing coating;
- increasing the strength of the base;
- the ability to provide hydro- and sound insulation of the balcony, as well as hide communications;
- Using a screed, you can eliminate defects, if any (for example, red spots on the floor, cracks, swelling).
Return to content
Preparing the base
To complete this step, the old floor covering is removed from the surface of the slab. The slab itself must be processed, removing all loose and cracked pieces. This can be done using a regular hammer. If the condition of the balcony slab is deplorable and it was necessary to remove the concrete down to the tension reinforcement, the metal must be coated with oil paint or primer. This must be done, otherwise rust may appear through the screed. The resulting chips and irregularities should be repaired using cement-sand mortar or tile adhesive.
USEFUL INFORMATION: How to lay parquet on a concrete floor: laying on a screed, all options
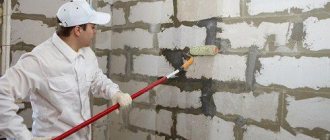
Then you need to remove all debris and thoroughly prime the slab. To do this, it is recommended to use a deep penetration primer. It is usually applied in two layers: the second time it is primed only after the first layer has completely dried. Further work can begin in approximately 7-8 hours. This is exactly how long it takes for the soil mixture to dry completely.
Insulation
Depending on the presence of a thermal insulation layer and the type of material used, different results can be achieved on the balcony. In most cases, before finally leveling the floor on the balcony, insulation is laid, which does not change the dimensions of the internal space.
Insulation without changing the coating
In this case, we are talking about installing an electric-type underfloor heating system. Installation is carried out as follows:
- First of all, roll phenol insulation is laid over the entire area of the balcony.
- The rolled part of the heated floor system is rolled out onto the prepared base.
- The edges of the material adjacent to the wall should be treated with bitumen insulation.
- On the opposite side you need to make contacts and solder them.
- All exposed electrically conductive parts must be insulated.
- The thermostat should be connected to the network, and the temperature sensor should be placed under the heating element, while securing the wire with tape.
- Next to the socket, drill a hole for the control panel and a groove for connecting the cable.
- Power is supplied from a nearby outlet.
Important! After all the above steps, you should conduct a test run of the system, and only then lay the finishing coating.
Insulation with changing floor thickness
The first step is to mark the surface. To do this, draw 3 longitudinal lines with a distance of 5 cm from the walls and 40-60 cm from each other, depending on the width of the balcony. Then brackets are installed along the lines every 30-40 cm. Wooden blocks are mounted into the installed fasteners and secured with self-tapping screws. After this, the transverse joists are installed (usually no more than 4 pieces are required, spaced equally apart from each other). The installed logs are checked with a level, after which mineral wool or penoplex is laid between them. The top of the structure is covered with plywood, which is installed on self-tapping screws in 15 cm increments.
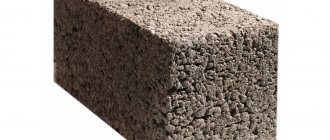
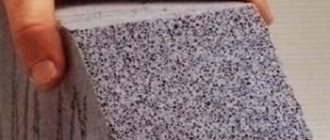
Penoplex is one of the most popular materials for floor insulation on the balcony
Dry screed
Dry screed is ideal for older houses. It does not increase the load on the balcony slab, serves as additional thermal insulation and is quickly installed. Among the disadvantages, it can be noted that a dry screed will not give special strength to the floor on the loggia.
Installing a dry floor screed on a balcony is a rather complex process that requires a certain level of skill. If you are not sure that you can do the job yourself, it is better to call a specialist or try another method.
The work is carried out according to the following scheme:
- A waterproofing film is laid on the slab. It is important that the edges extend onto the walls by about 5-7 centimeters. The waterproofing can be secured using damper tape.
- They put up beacons. This is a metal profile that will help simplify the pouring process. Remember that beacons are installed strictly according to level!
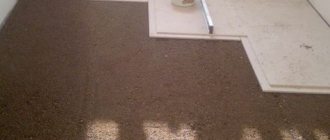
- Add a layer of thermal insulation. Some builders use sand for these purposes. This is not the best solution: such floors turn out cold. If you do the work yourself, we recommend using dry ready-made Knauf backfill.
- The mixture is leveled into beacons using the rule. In those places where the backfill has sagged, it is necessary to fill in the missing part. The dry mixture should lie flat.
- GVL (gypsum fiber sheet) is laid on top of the backfill. It is recommended to do this in two layers, overlapping the joints. The sheets are fixed with glue.
- Install the floor covering.
With certain skills, you can cope with such work with your own hands and quite quickly - within one day.
USEFUL INFORMATION: Floor screed using foam plastic
Self-leveling floor technology
Sequence of work:
- 1Mark the specified fill height with tape.
- 2Install the prepared demarcation bars.
- 3Using a drill or mixer, dilute the required dose of the mixture to be poured into the container, avoiding the presence of lumps.
- 4 Pour over the prepared area of the surface (the work is carried out very vigorously, since the diluted mixture sets quickly).
- 5Use a notched trowel to level, then roll a needle roller over the surface to displace air bubbles from the poured composition.
- 6Remove the restrictive block and repeat the same steps for another section of the surface.
Important! You can move around the self-leveling floor until it is completely ready (indicated on the packaging) only in special shoes that do not have heels.
After pouring, gaps from the installed bars may remain on the surface of the finished floor. This is necessary because during operation the coating undergoes the same temperature deformations as the concrete base. Therefore, it is better to cover the cracks with plastic sealant or sealing cord.
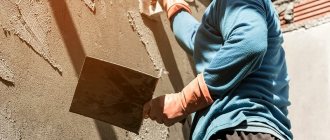
Wet screed
This is the best option for doing the work yourself. This method is based on pouring the loggia floor with cement-sand mortar. Even a person far from construction can cope with this task. Among the disadvantages of this method, one can note the increased load on the balcony slab. In addition, wet screed requires time and certain conditions. If you decide to make loggia floors using this method, we recommend planning the work for spring - summer.
The work is performed as follows:
- Install waterproofing. If you used a special mastic as a primer, then the need for additional protection from moisture disappears. If you are laying film, the edges should extend onto the wall by at least 10 centimeters. After completing the work, the excess can be trimmed with a knife.
- A reinforcing mesh is laid on the waterproofing. It is better not to use metal for reinforcement, this will make the structure even heavier.
- Beacons are installed. The distance between the guides should be about 50 centimeters, the profile height should be 5. It makes no sense to make the floors on the loggia thicker.
- To fill, you can use ready-made mixtures or make the solution yourself. To give the screed greater strength, it is recommended to add frost-resistant reagents to the solution.
- The screed is poured at the level of the beacons. Remember that the solution must be smoothed in one direction. It is best to do this from the far wall towards the balcony door. The solution must dry for at least a week, only after which you can proceed to the next stage of work.
- Your next steps depend on what kind of flooring you decide to use. If you plan to lay tiles or linoleum, then simply prime the surface. In the case of installing laminate, you will have to apply a layer of leveling putty.
Start of the process
So, as already mentioned, pouring the floor with concrete is the best option for repairing the flooring on the balcony and loggia. But before you start mixing the solution, you need to prepare for this process in advance and carefully prepare for the repair. The most important thing in this process will be determining the amount of materials that will be required to fill the floor.
It is absolutely natural that it is undesirable to mix either too much or not enough concrete. Therefore, you will first need to measure the area of the balcony. To do this, you just need to measure the length and width of the balcony, which are then multiplied by each other. This value will subsequently be used to determine the amount of concrete required when pouring the floor.
So, this indicator is multiplied by the height of the floor you are planning to build.
The resulting number will become the exact guideline according to which you will further mix the solution.
Non-standard solutions
There are quite original ways to insulate loggia floors. Please note that it is insulating, not strengthening. We will talk about how to insulate a loggia as much as possible without using a “warm floor” system. The methods are quite simple, so you can easily do it yourself.
USEFUL INFORMATION: Adhesive for linoleum cold welding, price
Option #1
Make a floor screed using polystyrene foam or penoplex. These materials will serve as excellent insulation. They do it like this:
- the balcony slab is leveled and foam sheets are laid on it. The sheets should not be too thick, because the screed itself will still go on top.
- Waterproofing and reinforcing mesh are laid on top of the foam.
- after this the screed is poured. The recommended layer thickness is 3-5 centimeters.
Option No. 2
Floor screed using expanded clay. This material has good thermal insulation properties, but you need to know how to work with it. You can do the work yourself according to the following scheme:
- A waterproofing layer is laid on the concrete base, and beacons are placed.
- A layer of expanded clay is poured between the beacons. This must be done so that at least three centimeters remain on the main screed.
- Expanded clay is a fairly light material, so when pouring the screed it will most likely float, so it needs to be fixed. This can be done using cement laitance.
- When the milk has set, you can begin the main filling.
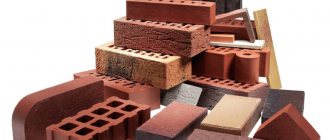
Choosing material for the balcony
The choice of materials depends on the type of balcony:
- glazed and heated;
- glazed without heating;
- open.
If the balcony is well glazed, insulated and has radiator heating or heated floors, then residential materials are used for leveling and finishing.
An unheated closed balcony is not exposed to rain and snow. But due to sudden temperature changes, condensation may form. For this reason, moisture-resistant materials should be used in such rooms. For example, plywood, gypsum fiber sheets, moisture-resistant plasterboard, cement-bonded particle board, oriented strand board, screeds. For final finishing you can use tiles, linoleum, moisture-resistant laminate, carpet.
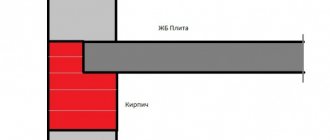
The difficulty is the open balcony. Its concrete floor is exposed to precipitation and frost. In this case, leveling the floor on the balcony can be done using screed, cement-bonded or oriented strand boards. The floor can be finished with porcelain stoneware, ceramic tiles, or terrace boards.
Do not forget that a balcony is a slab on three sides that does not have support. You should not overload it. This means that the floor structure should be as light as possible. Cement screed is not used in cases where the floor rises by 20 cm during leveling. It is better to choose floors on joists. They add minimal weight to the slab. When the floor is leveled no more than 3-5 cm, then a cement screed will be a good option.
Flooring installation
The last stage of arranging the floor on the balcony is the installation of the finishing coating. There are several ways to carry out this operation, but the most popular is tiled flooring.
Laying tiles
Laying tiles on the balcony begins with preparing the mortar. It is recommended to use branded products, since home-made mixtures may be of too low quality. The prepared solution is applied to the floor with a shaped spatula and stretched over the surface. The tiles are pressed to the floor and checked with a building level. The next element is placed next to it, and crosses are installed between them, with the help of which the seams will be formed.
Tiles allow you to emphasize the individuality of the balcony interior
In areas near walls, material may need to be trimmed. To do this, it is better to use a tile cutter; using a grinder in this case is dangerous. After installing all the tiles, you need to wait a day for the solution to dry, and then fill the seams with a special grout.
Laying deck boards
First, longitudinal logs are installed without rigid fixation; transverse beams are mounted on them, fastened with self-tapping screws. Then special clips are installed on the transverse boards, which come complete with the decking board. The material will be installed in these clamps. The side on which there is a groove is inserted into the clips and so on until the entire roll is lined. The correct installation of each element is checked by the building level.
When laying decking boards, it is necessary to install logs
Floor painting
First you need to prime the surface. Firstly, this will significantly increase the adhesion of the coating, and secondly, paint consumption will be reduced. Then the material is poured into a convenient container, the roller is dipped in it and the floor surface is painted, starting from the far corner. After a few hours, when the paint has dried a little, a second coat should be applied. After these procedures, no more work will be done, so you can install the plinth. Although some people prefer to additionally coat the floor with varnish.
Painting the floor on the balcony is carried out in two layers
Laying linoleum
A sheet of material is rolled out on the floor and the excess is trimmed. To do this, the edge of the roll is pressed against the wall and cut just above the floor line to leave a margin. Then the material is removed and special glue is applied to the surface. The linoleum is again laid on top of the prepared base and pressed tightly to the floor. Next, the entire surface is rolled with a roller, and excess glue is removed with a rag.
Read more about how linoleum is laid.
Laying linoleum is a fairly simple procedure that does not require special skills.
Installation of laminate or parquet
The first step is to lay a backing made of polyethylene or cork. The material must completely cover the surface to be treated. Fragments of the substrate are fastened with ordinary tape. Laying parquet or laminate on the balcony begins from the far corner, while the tenon should be pressed against the surface of the wall. Then they pick up a row adjacent to the balcony railing.
On a note! Wooden pegs should be inserted into the gaps between the wall and the material to form an expansion gap. This gap is necessary so that when the floor covering gains moisture, it does not swell.
Installation of laminate and parquet requires attention and a responsible approach to the matter.
Next, they cover the entire area, inserting the spikes of the material into the grooves of the installed elements. The last row at the entrance is fixed with a construction bracket.