DIY construction of interior partitions
Foam blocks are considered an effective building material. They are used in the construction of interior partitions with their own hands. The optimal dimensions used to perform this task are 300x600x80 mm or 300x600x100 mm.
The advantages of using modern foam blocks when constructing interior walls in a private house or apartment:
- The dimensions of foam blocks significantly reduce construction time.
This building material is easy to cut, which allows you to obtain structures of unusual shape.
A high degree of sound insulation eliminates the possibility of becoming an involuntary witness to everything that happens in the next room.
Profitable price.
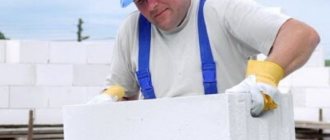
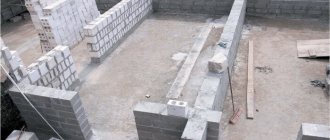
The maximum speed of laying is an undeniable advantage of this building material, which allows you to quickly lay out the internal wall yourself. The most optimal thickness of the foam block is 100 mm. Before you start laying, you need to do some preliminary work: take a block or starting profile in your hands and use them to draw straight lines. Look at the photo to see how to do this.
- When choosing the size of the blocks and calculating the required number of pieces, you should not allow this wall to come into contact with the ceiling.
The left gap of 1 centimeter is subsequently filled with construction foam.
Description of the stages of laying blocks
- The first row is laid on a base made of concrete or wood. This will take you a little time. The following can be used as a connecting layer:
- gypsum based plaster,
cement,
special glue.
- Each subsequent row is laid out with vertical seams arranged in a checkerboard pattern. This is easy to do if you buy blocks of different lengths. In this case, those that are shorter should be placed at the beginning of every second row.
Do not forget to secure the masonry of the interior partition to the main walls. Use special pins for this, as in the photo.
- To prevent the wall from shaking in the future, pins must be driven into its base.
When using cement mortar as a base, there is no need for additional fastenings.
Technology of working with foam blocks
Layout of foam blocks.
The masonry process is most conveniently carried out with blocks whose dimensions are 200x300x600 mm. If you plan to build walls from this material, then a strip monolithic foundation, arranged on a sand cushion, can be used as the basis for the house. This is due to the fact that the blocks do not have significant weight, which could subject the base to significant load.
When laying foam blocks in the basement area, it is recommended to use products with a more impressive density, which is equal to 700 kg/m2. Afterwards, waterproofing and insulation will need to be installed.
For laying blocks, you should use a special glue, which is a dry mixture of cement, fillers and additives that increase water resistance, strength, frost resistance and ductility. This adhesive composition is convenient to use, easy to apply and apply. On the other hand, there is an opinion that to carry out work using such glue, the master must have certain skills, so it is recommended to turn to professional masons.
Foam concrete blocks in the first row must be laid on a layer of waterproofing, which can be roofing felt.
Tools for laying foam blocks.
If the base is uneven, it should be leveled with a solution. It is necessary to start working from a corner; the technology requires constant alignment of the position of products horizontally and vertically. To do this, use a plumb line and level.
Laying the foam block in the second row must be done by forming the correct seam; for this, the mixture should be laid in a layer of 2-3 mm, while the width of the strip should be equal to the equivalent indicator of the block. First, the mixture must be applied to the vertical side of the previous foam block, which will allow the formation of a butt seam, only after the glue is applied to the horizontal surface. All rows should be laid with bandaging, as when working with ordinary bricks. This guarantees higher wall strength.
Leveling the surface should be done using a construction float. It is necessary to ensure that there are no level differences between products. Otherwise, cracks will form. Load-bearing walls can be connected using anchors or dressings.
When arranging partitions, you should use a slightly different method of carrying out work. Unlike the process of constructing load-bearing walls, products here need to be laid not on the base, but on the surface of the gasket, which will reduce the transmission of noise to the partition.
Scheme of a partition made of foam blocks.
The peculiarity of the technology for laying blocks in the first row is that you should use cement mortar, not glue, and the layer should also be equal to a thickness of 2-3 cm. You can use ordinary mortar when building a wall if the base has minor deviations. This also applies to the blocks themselves, which could have been manufactured not in a factory, but at their own construction site.
If foam blocks are laid using glue, this will eliminate the occurrence of cold bridges, whereas using a solution it is difficult to achieve such an effect. That is why it is recommended to level the foundation before carrying out work. The absence of cold bridges is achieved due to the uniformity of the wall, which has seams of insignificant thickness. In addition, the process using glue will take much less time than in the case of a solution.
The foam blocks are laid in such a way that there are no voids left in the seams. This can be achieved if the glue is distributed using a notched trowel.
If the foam block is laid using cement mortar, then the products must first be wetted. When preparing such a mixture, it is necessary to use cement and sand in a ratio of 1:4.
Reinforcement of foam block with composite reinforcement.
If you decide that you cannot cope with this type of work, then you need to seek the help of professional developers. The cost of installation work will not be excessively high and will be limited to 1000-2000 rubles. for 1 m3.
To carry out the work you need to prepare:
- notched spatula;
- glue;
- construction float;
- reinforcing mesh;
- waterproofing;
- plumb line;
- level.
Return to contents
What tools may be needed
When working, you will need special tools, as in the photo. To build interior partitions in a house with your own hands, you cannot do without:
- drills and attachments;
leveling hammer with rubber head;
building level;
hacksaws and corners;
graters and plane for foam blocks;
wide brush to remove dust.
These tools will allow you to use building material as economically as possible. To level each laid row, you need a plane and a grater. After completing the work, the use of these special tools allows you to process the surface and prepare it for finishing work. The simplicity of the process makes it possible to carry out all construction work in a short time.
At this stage, you have to get rid of the remaining solution, as well as dust and dirt. Before proceeding with the final finishing of the interior partition, it must be carefully plastered and puttied. You will see all the stages of the necessary work clearly if you watch the video.
Nuances of finishing internal partitions made of foam concrete
Finally, let’s briefly look at how to finish a wall made of aerated concrete. Since the partition turns out to be almost perfectly flat, there is no point in using drywall or other sheet materials. The optimal solution is plaster, and it can be applied in a thin layer without beacons.
If you need to finish a partition in a bathhouse, attach a lath to it and cover it with clapboard.
For finishing we will need the following materials:
- Plaster mortar - you can plaster the foam block with any plaster mixtures. Also a good solution is tile adhesive, which can be applied in a thin layer;
- Reinforcement mesh for interior work;
- Acrylic primer universal or deep penetration.
Finishing is carried out as follows:
| Illustrations | Actions |
| Padding. The surface of the partition must be covered with two layers of soil with interlayer drying. | |
| Gluing the mesh: |
- Apply a thin layer of plaster to the surface;
- Attach reinforcement mesh;
- Run a trowel or spatula over the mesh to press it down and level the surface;
- Place the second and subsequent panels overlapping with the previous one, and glue them in the same way.
Upon completion of plastering, prime the surface again. After this, the wall can be plastered with finishing putty or covered with finishing materials, for example, wallpaper or tiles.
What to look for when purchasing
When purchasing foam blocks, be careful, as unscrupulous manufacturers may replace it with more expensive aerated concrete blocks.
In order not to overpay extra money, you need to know how they differ from each other.
- Aerated concrete blocks look neater than foam blocks: they have more regular and smooth edges.
The main difference between these two materials is how they are produced: aerated blocks are made using the autoclave method. The material is placed in a special autoclave oven, where it is exposed to high temperature and high pressure for a long time. Foam blocks are made in two possible ways: injection technology and cutting technology.
You can do the laying of an interior partition from foam blocks yourself. High-quality material allows you to minimize construction time. Such a reliable and durable interior wall will serve you for a long time.
They are faced with the problem of erecting partitions. It is not advisable to use ceramic bricks or drywall for this. The first material is heavy and its installation is quite labor-intensive. Installing walls made of gypsum board will not provide the necessary sound insulation and strength. The construction of partitions from foam blocks is the best solution.
Important!
The construction of walls from this material is a very responsible matter. Failure to comply with the technology will lead to significant defects that can only be eliminated by dismantling.
How much will it cost to lay foam blocks?
If you live in Moscow and are planning a renovation, please contact us. We are a company that guarantees high quality and a responsible approach to all operations. To carry out repairs, only professionals who have many years of experience in this field are involved. During the construction of walls, stage-by-stage quality control takes place using modern equipment, which guarantees the best result. Delivery of materials directly to the site is carried out by trusted companies that have the necessary quality certificates. The cost of installing foam blocks in Moscow depends on many factors, including the volume of work.
Material advantages
Installation of walls made of foam blocks has its advantages:
- light weight;
- the relatively large dimensions of the blocks simplify installation;
- optimal density ensures convenient processing of the material (trimming, making holes;
- allows you to implement any design solutions (creating walls of different shapes and sizes);
- optimal thickness for creating doorways;
- has a perfectly smooth surface;
- does not deteriorate under the influence of moisture, sun, or various aggressive substances;
- has an optimal price.
Partition construction technology
To ensure that the installed partition is stable, reinforcing bars are attached to the ceiling where the foam blocks are laid. Also, to facilitate all operations, the area is pre-marked. To do this, use a level, stretch the fishing line, etc. Metal guide profiles are also installed. The result obtained depends on the quality of this operation. The first row of foam blocks is laid on a pre-primed surface. Installation is carried out using a special adhesive composition, which is prepared from a dry mixture. During the construction of the partition, you should periodically check the verticality of the surface, which will allow you to quickly eliminate any defects. The installed foam blocks dry within 2 days, after which you can begin decorating them.
Laying the first row of foam blocks
Material such as foam blocks first appeared in Sweden at the beginning of the last century. In our country, similar products are used for installing walls of private country houses, constructing garages, and constructing fencing for balconies and loggias. The popularity of cellular blocks among developers is determined by their precise overall dimensions, low weight, high installation speed, and excellent technical characteristics of the material. Even an inexperienced builder can lay foam blocks, but before installing the walls it is necessary:
- Lay high-quality waterproofing on the foundation, which will prevent the destruction of the blocks.
- Maintain horizontal position when laying products (this can be achieved by adjusting the layer of cement mortar). A correctly installed first row of foam blocks allows you to align subsequent products on thin seams of the adhesive mixture.
When laying the first and subsequent rows of blocks on the mortar, it is necessary to take into account the purpose of the enclosing structures. Walls can be main, load-bearing and non-load-bearing (interior partitions).
It is recommended to lay foam blocks on a pre-leveled base. If there is a significant difference in height, it is recommended to use a cement-sand mortar for this purpose. After leveling, waterproofing is laid on the base.
Laying foam blocks with your own hands begins with preparing the products. To do this you need:
- eliminate irregularities and chips;
- remove burrs using a grater or drywall plane;
- set aside heavily damaged blocks and leave them for later trimming.
Step-by-step instructions for constructing a partition
The process of building a partition includes several stages:
Preparation of materials and tools
In addition to the foam blocks themselves, the following materials will be needed to build the wall:
- Adhesive for gas block;
- Acrylic primer;
- Cement and sand;
- Polyurethane foam;
- Metal perforated tape;
- Guide (UD) profiles for drywall;
- Dowel-nails;
- Fittings with a diameter of 12 cm.
The set of tools is quite simple:
- Notched trowel;
- Master OK;
- Rubber mallet;
- Reciprocating saw;
- Wood hacksaw;
- Electric drill;
- Mixer attachment for drill;
- Level;
- Plastic bucket;
- Vacuum cleaner.
After preparing everything you need, you can start working.
Surface preparation
Construction begins with surface preparation:
| Illustrations | Actions |
| Cleaning. Remove dust from the floor and walls. The surface on which the wall will be built must be clean. | |
| Marking. |
- Draw a line on the ceiling for the location of the future partition;
- Using plumb lines, transfer this line to the floor;
- Draw a vertical line on the adjacent wall between the horizontal lines on the ceiling and floor. For convenience, use a rule or level. As a result, the outline of the future structure should be completely marked.
Installation of guides
Installation of guides is not a mandatory step. However, they make the task much easier. I especially recommend installing guides for beginners.
All you need to do is cut the profiles to the height and length of the future wall, and secure them with dowels along the drawn lines. The guides do not need to be attached to the ceiling.
If you have long wooden slats, they can replace metal profiles.
The result should be a kind of frame that will guide the masonry, i.e. will avoid distortions. After completion of construction, the profiles must be dismantled.
Wall masonry
Now you can start building the wall. The step-by-step instructions look like this:
- Pull a nylon thread between the guides at the level of the first row of blocks;
- If the floor is not level, lay the first row of blocks on cement leveling mortar. The width of the mortar strip should be two centimeters greater than the width of the blocks.
- Place the block and level it. Use a rubber mallet to adjust the position.
This completes the construction of the wall.
Installation of the first row
The first products are fixed on cement mortar at the corners of the future building, and the first of them is installed in the highest part of the base on a thin layer of the mixture. Lighthouse masonry elements are considered basic, so their installation must be carried out with special care.
Important! When installing a corner block, make a protrusion above the base within 3-5 centimeters. This gap will prevent the accumulation of moisture at low tide. Thus
the masonry
will remain dry and will not be subject to destruction as a result of moisture saturation and exposure to negative temperatures.
When fixing the side wall elements, it is recommended to use a building level. Correction of their position is carried out with a rubber hammer. After installing several rows of lighthouse blocks, nails are forced into the seams and the cord is pulled. If there is a significant distance between the corner parts (more than 6 meters), it is recommended to use intermediate guides.
Using a carriage to apply glue to foam concrete
The first row of foam concrete is laid on a cement-sand mixture using a trowel, all subsequent versts on the adhesive mixture using a notched trowel or a special tool, a carriage.
Note! The construction mixture is spread not only on the horizontal surface, but also on the side edges of the products. The vertical seam must be filled with mortar without fail. Failure to comply with this rule will lead to the appearance of voids, accumulation of moisture and destruction of the product under the influence of negative temperatures.
When laying foam blocks on a regular mortar, the thickness of the horizontal seam should be within 1-1.5 centimeters, the vertical gap should be about 1 centimeter. If there is a perfectly leveled surface, masonry can be done using glue. In this case, the thickness of the gaps between adjacent elements is determined according to the manufacturer’s recommendations.
Advice! When the surface of the block is wetted with water, its adhesion to the glue will increase. This recommendation is valid for installation in the warm season.
If necessary, blocks are cut to the required dimensions. A product with a thickness of 5 centimeters or less looks ugly. To eliminate this unpleasant moment, you can increase the thickness of the seams. After laying the product on the solution, it can be further adjusted over a short period of time. Subsequently, unevenness is eliminated using a drywall float or a special plane.
Technology of laying foam concrete blocks
By the time the construction of foam concrete walls begins, a foundation must be built. The first mandatory action should be the creation of a water barrier between the base of the building and the future wall. To do this, the contacting surface of the foundation is generously covered with a coating containing bitumen, after which several layers of roofing felt are laid. Only after creating a reliable waterproofing barrier is the masonry of walls made of foam blocks, which includes several technological processes.
First row
The foundation surface is rarely ideal, differing in horizontal projection by 1-3 cm, and sometimes more. The task of the foam blocks laid in the first row is to create a surface that is as horizontally level as possible, allowing subsequent laying of building materials with a minimum of seams using polymer-cement glue.
Before installing corner blocks, you need to determine the degree of deviation of the foundation surface from the horizontal, for which a water level or a laser level is used. A cement-sand mortar is prepared, which can be used to adjust the thickness of the seam. The greater the difference between different sections relative to the horizontal plane, the thicker the solution becomes.
The block is placed first at the highest corner of the foundation, and the smallest possible masonry joint is formed. Using control of the horizontal level, the remaining corner elements of the masonry are then laid. As a result, the surface of the foam blocks laid in the corners should correspond as much as possible to one horizontal line, while the blocks themselves must be leveled in all projections.
On a note. Forming the corners of the first row is a very important task, the result of which determines further work, so there is no need to rush, and if errors are detected, it is better to redo it.
After making sure that the corners are positioned correctly, cords are stretched between them, which serve as a guide when laying the order. Vertical seams, even when forming the first row, are closed with glue, so it is necessary that the master has both solutions and the appropriate tool at hand.
Second and subsequent rows
In the future, during construction, only assembly adhesive is used. For better adhesion (gluing) of foam concrete surfaces, they must be cleaned of dust as much as possible and coated with a thin layer of mortar. Only after this is glue applied, a uniform layer is formed using a comb and the masonry elements are pressed. Masonry adhesive is very flexible, so excessive force is not recommended. The blocks are gradually seated to the required level by lightly tapping with a rubber hammer.
Another feature of the adhesive mounting solution is the long initial setting time (1-3 hours depending on the humidity of the material, the consistency of the glue and the air temperature), so the blocks are laid in one row around the perimeter. The next row of blocks is placed after the glue in the previous seam has set.
When forming seams, some of the glue comes to the surface. The solution should be removed immediately with a spatula. If the glue is not cleaned off very carefully, by the time the next row is laid, the solution dries out and forms unevenness on the masonry surface, preventing the formation of a thin horizontal seam. To remove glue tubercles, you should have a special board with an attached abrasive on hand.
If necessary, cut off a fragment of a block, use a special hacksaw and a square. The latter allows you to create a cut surface geometry similar to the factory one. If problems arise with the evenness of the cut, it is more advisable to direct the cut edge towards the openings (here small unevenness is not a problem, and besides, they can always be straightened upon completion of the masonry).
Installation of the second row
The second and all subsequent rows of walls begin to be laid from the corners after measuring the deviation from the vertical and horizontal position. When performing such work, the cord is moved to a higher block and secured in the seam. An adhesive mixture is used to lay all subsequent rows, which saves material and work time.
It is not recommended to lay foam blocks with gaps crossing at an angle of 90 degrees; such seams only weaken the masonry. For high-quality dressing of seams, the products are shifted at least 25% of the length. The ideal option is to bandage half the size of the element.
The second and subsequent rows of blocks are laid on glue. The thickness of the building mixture should be within 5 millimeters. The glue is applied with a notched trowel, spreading evenly over the surfaces. After laying and preliminary leveling, the thickness of the seam will decrease to 3 millimeters.
Laying the second and subsequent rows of foam blocks
During work, the horizontal and vertical position of the blocks is adjusted using a plumb line and a building level. To improve the load-bearing capacity of the wall, reinforcement is carried out every 3-5 rows of blocks. To do this, grooves of the required depth are made in the products and reinforcement is laid. Attention should be paid to the fact that the metal rods should not extend beyond the surface of the blocks.
When laying foam concrete with your own hands, you must comply with a number of requirements:
- The adhesive composition or cement-sand mortar must be prepared in small portions, because such substances retain their performance characteristics for 1.5-2 hours after mixing.
- The blocks are adjusted within 10-15 minutes after installation. When doing DIY work, use mixtures with maximum adjustment time. In this case, an inexperienced builder will have more time to level the masonry. When using a high-quality solution, it will be problematic to correct the block without damage.
- Work on the installation of foam concrete walls must be carried out during the warm season from spring to mid-autumn, at temperatures from +5 to +25 degrees.
- To simplify installation, the surface of the blocks is moistened. After such procedures, the adhesion of the porous surface improves.
- You can apply an even layer of glue using a notched trowel.
It should be noted that finishing work is carried out only a month after the walls are installed. This is due to significant shrinkage of foam blocks, up to 3 millimeters per meter of length.
Tools and devices for laying foam concrete walls
Considering the peculiarity of laying foam concrete blocks, you will need an appropriate set of special and general construction tools. The first include:
- specific plastic trowels with a comb (can be replaced with a regular notched trowel);
- wall chaser for making longitudinal recesses on the surface of foam concrete;
- hand saw for cutting and fitting blocks;
- flat sanding boards for removing large and small irregularities and protrusions;
- a square to facilitate precise cutting of cellular building materials;
- hammer with rubber working part;
- small paint spatula.
General construction tools that will be useful when laying foam blocks with your own hands include:
- bubble level;
- laser level (water level);
- strong thread or fishing line;
- a construction mixer or drill (perforator) with an appropriate attachment for preparing construction adhesive.
To lay the first row you will need an ordinary trowel, a container for preparing cement-sand mortar and available tools. If you have a concrete mixer, the solution is prepared in it.
How to tie stitches
Suture dressing options
The load-bearing walls of a residential building can be laid out in one or two rows of blocks. Products with standard overall dimensions of 20*30*60 centimeters are not enough for the construction of enclosing structures, so they are laid in two rows and reinforced with mesh. When laying foam blocks with butts, the products must be placed in a perpendicular position relative to the main masonry. If the length of the material exceeds the width of the supporting structure, trimming is done.
When laying foam concrete flat, the rows are mounted parallel to each other and connected to each other using flexible connections. Sometimes the main masonry of the walls is combined with brick cladding; here the materials are reinforced with metal mesh. The corner part also needs to be bandaged. It is considered normal to place a vertical seam in the middle of the foam block.
When installing internal load-bearing walls, individual blocks can be joined as follows:
- With bandaging to the full depth of the part. Here the first foam block intersects with the masonry of the outer wall.
- With combination on part of the element. In this case, the product is wedged into the main masonry by 15-20 centimeters.
- With joining of material. In this case, dressing is not used; the foam block is placed close to the outer wall.
How to lay the floor
The ceiling in a house made of foam blocks can be anything - wooden, metal or slab. But, in any case, it fits only on the armored belt. As with the installation of lintels, the minimum length of the platform on which the ceiling must rest is 25 cm.
It must be said that to make an armored belt it is not necessary to use U-shaped trays. Instead, ordinary formwork will do. Otherwise, the work is carried out in the same way as when installing floors on walls made of concrete or brick.
If wooden beams are used, they must be waterproofed with roofing felt. Also, be sure to provide a thermal air gap of about a centimeter, as shown in the diagram above.
That's all the information about the construction of external walls.
What mistakes can occur when installing foam concrete walls?
When laying blocks with your own hands, an inexperienced builder may make the following mistakes:
- Incorrect installation of the first row of products will lead to the need to lay a thick layer of adhesive mixture on subsequent rows; the supporting structure may shift vertically.
- Carrying out work in humid weather and freezing temperatures often causes wall destruction.
- Incorrect application of the mixture and incomplete filling of the joints. Such actions lead to loss of the wall’s thermal insulation qualities and loss of strength.
- Lack of preparatory work to clean surfaces from construction debris and dust. Poor quality connection of parts leads to cracks in the structure.
- The lack of reinforcement causes a general weakening of the wall.
Soil shrinkage will inevitably lead to the appearance of cracks on the surface of the supporting structure, so window and door openings must be reinforced. To prevent the occurrence of point loads from floor slabs in the upper structure, it is necessary to create an armored belt.
How much does it cost to build a house?
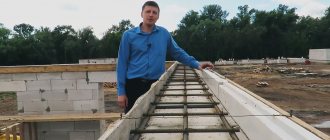
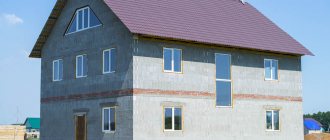
Finished house made of foam blocks
Many users are interested in the question of the cost of laying walls from foam blocks. When making such calculations, it is necessary to take into account the price of wall material and mortar, if the work is done by hand, as well as the cost of hiring builders when ordering such services.
First, you need to calculate the total volume of the walls according to a pre-compiled project and calculate the required number of blocks per m3. You should pay attention to the fact that one cube of material with standard overall dimensions of 60*30*20 centimeters costs 2500-3200 rubles. To this indicator it is necessary to add the price of glue. According to experts, the consumption of adhesive composition per m3 of masonry is in the range of 20-30 kilograms, which is another 200-250 rubles. Taking into account the cost of foam blocks, glue, reinforcement, cement and other expenses, one m3 of masonry will cost 3000-3500 rubles.
Anyone, even an inexperienced builder, can install walls made of foam blocks. For a detailed overview of the process, watch this video.
5
/
5
(
1
vote)
Being an inexpensive and accessible material, foam blocks are widely used in the construction of residential buildings, garages, industrial and domestic premises. They represent a serious alternative to traditional brick and allow you to independently erect a building in a limited time, without the involvement of hired workers. No professional training is required to build permanent walls and internal partitions of a building from foam blocks with your own hands.
It is important to know the technological nuances and comply with a number of conditions so that the laying of foam concrete products is carried out quickly and ensures the quality and durability of the building. Having mastered the specifics of constructing walls and walls, the laying technology of which is quite simple, you can carry out the construction yourself or monitor the correctness of the work performed by the builders.
The technical data of this material compare favorably with a number of significant advantages
You need to understand where to start laying foam blocks. Not everyone knows what materials and tools are needed, or how to work correctly, observing the main principles. Let's take a closer look at these issues.
Where to start laying foam blocks
High-quality masonry of walls made of foam blocks is carried out subject to the following recommendations:
- ensuring reliable waterproofing of the building base. Using special waterproofing compounds or two layers of rolled roofing felt, you can effectively protect foam concrete walls from the negative effects of moisture;
- performing masonry of foam concrete products from the highest corner point. This will make it possible to form a level base for the construction of capital walls and internal partitions, subject to control of horizontality by the building level;
- fine-tuning the geometry of blocks with dimensional deviations. Sagging should be eliminated, burrs should be removed using a grater or a special plane, and defective products with large chips should be trimmed.
To ensure high strength and reliability of the structure, prepare the foundation surface for the construction of walls in advance
Features of laying foam blocks
Foam concrete is chosen not only because it is quite easy to work with, but also because of its outstanding characteristics. Thus, walls made of this material have excellent heat-saving and sound-proofing qualities. The material has a closed-cell structure, which prevents moisture from penetrating inside. The walls have the ability to withstand significant temperatures and fire, which is important in the construction of residential buildings. After construction is completed, you don’t have to worry about the walls deteriorating or rotting.
Types of foam blocks depending on filling.
During the masonry process, it is necessary to adjust the dimensions of the products; the blocks can be easily processed by drilling, planing and sawing. Thus, it is possible to arrange geometrically complex components of the structure, as well as carry out construction taking into account any angle of inclination of the roof.
Masonry technology involves taking into account insufficiently high strength indicators of the material. That is why it is necessary to supplement the structure with a reinforced concrete frame of strength, which will increase the reliability of the building. The floor panels will rest on this system.
Some believe that a house built from foam concrete blocks can only be faced with brick. However, this belief is wrong. You can use siding, tiles, stone in natural or artificial forms as cladding; vapor-permeable plaster is also suitable.
Return to contents
Laying foam blocks - necessary materials and tools
To complete the masonry, prepare the following materials:
- Foam concrete blocks.
Use material for main walls that can withstand increased loads with a density of D600, and foam concrete marked D500 for interior partitions. Use products manufactured by trusted manufacturers using industrial technology. Please note that there is a certificate guaranteeing compliance with performance characteristics. - Sand-cement mortar.
When mixing sand and cement, maintain a 4:1 ratio. Add plasticizers if necessary, following the dosage indicated on the package. The use of available materials makes it possible to lay blocks with dimensional deviations of up to two centimeters on an increased layer of mortar at low cost. The disadvantage is the increased thickness of the seam and increased heat loss caused by “cold bridges”. - Adhesive composition.
Industrially produced dry mixture is offered in specialized stores in a form ready to be diluted with water (0.2 liters of water per kilogram of mixture is added). The glue is mixed with a mixer to a homogeneous consistency, laid in a layer of up to three millimeters, ensuring high adhesion to the foam concrete material. This allows you to reduce the cost of preparing the mixture and increase the thermal insulation of walls by reducing the thickness of the seam.
The entire process of laying foam blocks is not complicated, but there are some mandatory nuances
Partitions made from foam blocks are durable, have a flat and smooth surface and are easy to process. The dimensions of blocks made of foam concrete and aerated concrete are larger than those of brick, which speeds up and facilitates the installation of the structure. Thanks to these qualities and the light weight of the blocks, the installation of the partition element can be carried out independently, without calling professionals. Let's find out how to do it correctly.
If you need to create a strong monolithic wall in a room, then foam blocks are ideal for this. Block partitions made of foam concrete are durable, but the load on the load-bearing slab will be much lower compared to a brick structure.
The main advantages of the material are:
Since sawing blocks is quite easy, you can create partition elements of various shapes and designs according to the most complex design project. The finished wall is smooth and suitable for any type of decorative finishing.
The disadvantages of block structures include the difficulty of dismantling and low moisture resistance. Coating with a waterproofing compound or plastering helps to level out the last flaw.
When purchasing blocks, pay attention to the clarity of their shape.
This indicates the quality of the parts, and will greatly facilitate installation in the future. It is better to purchase material from well-known brands, where they carefully check it for compliance with standards.
Dimensions of foam blocks for creating interior partitions
It is advisable to choose foam blocks for interior partitions in an apartment that are autoclaved and have a density of at least D 300. Then you will get strong and even walls.
The sizes of foam blocks for partitions may vary, but they must meet the following parameters:
- length and height – 30 x 60 cm;
- thickness from 7.5 to 15 cm;
- weight from 5.5 to 16.2 kg.
Also, when choosing, you should pay attention to how the blocks were formed - by cutting or stamping. When cutting elements with a circular saw, their edges will be clearer and their ends will be even. When creating blocks in forms, geometric errors are possible.
Which foam blocks to use for partitions - dimensions and other characteristics
There are special foam blocks for the construction of partitions. They differ from external ones primarily in size. Despite the fact that GOST does not say anything about the dimensions of partition blocks, products with the following dimensions are most often found on sale:
| Characteristics | Value, mm |
| Thickness | 100; 150 |
| Length | 600; 625 |
| Height | 200; 250; 300 |
As you can see, the difference from blocks for outdoor work is the thickness. In fact, these are not even blocks, but slabs. Thanks to these dimensions, space is saved in the room. A gain of 100-150 mm is not so little, especially for small-sized housing.
It must be said that manufacturers can make blocks of any size to order. But, by and large, it makes no sense to change the dimensions, since the proposed parameters are optimal.
In addition to its size, the partition foam block differs from the outer one in its lower density. As a rule, they are produced under the brand name D300-D400. For interior work, a D300 foam block is quite sufficient. It is lightweight and also has good heat and sound insulation properties.
If you need a block for building a partition on a balcony or loggia, it is better to give preference to higher brands, such as D400. They absorb moisture less and have higher strength. In addition, they provide good sound insulation.
All of the above applies only to blocks intended for the construction of non-load-bearing interior partitions. If you need to build a load-bearing internal wall, which is built on the foundation when building a house, you must use a full-size block designed for external walls. Its brand must be at least D500.
Do-it-yourself installation of partitions
The construction of high-quality partitions from foam blocks is accessible to any person capable of working with construction tools. No special knowledge or skills are required here, the main thing is to follow construction technology.
What is required for construction
All the tools for creating a partition from foam blocks are usually found in a workshop, garage or storage room. There is no need to buy special equipment. You will need:
- safety glasses, gloves and a respirator (when cutting, foam concrete generates dust);
- spatulas and trowel;
- mixer and glue container;
- drill;
- mallet;
- gun for construction foam;
- level;
- hacksaw;
- plane or grater for foam blocks;
- wall chaser;
- wide brush.
The materials you will need are the blocks themselves, an adhesive, a cement-sand mixture for the cushion under the bottom row (if necessary), construction foam, reinforcing bars and mesh, and self-tapping screws.
Preparing to lay the wall
The installation of partitions from foam blocks begins with creating a diagram of the future structure according to the apartment plan. It is necessary to measure the room and draw the partition element to scale. This is important for calculating the number of blocks and binder composition. If the glue layer is supposed to be about 2 mm, then 15 kg of it will be required per cubic meter of blocks.
In this case, the location of window and door openings or arches should be taken into account. So, when the door is located at an angle, it is important that there is a distance to the wall for the platband and ease of installation - at least 10 cm.
The width of the opening itself consists of the width of the door leaf, double the thickness of the door frame and an installation gap of 4 cm.
Before you start laying interior partitions from foam blocks, thoroughly clean and prime the base, and then apply basting lines on the floor and walls. To ensure that the block structure is perfectly level, install temporary beacons along the marking lines. For this you can use wooden slats or metal profiles.
Clean the blocks themselves from dust, cut them into the required pieces with a hacksaw and moisten them with water to make the masonry dense. Dilute the glue to the thickness of rich sour cream.
Types of reinforcement
The block design with a small thickness is quite high. When laying, you will need to reinforce the wall. How to do it? Interior partitions of this type require three types of reinforcement:
| Type of bundle | Technology | Frequency |
| With walls | Before installation begins, metal pins are driven into the walls adjacent to the partition or reinforcing bars are inserted into pre-drilled holes (5 cm). Holes are cut out in the blocks for mounting on these pins, or the reinforcement is positioned so that the block elements are laid on the protruding ends. | Every 2-3 rows. |
| Between partitions | Required when laying several partitions connected to each other for bonding strength. | Depending on the project. |
| In the masonry itself | Reinforcing mesh or rods are laid between the rows. | In the top three and bottom three rows. |
If the structure is created in a room with high ceilings, reinforcement will also be required in the middle part.
Do-it-yourself foam block partition
When deciding to build a partition in an apartment, we are faced with a wide range of materials from which it can consist. Partitions must have good thermal and sound insulation characteristics, as well as be durable. One such material is foam concrete blocks. Content
- Advantages and disadvantages of foam blocks;
- Types of foam blocks;
- Tools and materials for work;
- Installation of a partition made of foam blocks.
Advantages and disadvantages of foam blocks
Foam blocks are produced from concrete mortar under special conditions using foaming agents. They are used both for capital housing construction and for repair and finishing work for the construction of interior partitions.
For partitions, foam blocks of the D300-600 brand are used. The number in the foam block brand indicates the specific gravity of 1 cubic meter. Such blocks have many advantages, such as:
- Light weight with significant dimensions - so 1 foam block measuring 600x300x100 mm, brand D300, weighs about 6 kg. for comparison, 1 brick measuring 250x120x65 weighs about 4 kg.
- Good heat and sound insulation - due to their porosity, foam blocks absorb sound well and retain heat.
- Easily processed - the foam block can be easily sawed with a hacksaw. You can easily make holes in it for pipes, grooves for wiring, as well as build complex geometric structures, arches and other design ideas.
- The dimensions and weight of the blocks allow the construction of partitions in a short time and with the involvement of less labor. It will also reduce transportation costs.
- Non-flammability - withstands exposure to open fire for a considerable time.
- Resistant to sunlight and chemicals.
- Moisture resistant - foam concrete has a low absorption coefficient, so it can be used in bathrooms and other rooms with high humidity and temperature changes.
- The smooth surface of foam blocks is excellent for further decorative finishing.
- Low cost compared to other materials of that group (brick, aerated concrete).
With so many advantages, foam concrete is not without its disadvantages:
- Low compressive strength of low-grade foam concrete - but since the partitions are not load-bearing elements - this is not critical.
- The presence of low-quality foam blocks on the market - due to the relatively simple process of making foam blocks, many people make it in an artisanal way without strictly following technology, so be careful when purchasing.
- The ability to absorb atmospheric moisture - like any concrete, foam blocks absorb moisture from the environment, drying the air in the apartment; this disadvantage is easily covered by plastering and other types of finishing.
Read also: Soundproofing an apartment
Types of foam blocks
In order to purchase the necessary material for work, you need to have at least a minimal understanding of its quality and required characteristics.
According to the production method, there are autoclave and non-autoclave methods. When produced using the second method, blocks have a lower cost, but are of poor quality with an uneven porosity structure, so they can shrink up to 3 mm per 1 meter of height. Therefore, preference should be given to blocks manufactured using the autoclave method.
The blocks also differ according to the method of shaping: cut and molded. When cutting, blocks are cut from foam concrete with circular saws, due to this the foam blocks have precise geometric shapes and precise dimensions. When molding, foam concrete is poured into special molds with standard dimensions, but still the final size of the blocks may have some deviations.
Foam blocks are produced in various densities from D300 to D1200. For interior partitions I mainly use brands D300-500. Blocks for interior non-load-bearing partitions are produced in widths of 50, 75, 100 and 150 mm, with standard heights and lengths of 600 mm and 300 mm.
Most often, blocks with a width of 100 mm are used, since they are optimally suited for the subsequent installation of interior doors and have suitable characteristics for an apartment in terms of sound insulation and fire resistance.
Tools and materials for work
To install partitions made of foam blocks, a certain set of tools and materials is required. They should be prepared before starting work so as not to be distracted by searching for them in the future.
- Tape measure and pencil;
- Trowel spatula for applying adhesive solution;
- Rubber hammer for adjusting blocks;
- Electric drill with a nozzle for mixing the solution;
- A plastic bucket of 10-15 liters in which we will mix the solution;
- A wide sweeping brush was used to remove the blocks before laying the mortar;
- Wood saw for cutting blocks;
- Square for marking cutting lines;
- A grater and plane for foam blocks to level the walls before further finishing;
- If you plan to lay wiring or pipes, then use a manual or electric wall chaser;
- Construction bubble level;
- Mounting foam and foam gun for sealing the top joint;
- Adhesive composition for foam blocks (with a seam thickness of 2-3 mm, consumption is about 15 kg per 1 cubic meter of blocks);
- Laying mesh for reinforcing seams;
- If there is a door or window opening, then 20-25 mm reinforcement to reinforce the top of the opening;
- Primer for surface treatment before laying partitions.
Read also: Fastening drywall
Having prepared all the necessary materials and tools, you can begin the main stage of work.
Installation of partitions made of foam blocks
Installation of a partition made of foam blocks begins with preparing the working surface. If you have a concrete base, then the first row is laid on a cement-sand mortar; if the base is wooden, then you need to screw self-tapping pins into the floor; this will prevent the partition from wobbling.
- We prime the surface on which the blocks will be laid.
- We mark the location of the future partition on the load-bearing floor, walls and ceiling using a tape measure and a level. It is convenient to apply markings using dye thread.
For high-quality masonry, it is better to use guides that are attached along the marking line and from floor to ceiling in the corners, this will reduce work time and maintain the geometry of the partition.
- We lay the first row of blocks. If you have a concrete base, then the first row is laid on a cement-sand mortar; if the base is wooden, then you need to screw self-tapping pins into the floor; this will prevent the partition from wobbling.
Foam concrete absorbs moisture, so before laying it is necessary to moisten the blocks so that they do not draw water from the adhesive mixture.
- Each even row should be placed staggered on the floor of the block, this will avoid vertical cracks along the joint lines.
The first three rows must be reinforced with laying mesh for structural reliability. Every third row and the last three are also reinforced.
- The glue is applied to the previously cleaned surface with a brush. At the ends the layer should be no more than 3 mm, on the face no more than 2 mm after installing the block, this will preserve the sound and thermal insulation of the partition.
- After applying the glue, the block is installed in place and rubbed against the bottom row, then the last movement of the block is pressed with its end to the previous one. Immediately remove any glue that comes out from the joints.
Do not forget to control the horizontal position of the installed blocks using a bubble level; you can use a rubber hammer to adjust the position of the block. Also check the verticality of the partition using a plumb line or a thread stretched between the guides (if you installed them)
- Door or window openings can be formed immediately when laying the blocks or after erecting the partition; be sure to reinforce the upper part of the opening by installing a ceiling made of wooden beams or several bars of reinforcement. Installing the overlap will allow the section of the partition above the opening to settle.
- After laying all the rows, the partition should dry, leave it for 48 hours.
- After drying, fill the gap between the last row and the ceiling with foam.
Read also: Plastic panels for walls
It is not recommended to seal the top seam with glue because it will crack over time due to the different expansion coefficient of the glue and the ceiling material.
- Before further finishing, the partition must be floated over foam concrete and treated with a primer.
- Tiling can be done directly on the surface of the foam blocks; for wallpapering, the partition is plastered and leveled with putty.
Be sure to watch the video that shows the main stages of installation of partitions made of foam blocks.
Similar articles:
Installation of PVC panels in the bathroom
Painting tiles
Pasting walls
Ceramic tile care
