In this article we will consider the question of how to glue wood to concrete. Many people who have started renovations in an apartment or house certainly face the problem of combining these materials.
The need for gluing such materials is seen when a wooden floor covering is laid on a bare cement screed or when skirting boards are installed with your own hands, wooden fillets are mounted, etc. But, from time to time, fasteners are needed for more substantial and weighty objects, and this results in additional difficulties.
Fastening methods
Over the long history of construction work, many methods of attaching wood to concrete have been tested. Among the current and widely used methods, we note the use of specialized assembly adhesives and the use of fastening hardware.
Let's look at the highlight of the implementation of these methods and find out which specific materials are optimal for the purpose of carrying out similar work.
Use of specialized adhesives
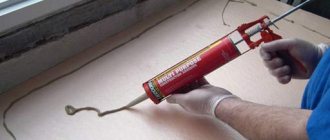
If reinforced concrete was cut with diamond wheels, and now you have to install wooden parts that are small in size and weight, you can use special assembly adhesives.
A correctly selected adhesive composition allows you to reliably fix not only baguettes or baseboards, but also overlays on stair steps. But, you need to understand that the range of adhesive compositions is wide, and therefore you can count on the optimal result only if you select the right product.
If you need glue for concrete and wood, pay attention to the following compositions:
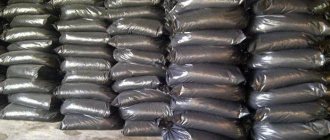
- Construction adhesive “Liquid Nails”
is a relatively inexpensive and at the same time effective solution for working with materials of interest to us. “Liquid nails” are presented on the market in several modifications, in particular, “Universal”, “Express”, “Super strong”, “Very durable”, “For panels”, etc.
If the question is how to attach a wooden block to a cement wall, the best choice would be a very vicious and universal modification.
The universal type of glue “Liquid Nails” is a good choice for interior use. For example, with this method you can successfully glue wall panels made of lumber to previously cleaned and dust-free concrete.
But if you are interested in how to glue wood to concrete at sub-zero temperatures, you will need very strong “Liquid Nails” with a gripping force of up to 70 kg per 1 m2. This glue will also hold the wood on uneven concrete at temperatures down to -17°C.
- Moment glue
is a large assortment of different compositions with different technical and operational properties.
Of particular interest is the “Epoxylin” modification, which is a two-component composition that works with a wide range of materials including concrete and wood.
After drying, the composition not only reliably holds the glued surfaces, but can also be sanded or subjected to other mechanical processing without compromising the adhesion strength.
Another modification of the Moment glue, with which it is possible to connect concrete with wood, is the Joiner Moment. This product is widely used in the installation of floor coverings made using lumber.
Polyurethane foam is a good option for simple and effective gluing
If necessary, it is possible to use high-strength polyurethane foam as an adhesive. This is a good solution for laying wooden floors, installing window sills, wall panels, etc.
This method of connecting two surfaces is characterized by a number of advantages, including:
- affordable price compared to other adhesives;
- greater strength of the connection after the composition has completely dried;
- low degree of thermal conductivity, which is important when finishing floors and walls;
- excellent soundproofing qualities;
- hydrophobicity;
- biological stability;
- simple instructions for use.
But there is also a significant drawback, in particular the long drying time of the foam. Therefore, within 5 minutes. the glued part will need to be held in the desired position so that it does not move away from the surface.
Fundamentally important: In order to ensure optimal contact between the surfaces to be bonded and the foam, they must be lightly wetted with water.
Surface preparation is the key to success
Whichever of the above compositions you choose, before attaching wood to concrete, both surfaces must be properly prepared. In order for the installation work to result in a strong and durable connection, both surfaces must be as smooth as possible, dust-free and grease-free.
The main problem is the porous structure of the material, especially if diamond drilling of holes in concrete was carried out. This property is a circumstance of excessive absorption of adhesives, and therefore the connection does not have time to gain the proper strength.
It is not difficult to make a coating from concrete that is predisposed to gluing; to do this, it is necessary to reduce the number of pores. For this purpose, deep penetration primers are used, which penetrate into the porous structure of the material and harden there. As a result, the micropores close, and the density of the concrete allows the use of glue.
It is fundamentally important: Wooden parts should be glued to previously prepared cement bases in strict accordance with the instructions of the manufacturer of the adhesive compositions.
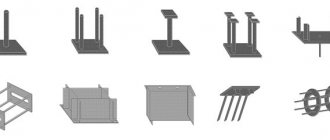
Pile foundation and timber fastening to it
In some areas, the use of a slab or strip foundation is difficult; there, only pile or screw options for foundation of the future house are suitable. Therefore, the issue of attaching timber to them is relevant for many homeowners. Here the fastening follows a slightly different pattern. After installing the piles, special U-shaped steel caps are attached to their upper part. A beam of timber is laid between the steel plates of this head, and then the beam is fastened through the holes in these plates using screws or studs. If you want to use studs, you will also have to drill through the timber. This will not provide better fastening compared to self-tapping screws, but it will cause much more trouble. So it is recommended to choose the latter mounting option. Let's analyze this type of fastening step by step:
- It is first necessary to prepare the beams by cutting them according to the existing parameters. The beams must be used with a square cross-section.
- The second stage is the installation of the heads. To do this, prepared sections of timber are laid on the piles, and steel angle brackets are inserted under them. Having measured the width of the beam in this way, the heads are fastened to the piles by welding. After this, the welded corners are used as beacons for attaching the remaining heads. The beam can already be removed at this time.
- In this type of fastening, it is also necessary to lay waterproofing between the steel of the ends and the wood of the beam. The most common type of insulation is ordinary roofing felt. Contact of wood with concrete and steel is unacceptable.
- All that remains is to lay the prepared beams, fastening them together in the corners by placing them in a paw, in a bowl, or placing them on spikes.
- All preparation is completed, you can fasten the lower log of a log house or the timber of a light frame house with the steel caps. As already mentioned, you can fasten them with studs (then you will have to drill holes in the wood) or self-tapping screws. It is recommended to choose the latter option, since the first does not provide any advantages and will add more hassle.
Installation of timber without rigid fixation proceeds according to the following scheme. To do this, not a U-shaped, but a T-shaped steel top is attached to the pile.
Return to contents
Fastening using dowels
If you need high-quality and durable fastening of a wooden pole to concrete, simple glue or foam is not enough. In this case, it is possible to use fastening iron products designed for high mechanical loads.
Heavy wooden parts can be attached using dowel nails and anchor bolts. The principle of operation of these fasteners is similar, since after they enter the concrete, their working part begins to burst. As a result, the fastening of wooden pillars to the cement base is very strong.
Conclusion
There are many ways to securely connect cement surfaces to wooden parts, but greater strength will be guaranteed if preliminary preparation is carried out. There is no need for priming and dust removal of concrete if a connection using dowels is used.
You will find more informative and necessary information by watching the video in this article.
Carpentry is based on precise fitting and gluing of parts, and it is the latter part that is responsible for the strength and durability of the product. There are quite a few types of wood glues, and today we will talk about the difference between them and the rules of use.
Attaching joists to a concrete floor
The second common case in construction of attaching a wooden beam to a concrete surface is installing joists on the concrete floor. Modern floor equipment techniques are very diverse: various insulating materials, heated floors, various solutions for leveling and improving the floor surface, etc. are used.
But even today, the option of installing ordinary wooden logs is quite relevant for both houses and apartments. This method of laying floors is used, as a rule, in houses where there are no problems with ceiling heights, but where one would like to save on expensive insulating materials.
Return to contents
General classification of wood glues
The modern range of glues for carpentry includes more than a hundred items. Therefore, first, let’s briefly go over the types of glue, their properties and the most popular brands.
Based on their origin, all types of glue can be divided into compositions of natural origin and synthetic ones. In turn, natural adhesives can include astringents of animal and plant origin, while synthetic adhesives are divided according to the production method into condensation (formaldehyde) and polymerization (PVA, polyamide). The list of natural adhesives includes compositions based on casein, collagen and albumin; chemical compositions include PVA, formaldehyde, PVC, epoxy, as well as most universal types of glue. As you might guess, adhesives of natural origin are most widespread, primarily due to their low cost and well-established production technology.
Wood is a highly porous material, which means that almost any adhesive composition can be used for gluing. However, since most carpentry products are used for domestic purposes, it is not customary to use adhesives based on volatile solvents for gluing them. This is the second advantage of natural glue - it provides sufficient strength while not releasing any toxic substances into the environment.
However, for a number of products it is necessary to ensure resistance to various external influences. The main struggle is to increase moisture resistance, because most types of natural glue lose strength when wet. It may also be necessary to increase adhesion; this need mainly arises when gluing parts made of hard and dense wood. Here, the best performance is demonstrated by connections made with synthetic adhesives.
How to choose the right glue
If you are not a professional carpenter, do not be intimidated by such a variety of compositions for gluing wood. You can take an easier route - use time-tested types of wood glue, environmentally friendly and with a certain set of special properties.
Natural glue is supplied mainly in dry form and requires preparation before use. The main disadvantages of natural adhesives are their short lifetime (up to 2-3 days) and low strength of joints, due to the low degree of chemical purity and errors made during preparation. At the same time, natural glue is the optimal choice for fastening non-critical parts with a large area of adjacent surfaces.
As a universal glue, most carpenters use factory-prepared PVA-based compounds. Well-established manufacturers are Titebond, Kleiberit, Moment, they are listed in order of decreasing product cost and, accordingly, quality. These types of glue are classified according to the reliability and quality of the connection by index D with four serial numbers. The higher the number, the more pronounced the moisture resistance and strength of the seam; additional properties may also appear. Thus, Titebond III glue, also known as D4 in the general classification, allows contact with food after drying; this glue is mainly used for assembling end cutting boards.
If the contact area of the parts to be glued is small, high gluing accuracy or resistance to stress is required, it is better to use compounds based on synthetic resins. Even ordinary EAF epoxy resin in such cases will give odds to any water-soluble glue. It is especially advantageous to use it for gluing hard wood, including thermally modified wood, as well as when connecting wood with foreign materials.
Gluing wood to plastic using epoxy glue
Preparing parts for gluing
When gluing wood, the general rules for making adhesive joints apply. The smaller the thickness of the adhesive seam, the deeper the impregnation and the lower the content of foreign impurities, the stronger the fixation. For these purposes, the surfaces to be bonded must be carefully prepared.
Gluing of wooden parts is carried out before finishing sanding. Preliminary contacting surfaces must be thoroughly sanded with abrasive paper with a grain size of at least 300 grit to remove fine lint that interferes with the absorption of the glue. It is important to remember that the cleaned surface is suitable for gluing only for a certain time: over time, the top layer of wood oxidizes, the vessels become clogged with dust and new portions of pile rise.
When using water-soluble glue, degreasing is not necessary. However, when gluing with epoxy resin or polyurethane hot melt adhesive, it is advisable to remove residues of wood resins and natural secretions from the surface using concentrated technical acetone. It is worth mentioning separately about the moisture content of the parts being glued: a moderately increased moisture content (20-22%) when working with water-soluble adhesives slightly slows down the hardening process, but at the same time promotes deeper absorption and ultimately has a positive effect on the strength of the joint. But when using adhesives on liquid resins, an increased (more than 12-14%) moisture content is categorically unacceptable, so the adjacent surfaces are first dried with hot air for 2-3 minutes.
TOP 7 best liquid nails
The rating of the best brands includes the following liquid nails:
- Moment Installation Superstrong MV-70;
- Quelyd Mastifix Decor white;
- Tytan Professional 901 is super durable;
- Makroflex MF910 for panels;
- Kraftool KraftNails Premium KN-901 super strong;
- STAYER BlackPRO EXTRA FIX super strong;
- Moment Installation Transparent Grip MF-80.
Next, we will dwell in more detail on the description of the selected materials, listing their main characteristics and features of use.
Moment Installation Superstrong MV-70
Universal nails in white. It is used in various fields, it allows you to firmly glue complex materials, fills cracks up to 1 cm. There are no solvents in the composition, the material is odorless, it is convenient to work with it in various conditions. Bonding is carried out at a temperature of 10 degrees. Gluing time is 15-30 minutes. There are exceptions, since the material does not glue Teflon, polypropylene, and similar materials, but it copes well with complex work with ceramics, wood, styrofoam and other materials.
| Weight, in g | 400 |
| Materials | Chipboard, wood, metal, gypsum, PVC |
| Manufacturer | Russia |
Price: from 219 to 249 rubles.
pros
- universal use;
- working with complex products;
- economical consumption;
- work at temperatures from 10 degrees;
- minimum operating time;
- has no pungent odor;
- the composition does not contain solvents or similar components;
- super strong hold.
Glue application and curing
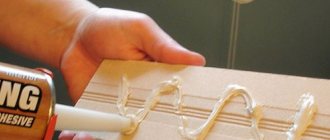
The glue is applied to the surfaces to be joined as evenly as possible. The thickness of the layer should be as minimal as possible, but at the same time sufficient to compensate for the curvature. The presence of air cavities in the adhesive seam has an extremely negative effect on the reliability of the connection. Particular attention is paid to seams with uneven thickness, reaching several millimeters at the peak: in such joints, it is recommended to mix the glue with wood flour or cellulose fiber.
In certain cases, glue does not have the main fastening function, but is used as a plastic filler. Such situations include strengthening joints on tenons and lamellas with glue; merging wood using the groove and microtenon method also partly falls into this category. In such cases, the glue is applied with a clear excess, after which quite painstaking work is carried out to remove the protruding residues.
It is convenient to apply glue to even and smooth surfaces with a small flexible spatula, which can be used as an ordinary plastic card. Glue is applied to grooves and small holes, as well as to tenons and folds, using a brush with synthetic bristles. When gluing parts with a large adjacent area, it is necessary to apply a large amount of glue as quickly as possible so that it is absorbed evenly. For example, you can take the same end boards and furniture panels: to glue several dozen bars, glue is quickly rolled over them with a roller. The same applies to gluing veneer and gluing flat parts of plywood.
Almost all types of glue require exposure after application in the open air. Upon contact with oxygen, the glue undergoes primary curing, which speeds up the drying process of the assembled parts. For PVA-based adhesives, the exposure period can be up to 20-30 minutes, for natural ones - up to several hours. Manufacturers may give special recommendations, for example, polyurethane glue is kept until it completely loses viscosity, after which it is activated by temperature.
Glue Features
When choosing glue, you should also pay attention to its composition. It must be resistant to temperature changes, water and light. The most popular today include the following:
- "BF";
- PVA for wood;
- industrial adhesive for working with wooden surfaces.
BF glue is used by many woodworkers due to its minimal drying time. The composition is not afraid of corrosion and rotting. It is resistant to oil, gasoline, and water.
PVA for wood is a non-toxic, cheap and practical substance that can reliably glue wooden parts. Their final adhesion occurs after 24 hours.
Industrial adhesives are waterproof and can hold together different types of wood. At the final stage of work, this composition does not damage working tools.
But how do you glue wood to wood firmly?
This is an ideal substance for joining wood parts. It is environmentally friendly, not harmful to human health, and non-toxic. It is easy to apply to any surface configuration. The connection can withstand a maximum load of up to 60 kg/cm². Moreover, the substance has a long shelf life. PVA glue is actively used in the manufacture of furniture.
Which PVA is best for gluing wood is the choice of every craftsman. Its only drawback is its low moisture resistance.
Positioning, compression of parts
Curing the parts helps increase the viscosity of the adhesive, which is good for holding the parts in the bonding position. However, this approach is used mainly in modeling and making non-critical adhesive seams. Most carpentry adhesive joints require rigid fixation of parts using clamps and stops.
Fastening parts with additional pressure not only allows you to maintain their position while the glue dries, which is almost always accompanied by shrinkage and warping of the wood from local moisture. As the glue becomes more viscous, the pressure helps to push the composition that has not yet set deep into the pores, which increases the strength of the adhesive seam.
A huge number of clamps of different types and sizes are used in carpentry. To glue flat parts, you can also use regular bending, pressing the product to the table with a weight weighing 7-10 kg. But to connect linear elements, you need not only to maintain the corners, but also to compress the parts, which can be quite large. Ordinary linear clamps do an excellent job of this task; if the length is insufficient, a stop can be attached to the parts, but only if the place where it is fixed is covered by another part of the product. It is also widely practiced to temporarily attach the stops to the frame with clamps.
To glue parts at an angle, specially shaped clamps are used, having two pairs of clamps and fixed jaws, rigidly fixed to the frame in a given position. This tool can be replaced by a number of devices, which is often practiced when gluing at angles other than straight lines. For example, wedges cut according to a general template can serve as a temporary stop. With this positioning method, it is important that the clamping force is directed as close as possible to perpendicular to the adhesive joint. For these purposes, the back parts of the clamps and stops can take a wide variety of shapes.
In conclusion, we will give a couple of practical tips on how to ensure that adhesive seams are invisible. Most wood glues have a translucent white color for a reason: after drying, minor drips can be easily hidden under a layer of protective and decorative coating. But there are a number of exceptional situations.
For example, initially invisible traces of glue on wood become clearly visible when impregnated with oil. If you plan to coat the product in this way, you need to work with glue as carefully as possible. Excess glue protruding from the seam should not be wiped off immediately; it is better to wait for it to pre-set, and then cut it off with a modeling knife. It’s the same story with drips: attempts to wipe them off will only lead to deeper absorption, so it’s better to simply blot the drop with a foam sponge, and after drying, clean the defective area with a scraper.
If small residues of exposed adhesive need to be removed, solvents can be used. Depending on the type of glue, these can be acetone (for most adhesives based on synthetic resins), isopropyl alcohol (for those based on PVA), toluene (for universal rubber adhesives and epoxy resins), as well as ordinary soapy water (for natural reversible adhesives). Dried excess should be wiped off with a completely clean rag or cotton napkin strictly in the direction of the adhesive seam.
Today there are many floor coverings, however, time-tested wood has not lost its relevance and is still very popular. As a result, many home owners decide to install wooden planks on top of a concrete screed. This procedure is not too complicated, but it requires certain knowledge, so next we will look in detail at how to install a wooden floor over concrete.
Installation of wooden boards
General information
Often, before making repairs, people wonder which floors are better - wooden or concrete?
At first glance, concrete floors may seem more practical for the following reasons:
- They do not rot, and as a result are more durable;
- Over time, they do not begin to creak, unlike a wooden floor;
- They have good strength.
- They are moisture resistant, etc.
However, it is no secret that a concrete floor is colder than a wooden floor and, of course, less comfortable. As for the disadvantages of plank flooring, such as a tendency to rot or loosen and squeak, if modern installation technologies are followed, they cease to be a problem.
Therefore, when deciding which floor to lay - concrete or wood, you should take into account the operating conditions. For example, in a bathroom or kitchen it is more advisable to use a concrete screed covered, for example, with tiles. But in a living room or bedroom, where comfort and coziness come first, it is more advisable to cover the floor with wood.
Technology of laying wooden floors on concrete
Now let's take a closer look at how to lay a wooden floor on a concrete base.
It should be said right away that there are several installation technologies:
- Gluing boards to concrete;
- Laying on joists;
- Laying on plywood;
To choose the appropriate technology, you should familiarize yourself with each one, which is what we will do next.
Leveling concrete with self-leveling mixture
Preparing the base
Before laying a wooden floor on concrete, you need to prepare the base, regardless of what installation technology will be used. Preparation consists of drying the screed if the floor was recently poured and leveling it. If the surface of the base has bumps, then they can be removed by grinding; if there are “pits”, then such a defect can be most easily eliminated using a self-leveling mixture.
Note! You can begin installation work only if the humidity of the screed does not exceed 3 percent.
At this stage, you should also make holes in the concrete for communications, for example, sewer or water pipes, cables, etc. The most effective method is diamond drilling of holes in concrete.
If the room area is large, then expansion joints should be made in the freshly poured screed. For these purposes, reinforced concrete is cut with diamond wheels. The final stage of preparing the base is coating the surface with a primer.
Impregnation will serve as waterproofing and will also prevent the occurrence of fungus and mold under the wooden floor. A one-component polyurethane primer mixture is usually used as a primer. After the primer has dried, you can begin installing the floor yourself.
Gluing boards to concrete floor
Installation with glue
This technology involves installing boards directly onto a concrete base. Recently, it has been the most common way of laying wooden boards on a screed.
True, installation can only begin if the base complies with SNiP 3.04.01-87. If the concrete is loose or contains cracks, it is necessary to use special strengthening primers or cover it with a separating substrate, for example – Multimoll Vlies.
If it is intended to lay wide solid boards, then a modified elastic one-component polyurethane adhesive is used to glue the boards. Installation of narrow solid or engineered boards is carried out using two-component polyurethane adhesive.
Polyurethane glue
The installation of a wooden floor on concrete in this case looks like this:
- First of all, you need to measure the room and cut the boards to the required length.
- Then, starting from the wall opposite the entrance, glue is applied to the surface of the base and leveled with a notched trowel. The layer thickness should be no more than 3 mm.
- Next, a board is laid on the glue-coated surface and pressed over the entire area
. In this way, 2-3 rows of boards are mounted. When laying boards, they must be tightly joined in the longitudinal and transverse directions; for this you can use tightening belts or wedges. - After the glue has polymerized, the remaining boards are laid
. In this case, the boards of the last row must be cut to width.
Note! A gap of at least 15 mm must be left between the walls and the coating.
The photo shows the lag installation diagram
Installation of floors on joists
This technology involves installing boards to wooden joists (rectangular beams). It can be used for boards with a thickness of 20 mm or more. Thinner boards should only be mounted on plywood.
The installation instructions are as follows:
- The joists are attached to the concrete floor using dowels and screws. In this case, their caps should be recessed several millimeters below the surface level. The axial distance between the logs should be 25-30 cm.
It must be said that there is another way to attach the logs - using adhesive and bitumen-containing mastics. This technology is justified if there is a possibility of damaging communications when drilling concrete.
- After installing the logs, it is necessary to level them. Places that protrude above the level must be removed with a plane. As a result, the deviation from the level should be no more than 2 mm per two meters.
Scheme of installing a wooden floor on logs
- Next, along the walls you need to lay soft wood-fiber boards, which will serve as a soundproofing gasket between the floor and the wall.
- It is advisable to fill the space between the joists with heat-insulating material, for example, expanded clay or mineral mats.
- After this, the boards are installed, which are attached to the joists using self-tapping screws. Of course, nails can also be used for these purposes, but over time, such fastenings begin to loosen, resulting in a characteristic creaking sound when moving across the floor.
This technology is good because it allows communications to be carried out under the floor, as well as the use of insulation. However, the price of the structure increases, since in addition to the boards, it is also necessary to purchase beams.
Laying on plywood
A wooden floor on a concrete base can be laid using moisture-resistant plywood 12-18 mm thick.
In this case, the procedure is as follows:
- Standard sheets of plywood need to be cut into squares measuring 40x40 cm or 80x80 cm.
- The resulting fragments are laid diagonally towards the future coating. Moreover, the gap between them should be about 4 mm. The plywood is first glued and then shot with dowels.
A distance of about 10 mm should be left between the edges of the plywood and the walls. The sheets are laid offset according to the principle of brick laying, while the heads of the screws must be recessed by 3-4 mm.
- Before laying plywood on a concrete floor, it is rough sanded.
- The leveled base should be cleaned of dust.
- Then the boards are attached to the plywood using self-tapping screws.
That's all the main points of installing a wooden floor over a screed. It must be said that in some cases it is necessary to perform the operation in reverse, i.e. pour concrete over the wooden floor. Most often, in this case, a concrete screed is made over wooden joists.
Sanding plywood
To do this, metal corners are attached to the side walls of the joists, onto which a reinforcing mesh is laid, and the space between the joists is filled with expanded clay. After this, the concrete mixture is poured, which should be above the joist level.
This technology is used in old apartments, in which wooden beams serve as floors between floors.
Laying a wooden floor over a screed is a completely affordable operation that every home craftsman can perform. The only thing is that you must strictly follow the installation technology and do the work very carefully and accurately. In this case, the floor will be strong, smooth and durable (see also “Attaching wood to concrete: the main methods and features of their implementation”).
You can get more information on this topic from the video in this article.
In this article we will look at how to glue wood to concrete. Sooner or later, many people who have started renovating an apartment or house face the problem of combining these materials.
The need to bind such materials arises when wooden floors are placed on ready-made concrete bases or the sandwich is assembled with your own hands.
Over the long history of construction, many methods of attaching wood to concrete have been tested. Among modern and generally accepted methods, we note the use of specialized adhesives and the use of fasteners. If you need concrete, you can purchase it on the website of the Beton-Selinskoye company.
Let's consider the features of using these methods to understand which materials are optimal for gluing wood and concrete.
For small areas of bonding between concrete base and wood trim, special assembly adhesives can be used.
Please note the following:
Construction adhesive “Liquid Nails” is a relatively cheap and at the same time effective solution for working with materials of interest to us. “Liquid nails” are present on the market in the form of several modifications, namely “Universal”, “Express”, “For panels” and others.
Liquid nail universal adhesive is an excellent choice for joining concrete and wood indoors. For example, with the help of such a material you can successfully connect wooden plates to pre-cleaned concrete walls.
Polyurethane foam is a good option for simple and effective gluing. This is a universal solution for arranging wooden floors, installing window sills, wall panels, etc.
This method of joining two surfaces has a number of advantages, including:
1.Affordable price compared to other adhesives; 2.High bond strength after drying the composition; 3.Low thermal conductivity, important for floor and wall coverings; 4.Excellent soundproofing properties; 5.Hydrophobicity; 6.Biological stability. However, there is a significant drawback, namely the long drying time of the foam. Therefore, for 5 minutes the glued part must be held in the desired position so that it does not move away from the surface.
Important: To ensure optimal contact between the surfaces to be joined and the foam, they should be slightly moistened with water.
If you want a high-quality, long-lasting fix for wood posts to concrete, you can't use glue or foam. In this case, you can use metal fasteners designed for high mechanical loads.
The main problem that one has to face when gluing anything to concrete is the extremely low adhesive ability of this material. Simply put, taking plywood, linoleum or MDF and gluing it to concrete will not work. First you need to strengthen the adhesion of concrete, and then glue the required material.
Rigid fastening of timber to the foundation
The first beam is attached to the foundation using anchor bolts and only after the foundation has completely hardened.
To carry out rigid fastening of timber to such common types of foundations as slab or strip, it is necessary to carry out a number of preparatory measures. They can be carried out at the stage of foundation construction or immediately after completion of pouring or installation. First of all, they consist in the fact that even at the stage of pouring concrete into the foundation grillage (concrete strip or slab), special foundation bolts are introduced with the studs facing up. It is to these studs that the beam of the future structure will be attached. The fastening process itself will consist of inserting a timber with a pre-prepared hole onto a stud and screwing it using a locknut. A tightly twisted pin-locknut pair reliably attaches the beam to the surface of the grillage.
Let's consider the process using the example of a slab foundation in more detail and in stages:
- So, after finishing pouring the foundation, those same foundation bolts are immersed in the wet mass of concrete with the studs up and the bases down (they can be conical or simply curved). The distance between the bolts must be at least half a meter, and each individual wooden element must be fastened with at least two fixation points.
- The next step is to prepare the timber. Preparation involves drilling holes for the foundation bolts. Here you need to be careful when measuring.
- If you have not yet checked the evenness of the grillage, now is the time to do so. It is necessary to check the horizontal position and eliminate all possible defects - fill the recesses with solution, trim off the bulges. The timber can only be attached to a flat concrete surface.
- At the fourth stage, it is necessary to lay waterproofing, in most cases it is simple roofing felt. It is impossible to lay timber directly on concrete.
- Then the prepared wooden structures are laid on the roofing felt. The beams should lie so that all the studs from the bolts fit into the drilled holes.
- How to connect the corners is up to you. Can be connected into a paw or into a bowl. If you want to make the connection more reliable, then use metal corners to fasten the beams, which are attached to them using self-tapping screws.
- At the last stage, we begin to twist the structure using locknuts, having previously placed washers under them. In order to avoid distortion of the structure, the nuts are tightened little by little and in parallel. That is, we make several turns of one nut, then move on to the second and make the same number of turns there.
This process is described for a slab base. To attach the beam to a strip foundation, you need to do all the same operations, except for installing the foundation bolts.
Return to contents
How to glue plywood and linoleum to concrete
It is better to increase the adhesive properties of a concrete surface using a primer. After which you can safely glue the plywood to the concrete with any good parquet adhesive. If you need to glue plywood to concrete on a utility room floor, an inexpensive water-based adhesive or flexible polyurethane adhesive will suffice. In some cases, you can use double-sided tape, for example, Dublfix. When plywood is glued to a concrete floor under parquet, it is worth using two-component adhesive to ensure the strength of the fastening. The adhesive compositions Bona, Adesiv, Kiilto have proven themselves well.
If we talk about linoleum, then double-sided tape can again be used as an adhesive. This is perhaps the easiest option to glue linoleum to a concrete floor. High-traffic hallways and corridors will require a more reliable method of securing the covering. Special mastics are suitable here. Elastic and well fixing linoleum, they are inexpensive and do not leave a smell. If the floor screed has defects, bitumen mastic will eliminate them. It glues perfectly and levels the floor at the same time. Mastics that are recommended for residential premises include: Gumilax, Homakoll, Omega Bustilat.
Regardless of how you adhere linoleum to concrete, the surface must be thoroughly cleaned before applying tape or adhesive. Before applying the mastic, also treat it with a primer. When using mastic, a layer of 0.4-0.5 mm of glue is sufficient for reliable fixation.
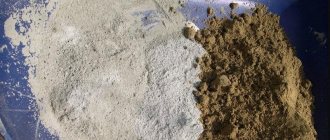
Choosing adhesive for cellular concrete blocks
- Hercules for cellular concrete
is worth highlighting among the highest quality and inexpensive. The solution is used in the construction of external and internal walls made of highly porous materials, including cellular concrete. Also suitable for eliminating small defects in walls and floors. Before use, the surface must be sanded, dirt, lubricating oils, and bitumen removed. The preparation of glue is carried out by dissolving the powder in water and thoroughly mixing mechanically or manually until a plastic mass is obtained. - Volma-Block which is designed to eliminate cold bridges at joints. It is used both for installation of gas and foam concrete, and for laying walls. The solution is easily mixed and applied to a clean surface, which, if necessary, is leveled in advance with the mortar mixture. The finished mixed mixture can be used within three hours, and the glued blocks can be adjusted within ten minutes. Operating temperature range +5…+30С. The glue must be stored in dry rooms on wooden pallets.
When working with any glue that contains cement, you must be careful, be sure to use work clothes, gloves, and protect your skin.
Cellular concrete blocks are held together with special dry mixtures of quartz sand, Portland cement, and additives to improve thermal insulation properties and strength.
Their advantages over simple mortars:
- possibility of applying a thin layer up to 3 mm,
- higher strength and water holding capacity,
- reducing the number of cold bridges.
Preparation of the composition begins by pouring the contents of the bag of powder into water.
- Mixing is done using a drill or stirrer.
- The resulting solution should be thick, plastic, and not spread when applied.
- The finished mixture is given about three hours to use, after which it begins to thicken and requires repeated mixing.
It is possible to glue materials of different compositions, you just need to choose a suitable adhesive base. It would seem how you can connect concrete and metal, or attach glass to it, but this is done with the help of special adhesive solutions and products. During the construction of houses and their subsequent finishing, it is supposed to glue various surfaces to concrete, including concrete to concrete, and not only the decorative part, but also the stability of the walls of the room sometimes depends on the reliability of their adhesion.
How to glue panels to concrete (wood and MDF)
You can glue panels to concrete, no matter if it is MDF or PVC, using liquid nails. To do this, large drops of liquid nails are applied to the panels along the perimeter every 10-15 cm. It is advisable to wait a few minutes for the glue to thicken, and then glue the panel to the concrete. Liquid nails are a water-based adhesive, so there is no strong odor left after gluing.
The second option for gluing wood or MDF to concrete is to use double-sided tape. This fastening method is suitable for thin, small structures, such as ceiling panels or wooden slats. However, if possible, it is better not to glue the panels to concrete, but to install them on lathing or fasteners. This is a more reliable and durable option.
In any case, in order to glue MDF or wood to concrete, the surface of both concrete and wood must be cleaned, degreased and primed.
General questions about timber fastening
When building a wooden house in the form of a log house or a frame dwelling, the question often arises of how to reliably fasten the timber to a concrete foundation, how to fasten the lower crowns to the concrete surface as reliably as possible, so that you don’t have to worry about the safety of the structure. The wooden beam is attached to the grillage using two methods that have been known for quite some time: rigid fixation and overhead installation.
- As the name suggests, the essence of the first method is to securely fix a wooden beam to a concrete base using several special foundation bolts or steel clamps. If you decide to use bolts, then this method of fastening will be permanent and non-dismountable, and fastening with clamps implies the ability to disassemble the entire structure if necessary.
- The overhead fastening consists of simply installing the timber on top of the grillage without any fixation. On the one hand, the beam is loose and movable, but due to its weight it is securely installed without additional fastening.
It is clear that the first option is much more reliable and provides more guarantees of the reliability of fastening the beam to the concrete foundation. But the second option is more common. This is due to lower installation complexity and, accordingly, lower cost. And the rather significant mass of the entire structure gives sufficient reliability of fastening to the base and immobility of the lower crown of the frame.
You will have to independently choose the option that is suitable for your case. If there are no strong winds in your area, the total weight of the house will be quite significant, and the builders are confident in the reliability of the overhead option, then it may be worth choosing a cheaper option.
Return to contents