Glue for plywood on a concrete screed may be needed in a variety of situations, but most often covering with slabs is done to level, insulate, and strengthen a concrete floor under the finishing coating (linoleum, laminate, carpet, etc.). This solution allows not only to improve the technical characteristics of the concrete screed, but also to significantly extend the service life of the final coating and increase comfort in operation.
You can lay plywood on concrete using different types of fixation. Glue for these purposes began to be used relatively recently, but provided that a high-quality and suitable composition is selected, this option provides maximum reliability and strength of fastening, allows you to achieve a good fit, resistance to wear, and durability.
Why do you need plywood?
When laying finishing material on the floor, it is necessary to first level the base. If this is not done, then not only the appearance of the finish may suffer, but also its integrity. For example, a laminate with a locking joint can crack, linoleum can wear out in places where it bulges, etc.
The best option for leveling a wooden floor is to lay plywood.
Plywood is a multi-layer veneer that is joined together using a special glue. The material is divided into three main types: peeled, planed and sawn. Based on texture, there is a distinction between homogeneous and combined plywood. Depending on the surface treatment, the material is divided into sanded, unpolished and laminated types. Based on the degree of moisture resistance, plywood is divided into limited moisture resistance (FB), average moisture resistance (FC, FS, FBA) and moisture resistant (FSF).
For leveling, it is better to use FK plywood with a thickness of 10 or 12 mm with a surface sanded on one side. These sheets are characterized by sufficient strength and reliability. If a fairly heavy finish with a significant thickness will be laid on top (for example, parquet 22 mm thick), then the sheets, accordingly, need to be taken in larger sizes. You can also use a moisture-resistant type of material. However, it will cost more, which must be taken into account when purchasing.
How to attach plywood to a wooden floor? For work you need to stock up on a drill, a screwdriver, a hammer, an electric jigsaw, a tape measure and a building level.
Tips for choosing glue brands
When choosing an adhesive, you should take into account the characteristics of the surfaces to be joined, operating conditions, requirements for resistance to various influences, etc. If there are any special requirements and nuances, then they look for the appropriate compositions, but for fixing plywood to concrete in residential premises and with not very high loads, it is worth paying attention to compositions from well-known manufacturers, which are distinguished by excellent characteristics and optimal cost.
The most popular types of adhesives for fixing plywood to concrete:
- Sika Bond-54 Parquet is a universal, odorless adhesive that hardens quickly and is used when installing heated floors. Concrete is primed before applying the composition, plywood is glued without additional fixation.
- STAUF PUK-446 is a reliable two-component adhesive that can be used to fix plywood to a concrete floor without using dowels. After preparation, the solution is used within 60 minutes; before application to the concrete floor, it is primed.
- IBOLA L12 is a composition based on artificial resins and does not contain water, therefore it is suitable for working with wooden materials. Before applying it to the screed, it is primed.
- FORBO 148 Euromix Wood is an odorless polyurethane-based substance, universal and elastic adhesive, moisture resistant. Consumption is 800-1200 g/m2, made in Germany. After hardening, the glue becomes chemically inert.
- VERMEISTER Repox - adhesive does not imply any restrictions on use, two-component type on a polyurethane-epoxy base. Before applying the composition, the concrete screed is primed; there is no need to additionally secure the plywood with dowels.
- VERMEISTER Zer is a two-component Italian adhesive with high adhesion to concrete, can be used for fixing any lumber. Able to withstand severe temperature changes, it is relevant for the installation of underfloor heating systems, regardless of the type of heating.
- PARCOL Poly 2K is a two-component adhesive that retains its properties for an hour after preparation. The concrete surface is pre-primed; after completion of the work, the finishing coating is laid after 3 days. The composition demonstrates high adhesion to concrete and wood.
- KESTO (KIILT0) Standard is an inexpensive water-dispersion adhesive based on Finnish PVA. It is applied to concrete, plywood is laid for a maximum of 20 minutes. The composition can only be used indoors; the glue is absolutely safe, but requires additional fixation of the plywood with dowels.
These are the most popular and suitable adhesive options for attaching plywood to concrete, but others can be found on the market. The main thing is to make sure that the substance has good adhesion to concrete and plywood and is non-toxic (subject to installation in residential premises).
Preparing material for installation
How to lay plywood on a wooden floor? First, the plywood must be prepared for installation. In any case, the material should be kept in a horizontal position indoors for 1-2 days. If plywood was purchased in the cold season, it is recommended to dry it. To do this, it should be left in an upright position for about 2 weeks. After this, the material is coated with an antiseptic fungicide and dried.
Treatment with PVA-based putty will help improve the moisture-resistant properties of plywood. After applying the composition, the sheets are dried in a vertical position. However, it is not recommended to use the material on open balconies and loggias.
The strength of plywood can be improved by applying 2 layers of acrylic varnish to its surface. The second layer is applied after the first has dried.
Types of glue and their characteristics
Glue for fixing plywood to concrete floors is produced on the basis of epoxy resins, polyurethane, and vinyl acetate compounds.
The types and their characteristics are discussed in the table:
| Type of glue | Characteristics | Flaws |
| Epoxy two-component | Consists of two components that must be mixed before use. Hardens within 4-5 days. | Releases harmful substances. |
| Water-dispersed (WVA) | Environmentally safe, fire resistant, odorless, inexpensive. Suitable for moisture resistant plywood. The difference in floor height should be no more than 2 mm. | Long drying time (up to 7 days), fixing with glue alone is not enough, additional fixation with self-tapping screws is required. |
| Polyurethane one-component | Has a viscous consistency. Hardens within 1.5-2 days. Withstands temperature changes. Forms a base that is stronger than concrete. Characterized by high elasticity and strength. | Before hardening, it releases harmful substances into the air. |
| Polyurethane two-component | It has a high viscosity and is applied and spread with a notched trowel. Before work, it must be mixed with a hardener. Dries in 25-30 minutes. | You cannot prepare a lot of the mixture, otherwise it will harden and become unusable. |
| Alcohol compositions | They contain rubber, solvents, and resins. It adheres well to the surface and dries within 3 days. | In a liquid state they are subject to fire. They release esters and volatile oils; you need to wear goggles and a respirator. |
Polyurethane, epoxy, and alcohol adhesives become environmentally friendly after hardening. When working with them, you must comply with safety requirements: ventilate the room, use personal protective equipment.
The most environmentally friendly for humans and the environment are water-based glues.
Laying technology
Before laying plywood, the wooden floor must be prepared for finishing.
Old rotten boards should be removed and new ones put in their place. You can treat the surface with a plane, removing the old layer.
If the boards are poorly secured or wobbly, they should be secured with nails or self-tapping screws. After this, all dirt and dust are removed from the surface.
The next step is laying out the plywood on the floor. The sheets are first laid out on a wooden floor, and marks are made at the cutting points using a pencil and tape measure. All sheets are numbered, which eliminates incorrect fastening in the future.
Next, you can begin laying and fastening the sheets. Let's look at how to install plywood on wood floors. Laying should begin from the corner that is located above all the others. The sheets are fastened using self-tapping screws. The interval between fasteners should be 15-20 cm, the distance from the edge - 1.5-2.0 cm. It is recommended to take the length of the screw equal to the thickness of the plywood sheet, increased by 3 times.
You can also use nails for connections. However, the process takes much longer, and the reliability of the connection is similar to fastening with self-tapping screws.
After attaching the first sheet, the canvases are laid further. It is important to take into account that the plywood must be laid staggered, that is, the corners of adjacent sheets should not connect at one point. This makes the base more durable and reliable, eliminating the risk of deformation of the canvas.
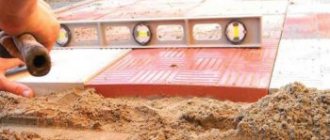
With each subsequent laying of the sheets, it is necessary to check the evenness of their location. A building level is used for this. The evenness of both the sheet itself and its location relative to the other sheet is checked. To do this, the building level is located at the junction of two adjacent elements.
If the plank base has small differences in height, then they are filled with a special substrate or a self-leveling mixture. If the differences are large (from 1 cm per sq. m), then it is necessary to install logs. Their position and height are regulated by the building level.
If the floor needs to be given additional strength (in places where heavy objects or furniture are installed), plywood is laid in two layers. The sheets are glued together using PVA glue.
This completes the installation of plywood on the wooden floor. Now you can begin further installation with finishing material.
Plywood over wood floors in your home allows you to level the base without dismantling the old wood flooring. The backing in this case prevents squeaking and other problems that may arise. The technology allows you to do the installation yourself without any serious difficulties.
Selection of material for work
Laying plywood on a wooden floor is an excellent solution. This DIY rough coating has the following advantages:
- low cost;
- ease of transportation;
- reduction of preparatory work time;
- good leveling of small floor defects and increasing the service life of the floor covering;
- strength and wear resistance of the material;
- flexibility, which allows it not to break or crack during operation and installation;
- minimum number of joints between sheets;
- installation is carried out without serious labor costs.
Classification of types of plywood
Before laying the material with your own hands, you need to choose it correctly.
There are several classifications based on various criteria:
- by grade and type of raw materials used (wood);
- impregnation (its presence and method);
- variety;
- surface treatment method;
- number of layers;
- moisture resistance.
Laying plywood on a wooden floor in a house (subfloor) involves the following recommendations for choosing when doing the work yourself:
- the flooring is made from sheets of the second or third grade, the use of the first is not justified from an economic point of view;
- It is best to use moisture-resistant material in the house, this is especially important when installation is carried out in wet rooms (bathroom, toilet, kitchen);
- flooring involves the use of sheets with a minimum thickness of 10 mm, but this is only suitable for small rooms with low traffic;
- laying technology in more critical premises assumes that the substrate under the finished floor will be made of a material with a thickness of 14-22 mm, such sheets have sufficient strength;
- It is recommended to choose materials sanded on both sides (if possible).
Useful tips
To ensure maximum quality of work, it is necessary to take into account all the nuances, features of both types of material, and remember the basic rules for performing work.
Useful recommendations from the experts:
- The type of plywood must be chosen very carefully and taking into account the finish of the floor. For natural piece parquet, the sheets must be polished and at least 3 grades on the front side, 4 on the back. Other floor coverings can be laid on lower quality material.
- Two-component adhesive is considered the strongest and maximum fixation can be achieved with a self-leveling polymer screed. In other cases, craftsmen advise insuring yourself with dowels.
- During installation, it is important to maintain a level between the sheets to reduce the time for sanding the layer.
- Plywood must be moisture resistant, especially if the floor is being finished in a room with high humidity.
- You should not put large sheets; it is better to cut them into smaller ones.
- It is better to prime concrete in all cases, this way you can achieve more effective fixation.
- If an insufficiently strong glue is used, the plywood is additionally fixed with dowels.
- When fastening with dowels is carried out, it is important to eliminate the risk of an air cushion.
Preparatory work
Preparing a Wood Floor
Before laying plywood on a wood floor in your home, the flooring and surface must be prepared.
Do-it-yourself activities are as follows:
- the base for installing plywood must be cleared of debris, dirt and treated with antiseptic compounds; when laying without logs, priming will need to be done;
- checking the condition of the floor, removing and replacing damaged elements;
- if you have time, it is recommended to arrange the sheets vertically and dry them for 2-3 weeks, the temperature should be at room temperature or slightly higher;
- after drying, the sheets are treated with antiseptic compounds;
- Next, it is necessary to ventilate the material;
- if there is a need to increase strength, it is worth treating the plywood with acrylic varnish; the coating is done in several layers;
- When laying it yourself, you need to bring the sheets into the room two days in advance and lay them out horizontally; this is done so that the material adapts to the temperature and humidity conditions of the room.
Methods of carrying out work
Installation in the house can be done in two ways:
- laying on an old wooden floor (suitable for small height differences);
- installation along joists (with differences of 1 cm or more).
Leveling the old floor
Installation of plywood on a wooden covering
In this case, fastening the plywood can be done in three ways:
- glue;
- liquid Nails;
- self-tapping screws
It is worth noting that the latter option provides the most reliable fastening of sheets than laying with glue. Adhesive compositions can be water-based, two-component, mounting adhesive or bustylate are also used.
Installation with glue is carried out in the following order. After completing the preparatory work, the floors are checked with a level. If the vertical difference is less than 1 cm, then you can use the method described below. To compensate for unevenness with your own hands, use a plywood backing, the joints of which are glued with tape.
Layout options for plywood sheets
Next, you need to lay out the sheets, which will allow you to cut the source material in the most efficient way.
The plywood is pre-laid out, taking into account the seams for expansion of the material under load and with temperature fluctuations (damper seams are 3-4 mm). Leave 8-10 mm between the wall and the subfloor.
Having laid out the sheets, the elements are cut with an electric jigsaw to the desired size.
If you need to perform installation for a large room, use squares with a side of 50-60 cm. All parts of the coating must be numbered in the order in which they should be laid later.
When fastening with self-tapping screws, holes are drilled in the sheets, which are then countersunk using a larger drill.
When laying with glue, it would also be wise to make additional fastening. The holes are located at a distance of 2 cm from the edge of the part. The pitch between fasteners is taken to be 15-20 cm.
The production of work begins with such elements as niches, ledges, raised podiums.
When attaching with glue and other methods, it is necessary to place the elements of the subfloor with a bandage. This is similar to brickwork, that is, each subsequent row is mounted offset from the previous one. The easiest way is to offset it by half a sheet. Minimum displacement – 10 cm.
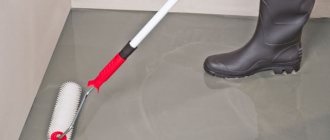
The glue is applied in an even layer 2-3 mm thick to the base. After laying the sheets, they are pressed down with a roller. To ensure greater reliability when installing with glue and to prevent displacement, self-tapping screws are used.
Procedure for laying plywood sheets
After fixing, the sheets are sanded with a special machine with a coarse sanding attachment.
. The evenness of the rough coating is checked by the rule (a lathe at least 2 meters long). It is applied to the surface and the tightness of the fit is checked. The gaps between the tool and the surface when laying on glue should be no more than 2 mm.
Laying on joists
Laying plywood over joists
This method is more labor-intensive, but allows you to eliminate significant defects in the base.
When cleaning and inspecting old flooring, pay special attention to the seams between the floorboards. If necessary, they are covered with adhesive to prevent problems (creaking).
Cutting sheets for the floor along the joists is carried out in the same way as in the previous case. First of all, you will need to secure the logs - wooden boards with a section of 40 by 15 mm. The elements are laid on the old coating in one direction. The pitch is selected based on the size of the plywood sheets. You need to make sure that the seam between the elements fits onto the wooden batten.
Instructions for installing plywood sheets on joists
When installing the floor on joists, the boards are secured to the wooden floor with self-tapping screws. The sheets are attached to the guides in the same way. Soundproofing material is laid along the joists (between them). Most often, insulation is used for this. If communications need to be laid, they are placed in a layer of thermal insulation.
It is most reliable to attach the sheets to the guides with self-tapping screws, but you can also use liquid nails. Holes for fasteners are pre-drilled in the same way as when laying without joists (observing the same requirements). Next, the surface is treated using the method described above (grinding).
With proper installation, you don’t have to worry about the durability of the finish coating and the squeaking of the floors. It doesn’t really matter which method is chosen: with or without lags. It is important to perform the work in accordance with technology.
Plywood is often used to create flooring. Its smooth surface is considered a good basis for laying finishing material, and some types of plywood are also used as decorative finishing. In this article we will talk about laying plywood on a wooden floor.
Plywood sheets are very often used in construction to create a subfloor, and the reason for this is their positive properties:
- Plywood is durable, it can withstand significant static and dynamic loads, while hardly deforming.
- The budget cost of the material makes it an attractive and affordable option for most categories of citizens.
- Long service life is another advantage of such sheets.
- Despite its strength, plywood is lightweight, which is considered an important indicator in the construction industry.
- The surface of the sheets is smooth and hard, it is well suited for further installation of almost any floor covering.
- Plywood is environmentally friendly, safe, does not emit harmful substances into the environment, and does not have an unpleasant odor.
- The material is easy to process. It is easy to cut and can be bent if necessary. Transporting plywood is also not difficult.
- Some brands of plywood look very attractive and can be used for finishing floors. Their processing in such a case will consist of painting or opening with varnish.
- In terms of its moisture resistance, modern plywood is noticeably superior to chipboards, which have greater porosity, absorb water well and are quickly destroyed by moisture.
When choosing plywood for flooring, pay attention to its thickness. The best option is considered to be 12-15 mm, but if the finishing coating is heavy boards, then it is better to use thicker plywood sheets.
How to glue plywood to screed
In private homes, plywood is often used to level and insulate the floor. The thermal conductivity of a concrete base is 5 times higher than that of wood materials.
The intermediate layer of the floor contributes to additional shock absorption and performs the function of redistributing mechanical load, thereby extending the life of the substrate and the finishing floor covering.
Let's look at how to choose the right glue for plywood on a screed, its types, characteristics, and do-it-yourself installation technology.
Advantages of attaching plywood with glue
Plywood is well suited for leveling the base.
Most finishing floor coverings (laminate, parquet) require installation on a perfectly flat surface.
Laying plywood provides:
- fast preparation time for the foundation;
- a flat surface is obtained that serves as a substrate for the finishing flooring;
- additional sound and heat insulation;
- affordable cost of material;
- good adhesion with adhesives.
Fastening sheets of plywood with glue allows you to get a strong and reliable base.
Application of glue does not require construction skills or special equipment.
Many adhesive compositions can be used in rooms with high humidity and when installing underfloor heating systems.
Correctly selected adhesive for plywood on a concrete floor guarantees tight fastening of the material and a long service life.
Types of glue and their characteristics
Glue for fixing plywood to concrete floors is produced on the basis of epoxy resins, polyurethane, and vinyl acetate compounds.
The types and their characteristics are discussed in the table:
Type of glueCharacteristicsDisadvantages
| Epoxy two-component | Consists of two components that must be mixed before use. Hardens within 4-5 days. | Releases harmful substances. |
| Water-dispersed (WVA) | Environmentally safe, fire resistant, odorless, inexpensive. Suitable for moisture resistant plywood. The difference in floor height should be no more than 2 mm. | Long drying time (up to 7 days), fixing with glue alone is not enough, additional fixation with self-tapping screws is required. |
| Polyurethane one-component | Has a viscous consistency. Hardens within 1.5-2 days. Withstands temperature changes. Forms a base that is stronger than concrete. Characterized by high elasticity and strength. | Before hardening, it releases harmful substances into the air. |
| Polyurethane two-component | It has a high viscosity and is applied and spread with a notched trowel. Before work, it must be mixed with a hardener. Dries in 25-30 minutes. | You cannot prepare a lot of the mixture, otherwise it will harden and become unusable. |
| Alcohol compositions | They contain rubber, solvents, and resins. It adheres well to the surface and dries within 3 days. | In a liquid state they are subject to fire. They release esters and volatile oils; you need to wear goggles and a respirator. |
Polyurethane, epoxy, and alcohol adhesives become environmentally friendly after hardening. When working with them, you must comply with safety requirements: ventilate the room, use personal protective equipment.
The most environmentally friendly for humans and the environment are water-based glues.
Glue consumption
The smoother the surface, the less glue will be needed.
Glue consumption depends on how smooth the surface of the screed is, on the quality of the plywood and concrete, and their absorbency.
With proper application and a tool selected for a certain type of glue, consumption is significantly reduced.
To decide how much glue to buy, consider:
- Base area.
- When gluing on a flat and uniform surface, the glue consumption will be less. On a porous, uneven surface, the adhesive composition will fill the pores and depressions, which means the consumption will be greater.
- To reduce consumption, apply primer to the concrete screed in 2 layers. Apply the next layer after the previous one has dried.
Apply water-based plywood glue with a roller or brush. Compositions that have a viscous consistency are distributed using a notched trowel.
Depending on the condition of the screed, the consumption will be from 500 to 1500 g. per square meter.
Drying speed
Two-component compositions dry the fastest.
When construction and repair work is under tight deadlines, the drying speed of the adhesive is of great importance.
The fastest way (in 1 day) is to glue plywood with two-component compounds, to which a hardener is added before starting work. This method does not require additional fixation of plywood with nails.
Solvent-based compositions dry in 3-5 days. Before applying the glue, you need to prime the screed. Additional fixation with self-tapping screws is required.
Water-based glue dries in up to 7 days. Before application, you can prime the concrete base with a compound diluted with water. Additional fastening of plywood with self-tapping screws is required.
If the screed is not completely dry or there are communications underneath it, it may be necessary to coat the surface with an epoxy-based primer.
Technology of fastening plywood with glue
Before laying plywood on a concrete base, we check its moisture level. Wood materials cannot be laid on a wet base. See this video for all the details of the process:
Method for determining screed dryness:
- We cover the area of the screed with polyethylene, press its edges to the surface, press down with heavy objects or fix it around the perimeter with tape.
- If after 5 days the film remains dry, you can safely proceed to laying the plywood.
If condensation forms, wait for the screed to dry; the residual humidity should be no more than 2%.
Material cutting
It is convenient to install pieces measuring 500 by 500 mm.
The material is sold in large sheets; if they are laid in one piece, this can lead to deformation of the floor during operation.
We cut the plywood sheets into 4 squares ranging in size from 500 to 750 mm in width and length.
We cut the material using an electric jigsaw or grinder.
We number the squares so as not to confuse their location during installation and sketch out a diagram of their layout.
Gluing plywood
Before installation work, you need to level and clean the base from dust and debris. Primer of the base surface helps reduce glue consumption and improve adhesion to the surface. As a primer, you can purchase a special mixture or dilute glue with water.
We divide the floor into four rectangles and find the center. Without using glue, we lay out the plywood on the floor from the center with the seams staggered. We leave a compensation gap of 1 - 1.5 cm along the perimeter of the walls and between the squares of plywood.
Installation steps:
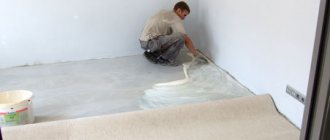
- We apply an adhesive composition 2 mm thick, which we will have time to cover with the material before the adhesive composition sets. Glue the plywood to the screed.
- We lay out the material and, if necessary, additionally fix it with self-tapping screws.
- After the glue has completely hardened, sand the surface of the plywood with sandpaper or a grinding machine. This allows you to eliminate burrs, cuts, and small differences in height.
We lay the plywood on the screed according to the diagram and numbering of the sheets. Sheets of material must lie for several days in the room in which they will be used.
If you lay the floor immediately after the material has been brought in from the street, the base may move, because... it will either pick up moisture from the room, or, conversely, dry out sharply.
We check the quality of installation
Leave gaps between the sheets.
After the glue has hardened, check the quality of the material:
- Gaps from 0.7 to 1.5 cm are left along the perimeter of the walls and between the sheets;
- the entire floor is in a horizontal plane, deviation from the level is no more than 2 mm;
- When you tap a wooden beam on the flooring, you should hear the same hard sound over the entire floor area. For more information about styling secrets, watch this video:
In those places where a dull sound is heard, the material needs to be re-glued. This indicates peeling of the plywood.
Laying plywood on a concrete floor allows you to make the base smooth, stable, and warm. This intermediate layer is an ideal base for laying the final floor covering. The ease of installation, reliability and durability of the base depend on the correctly selected adhesive for fixing the sheets.
gurupola.ru
Subtleties of installing plywood on a wooden floor
- If the floors are laid on joists, before installing the plywood you need to check whether the boards are sagging. If the boards bend along the joists, the covering must be removed and the base of the floor itself must be repaired.
- Covering floors with plywood is not possible everywhere. For example, in rooms with unfavorable environmental conditions, the material will quickly become unusable. Unfavorable conditions include humidity and temperature fluctuations. Laying plywood is not recommended in bathrooms, as well as in unheated rooms, for example, in basements. By the way, you can check the moisture level of the base yourself by laying plastic film on the floor and securing it with tape. After 2-3 days, you need to remove the film and see if droplets of water appear on its back side. If not, the floor is dry enough and suitable for laying plywood.
- Installation of plywood sheets must be carried out offset so that no more than 3 seams intersect at one point.
- There should be small gaps up to 1 cm wide between individual fragments of material. They are called damper seams, and they are needed so that the material does not deform as a result of linear expansion.
- At the junction of the plywood with the walls, the seams should be even wider and amount to 1.5-2 cm. They will not affect the appearance of the coating, since they will subsequently be disguised under the baseboard.
- Before installation, the sheets must be cut into fragments of the required shapes and sizes. In order not to confuse the elements during the work, it is better to number them, and schematically depict a plan for their installation on a sheet of paper.
- Many builders recommend cutting plywood into squares measuring 60x60 cm. In this case, the number of expansion joints will be optimal.
- Before laying plywood on a wooden floor, it should be cleaned of debris and dust, and then covered with a primer.
- The material is attached to the base with glue or self-tapping screws. Self-tapping screws are screwed in along the perimeter of the sheet and diagonally, taking steps of 15-20 cm. Approximately 2 cm recede from the edge of the part. The heads of the screws must be well sunk into the wood.
- When laying plywood on a wooden floor, choose fasteners that will be at least 3 times the thickness of the sheet.
Step-by-step instructions for gluing plywood
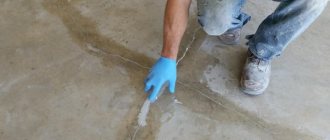
The reliability of fixing plywood to concrete with glue depends on the type of adhesive composition, as well as the strength of the surface layer of the concrete screed. It is advisable to make sure in advance of the strength of the concrete and this can be done without special equipment: using an ordinary nail 10 centimeters long, draw a grid on the screed of 2-3 parallel lines that intersect at an angle of 40-60 degrees.
Next, press on the nail with little force. If the edges of the lines are smooth, and the grooves are almost invisible, there are no chips at the intersection points - the screed is strong enough to be fixed with glue.
Preparation of concrete screed
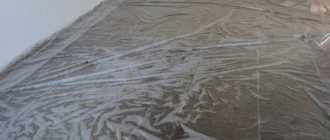
The main purpose of laying plywood on concrete is to quickly and effectively level the screed. There may be defects on the surface of a maximum size of 2-3 millimeters, small cracks. It is also important to check the degree of dryness of the screed - it should be completely hardened and not damp (to check, cover a small area with plastic wrap and leave overnight: the absence of condensation in the morning indicates the possibility of starting work).
The main stages of preparing the base for gluing plywood:
- Thoroughly clean the surface from debris and dust with a powerful vacuum cleaner.
- Calculation of area, purchase of materials. It is necessary to ensure that the primer and glue are of a similar composition, and the primer must have deep penetration. It is important to correctly calculate the glue consumption - usually the instructions offer an ideal option and it is advisable to add 10-15% to the standard consumption.
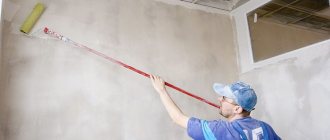
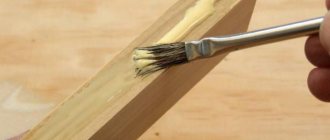
- To prime the screed, use a brush or roller. There is no need to prepare a primer; it is simply used to cover the concrete, simultaneously achieving several effects: removing dust from the surface, binding sand in a solution, creating a waterproofing layer, regulating the absorption rate of glue, increasing the adhesion rate. Prime as follows: pour the substance onto the floor and roll it evenly over the surface with a roller. It is enough to apply 1-2 layers.
- After the primer has dried, you can continue working.
Gluing plywood to concrete screed
The glue allows you to accurately level the floor, since the plywood rests on it with the entire sheet area, eliminating wobbling and sagging of the finishing coating. This way it is possible to minimize the appearance of squeaks, fill voids evenly, and avoid loosening of dowels (if they are used for additional fixation).
Depending on the condition of the screed, the thickness of the plywood and the strength of the adhesive, the layer of the composition can perform the function of fixing and leveling the surface (substrate).
How the work of gluing plywood to concrete is carried out:
- Carefully consider the layout of plywood to reduce waste. The plywood is cut in another room to avoid chips getting on the primed screed.
- Open the container with glue, use a drill with a mixer attachment to mix the contents. If the glue is dispersive, you need to stir longer. The two-component composition is prepared exactly according to the instructions.
- A little glue is poured onto the floor and leveled with a comb spatula. The higher the level of unevenness, the greater the height of the ridges. The best option is a comb with teeth 6 millimeters high. The tool is held at an inclination of 40 degrees; when leveling, try not to leave gaps; excess glue will then fill the grooves.
- The plywood is carefully laid on the area with glue, and the top is tapped a little. Compensation gaps of 3-4 millimeters should be left between the sheets. Check the position of the plywood, if everything is in order, fix it with dowels (provided that they are intended to be used): first, the sheet is nailed in two corners, then the remaining fasteners are driven in in increments of 30-40 centimeters. The length of the dowels should be 5-6 centimeters. The holes for the dowels are made with a drill tipped with pobedit with a depth of 1 centimeter greater than the length of the dowels.
- The remaining sheets of plywood are fastened in the same way, arranged in a checkerboard pattern. You need to fasten it in such a way that air mirrors do not form: they start working on one side, fixing it in the same direction, expelling the air.
It is best to cut sheets of plywood with a hand saw with a ruler, since a jigsaw will not provide high accuracy. While performing work, it is important to follow safety regulations. It is imperative to leave 1 centimeter gaps between the sheets of plywood and the nearest walls to compensate for expansion and facilitate the laying of sheets.
Laying plywood on a wooden floor
To install plywood sheets you will need the following:
- roulette;
- jigsaw;
- screwdriver;
- screws and dowels;
- building level.
Laying plywood on a wooden floor starts from the central part of the room, and only then finishes niches in the walls and areas near columns and ledges. The material is first laid without the use of fasteners. After dividing the sheets into fragments, be sure to inspect the ends to exclude the presence of delaminations. If there are any, it is advisable to replace the sheet, since in the future a low-quality part will spoil the entire finish.
Having laid out the material on the surface in accordance with the diagram and observing the expansion joints, the plywood is fastened to the wooden floor using self-tapping screws. The holes for them are made in advance, and the heads of the fasteners must be recessed into the wood. In some cases, plywood is mounted with a special adhesive composition, which must cover at least 80% of the area of the material.
Having laid plywood on a wooden floor, the evenness of the coating is checked using building regulations, paying attention to the width of the damper joints. The plywood should lie horizontally, the permissible deviation is no more than 2 mm. Then the floor is tapped with a wooden hammer or block to identify the presence of delaminations. You can identify weak points by the sound - it will be dull and booming. Having noticed this, the sheet of material must be dismantled and replaced with another fragment.
If plywood is used as a final covering, the final stage of its installation will be sanding and varnishing. Sand the material with fine-grained sandpaper until smooth, and then cover it with transparent varnish or paint.
Laying plywood on joists
Installation of plywood sheets on joists is a labor-intensive and time-consuming process. For such work it is necessary to use material with a thickness of at least 15 mm. The installation process consists of several stages:
- First, all the logs must be adjusted to the same level so that they form a single horizontal plane. When trimming the logs, their evenness is checked using a building level.
- The next stage is insulation and soundproofing of the floor. The necessary communications and insulating material are laid between the lags.
- After this, the installation of plywood boards begins. The joints between the sheets must coincide with the wooden beams of the floor base.
- Having attached the material with self-tapping screws, the surface is sanded and cleaned of debris with a vacuum cleaner.
If a laminate is laid on top of plywood, then the subfloor is covered with a shock-absorbing underlay, which will level out small differences in height and serve as an additional heat-insulating layer.
Laying plywood on a wooden floor. Video
During renovations, it is often necessary to replace the floor. At the same time, choosing a suitable coating is not difficult. Before laying the top layer, it is necessary to level the base, since the service life of any floor covering depends on this. Laminate and boards, for example, have interlocking joints and form cracks when laid on a lumpy surface.
In this case, the most favorable option for leveling the base would be plywood. And here, not very experienced repairmen are faced with the question of how to strengthen the plywood onto the base, and with what tools to do this. Before leveling the main floor, you need to assess in advance the condition of the surface and the degree of deformation of its “relief”. Sometimes the subfloor per 1 m² has differences of about 2 mm. Then you can achieve perfect evenness using putty made from wet sawdust mixed with PVA, or by covering the base with acrylic sealant. Old boards are renewed with a plane and laid back. All loose parts are simply nailed or secured with screws. But in order to smooth out significant unevenness, you will need to lay sheet material. Here again, information on how to attach plywood to the floor before finishing is useful.
Attaching plywood to concrete floor
Installing plywood on a concrete floor can be done using mechanical fasteners or using an adhesive such as artelite.
Before attaching plywood to a concrete floor, several preparatory steps are carried out. One of the most important is cutting.
The base should be divided into squares or rectangles in such a way as to minimize the number of trimmings.
This preparatory process will allow you to properly spend not only materials, but also money. An example of plywood layout is shown in the diagram.
To help with this process, there are special online programs for cutting plywood. In these programs, you can set the parameters of the room and the dimensions of the material used, after which the online assistant will calculate the optimal cutting.
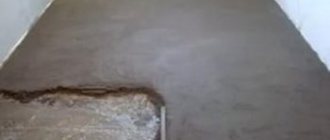
Another preparatory stage is the installation of the screed. Concrete floors are not always perfectly level, and quite often they need to be leveled using self-leveling materials or sand-cement mortar.
Laying plywood on the screed should be done after you are completely sure that the monolithic base is absolutely dry. To do this, the screed can be checked with a measuring device - a sclerometer. Further, if necessary, the screed is polished with special equipment. Irregularities should not interfere with the installation of the flooring.
Installing plywood with glue will not require installing joists
When the surface is completely prepared, that is, it is smooth and clean, and the plywood is cut according to the layout, it is time for fastening. As noted above, it can be glued, and it can also be secured to dowel nails.
The ideal option is to combine these two methods.
To glue plywood to the floor, the adhesive must be evenly distributed over the base, and the workpiece must be laid on top of it.
Then the sheets are fastened mechanically. They are made of 5 holes. One in the center and 4 in the corners. Next, holes are drilled in the monolithic floors. After this, the wood-based material is secured to the dowel with nails.
It is advisable to leave a gap of several millimeters between the sheets, and embed the dowel-nails in the material.
Gaps are necessary when the material expands, and the fasteners must be screwed into the body of the plywood in order to be able to sand the surface if necessary. Watch the secrets of installing plywood in this video:
Working conditions
Before you begin the repair process, you should prepare all the tools that you will need for the job. This list includes:
- perforator;
- hammer;
- notched spatula;
- electric jigsaw;
- roulette;
- drill;
- screwdriver;
- spirit level
To secure the plywood to the base, glue and dowels are used. The adhesive can be solvent-based, water-based, or two-part. What is the difference between these means? In short:
- the water base slows down the drying of the glue and can delay the repair for several days;
- glue, which is based on a solvent, dries very quickly, but has a pungent specific odor;
- two-component adhesive is used most often, especially if communications are laid in the concrete and the screed has not yet dried.
To lay plywood on the floor, you simply need a good screed.
This is where the labor process begins. It doesn’t matter what method (wet or dry) the screed is made, but it must be done with high quality and in perfect horizontal position. In order for the floors to remain in their original form, dry and warm, the following conditions are necessary:
- screed completed according to all rules;
- waterproofing;
- compliance with technological standards when installing thermal insulation;
- the presence of moisture in the base is not more than 1%.
Return to contents
Drying speed
Two-component compositions dry fastest
With tight deadlines for construction and repair work, the drying speed of the glue is of great importance.
The fastest way (in 1 day) is to glue plywood with two-component compounds, to which a hardener is added before starting work. This method does not require additional fixation of plywood with nails.
Solvent-based compositions dry in 3-5 days. Before applying the glue, you need to prime the screed. Additional fixation with self-tapping screws is required.
Water-based glue dries in up to 7 days. Before application, you can prime the concrete base with a compound diluted with water. Additional fastening of plywood with self-tapping screws is required.
If the screed is not completely dry or there are communications underneath it, it may be necessary to coat the surface with an epoxy-based primer.
Mounting Selection
For the base under a parquet floor, it is best to choose material of grade FK 4/4 and higher. A thickness of 1 cm or 1.2 cm is suitable. It is these plywood sheets that have sufficient strength and the necessary flexibility. And this plays an important role, since laminated plywood bears quite a serious load when arranging furniture and when residents walk around. When choosing a material thicker than 1.2 cm, financial resources will be wasted, since its properties are equivalent, but the cost is more expensive. If we take into account the price-quality ratio, then 2nd grade plywood is suitable. When marking on plywood sheets, it is indicated what type they are - sanded or unsanded:
- Ш1 ─ grinding 1 side;
- Ш2 ─ grinding of 2 sides;
- NS ─ without grinding.
Sanded plywood is marked with the free formaldehyde content:
- E1 ─ 100 g of dry plywood mass contains less than 10 ml of formaldehyde;
- E2 ─ 100 g contains 10-30 ml of formaldehyde.
To make the floor perfectly flat, you need to choose a 2nd grade plywood sheet, marked with the marks Ш1, ФК and Е1, the thickness of which is 10-12 mm.
Return to contents
Cutting and fitting
Plywood consists of several layers, so high humidity does not have the best effect on it and delamination can soon be expected. Before proceeding with the flooring, it is necessary to determine the moisture content of the concrete structure. To do this, during repairs, the worn out top covering is removed, and during construction the ceiling is cleared. Then a large piece of polyethylene is laid out on concrete slabs and pressed tightly along the edges, leaving the central part free. After 7 days, the film is examined. If no condensation is found on it, then you can safely lay the substrate. If drops of liquid appear on the polyethylene during testing, then the floors must be additionally covered with waterproofing.
When everything is ready to lay plywood, the room is measured and the sheets are cut according to the measurement results. In this case, you need to ensure that the seams between the sheets of plywood are 1 cm, and near the walls they are 1.5-2 cm. The plywood covering should not be allowed to touch the walls. This gap is left in case the coating parameters increase due to heat or humidity. If there is no free space, the floors may simply swell. In addition, the small format of plywood panels has greater stability and strength.
After cutting, check the ends of the workpieces. If they delaminate, they are rejected and new ones are prepared. Then the plywood sheets are laid out on the floor and adjusted to the base. It is very important that 4 sheets do not join in one place. To do this, all workpieces must be laid out using the bricklaying method, that is, with a shift.
Return to contents
Surface primer
Having adjusted the plywood, the sheets of blanks are numbered and a schematic representation of the layout is sketched out. Then the parts are removed and the base is leveled. To do this, remove any remaining mortar, paint, and construction debris. After this, dust is removed. It is better to do this with a special vacuum cleaner, but a simple broom will do. Do not carry out wet cleaning, as water will damage the wooden parts of the structure.
Now the coating needs to be primed. A primer is required for this. It is prepared from an adhesive composition, diluted with a special solvent. The purpose of the primer is to:
- Increase the strength of the bonding surface. This is achieved by the primer penetrating into the pores of the concrete base and gluing microscopic dust particles. All this increases the adhesion of plywood, glue and any dissimilar materials.
- The primer holds the concrete surface together and protects against the formation of cement dust.
If the room is large, then it is done in sections. In this case, the primer should be applied in parts. The base for plywood covering in small rooms is primed entirely. In both cases, the primer is applied before laying the plywood sheets.
All photos from the article
To figure out how to attach plywood to a concrete floor, first of all, you need to know for what purpose this is being done - whether you will insulate or level the floor, or maybe you just need a wooden base. By and large, there are two ways to lay such sheets - rigid and “floating”.
Hard is divided into two more subtypes - gluing and screwing. It will also not be superfluous for you to learn about the geometric parameters of such panels so that you can select their optimal thickness and area. About all this below, where else you will find a video in this article.
Types of suitable glue
There are many adhesive compositions on the modern market. To fasten plywood to a concrete floor, it is important to choose an adhesive that will glue the surfaces well enough, not be afraid of exposure to moisture and other factors, and will ensure reliable and durable fixation.
Polyurethane
This type of adhesive composition is characterized by the highest strength, excellent adhesion to all building materials, does not have a pungent odor, meets all sanitary standards and is recognized as safe by government organizations.
Types of polyurethane glue by composition:
- Two-component - consists of two parts (direct adhesive and hardener). It is used for fixing lumber on various types of bases, including concrete screed. Only this composition can be used for super-reliable fixation of plywood to concrete and without dowels. They are more expensive than other adhesives, they are used after preparation for 50-60 minutes (and then become unusable as the polymerization process is completed).
- One-component - not very plastic, polymerization occurs due to moisture in the environment.
Polyurethane can be diluted with different types of solvents, inorganic and organic. In most cases, it is the type of solvent that determines the environmental friendliness of the material and the permission to use it in residential premises.
Sometimes glue can be toxic. Therefore, before purchasing, carefully study the instructions and strictly adhere to the manufacturer’s recommendations.
Based on artificial resins
This adhesive for plywood on concrete floors can also be used and provides good adhesion. It does not require any preparation before starting work and is suitable for gluing different types of lumber. To increase the fixation strength, plywood is also additionally secured with dowels. One of the disadvantages of this glue is its strong unpleasant aroma, so work is carried out using personal protective equipment.
Water based
This type of composition is considered the safest, since it does not contain toxic or strong-smelling components. The price of the glue is relatively low, but the level of adhesion is lower in comparison with the above compounds. The adhesive is designed for use inside heated rooms, but the plywood must be moisture resistant.
The most popular example of a composition of this type is water-dispersed PVA glue. Its main advantage is that it does not lose its properties even if the substance is applied to a damp screed. The glue guarantees the plasticity of the connection, dries for a long time (within 5-7 days), but requires mandatory fastening of the material with dowels.
Selecting and fixing plywood
Note. Plywood is a structural sheet material glued together from veneer, where the number of layers is at least three and they are all located perpendicular to each other.
Technical specifications
Assortment:
- The instructions from GOST 3916.1-96 classify such products according to the presence of wood defects and defects on the surface of the sheet;
- in total there are grades I, II, III and IV, but there is also category E, which is beyond competition - this is the highest or elite quality;
- if each of the categories allows or does not allow a certain (limited or unlimited) number of vices and defects, then grade E does not allow them at all, in any quantity.
Surface treatment:
- according to the type of surface treatment, plywood can be unsanded (NS), sanded on one side (Sh1) and sanded on both sides (Sh2);
- the surface can also be laminated or non-laminated;
- the top layers of veneer can be either longitudinal or transverse, which is reflected in the recording of area dimensions. For example, if the size is written as 3000×1500 mm, then the fibers will be directed longitudinally and a larger value is placed in front, but if it is 1500×3000 mm, then the fibers will be transverse.
Adhesive impregnation:
- GOST 9462-88 divides plywood according to strength, elasticity and moisture resistance, which depend on the composition of the adhesive impregnation, and this is reflected in its markings - FBA, FSF, FSF-TV, FK, FB, BS and BV;
- Of these, FB, BS and BV are particularly durable, and FSF, FSF-TV, FC, FB and BS have sufficient moisture resistance.
Wood species:
- the veneer used for construction material can be coniferous or birch;
- of coniferous species, spruce, pine and larch wood can be used, and cedar is used for purely decorative purposes;
- Depending on the breed, the price varies (needles are slightly cheaper) and weight. For example, birch plywood with parameters 2440x1220x12 mm will weigh 23.2 kg, and exactly the same sheet of coniferous veneer will weigh 19.5 kg.
Note. The plywood range in some cases allows the use of coniferous or birch veneer only for the top layers, and the inner sheets can be made of other types of wood.
| Thickness (mm) | Sheet area (mm) | |||||||||||
| 1525×1525 | 2500×1250 | 2440×1220 | 3050×1525 | |||||||||
| Pieces in a pack | Pack volume (m 3) | Area per pack (m2) | Pieces in a pack | Pack volume (m 3) | Area per pack (m2) | Pieces in a pack | Pack volume (m 3) | Area per pack (m2) | Pieces in a pack | Pack volume (m 3) | Area per pack (m2) | |
| 3 | 130 | 0,907 | — | — | — | — | — | — | — | 130 | 1,814 | 504,662 |
| 4 | 100 | 0,93 | 232,563 | 100 | 1,25 | 312,5 | 100 | 1,191 | 297,68 | 100 | 1,861 | 485,126 |
| 5 | 80 | 0,93 | 186,05 | — | — | — | — | — | — | 80 | 1,861 | 312,1 |
| 6 | 65 | 0,907 | 151,565 | 65 | 1,219 | 203,135 | 65 | 1,161 | 193,493 | 65 | 1,814 | 303,13 |
| 8 | 50 | 0,93 | 116,281 | 50 | 1,25 | 156,25 | 50 | 1,191 | 148,84 | 50 | 1,861 | 232,562 |
| 9 | 44 | 0,921 | 102,328 | 44 | 1,238 | 137,5 | 44 | 1,179 | 130,979 | 44 | 1,842 | 204,656 |
| 10 | 40 | 0,93 | 93,025 | 40 | 1,25 | 125 | 40 | 1,191 | 119,072 | 40 | 1,861 | 232,582 |
| 12 | 33 | 0,921 | 76,748 | 33 | 1,238 | 103,125 | 33 | 1,179 | 98,234 | 33 | 1,842 | 204,656 |
| 15 | 26 | 0,907 | 60,456 | 26 | 1,219 | 81,25 | 28 | 1,161 | 77,397 | 26 | 1,861 | 186,05 |
| 18 | 22 | 0,921 | 51,164 | 22 | 1,238 | 88,75 | 22 | 1,179 | 65,49 | 22 | 1,842 | 102,326 |
| 21 | 19 | 0,928 | 44,187 | 19 | 1,247 | 59,375 | 19 | 1,189 | 56.58 | 19 | 1,856 | 88,374 |
| 24 | 16 | 0,893 | 37,21 | 16 | 1,2 | 50 | 16 | 1,143 | 47,629 | 15 | 1,766 | 76,42 |
| 27 | 14 | 0,879 | 32,559 | 14 | 1,181 | 46,875 | 14 | 1,126 | 44,562 | 14 | 1,758 | 65,118 |
| 30 | 13 | 0,907 | 30,233 | 12 | 1,125 | 40,625 | 12 | 1,072 | 38,698 | 12 | 1,954 | 65,118 |
Table of the most popular geometric parameters
Note. In the Russian Federation, continuous production of plywood sheets with dimensions of 1525x1525 mm, 1220x2440 mm, 2440x1220 mm, 1250x2500 mm, 2500x1250 mm, 1500x3000 mm, 3000x1500 mm, 1525x3050 mm and 3050x1525 has been established mm and thickness from 3 mm to 30 mm.
Installation on concrete floor
Now let's figure out how to attach plywood to a concrete floor and this will largely depend on the evenness and smoothness of the surface of the screed. But first things first:
- Firstly, when the screed is even and smooth, as in the top photo, then you can use any of the above methods.
- Secondly, the thinnest sheets can be laid here, unless, of course, they are intended for insulation.
Even when there are cracks and potholes, this is not an obstacle to laying plywood - the method of fixing it with dowels and screws is suitable, as shown in the title photo. But there is one important requirement here - the total area of the screed must be horizontal.
Although there may be different standards for different coatings. For example, if for laminate and wooden parquet a difference of no more than 2 mm/m 2 is allowed, then for soft coverings (carpet, linoleum) these restrictions do not exist.
In addition, on a flat floor you can use the “floating” installation method, when the sheets are not secured with anything at all. This method is suitable for any surface covering - parquet, laminate, linoleum or carpet. But it is advisable to use panels with a thickness of at least 10-12 mm, the grade of which must be at least II, so that they do not deform when air humidity changes.
To glue sheets, you should use glue that is used for wooden parquet, and there are four types:
- Water-dispersed adhesives or PVA, which dissolve well in water, but they take a long time to dry and do not have good enough adhesion for concrete.
- Solvent-based - the compositions have good ductility and dry faster, but have a pungent odor, so you need to work in a respirator.
- Polyurethane (one-component or two-component) glue. It is universal, as it is suitable for any surface, and there is no pungent odor.
- The powder composition is diluted with water and is similar in quality to polyurethane.
As you can see, you have plenty to choose from, but it is better not to use PVA and water dispersion for gluing, since cohesion is quite possible here. Well, the best option that you can use when gluing plywood with your own hands, of course, will be polyurethane and powder compounds.
Glue consumption
The smoother the surface, the less glue will be needed.
Glue consumption depends on how smooth the surface of the screed is, on the quality of the plywood and concrete, and their absorbency.
With proper application and a tool selected for a certain type of glue, consumption is significantly reduced.
To decide how much glue to buy, consider:
- Base area.
- When gluing on a flat and uniform surface, the glue consumption will be less. On a porous, uneven surface, the adhesive composition will fill the pores and depressions, which means the consumption will be greater.
- To reduce consumption, apply primer to the concrete screed in 2 layers. Apply the next layer after the previous one has dried.
Apply water-based plywood glue with a roller or brush. Compositions that have a viscous consistency are distributed using a notched trowel.
Depending on the condition of the screed, the consumption will be from 500 to 1500 g. per square meter.