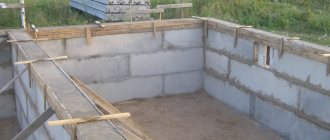
Not so long ago, a kind of revolution took place in the world of building materials; hybrid materials, better known as cinder blocks, took a dominant position in sales.
They are produced by pressing concrete with powerful vibrations. If we talk about the composition, then construction residues are used as a basis, such as ash, slag, broken bricks, etc.
However, the mixture may also consist of specific components, such as crushed stone, expanded clay, and shell.
Of course, such additives make certain adjustments to the technical characteristics of the stone.
If you try to describe a cinder block in simple words, two words come to mind - massiveness and lightness.
The negative qualities of the building material include: low performance level, poor frost resistance and low strength.
It is quite natural that a cinder block structure can quickly become unusable.
All these nuances significantly shed light on the dismantling of a wall made of cinder blocks in domestic conditions.
Due to its meager strength, a wall made of the above material can collapse under the blows of an ordinary sledgehammer.
Of course, the average owner will be happy with such weaknesses, because you will not need specialized equipment for destruction, therefore, you can save a lot on rent.
The only subtlety in this matter remains the role of the wall; if it is load-bearing, then it is better to abandon attempts to dismantle it, because such an initiative can lead to unexpected consequences.
Returning to the topic of equipment, it should be noted that during the dismantling process you should use the following equipment:
- A respirator mask, goggles and gloves, long sleeves are excellent protection against a thick layer of dust and construction debris.
- Tape measure and marker - for marking the working surface.
- Jackhammer, perforator, sledgehammer.
- Garbage bags.
After you have outlined the work area, you need to gradually saw the cinder blocks with a hammer drill.
Remember, dismantling must proceed exclusively from top to bottom.
Blocks that cannot be sawn must be carefully demolished with a sledgehammer. After this, we put the construction waste in bags and take it out of the house.
Dismantling a wall made of foam blocks
Before starting a specific conversation about the destruction of a structure, it is worth focusing on the list of necessary equipment that will undoubtedly be useful in this difficult work.
By and large, we don’t need any supernatural equipment; it’s enough to arm ourselves with a largely standard arsenal:
- A special role in this process is given to the hammer drill; moreover, it is advisable to have a model with a so-called “shovel”.
- Of course, you cannot reach the top of the wall by simply raising your hands up, so we will need a comfortable and reliable support, that is, a ladder or a table.
- Think carefully about how you can protect yourself from the huge flow of dust? The most reliable protector is a respirator and glasses.
- Bags in which you will pack the remains of the structure.
Dismantling a wall made of foam blocks is not a particularly significant problem, because the thickness of this building material does not exceed 40 centimeters and is also characterized by a minimum level of strength.
Therefore, this process should go without a hitch.
Basic methods of dismantling: dismantling walls and partitions
Technologies for dismantling walls and partitions are determined based on the characteristics of the room and the materials from which the surface is made:
- Partitions made of aerated concrete or foam concrete are dismantled using impact equipment (for example, a hammer drill).
- Brick partitions, which have great strength and weight, are dismantled along the length line in several stages.
- Frame partitions constructed using sheets of chipboard, fiberboard or plasterboard are dismantled in several successive stages: the sheathing is removed from the frame, then the frame itself is dismantled.
- Partitions using glass blocks are dismantled by step-by-step disassembly or using impact tools.
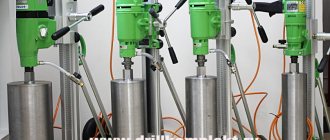
- Dismantling partitions made of concrete and reinforced concrete is the most labor-intensive and complex. Most often, work is carried out using modern equipment with diamond working surfaces.
Removing a brick wall
Brickwork is most often used as a partition between rooms.
Of course, during the process of major renovation, the owners of a house or apartment have the right to destroy it in order to change the layout, for example, to connect two rooms. “However, how to carry out this procedure?” is an open question.
If you decide to tackle the dismantling of a brick wall yourself, you will have to arm yourself with specialized equipment.
Without the help of which, you will not advance one iota in the process of solving this problem:
- Crowbar or pickaxe
- Chisel
- Jackhammer
- Sledgehammer or hammer
- Steel wedges
You should be no less careful when selecting protective equipment, in particular a respiratory mask and a pair of work gloves.
Important! Brick is a heavy building material that can damage flooring or furniture if it falls.
Therefore, it is better to remove all decor from the repair work area, and cover the floors with old blankets.
Video to break a wall without noise and dust
As a healthy alternative, you can use a thick layer of rags.
Recently, the services of construction consultants who can determine the role and specifics of brickwork are of particular relevance.
Of course, it is better to leave load-bearing walls alone; demolishing them is not recommended.
You can learn how to demolish walls correctly
You must also obtain documentary permission to transform a house or apartment; the Housing Commission will help you with this.
Removing a plasterboard wall
Today, two methods of destroying plasterboard walls are actively used.
In conditions of major renovation, many owners are trying to get rid of various shortcomings and defects that were made during the construction process; in this case, plasterboard walls should be dismantled using the standard method.
Important! All work is done from top to bottom.
I. We de-energize the house or apartment, then remove the electrical wiring, sockets, switches and other various communications.
II. We remove the doors and also temporarily dismantle the door frames.
III. Plasterboard walls are most often erected at the joints of the seams, therefore, dismantling should begin with fastening the self-tapping screws located on the load-bearing beams.
IV. We mark the working surface.
V. Gradually cut out the selected areas.
Dismantling a plasterboard wall using this method preserves the integrity of the metal profiles, in turn, the sheets can be reused in the process of erecting small structures.
The disadvantage is a huge amount of debris and dust.
The second disassembly method involves using magnets to detect self-tapping screws.
After which, we remove them using a screwdriver.
Gradually remove the sheets and unscrew the frame. A kind of spot work that will save you from construction waste.
Dismantling a wall made of tongue-and-groove slabs
Tongue-and-groove slabs are a fairly popular material that is in enormous demand in the modern construction market.
In the process of demolishing a wall made of the above material, you should decide whether you plan to use the dismantled blocks a second time?
If so, then dismantling the wall made of tongue-and-groove slabs should be carried out as carefully as possible so as not to damage the original material.
Many construction experts believe that such an operation is impossible to accomplish, but this thesis does not correspond to modern realities.
Basically, manufacturers of the above blocks save significantly on glue, so disassembling already installed blocks is not easy, but quite possible.
If you are not going to reuse the dismantled material, you should get: an angle grinder with a diamond wheel and a powerful hammer drill.
Don't forget about protective equipment. Remember, tongue-and-groove slabs are quite heavy material, so be careful.
Just in case, it is worth protecting the floor by first covering it with blankets or rags. In addition, you will undoubtedly need a sledgehammer and trash bags.
Briefly describing the dismantling process, we will divide it into the following stages:
- Sawing a wall using a grinder.
- Knocking out the structure using a hammer drill and sledgehammer.
- The dismantled material must be crushed into smaller particles.
- We prepare construction waste for removal.
As you can see, dismantling walls made of any material is a fairly affordable operation that every owner can carry out.
Selected for you:
Insulation of aerated concrete houses: methods and materials
Properly carried out insulation work will ensure not only optimal temperature, but also the well-being of the people in this room. This issue requires a rational approach; the system must meet the requirements of accessibility, efficiency, reliability and small size. To do this, it is necessary to select the appropriate technology and building materials. Thanks to the modern construction market and technological advances, there are currently many ways to insulate houses and apartments.
Is insulation of aerated concrete houses what you need? Then contact us!
*Our specialists will call you within two minutes, and you can also call the number around the clock and we will be happy to answer your questions
Preparatory work
The first mandatory action when preparing for the actual dismantling work is to prepare design documentation and obtain permission to demolish the structure or part of it. This is prohibited without first contacting local authorities.
At the next stage, all communication systems are turned off. They must not operate at the site during dismantling work;
- Gas pipeline;
- Sewerage;
- Heating;
- Circuit;
- TV antenna;
- Radio point.
In addition, you should prepare everything for storing garbage. You will also have to pay attention in terms of the integrity of the floor covering. Avoiding various types of damage to the floor during the process of demolishing a wall can be achieved by spreading dense soft fabric.
Demolition stages
In the first step, the baseboards are dismantled. If the structure has a door, the door block with platbands is removed. Next, remove the plaster from the ceiling and wallpaper from the walls, which are pre-wetted with water. The latter will facilitate the work process and reduce the level of dust in the room. If there are switches and sockets on the structure to be demolished, these elements are removed.
To dismantle the wall, you will need the following tools:
- Sledgehammer;
- Angle grinder (grinder) with an abrasive wheel coated with diamond or pobedite tipped;
- Hammer, chisel;
- Saw.
There is always a possibility that the structure was strengthened with metal reinforcement during construction. Such elements are cut out with a grinder. Accordingly, you should also first prepare an abrasive wheel for the grinder for cutting metal. Otherwise, removing pieces of reinforcement will be problematic.
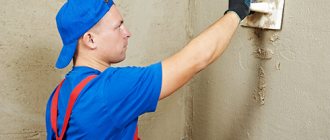
At the next step, using a suitable tool (hammer, chisel), the layer of plaster is removed, after which pieces of the foam block are knocked out using a sledgehammer.
You should start breaking the blocks above the doorway. To do this, if possible, the lintel, which in most cases is wooden, is freed from the solution and removed. The blocks located above the lintel should be dismantled quite easily. Next, each subsequent foam block is removed one by one.
The waste generated during work is placed in special bags and then transported to a landfill.
Preparation for dismantling
Dismantling any wall is preceded by a preparatory stage, which includes:
- Preparing the necessary tools: a hammer, a large chisel, a hammer drill and a grinder with a circle for working on concrete.
In addition, you should stock up on bags for storing construction waste. Hammer - Check the presence and disconnect all communications that are laid in the wall that is planned to be dismantled: electrical and radio wiring, wired Internet cables, sockets and switches.
- Remove the baseboards from both sides of the wall. If a door is installed, you must remove the door block completely, first removing the trim.
- If the walls are covered with wallpaper, they are separated from the surface of the wall, after being moistened with water.
Chip the plaster away from the blocks using a chisel.
Having completed the preparation, you can begin the dismantling process itself.
Before dismantling the wall, it is necessary to separate the plaster from the foam block; it is knocked down using a chisel and hammer.
If the solution is strong, then dismantling will be a little complicated.
The table shows the estimate for dismantling work, after reading which, everyone will be able to approximately calculate the total cost of the work when performed by hired workers.
| № | Type of work | Measurements | Price in rubles per 1 unit |
| 1 | removing wallpaper from walls | sq.m. | 45 |
| 2 | removing putty from walls | sq.m. | 45 |
| 3 | removing oil paint from walls | sq.m. | 170 |
| 4 | removing sockets and switches | PC. | 12 |
| 5 | dismantling door blocks | sq.m. | 380 |
| 6 | dismantling of partitions up to 100 mm | sq.m. | 250 |
| 7 | dismantling of partitions up to 200 mm | sq.m. | 290 |
| 8 | dismantling of partitions up to 300 mm | sq.m. | 570 |
| 9 | dismantling of partitions up to 400 mm | sq.m. | 750 |
Knowing the prices for the work will help the developer navigate when performing this procedure.
Cost of services
Dismantling walls
| Name | Unit. | Price |
| Removing lining from walls | m² | 80 |
| Removal of PVC and MDF panels from walls | m² | 75 |
| Removing chipboard from walls | m² | 85 |
| Dismantling walls (1 brick) | m² | 400 |
| Dismantling walls (1/2 brick) | m² | 200 |
| Dismantling walls (1/4 brick) | m² | 100 |
| Dismantling walls (1.5 bricks and above) | m² | 100 |
| Dismantling gypsum board wall covering 1 layer (with frame) | m² | 150 |
| Dismantling gypsum board wall covering 2 layers (with frame) | m² | 220 |
| Dismantling gypsum plasterboard wall cladding on a metal frame | m² | 100 |
| Removing wall sheathing from MDF panels | m² | 100 |
| Dismantling wall cladding made of chipboard | m² | 150 |
| Removing gypsum board cladding from walls without insulation | m² | 170 |
| Removing the cladding from gypsum plasterboard walls with thick insulation. 50 mm | m² | 140 |
| Removing cladding from ceramic tile walls | m² | 180 |
| Dismantling framed wooden walls | m² | 100 |
| Demolition of wooden walls (without shingles) | m² | 200 |
| Demolition of wooden walls (with shingles) | m² | 250 |
| Removing a plywood wall | m² | 120 |
| Dismantling walls made of asbestos-cement slabs | m² | 100 |
| Dismantling stucco molding (without saving material) | m² | 100 |
| Dismantling the casing of a loggia, balcony | m² | 100 |
| Removing wallpaper from walls (1 layer) | m² | 60 |
| Removing wallpaper from walls (2-3 layers) | m² | 80 |
| Dismantling walls made of aceid and plaster | m² | 200 |
| Construction of an opening in a wall made of aceid, plaster | m² | 200 |
| Removing oil paint from walls | m² | 150 |
| Cleaning walls from water emulsion | m² | 150 |
| Cleaning walls from water-dispersed paint | m² | 180 |
| Cleaning walls from chalk | m² | 200 |
| Cleaning walls from whitewash | m² | 70 |
| Removing tiles and ceramic tiles from walls | m² | 120 |
| Clearing tile joints | m² | 120 |
| Removing thick plaster up to 30 mm from walls | m² | 200 |
| Removing thick plaster up to 60 mm from walls | m² | 300 |
| Cleaning walls from putty | m² | 60 |
| Dismantling wooden partitions up to 100 mm | m² | 150 |
| Dismantling framed wooden partitions | m² | 200 |
| Dismantling of frame partitions: panel and wooden with sound insulation made of mineral wool. | m² | 150 |
| Dismantling wooden partitions | m² | 200 |
| Dismantling of aerated concrete partitions up to 100 mm thick | m² | 250 |
| Dismantling of foam concrete partitions, thickness from 100 mm | m² | 250 |
| Dismantling of reinforced concrete partitions up to 80 mm | m² | 400 |
| Dismantling reinforced concrete walls 8 cm thick | m² | 400 |
| Dismantling reinforced concrete walls 16 cm thick | m² | 1000 |
| Dismantling reinforced concrete walls 21 cm thick | m² | 1300 |
| Dismantling reinforced concrete walls more than 21 cm thick | m² | 1400 |
| Expansion of the opening in a concrete wall up to 7 cm | m.p. | 2500 |
| Expansion of the opening in a concrete wall up to 14 cm | m.p. | 4000 |
| Punching an opening in the wall (1 brick) | m² | 350 |
| Punching an opening in the wall (1/2 brick) | m² | 250 |
| Punching an opening in the wall (1/4 brick) | m² | 150 |
| Punching an opening in the wall (1.5 bricks) | m² | 500 |
The cost of the work is approximate and is set by the master after inspection.
Removing the floor
| Name | Unit. | Price |
| Dismantling laminate without saving | m² | 100 |
| Dismantling laminate while preserving | m² | 200 |
| Removing unadhered linoleum and carpet | m² | 100 |
| Removing glued linoleum, carpet | m² | 150 |
| Removing tiles and ceramic tiles from the floor | m² | 200 |
| Dismantling the floor plinth | p.m. | 60 |
| Dismantling the floor plinth while preserving | p.m. | 150 |
| Removing a concrete plinth | p.m. | 200 |
| Dismantling ceramic plinth | p.m. | 200 |
| Removing cement plinths | p.m. | 200 |
| Dismantling cement-sand screed up to 5 cm thick | m² | 200 |
| Dismantling cement-sand screed with a thickness of 5 cm to 10 cm. | m² | |
| Dismantling cement-sand screed with a thickness of 10 cm | m² | 350 |
| Dismantling cement-sand screed with reinforcement up to 5 cm thick | m² | 350 |
| Dismantling cement-sand screed with reinforcement thickness from 5 cm to 10 cm. | m² | |
| Dismantling cement-sand screed with reinforcement thickness of 10 cm | m² | 450 |
| Dismantling granite floor slabs | m² | 300 |
| Leveling the floor (knocking down uneven surfaces) | m² | 250 |
| Removing fiberboard from the floor | m² | 100 |
| Dismantling a wooden floor | m² | 300 |
| Dismantling chipboard floors | m² | 200 |
| Excavation of backfill from under the parquet (slag-sand) | m² | 250 |
| Dismantling of concrete floors up to 100 mm. Armirov. | m² | |
| Dismantling of concrete floors from 100 mm. Armirov. | m² | 450 |
| Dismantling of expanded clay concrete floors up to 50 mm. | m² | 350 |
| Dismantling of expanded clay concrete floors from 50 to 100 mm. | m² | 350 |
| Dismantling of expanded clay concrete floors from 100 mm. | m² | 450 |
| Removing a parquet floor | m² | 150 |
| Removing parquet floors (with glue, mastic) | m² | 150 |
| Removing panel parquet floors (with joists) | m² | 250 |
| Dismantling a wooden floor from boards, logs, timber | m² | 300 |
| Dismantling granite floor slabs | m² | 300 |
| Leveling the floor (knocking down uneven surfaces) | m² | 250 |
| Removing fiberboard from the floor | m² | 100 |
| Dismantling a wooden floor | m² | 300 |
| Dismantling chipboard floors | m² | 200 |
| Excavation of backfill from under the parquet (slag-sand) | m² | 250 |
The cost of the work is approximate and is set by the master after inspection.
Dismantling of ceilings
| Name | Unit. | Price |
| Cleaning the ceiling from whitewash | m² | 150 |
| Cleaning the ceiling from putty | m² | 250 |
| Cleaning lime from the ceiling | m² | 150 |
| Cleaning the ceiling from adhesive mastic | m² | 300 |
| Removing thick plaster up to 30 mm from ceilings | m² | 250 |
| Removing thick plaster From 30 to 60 mm from ceilings | m² | 350 |
| Dismantling of suspended ceiling(amstrong,akusto) | m² | 80 |
| Dismantling suspended ceilings | m² | 80 |
| Removing the rack ceiling | m² | 100 |
| Removing wooden ceiling cladding | m² | 250 |
| Stripping the ceiling of wallpaper in 1 layer | m² | 100 |
| Stripping the ceiling of wallpaper in 2 layers | m² | 120 |
| Removing tiles and ceramic tiles from the ceiling | m² | 350 |
| Dismantling a ceiling made of plastic panels | m² | 120 |
| Dismantling the ceiling plinth | m² | 100 |
| Joining ceiling seams (rusts) | m² | 100 |
| Dismantling gypsum board ceilings 1 layer (with frame). | m² | 200 |
| Dismantling gypsum board ceilings 2 layers (with frame). | m² | 220 |
The cost of the work is approximate and is set by the master after inspection.
Window removal
| Name | Unit. | Price |
| Dismantling of slopes made of gypsum plasterboard, PVC | p.m. | 200 |
| Cleaning window slopes from old paint | p.m. | 120 |
| Cleaning window slopes from plaster | p.m. | 150 |
The cost of the work is approximate and is set by the master after inspection.
Door dismantling
| Name | Unit. | Price |
| Dismantling the interior door block (without saving) | PC | 500 |
| Dismantling the interior door block (with preservation) | PC | 800 |
| Dismantling wooden window blocks while preserving | PC. | 1000 |
| Dismantling wooden window blocks without saving. | PC. | 600 |
| Removing a bathroom window | PC. | 250 |
| Dismantling the glazing of a loggia, balcony | PC. | 800 |
| Removal of window sills (concrete). | PC. | 500 |
| Dismantling window sills (wood, plastic) | PC. | 250 |
| Dismantling the input metal. door block (without saving) | PC | 1200 |
| Dismantling the input metal. door block (with saving) | PC | 2000 |
| Dismantling the entrance wooden door block (without saving) | PC | 1000 |
| Removing old paint from window frames | p.m. | 180 |
| Dismantling the entrance wooden door block (with preservation) | PC | 1600 |
The cost of the work is approximate and is set by the master after inspection.
Dismantling of plumbing
| Name | Unit. | Price |
| Removing the glued mirror | PC. | 300 |
| Dismantling a plumbing cabinet | PC. | 250 |
| Removing the toilet cistern | PC. | 200 |
| Toilet/bidet removal | PC. | 400 |
| Removal of whirlpool baths | PC. | 1500 |
| Bathroom dismantling (without removal) | PC. | 800 |
| Bathtub dismantling (with subsequent disposal) | PC. | 2000 |
| Dismantling a jacuzzi | PC. | 2500 |
| Removing the shower stall | PC. | 1500 |
| Removing the shower stand | PC. | 450 |
| Dismantling faucets | PC. | 300 |
| Removing the washbasin | PC. | 500 |
| Removing the water meter | PC. | |
| Removing the heated towel rail | PC. | 400 |
| Removing an electric heated towel rail | PC. | 400 |
| Cleaning the heated towel rail from paint | p.m. | 600 |
| Dismantling a storage water heater | PC. | |
| Dismantling a instantaneous water heater | PC. | |
| Dismantling of plastic pipes PVC, cold water supply, hot water supply (heating, water supply) | p.m. | 150 |
| Dismantling of metal pipes (heating, water supply and gas supply) | p.m. | 200 |
| Dismantling cast iron sewer pipes | p.m. | 250 |
| Dismantling of sewer pipes made of PVC, cold water, hot water supply | p.m. | 200 |
| Cleaning pipes from paint | p.m. | 600 |
| Dismantling the heating radiator | p.m. | 500 |
| Cleaning a heating radiator from paint | p.m. | 1000 |
The cost of the work is approximate and is set by the master after inspection.
Electrical dismantling
| Name | Unit. | Price |
| Removing the intercom handset | PC. | 200 |
| Dismantling sconces, lamps, chandeliers | PC. | 300 |
| Fan removal | PC. | 500 |
| Removing the bell button | PC. | 200 |
| Removing the electrical panel | PC. | 1000 |
| Removing the switch, built-in socket | PC. | 100 |
| Dismantling the switch, overhead socket | PC. | 100 |
| Dismantling electrical wiring, closed TV cable | p.m. | 250 |
| Dismantling electrical wiring, TV cable open | p.m. | 150 |
| Dismantling the cable channel (duct) | p.m. | 80 |
The cost of the work is approximate and is set by the master after inspection.
Removal and removal of garbage
| Name | Price |
| GAZ car 3.5 cubic meters up to 0.9 tons | 3,500 rub. |
| GAZ car 6 cubic meters up to 1.5 tons | 4,000 rub. |
| GAZ car 8.5 cubic meters. up to 1.5 tons | 4,500 rub. |
| Vehicle 12 cubic meters up to 3.5 tons extended wheelbase | 7,000 rub. |
| Flatbed vehicle 12 cubic meters up to 3.5 tons extended wheelbase | 7,000 rub. |
| Car 16 cubic meters. lo 5 tons | 10,000 rub. |
| Container 27 cubic meters (bulk) up to 10 tons | 14,000 rub. |
The cost of the work is approximate and is set by the master after inspection.
Cost of loading and packing waste
| Name | Volume | up to 8 cubes | up to 14 cubes | up to 30 cubic meters | from 30 cubes |
| Descent of garbage without an elevator | 1 cube per floor | from 170 rub. | from 150 rub. | from 130 rub. | from 110 rub. |
| Garbage removal if there is an elevator | 1 cubic meter per floor | from 120 rub. | from 100 rub. | from 80 rub. | from 60 rub. |
| Garbage packing | bag | RUB 50.00 | 45.00 rub. | 40.00 rub. | RUB 35.00 |
| Loading garbage (bags) | bag | RUB 50.00 | 45.00 rub. | 40.00 rub. | RUB 35.00 |
| Loading waste (scrap) | negotiated price | ||||
| Garbage collection | — | negotiated price | — | — | — |
The cost of the work is approximate and is set by the master after inspection.
Professionals of the “Unified Service Center 007” carry out dismantling work in St. Petersburg and the Leningrad region. Our company has been providing services in the field of repair and decoration for more than 20 years, so we know that dismantling work is the most important part of repair or remodeling. To prepare a room for renovation, you need to get rid of everything old: dismantle the walls, floors, ceiling, old plumbing and electrical fixtures. It is impossible to install new doors, windows or install safe modern wiring without first dismantling it. Our specialists will be happy to help with this, and upon completion of the work they will leave it clean - they will remove and remove all construction waste.
Dismantling the wall
Dismantling the walls begins with the partition above the door
After completing the preparatory work, you can begin disassembling. To dismantle the partition, you should start by dismantling the part of the wall above the doorway.
To do this, if possible, you can knock out the jumper, freeing it from the solution using a hammer drill. For partitions made of foam blocks, it is usually installed from a wooden block.
Then the foam concrete block, which was located on top of the lintel, is easily removed. Subsequently, the top row of blocks is dismantled. It is not always possible to keep them intact. But all subsequent rows will be dismantled without damaging the integrity of the block shape. Having completed the dismantling, the foam concrete is removed from the premises, and the construction waste generated during the work is removed. See this video for the principle of dismantling block walls:
Such work is possible only after obtaining the appropriate permission to dismantle the partitions. The main provisions for the dismantling and demolition of partitions are provided for by housing legislation, and for each region they are regulated by the relevant provisions adopted by local authorities.
Having completed the disassembly work, you can begin repair work and home improvement.
The wall made of foam blocks is dismantled when it is necessary to redevelop the room in order to reduce or add rooms, as well as to increase the total area. This type of work is very labor-intensive and dusty. Not only certain skills and knowledge are required, but also the presence of a construction tool, with the help of which the work process is facilitated and accelerated. An important point is the disposal of construction waste and the removal of wall material if it is not planned to be used in the future.
The walls undergoing planned demolition can be internal (interior) or load-bearing. When dismantling the first option, the building structure itself does not undergo any changes. But an undesirable point is the presence of communication and engineering systems (elements of ventilation, sewerage, gas pipelines, water supply, heating), distribution boxes that house electrical wiring and Internet cables. There may be a problem with moving them to another place.
Any changes inside the premises must be accompanied by documentation, requiring approval from the BTI or other organizations. Documents for redevelopment with the relocation of walls or their complete removal are drawn up before the start of dismantling work.
DIY aerated concrete partition - video
TOVIA 115mm Universal Wood Saw Blade for angle grinder 4.5inch…
737.18 rub.
Free Shipping
★★ ★★ ★★ ★★ ★★ (5.00) | Orders (7)
TOVIA 180mm Universal Wood Saw Blade for angle grinder 7inch…
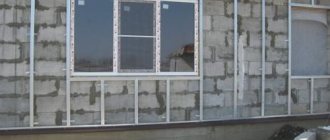
Partitions made from aerated concrete blocks have long been used in construction for buildings of any purpose. Because such material is easy to process - it can be planed with a regular hacksaw or processed with a chisel. It is enough to simply drive a nail or tighten a self-tapping screw into an aerated concrete surface. The products are manufactured with perfectly even dimensions; in one product line they also produce blocks that have grooves and ridges.
- They should not be load-bearing structures. Slab or monolithic reinforced concrete floors rest on main walls;
- The basis for it is the lower floor or foundation of the building;
- The partition must be adjacent to one or more walls.
The main requirements for such partitions are:
When aerated concrete partitions are installed during repair work and redevelopment of apartments and houses, there is a need to apply markings. Marking is carried out at all points of the perimeter - ceiling, floor, walls. This is best done with a laser device for constructing planes. If there is no such device, it is recommended to start from the ceiling in this order:
- Two points are marked on opposite walls; between them, stretch a painting cord, which should be painted with blue or other dry paints. Next, mark the marking line.
- Lines from the ceiling are transferred to the floor using a plumb line.
- Afterwards, the lines located on the floor and ceiling are connected using vertical markings on the walls. In order for everything to work out correctly, the markings must be vertical.
Preparatory work for dismantling
The beginning of dismantling walls made of foam blocks is the preparatory process, which includes cleaning the workplace and the availability of tools. There should be nothing in the premises - furniture is taken out, things are packed into boxes, electrical appliances are removed from the walls and ceiling. At the preparatory stage, the location of communications located in the dismantled area is checked. If there are any, they must be disabled. For example, drain the water from the heating system, turn off the power. Only after the switch for supplying current to the apartment, house, or office is turned off, can you remove the switch and sockets, as well as dismantle the electrical wiring.
At the next stage:
- The plinth is removed from both sides of the wall.
- If there is a door block, first the platbands are removed, then the door leaf is removed from the hinges and the frame is removed from the opening.
- Wallpaper is being torn off the walls. The process will go faster if the surface of the wallpaper is pre-moistened with water.
- The plaster or putty is knocked down to a foam block using a hammer and a metal chisel. Strong lime mortar makes the work much more difficult. Putty is more fragile and easier to remove. The wall is cleaned from bottom to top. On the foam block, freed from the cladding, you can clearly see how the electrical wires are laid. The wire is carefully wound up and placed in a place where it will not interfere with further work.
- If there are tiles, it will take more time to prepare the wall for disassembly.
You need to stock up on a sufficient number of bags for construction waste, and you also need to choose a place where they will be stored - in the apartment or on the street. Upon completion of the preparatory work, the process of demolishing the wall begins. It is at this stage that construction skills and the ability to work with tools will be needed.
Dismantling
If the stone will be used in the future, then it is very important to know how to disassemble a wall made of foam blocks and preserve their integrity as much as possible. You should start with the doorway above which the lintel is installed. Basically, builders use a wooden beam on which a foam block is laid. In order to free the jumper from the mortar and knock it out, you will need a hammer drill, which drills holes at a minimum distance from each other. The main thing is to remove the first block, then the workflow goes faster and easier.
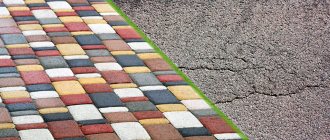
If artificial stone is not needed for further use, then accuracy can be neglected. It is advisable to break the blocks into small pieces so that they can fit into bags for further disposal. Removing debris from the floor is done using a broom and a shovel. Construction waste is transported to specially designated areas for disposal. But it is also successfully used for filling potholes on roads.
You should not accumulate a large layer of debris, as it will only interfere and create inconvenience during work. A thick layer is much more difficult to deal with, so it should be removed as it forms.
Selection of quality building material
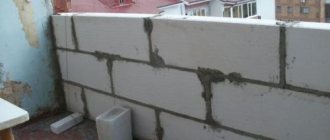
Foam concrete blocks are made in two ways. In non-autoclave production, the material may have non-uniform porosity, and this affects the quality of the material and its shrinkage characteristics. Over time, a foam block wall can shrink up to 3 cm per meter. The shrinkage coefficient of an autoclaved material differs by 10 times from its non-autoclaved counterpart.
High-quality foam blocks are the key to success
The operational characteristics are affected by the homogeneity of the structure. So, the diameter of the bubbles should be no more than 1 mm. A good manufacturer packs the blocks in film, thereby protecting them from excessive moisture. When purchasing building material, it is recommended to examine each block for cracks. Cracked blocks are not suitable for construction; the strength of a structure made from such material will be quite low. The color of aerated concrete blocks and foam blocks must be uniform; heterogeneity, inclusions and overflows are unacceptable, as this is an indicator of a violation of production technologies.
It is better to build partitions made of aerated concrete blocks from material 100 mm thick. This is the best combination of price and quality. Such aerated concrete blocks are inexpensive, and their size will save space while maintaining sound insulation properties. For better noise and heat insulation, you can choose a foam block with a thickness of 150 mm. If the wall is intended as a decorative barrier and does not serve the main functions, then the foam block can be used for partitions measuring 75 mm. Whatever the width, it should be identical for all blocks.
For partitions, structural and thermal insulating foam blocks are used, marked at least D600, the strength class of the blocks corresponds to B2.5.
- Applying preliminary markings. Before starting work, it is recommended to apply markings on the load-bearing wall and on the floor. You can attach a starter profile used when working with drywall, or use a dye thread. This will help to perfectly lay out the partition from foam blocks.
- Laying the bottom row of foam blocks. The building material can be laid directly on a cement floor that has been previously cleaned and primed. For fixation, a solution prepared for masonry is used. If the floor is wooden, parquet, to secure the first row of foam blocks, the base, self-tapping pins are screwed into the floor in advance. In this case, the walls will not wobble.
- At room temperature, foam and aerated concrete blocks absorb moisture well. To avoid absorption of water from the adhesive mixture, it is necessary to moisten the surface of the blocks before application.
- Subsequent laying of partitions. It is recommended to reinforce the next three rows, as well as the top three; for this you can use a laying mesh. Since the width of the foam block is 100 mm, it is better to use reinforcement in the form of a rod. In the future, it is recommended to reinforce every three rows. The doorway is also subject to reinforcement. This technique will avoid shrinkage of the structure.
- Different solutions can be used for laying foam blocks. This can be an ordinary cement mixture; the material is perfectly fixed on gypsum plaster. Construction stores sell adhesive mixtures specifically for aerated concrete blocks and foam blocks. You can also apply the material to regular tile adhesive. The glue consumption will be 15 kg with a layer thickness of 2 mm per 1 m3.
- In the process of erecting a partition from foam blocks, it is necessary to take into account the rules of masonry. Each subsequent row is laid out with offset joints between blocks. Recommendation: purchase foam blocks of different sizes, in this case you will not have to constantly cut them.
- Having laid out one row of blocks, it is necessary to let the glue dry completely, otherwise the structure may fail, and the interior partitions made of foam blocks will turn out uneven.
- Fastening to load-bearing walls. To ensure the reliability of a partition made of aerated concrete blocks, when laying it, it is necessary to attach it to the load-bearing wall. Metal connecting “crutches” are first driven into the wall.
- Ceiling mount. When the work is completed, between the last row of foam blocks and the floor slab, the ceiling, there will probably remain a small gap, which is filled with sawn blocks or blown with foam.
When the masonry is completed, it is necessary to fill all seams, cracks, and recesses. Allow to dry thoroughly, remove excess mortar (glue), peel and cover the masonry of aerated concrete blocks with primer emulsions. Only after complete drying can further painting and plastering work be carried out.
Laying partitions from aerated concrete is a fairly quick and inexpensive option when building houses. The ease of installation allows even non-professional builders to lay out the partition, while saving a lot of money not only on craftsmen, but also on building materials.
Partitions made of foam blocks and aerated concrete are erected in industrial and office premises. With appropriate processing, the material can withstand high levels of humidity and temperature changes and is not susceptible to various chemical compounds.
Being a fairly lightweight structure, such walls can be erected not only during construction. You can easily lay them out if you decide to remodel an already finished apartment or house, or implement design ideas.
When choosing a material for the construction of interior partitions, preference is given to large, breathable and lightweight blocks with good sound and heat insulation properties and fire resistance. Aerated concrete products used by many professional and private developers have suitable characteristics. The technology for their installation and cladding is simple, but labor-intensive; mandatory conditions include reinforcement of rows, thin seams, laying an expansion gap, tying with load-bearing structures and checking the level.
Features of the work
The foam blocks are dismantled in the following order:
- First, the top stone under the ceiling is knocked out using a hammer drill and a chisel.
- Then the adhesive connection between adjacent stones is gradually destroyed.
- The blocks are removed in a checkerboard pattern, as they were laid.
- If necessary, the stone can be drilled and sawed. The main thing is to choose the right tool.
- If part of the wall remains, then the end edge is leveled. In this case, you will also need a saw.
To dismantle foam blocks at height, construction “goats” will be required. Such equipment can be rented or made independently.
Modern technologies
At a professional level, the dismantling of foam blocks is carried out by diamond cutting. This technology ensures high-quality wall removal without noise or vibration. An important advantage of specialized equipment is the absence of dust. The process takes place with periodic application of liquid. Using diamond cutting, sections of the partition of any size can be removed. This is incomparable to working with a hammer drill. The advantage of the equipment is its speed and ease of use compared to an impact hammer.
By entrusting the demolition of a wall to specialists, you can significantly reduce the time it takes to complete labor-intensive work. The ends of the stone will be carefully cut, which will make its further use possible.
Doing the work yourself
How to make a high-quality partition from aerated concrete blocks? The main thing is to pay special attention when installing products in the first row, this will guarantee easier installation of subsequent row lines.
Work progress:
After building the partition with your own hands, you need to carefully check the surface for any gaps in the seams and, if there are any, seal them with adhesive. When the glue has completely hardened, which will take at least a day. It is recommended to treat the entire surface with an antiseptic property, which will prevent the formation of fungi on the interior partition.
Laying the wall without additional reinforcement is unacceptable. If the thickness of the interior partition is no more than 10 cm, each row must be reinforced with additional connection to the load-bearing walls. For this, scraps of reinforcement and steel wire are suitable, the recommended diameter is 6 mm. This method will give good strength to even the thinnest walls.
If you use a 20-25 cm partition gas block, then it will be enough to lay the reinforcement through one or two rows. Bandaging of elements is carried out using perforated corners.
Conditions for demolition
There is a ban on the complete demolition of a load-bearing wall, as this entails a decrease in the strength characteristics of the structure of the entire building. At the stage of creating design documentation for the construction of a house, calculations are made to determine the required number of load-bearing parts and the thickness of the wall. This is the only way to ensure safe operation of the building over a long period.
To install door or window openings in load-bearing walls, you must obtain permission to carry out such work. To achieve the desired result, you will need to perform the following steps:
- Receive a technical report that describes the condition of the house at the time of work. Such a document is issued by specialists after a complete inspection of the building and calculations of the strength of the structure.
- Special authorities will provide recommendations on how to strengthen the dismantled section of the structure.
Based on the calculations and recommendations received, a redevelopment scheme is drawn up with a description of the materials that will be used to replace the dismantled section of the load-bearing wall. Having a complete package of documents, you can contact the BTI or another company, which will issue a permit for partial demolition.
When can you make noise? According to the law, repair work can be carried out during certain hours. On weekdays, noise is acceptable from 9.00 to 19.00. At the same time, neighbors at the entrance must be informed in advance about this type of work.
Dismantling a load-bearing wall
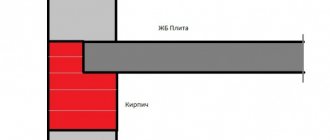
Complete dismantling of load-bearing walls is impossible, since thanks to them, loads are redistributed on the foundation, lower floors, floors, etc. However, partial dismantling of such walls is possible, provided that special supports or columns are installed to redistribute the loads.
Partitions and non-load-bearing walls can be completely dismantled, since they do not bear significant loads. Their thickness is usually about ten to twelve centimeters.
If partial dismantling of load-bearing walls is carried out, they are initially freed from the elements that affect them. To do this, the loads from the upper floors and floors are distributed onto the supports. After partial dismantling is completed, special structures are installed that will now bear the load. The optimal equipment for carrying out this work is diamond equipment, which does not create shock loads and vibrations that cause cracks.