The functional purpose of facade putty is to prepare a smooth surface of the external and internal walls of a house with the subsequent application of decorative facing material. You can pronounce it "putty" or "putty." The meaning of the words will be the same.
Experts call another function of the material: protective. External walls will be maximally protected from external factors.
Purpose of façade putty
No construction of a house, building or cottage is carried out without the use of putty.
In addition to its main purpose - leveling walls , facade putty, the strength of which is associated with the presence of cement and synthetic resins, has additional functions:
- protection from external weather influences and mechanical damage;
- strengthening the sound and heat insulation of the building.
Composition and properties
Components that provide basic properties: plasticity, high degree of adhesiveness (adhesion to the surface), moisture resistance, frost resistance, resistance to abrasion, cracking, fading, temperature changes, compatibility with paints and varnishes:
- cement, gypsum, chalk;
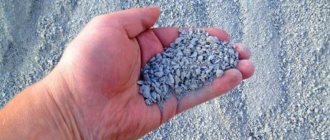
- special mineral (quartz, marble, etc.) fillers;
- modifying additives;
- special plasticizers;
- glue;
- drying oil, varnish;
- talc, barite.
Which putty to choose for walls under wallpaper - types, advantages and disadvantages of putty of different brands
Interior improvement is a complex and responsible job that requires a variety of repair activities, including the preparation and finishing of internal surfaces, therefore, in order to guarantee an attractive finish for an apartment or house, the owner should promptly decide which putty to choose for the walls under the wallpaper.
When ready for use, all putty on the market is divided into two types: dry and ready-to-use mixtures. Dry mixtures include many important components: filler, binder and various additives that determine the final performance characteristics and visual appeal of the finish. Before use, dry mixtures require dilution with running water.
Ready-made putties are used primarily for final finishing of surfaces. The composition of such putties includes a special solvent; it evaporates after applying the cladding to the wall, resulting in shrinkage of the finish. That is why ready-made mixtures are not used for repair work and leveling surfaces.
Choose a putty from among the finishing materials on the market, taking into account its individual characteristics. The most important parameters of putties are:
- water resistance level;
- grinding fineness: coarse, universal, finishing;
- chemical composition: adhesive-oil, latex, acrylic, PVA;
- composition of the binder component: cement, gypsum, polymers.
According to their intended purpose, putty is usually divided into four groups:
- specialized;
- universal;
- leveling;
- finishing.
The first mixtures in the list are used to solve highly specialized problems, for example, for sealing joints of plasterboard panels, for sealing joints of floor slabs, for filling “breathing” cracks, etc. It is very easy to choose a putty for performing such work, just study the information on label of the mixture from the manufacturer and determine the composition that most closely matches the purpose of the repair.
Leveling putties are much more common and are available on the market in a wide range. They are used for preliminary leveling of walls and other surfaces before further finishing work. It is necessary to select leveling mixtures taking into account what kind of finishing cladding you plan to use. The market offers mixtures intended for further painting, wallpapering and decoration with other materials.
The following requirements are usually met for leveling putties:
- compatibility with the finishing used;
- high adhesion to cladding and surface;
- high-quality filling of all surface imperfections;
- durability and strength.
Finishing putty is intended for final preparation of a wall or other surface for installation of facing materials. Such mixtures are selected taking into account the individual characteristics of the surface being designed and the finishing features.
Universal are mixtures that can be used to solve a wide range of problems in leveling and preparing building surfaces for decorative cladding. Some universal putties are equally well suited for eliminating wall defects, for finishing decoration and other installation work.
The building materials market offers a huge number of dry and liquid putties that can be used to prepare walls before finishing. Only by studying the characteristics of these materials, their advantages and disadvantages, can we answer the question: which putty is better for walls under wallpaper.
One of the most popular putties for finishing walls today is Vetonit KR. This is a lime putty that contains various organic additives that help increase the plasticity of the finishing layer and reduce dust emissions from the surface. Vetonit KR is used on walls in dry rooms for further wallpapering or painting. The putty can be used on brick, plaster, plasterboard and concrete surfaces, on fiberboard and chipboard.
The most important advantages of Vetonit KR are:
- reliable structure;
- environmental friendliness;
- ease of use.
Disadvantages of Vetonit KR:
- high price;
- the need for additional sanding due to uneven walls and improper installation of putty;
- the appearance of an unpleasant odor during use (disappears after completion of installation work).
Vetonit LR is a popular dry mixture for finishing surface preparation before wallpapering. The putty contains polymer binders and glue, which ensures high quality adhesion of the putty to the surfaces being treated.
- simple grinding;
- Possibility of use for leveling and finishing walls;
- high adhesion to the surface;
- does not dry out or pill.
Disadvantages of Vetonit LR:
- high price;
- presence of counterfeits on the market;
- viscous composition, complicating installation work.
Kestonit LH is a finishing polymer putty from Finland. It is used for cladding walls before painting or gluing, ideal for concrete and plastered surfaces, brick, plasterboard and other bases.
- ease of installation;
- high viscosity;
- environmental friendliness.
- high price;
- Not available in all construction stores.
Weber Vetonit putty for finishing walls
Knauf Satengips is a thin-layer dry putty based on gypsum. The mixture contains a mineral binder filler and a number of specialized additives that make it possible to use it to correct defects in walls and finishing. Suitable for coating most surfaces including concrete, cement, plaster and brick.
- can be used as a rough and finishing layer;
- allows you to correct even significant surface imperfections;
- high level of viscosity;
- attractive price.
Disadvantages of Knauf Satengips:
- not suitable for subsequent priming;
- requires installation in compliance with all manufacturer's requirements.
Knauf HP Finish is a dry mixture intended for finishing surface preparation. It is a very good, if not the best, universal product for use in finishing residential, commercial and industrial premises.
- price;
- allows you to create perfectly smooth surfaces;
- good viscosity;
- long service life, thanks to which the owner can independently decorate the rooms in his home without unnecessary haste.
- acquires a yellow tint after drying;
- requires careful sanding.
Acryl-Putz is a Polish gypsum-based putty, suitable for leveling walls and preparing them for finishing decoration.
- price;
- perfect white color;
- versatility.
- relatively low viscosity;
- Requires high quality polishing.
Good performance characteristics of the solution can only be guaranteed by properly preparing it for use. To mix the putty yourself, you need to pour clean water into a plastic bucket. The amount of water should correspond to the volume of dry putty diluted in it (the ratio must be checked on the packaging). The powder is poured into a bucket of water evenly and gradually. When the putty is poured in, you need to wait about a minute for the powder to become saturated with liquid and sink to the bottom.
Next, you need to vigorously stir the solution for 60–120 seconds. It is best to use a construction mixer for this, but you can get by with improvised means. Now you need to let the solution stand again for about a minute, after which the mixing procedure is repeated. After this, we can assume that the putty is prepared for use and can be applied to the wall.
Under no circumstances should you add new components - water and putty - to the solution prepared for work. If the created volume of solution is not enough to complete the planned work, you should re-mix the putty by repeating the entire procedure described above. Next, you can use the created solution to level the wall and prepare for wallpapering.
After the putty work is completed, the wall must be sanded and coated with a primer. Priming improves the adhesion of the final decorative coating, that is, it increases the quality and reliability of the interior design as a whole.
Related article: How to drill a concrete wall correctly
Types of facade mixtures
By purpose of work
There are types of finely dispersed compositions with fractions of various sizes:
- Starting or leveling putty of a coarse-grained structure for applying the first layer to the base material. The main rough processing and smoothing of the surface occurs with the sealing of defects: crevices, cracks, irregularities. Important criteria for choosing a composition for putty are the degree of adhesion to the base and strength. A layer of 2 to 25 mm is applied.
- Finishing or putty of the second layer of fine-grained structure for final leveling of the surface before decorative finishing. A more liquid composition is applied in a layer of up to 4 mm. The selection criterion is elasticity to temperature changes and wall shrinkage, compatibility with decorative coatings.
- Universal putty combines the features of starting and finishing putty, is convenient to use, but is of lower quality compared to functionally oriented ones.
- A specialized putty is created to perform a specific task: for example, covering joints, creating decorative details, or protecting wood from weather conditions. Requires precise application according to instructions.
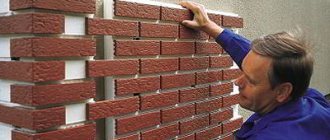
Decor can be applied to a putty-finished façade: mosaics, tiles, paint, enamels, etc.
By ingredient based composition
- With a predominant gypsum component - they level the surface well due to high plasticity and do not shrink. The disadvantage is low moisture resistance, and therefore the scope of use is limited. The gypsum composition is strengthened with polymer additives (expanded polystyrene, latex), which strengthen the protective properties of the coating.
- With a predominance of cement - it is characterized by high strength, moisture resistance, exposure to temperature changes, and is resistant to cracking.
For finishing work, the composition includes chemical components, marble and quartz fillers (microcalcite, marshalite), so the color can be white, gray or yellow. Disadvantage: it tends to shrink, takes a long time to dry, and is prone to contamination. Warning: cement-based putty is often counterfeited; you should pay close attention to the manufacturer’s brand and original packaging. - Using polymer components - easy to use, moisture resistant, plastic, no shrinkage or odors, have increased strength and durability, especially high adhesive properties, allowing you to putty on any base, including insulation. A general disadvantage of polymer binders is their incompatibility with certain types of building materials, for example, polyurethane. When choosing, you need to carefully study the instructions for use:
- Acrylic putties are suitable for both the first layer and the finishing layer. They are used to treat concrete, foam concrete, and plastered surfaces. Apply in a layer of up to 3 mm; in the presence of deep cracks, additional puttying is possible. Perfectly levels the surface due to its elasticity. Dries quickly and has a high degree of self-cleaning. Disadvantage: when sanding you need to use a respirator.
- Latex putties. They sell a ready-to-use paste composition. Environmentally friendly. The main characteristics are moisture resistance, plasticity, durability. Disadvantage: application to an additionally primed surface.
According to composition for use
Dry
A special powder mixture that can be stored for a long time while maintaining low humidity. It tolerates transportation well in bags and is prepared before use strictly according to the included instructions.
Advantages:
- ease of preparation (diluted with water) with strict adherence to the specified recipe;
- use for all stages of work.
Flaws:
- drawing up calculations for solution consumption for 1 sq.m. surfaces due to the short period of use after dilution with water: up to 3 hours;
- possibility of errors when preparing the composition for use.
Pasty
Ready to use - stored in plastic containers. Before use, it is recommended to beat with a construction mixer.
Advantages:
- maintaining the required proportions;
- ease of use;
- long shelf life.
Flaws:
- Impossibility of use in thin layers due to the tendency to shrink. It is not recommended to use putties of ready-to-use compositions in layers more than 5 mm thick.
- High price.
Features of the material
Putty mass on brick or concrete is used to give a beautiful appearance to the wall, while protecting the surface from mechanical damage and precipitation. Frost-resistant putty has excellent properties, as it is able to protect the surface even at strong negative temperatures. If you apply it correctly to the surface, you will not have to renew the coating for a long time.
Using frost-resistant facade putty, you get a high-quality and beautiful coating. Waterproof plaster has good properties, which perfectly withstands frequent rainfall.
Do not forget about monitoring the microclimate in the premises. Exterior decoration has a direct impact on it. For this reason, plaster is characterized by the following features:
- good vapor permeability;
- frost resistance;
- high ductility and strength;
- increased level of water resistance;
- a small percentage of shrinkage, which helps prevent cracks;
- absence of substances hazardous to health.
Using acrylic exterior putty, you can create the perfect finish for any building. And the gypsum mixture will successfully highlight the architecture with stucco.
Thus, using moisture-resistant plaster mixtures, you will get the ideal coating for your home or any other building. But it is necessary to select a high-quality mixture and apply it with strict adherence to technology. As a result, you get beautiful walls with high strength characteristics.
Recommendations for façade putty (2 videos)
Brands and putty work (35 photos)
Criteria for choosing façade putties
- resistance to weathering and technical damage;
- fractions (filler) of various sizes, affecting the degree of leveling of the treated surface;
- compatibility with materials for subsequent decorative finishing of the facade;
- durability, resistance to cracking;
- ease of use;
- high degree of adhesion to the base material (adhesiveness);
- ratio of price and quality indicators.
Paste-like combined compositions with a fine-grained fraction suitable for all stages of putty have optimal properties for facade coatings.
How to make the right choice
The correct choice of this material is completely justified. This is done in order to buy the required solution (mixture), and not just putty.
Things to consider:
- Surface to be treated. The material of the plane and the material of the putty should be similar.
- If the task is to process a brick, plaster or brick wall, then the best material for this will be the one with a cement base.
- The choice of gypsum compositions will be justified only after careful priming with a deep penetration primer.
- The same mixtures are needed for covering facades.
- Gypsum putties have proven themselves well for processing drywall. In this case, exceptional adhesion is observed - the force of adhesion to the surface being treated. Before using these for treating wet rooms, you should carefully read the attached instructions for the material.
- Polymer materials still have the best characteristics, but their price does not suit everyone. Perhaps the golden option would be to use them to fill small irregularities during the final processing of a wall or ceiling.
Related article: Technology of puttying walls for painting
There are a lot of materials in which the modern construction market is rich, so it is always possible to choose the right one.
The final choice of material is always yours, but you need to pay due attention to the advice of sales consultants, managers and experienced craftsmen. Pay attention to the characteristics and properties of the material you choose.
Comparison of putty types
| Name | View | Main component | Permissible layer size (mm) | Drying period | Temperature during work |
| PLITONIT-Kf | dry mixture | cement | 5 | 3 days | from +5 C to +30 C |
| Knauf Multi-Finish | paste | cement | 1-5 | 3 days | +10 C |
| 1 day | +20 C | ||||
| Founds Bassilk T-30 | dry mixture | cement | 1-8 | 1 day | no data |
| Glims Finish-R | dry mixture | cement and polymer | 1-10 | 1 day | not less than +5 C |
| Bolars Finish Super | dry mixture | polymers | 0,2-2 | 2 hours | from +5 C to +30 C |
| Ceresit CT 225 | dry mixture | cement | 1-3 | 1 day | from +5 C to +30 C |
| PROS | paste | latex | 1-5 | 4 hours | not lower than +5 C |
| BOLARS Empire Facade | paste | polymers | 0,1-5 | 1 day | from +5 C to +35 C |
| Holzer Festspachtel Elastic | paste | acrylic latex | 0,2-3 | 10 hours | from +10 C to +30 C |
Overview of the main manufacturing companies
Well-known manufacturers whose products are in demand in the construction market include:
- German company Knauf. External cement putties are frost and moisture resistant and are ideal for both finishing new and restoring old facades. Average price category.
- Finnish company Vetonit. Acrylic-based mixtures are especially popular for concrete and wooden bases in conditions of high humidity. Average price category.
- Ceresit – made in Russia. Supplies a wide selection of mixtures for putty coatings of various types. Average price category.
- “Prospectors” – made in Russia. Well-known brand, materials are affordable and meet quality requirements.
- Bolars - made in Russia. It is distinguished by good quality putty compositions and durability of use. Budget prices, wide selection of putties depending on the purpose of the job.
Before purchasing, you need to determine the scope of work, the purpose of the putty, the conditions for applying the composition and evaluate the reviews of practitioners familiar with the products of various companies. Recommendations and comments can help in your choice. The cost may depend on the manufacturer, city of purchase and supplier of the product.
Conclusion
Puttying concrete with mixtures that are intended for this and following the technology of operations solves the problem of forming an aesthetic facade and gives it moisture resistance, strength and durability.
In modern life, when constructing external structures, various problems have to be solved, the main one being ensuring the structure has an adequate service life and protecting the base material from harmful effects from the surrounding atmosphere. Of course, in such a situation, exterior finishing should be done only with high-quality materials. In this case, concrete putty is often used, since this is the most common option for load-bearing structures. In this case, we need to consider what concrete putties are, as well as their use and application procedure.
Solution preparation technology
If you have to prepare a solution from a dry putty mixture yourself, it is recommended to strictly follow the manufacturer’s instructions. The main stages are as follows:
- Pour the dry mixture in parts into prepared water in the proportions according to the specified recipe. This mixing method avoids the formation of lumps.
- Using a drill (using a special attachment), mix the solution until it reaches a uniform consistency. You can mix by hand, but the process will take longer.
- Leave for 5 minutes and stir the solution again.
The volume of the first portion should not be large; its use will allow you to subsequently estimate the required amount of solution per volume of working area. The prepared solution from the dry mixture is viable for no more than 3 hours. Therefore, application is carried out immediately.
Alignment
Preparation of the solution
Some people prefer to use ready-made putty. If you purchase dry material, you will need to prepare it properly.
- Take a suitable container (for example, a clean bucket).
- Dry putty should be taken in small portions and gradually added to water at room temperature.
- To obtain a uniform consistency, mix the material using a drill or mixer. If such devices are not available, you can mix the putty manually. The proportions are usually indicated by the manufacturer. Make sure there are no lumps in the mixture.
- After mixing the material, immediately clean the device you used to mix it. Otherwise, the mixture will harden and it will be very difficult to remove it.
Preparatory stage
To begin to understand how to apply putty yourself, you don’t have to do it many times. You just need to not skip important steps. Remember that before applying putty material it is necessary to carefully prepare the base. The result of finishing work largely depends on preparation.
- The surface should be as clean as possible. You should also remove cracked layers of plaster, wallpaper, and old paint. If the plaster is thick, you can leave it on.
- Overall, cleaning the base is quite easy. To make it easier to remove gypsum putty and wallpaper, moisten the surface with water. After this, start removing the old coating using a spatula. It is already much more difficult to scrape off old alkyd and acrylic coatings. To remove such paint, knock it off with a hammer or use a stripper.
- Remove dust and minor dirt from the base. To do this, you can use a dry brush.
- Before using putty, you will need to apply a primer to the base. It helps improve adhesion. If the humidity in the room is too high, it is better to opt for a primer with antiseptic properties. This way you can prevent the formation of fungus and mold on the surface. You can apply just one coat of primer, but you will need to make sure that there are no untreated areas on the surface.
Starting putty
The starting layer of putty will eliminate serious defects on the surface; it turns out to be quite thick. If the unevenness is significant, several layers of putty material may be required. You need to dry the coating for as long as indicated on the package.
To prevent the mixture from sliding down the wall, you can use a painting net. This way you can also make the surface more durable and the coating will not crack.
Final work
After the starting layer of putty has dried, you can begin applying the finishing coat. This layer is less dense; it will mask the rather rough starting coating. The manufacturer indicates the drying period and mixing technology on the container.
The finishing layer of putty material is not intended to correct unevenness on the base. For this purpose, starting putty is used. When the finishing layer has hardened, you can begin the next stages of finishing work.
It is possible that an additional coat of primer will need to be applied before using the paint. This depends on the type of primer material.
Should I use beacons?
The use of a beacon system is relevant if there are serious defects on the base. If the unevenness is not very strong, you can do without beacons. In case of significant unevenness, it will be necessary to apply a fairly thick layer of putty material and use a specific technology.
By contacting a hardware store, purchase special beacons. Consumers are offered galvanized products in different sizes. Using putty material, fix the beacons to the base. To install them as level as possible, you can use a level. When the material hardens, the devices will be securely attached to the surface.
After application, make the starting coating between the beacons even using the rule. This is much easier to do when there is a small gap between the devices. To make the putty layer as dense as possible, break the process into certain stages. It is better to first apply the material to the wall at a distance of half a meter from the floor, then you can move on to other areas. If you do everything wrong, it is quite possible that the putty on top will flow onto the bottom coating, and the surface will turn out uneven.
Related article: How to attach decorative stone to a wall
When the putty material has hardened, remove the beacons, fill the holes and make the base completely flat. If the beacons remain, traces of corrosion may occur. This finishing method is very complex (a lot of time and effort is spent when carrying out such work), so it is used infrequently.
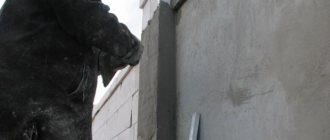
Solution application technology
Facade putty can be applied manually and mechanically. The mechanical method requires a special unit. When using it, the requirements for the uniformity of the solution consistency increase.
The disadvantage of this method is that the putty is not applied evenly. Therefore, they often prefer to use the manual method. To work, you will need two spatulas, wide and narrow.
It is recommended to follow the following rules:
- The surface is pre-cleaned of dirt.
- Putty is first applied to all recesses, depressions, crevices, cracks, and the main irregularities are eliminated.
- Before applying a new layer, you need to allow enough time for the previous one to dry. The minimum time must be specified in the instructions.
- The drying period of the last layer is longer than the first. The putty must be protected from sudden temperature changes and exposure to direct sunlight.
- Do not apply putty in rain, snow, or sharp gusts of wind. The permissible temperature for work is from 5 to 30 C. Freshly applied putty must be protected from drying out and waterlogging.
- The wall is covered with mortar using beacons. The first stripes show the required layer thickness, then further work is carried out.
- After the putty has completely dried, the walls are sanded with abrasives.
Remember that:
- The instructions may indicate small “tricks” for this composition or working with it. Study all recommendations carefully.
- If you plan to paint the facade after puttying, then select a light composition, it will preserve the brightness of the paint.