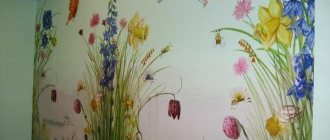
The interior of almost any room will become more attractive if you paint a picture of flowers on the walls. It can organically fit into almost any style, from classic to hi-tech and loft.
Therefore, you should not think that the room must necessarily be for women or children: a flower design will look appropriate almost anywhere.
How to create a pattern on wallpaper with your own hands. How to prepare a surface for drawing
First you need to decide where exactly the drawing will fit into the overall decoration of the room so well that it will become the main highlight of the room. Then free the working surface of the wall from old wallpaper or paint, then apply a layer of plaster and wait for it to dry completely. Such careful preparation is not needed if you plan to use the stencil technique of drawing - you can draw directly on the wallpaper. Also, the wall does not require cleaning if it is covered with wallpaper intended for painting (for example, non-woven or glass wallpaper).
How to create a pattern on wallpaper with your own hands. Tools for creativity
To decorate your walls with an original image, you may need:
- regular brushes. Minimum quantity – 3 pieces with different pile thicknesses;
- sponge or roller. Use them to apply fragments of the design to the work surface using a stencil;
- paints. Choose any - gouache, acrylic or tempera. Give preference to medium-consistency paints that are not afraid of moisture, thanks to which the hand-made image will be durable;
- palette. This device for mixing paints can be purchased exclusively upon request. This board is convenient for creating new shades, making test strokes and practicing them.
Color palette of the drawing
The palette of paints for walls depends on the type of paintwork. Due to the greatest prevalence of acrylic materials, it will be repelled from them. To start painting, you will need to purchase the following colors:
- The minimum set is yellow, red and blue.
- It is advisable to additionally take a purple color, since mixing blue and red often leads to a dirty shade.
- Orange and green will help diversify the painting.
- To achieve various light shades, the main color is diluted with white paint (whitewash).
- If it is necessary to paint dark areas, colors of the corresponding colors are purchased.
Drawing on wallpaper with your own hands: to make the work go smoothly
Wall art will give you real pleasure if you take into account some important nuances:
- If you only recently picked up paints and a brush, give up the idea of turning into reality a drawing consisting of 4 or more shades. As a beginner, 3 colors will be enough for you: their skillful combination can bring amazing results. In the end, you can even use paint of the same color. For example, black gives birth to enchanting abstract paintings;
- the drawing should be a logical reflection of the character of the room. The spirit of childhood should live in a child’s room, so it is best to decorate the walls there with images of the child’s favorite characters or funny animals. The restrained interior of the living room can be emphasized with an abstract composition of geometric shapes. The relaxed and calm atmosphere of the bedroom will be complemented by a picture of a forest or delicate flowers;
- Think carefully before you put the first touch on the wall. Don't grab the first eye-catching image you find online. It is important to draw not what is fashionable, but what will impress and lift your spirits.
Stickers, wall panels and tapestries with flowers
Another interesting option for interior design is to purchase special panels with flowers made from fabric. Apart from this, you can opt for flower wall stickers. Their versatility and ease of installation will make them the best choice, capable of quickly and effectively transforming the interior of an apartment. By the way, an extremely important task is the correct selection of the combination with the main background of the walls of the room.
You need to pay particular attention to this in cases where the walls of the room are covered with combined wallpaper, since not every companion shade will match the color of the pattern. In addition, do not forget about harmonious combination with curtains, window frames and other decorative elements of the interior space.
We hope that you now have more clarity on how to properly paint a flower on the walls of a room and what alternative options exist in the market. Good luck with your creativity and renovation!
Article on the topic: We independently cover the steps of the stairs with tiles and porcelain stoneware
DIY drawing on the wall: let's get to work
If the image you like involves drawing a picture on the background, then you need to start by drawing the background. The paints are spread over the moistened surface, having first lightly moistened the wall with water.
Draw a sketch onto the finished background. To draw a sketch, you can use a simple pencil and carbon paper. If the drawing is large, you can transfer its enlarged details to the wall in cells. To do this, the drawing on the paper and the working surface of the wall are drawn into squares, and then the image is carefully redrawn from the paper onto the wall. There is another way to create a sketch on the wall - gunpowder. Small holes are made in the contours of the drawing on the paper, then it is applied to the working surface and all holes are filled with a coloring agent, for example, charcoal. As a result, a dot pattern appears on the wall, which can be improved further.
To create large drawings, mark the wall using a level, otherwise the finished image may turn out skewed.
Now it all depends on the imagination and skills of the author of the drawing. The only thing you need to remember is that the already designed elements of the image must dry completely before the next fragments are covered with paint. A powerful stream of air from a hairdryer or fan will significantly speed up drying. However, it is better not to rush anywhere and let the drawing dry on its own.
How to draw correctly
By the way, flowers can be made either separately, thus being an independent plot, or as part of any composition, for example, with views of nature, against a background of wood, exotic birds, etc. By the way, you can order drawing done by qualified specialists. On the other hand, if you have the necessary knowledge and study certain instructions, it is quite possible to complete all the work yourself, with your own hands.
We list the main stages of applying a flower pattern to the wall:
- To begin with, we should take into account the fact that we cannot do without high-quality preparation of the wall surface itself. Some experts advise choosing a surface such as wallpaper intended for painting. They could be a really good option.
- After you decide on the surface, you will need to choose the type of pattern and, of course, select a specific sketch from which to draw. Draw this sketch on the wall using a simple pencil.
- After this, you will need to choose the right paints to fill in the outlines of the sketch. If we talk about the choice of paints, then the best option is probably acrylic. As for the color, it largely depends on the type of flowers that you are going to paint on the walls of the apartment. In addition, often not one color can be used, but a whole combination of shades, such as dark red, light pink, soft blue, blue, green (for drawing the stem and leaves), etc.
- After filling the outlines with paints, the design of flowers on the wall of your room is almost ready. All that remains (if necessary or if you have such a desire) is only to paint on the additional elements of the drawing, which were mentioned just above.
Related article: How to choose tulle for your window - designer tips
Attention! If you don’t feel like an artist, but at the same time you want to make a drawing of flowers on the wall of the room with your own hands, don’t despair. To do this, you can always use a stencil by ordering its production from a specialized company.
So, your drawing is ready! Enjoy the image yourself, and also delight your loved ones and guests!
Drawing on the wall using a stencil
For those who doubt their abilities, stencils will be an excellent solution, with which you can decorate a wall with a pattern. Thanks to this device, you can create your intended design on the wall quickly and easily. You can buy a stencil you like or order it from a printing house based on your own sketch, but it’s not always possible to quickly find what you want. In this case, a plate with a pattern or design cut into it is made by hand.
How to make a stencil with your own hands
Cutting your own stencil is not difficult. Take a sheet of thick cardboard and draw your intended design or pattern on it. Using a sharp blade, carefully cut out the image along the outline. The stencil is ready: the empty silhouette on a sheet of cardboard remains to be attached to the wall and filled with a decorative coating. A plastic paper folder is also suitable for creating a small stencil.
How to attach a stencil to the wall
If you decide to apply a drawing to the wall using a stencil, remember that after painting each fragment of the image, the stencil itself must be cleaned of excess paint. This, of course, is troublesome, but if you neglect this recommendation, the multi-colored paint will mix and the stains will ruin your drawing. Secure the cardboard or plastic stencil tightly to the wall with regular tape. When removing the stencil, be careful not to accidentally tear off part of the primer or wallpaper along with the fastening.
Popular stencil ideas
Butterflies, stars and flowers can be successfully incorporated into some parts of the room. Despite the fact that these simple designs are the most popular, in different apartments they give the room a completely original look. With the same pleasure, the authors of wall “paintings” exploit the image of a tree. This is where you can fantasize with all your might! Japanese cherry blossoms in bloom, fruit and fairy trees, silhouette trees, trees of life and family look very impressive wherever they are depicted. In addition, images of cats and birds are very popular - their presence will enliven any interior. In the nursery, using luminous paints, you can create a real starry sky on the ceiling or decorate the walls with cute fairy-tale houses.
At the end of the work, the image must be varnished. This matter cannot be rushed, otherwise the drawing will “float” and be hopelessly damaged. The varnish is applied to the image in small portions; brush strokes should be short and restrained. Having covered some part of the drawing, the varnish must be dried quickly, otherwise it will flow down. The work can be considered complete when the varnish is completely dry.
general information
When planning a renovation, many people think about something original. If you want to create a truly unique and unlike any other interior in the bedroom, then you can pay attention to such a technique in apartment design as creating drawings on the walls. It is the drawing on the wall in the bedroom that will help make the atmosphere in the room comfortable and cozy. You will be able to enjoy the beauty of a work of art, relax better and fall asleep faster.
Drawings of large flowers are one of the most frequently implemented ideas.
By the way, an interesting fact is that drawings can be applied not only to the walls of the bedroom, but also to the ceiling. Often, all the work can be done independently, without the help of specialists.
The interior of the room, in which such an unusual and even rare, but at the same time, wonderful design technique was used, will not look ordinary. In addition, it is often with the help of an original illustration on the walls of a room that it becomes possible to hide some imperfections on the walls that would manifest themselves if we used standard wallpaper that is familiar to all of us.
An original method of creating a drawing on the wall with your own hands
What some people lack in creativity, they make up for with resourcefulness and ingenuity. There is one technical device with which you can easily decorate a wall with any design you like - this is a regular projector. You just need to highlight the image on the wall and outline all its fragments with a pencil - here you have a finished sketch! All that remains is to color it. Be sure to take note of this convenient technique.
How to create a pattern on wallpaper with your own hands. Learning from children
A classic children's prank is drawing on wallpaper. With the help of paint and his own fingers, the baby expresses himself. Did you know that some progressive masters have used this children’s fun as the basis of their creativity? From under our fingers scurrying along the wall, real masterpieces can emerge! Naturally, such an original approach to decorating walls in a room requires a certain skill, but who’s stopping you from trying your hand and consolidating your skills on a large sheet of whatman paper? The beauty of such creativity is that the drawings created directly with the fingers are unique, since it is very difficult to repeat something like this. Any non-toxic paint without a pungent odor will be suitable for the job. And remember the only rule of “children’s” creativity - do not put too much paint on your fingers so that it does not flow.
Options with stickers and panels
In addition, you can also use such an interior decoration option as installing panels on the wall of the room. As an option, you can also stick on special vinyl stickers (stickers), which are designed for quickly decorating walls with your own hands. In fact, both of these methods have certain advantages, which are that you do not have to have any artistic abilities.
The main task that faces you in this case is the correct choice of tones to combine. The fact is that the color of the picture should be successfully combined with the shade of the wall, and in general, harmoniously coincide with the style of the room. The main difficulty in such cases relates to those situations when companion wallpaper is used as decoration in the room. It is also extremely important how you can successfully combine patterns not only with the color of the wallpaper, but also with the style of home textiles, curtains and drapes, decorative elements and furnishings. DIY drawings on the wall of the house, flowers:
Drawings on the wall with a roller
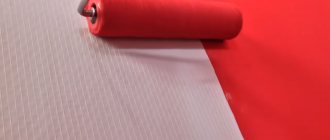
To decorate a wall with an elegant pattern, there are special rollers with a convex image on a rubber surface. Some famous designers even came up with original patterns for the relief part of the miracle rollers. Clean and prepare the surface, decide on a suitable paint color and get to work. To apply the design, use a roller using the standard movements for painting walls.
Drawings on liquid wallpaper in the interior
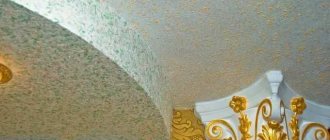
Liquid wallpaper is one of the most popular decorative coatings today. The novelty was of interest primarily to people with a creative worldview: on such wallpaper you can create unique designs with your own hands. The product's capabilities are a successful symbiosis of the positive qualities of ordinary wallpaper, plaster and paint. We do not undertake to say that creativity on liquid wallpaper is easy to master - this, of course, depends on the complexity of the ornament or picture. However, the end result will definitely not leave you indifferent. We invite you to discuss the features of wallpaper specifically designed for drawing.
What is liquid wallpaper
Due to its high aesthetic qualities, liquid wallpaper belongs to the same category of coatings as decorative plaster. The material was composed of cellulose and silk fiber, generously supplementing this mixture with a variety of dyes, glitter and granules. To fix liquid wallpaper, use KMS glue. The method of application and the finished appearance of this finishing substance also resemble decorative plaster. Work with liquid wallpaper using a trowel or spatula.
The ways to use this decorative coating are incredibly diverse. An important distinguishing feature of liquid wallpaper is the ability to apply it not only to horizontal and vertical walls, but also to surfaces with complex shapes. Thus, the material adheres perfectly to surfaces made of OSB, cement, brick, wood, metal, clay, holds on and does not come off for a long time. Liquid wallpaper is easy to combine and create applications of varying levels of complexity.
Drawings with liquid wallpaper: advantages and disadvantages
There are many ways to decorate your home with original abstract patterns, designs or wall art. For example, you can realize your plans using photo wallpaper or work on an image made of mosaic plaster. You can also apply the design to the wall with regular paint. Meanwhile, many today choose liquid wallpaper and there are many reasons for this:
- Drawings on the liquid wallpaper of a room are not afraid of sunlight, which cannot be said about photo wallpapers, which fade with prolonged contact with the bright sun. This decorative covering is an excellent option for decorating a room with windows facing south.
- The condition of the decorative coating is not subject to drafts and cold air - it dries quickly in any conditions.
- The image on liquid wallpaper will not fade under a layer of dust over time. Liquid wallpaper cannot be washed with water, but it can be vacuumed - the design will not suffer at all.
- Liquid wallpaper will give you a pleasant tactile sensation - its surface is warm and soft and does not leave a “scratching” sensation after touch, like mosaic plaster.
- Damaged liquid wallpaper can be easily repaired. After retouching, you won't even be able to find the place where the flaw was. This is a great opportunity to always keep the wallpaper looking neat in a home where there are small children and pets. It is no coincidence that liquid wallpaper is often used to create designs on the walls of children's rooms.
For all its advantages, liquid wallpaper also has disadvantages: it differs from most decorative coatings in its high cost and complexity of application.
Preparing to work with liquid wallpaper
For the job to proceed smoothly, you need to have all the necessary tools on hand, a prepared wall and know how to properly dilute the solution.
First of all, treat the work surface with a special antiseptic and waterproofing agent that prevents the appearance of mold spores. You may need to spend some time puttingtying and priming the wall for good adhesion. Now make sure that the wall is perfectly smooth, even and white, otherwise the image you have in mind on liquid wallpaper will not work. Applying a decorative coating to a surface of uneven height will result in different thicknesses of the applied layer. As a result, the image will be thicker in some places and thinner in others. The white color of the wall is needed so that the color of the liquid wallpaper and the pattern on it is uniform.
After treating the wall, it's time to work on the liquid wallpaper mixture. Prepare the solution according to the instructions on the package. Decide in advance what color scheme you will use in order to mix the right amount of liquid wallpaper of one shade or another.
During the work you will need the following tools:
- Plastic trowel. The main tool for uniform application of liquid wallpaper and limiting the contours of the pattern.
- Small spatula. Makes it convenient to distribute the wallpaper mixture into small areas.
- Hopper. Allows you to spray liquid wallpaper en masse over the entire wall.
- Stencils are the basis of future drawings.
- To some extent, your hands can also become a tool: from an environmental point of view, liquid wallpaper is absolutely safe (it is most convenient to transfer the mixture to the work surface with your hands, and not with a spatula).
How to create a pattern on liquid wallpaper
- Stencil image
Fix the stencil on the wall with tape and distribute liquid wallpaper in the slots. After applying the material, carefully peel the stencil off the wall. To create a large pattern or ornament, the procedure of filling the stencil with liquid wallpaper will have to be repeated more than once. As you understand, the cardboard quickly gets wet and you have to cut out several stencils. Therefore, it is important to foresee in advance how much effort the desired design will require from you - sometimes it is easier to buy ready-made reusable stencils.
Special devices are made on the basis of a polymer film, which makes them resistant to water. It is easy to remove excess liquid wallpaper from such a stencil using a spatula and mix it again with the total mass.
A single pattern can be transferred to the wall using a stencil made of plain paper. If the stencil will be used several times in the design of the wall, you will need a cardboard stencil. To decorate a large area of the wall, you need to stock up on several cardboard stencils or purchase a non-wetting plastic stencil. The video will tell you how to make a stencil yourself:
- Image from sketch
To create a drawing, guided by a finished sketch, you will have to work hard, armed with a spatula and a trowel.
The work is carried out in several stages:
- A sketch of the future image is drawn on the wall with a simple pencil: the contours and important details are clearly drawn, while noting what color the different parts of the drawing will be. Simple drawings do not require special creative abilities from the author, but the creation of complex compositions is best entrusted to a person with high artistic abilities.
- We begin to apply a decorative coating to the drawing. Areas that are not adjacent to each other are filled first. Within their contours, the mass is applied and distributed with a trowel. The mixture that has protruded beyond the boundaries of the pattern is collected and tamped down using a trowel, placing the tool at an angle to the wall. As a result, the selected areas should be evenly covered with a mass of liquid wallpaper.
- Similarly, you need to apply a decorative coating to the remaining parts of the image that are not connected to each other.
- Now you need to wait for the applied mass to dry. The process can be speeded up with a hairdryer.
- When you are sure that the parts of the pattern decorated with liquid wallpaper are completely dry, proceed to fill the adjacent areas with the decorative mixture.
- Where liquid wallpaper needs to be placed and spread over small areas, use a spatula. These areas need to be filled last; after the mixture has dried, they will need to be smoothed over with a trowel. It is most convenient to work when the remaining decorated parts of the image are completely dry.
Drawings based on liquid wallpaper for the kitchen
When thinking about the possibility of transforming your kitchen with liquid wallpaper, keep in mind that this type of decorative coating is not used to decorate the entire area reserved for the kitchen. The catch is that liquid wallpaper does not tolerate water and quickly deteriorates after contact with moisture. And in the kitchen, there is always a risk of splashing a beautiful wall with water or other liquids that are difficult to remove, so it is better to decorate the kitchen work wall with more stable materials: mosaics or regular tiles.
The best option is to apply liquid wallpaper to the wall farthest from the work area. Even if one area is somehow stained or damaged, it can be easily restored. To do this, the damaged area is moistened with water from a spray bottle, cleaned and replaced with a new fragment.
Before decorating the kitchen with a pattern on liquid wallpaper, the working wall must be thoroughly cleaned and primed. Next, the work progress is as follows:
- Apply the mass of liquid wallpaper within the contour of the image so that it protrudes beyond the edge of the picture by 1 mm.
- Take a small rubber spatula and carefully move the entire mass with its edge back beyond the contour of the design - this will create the edge of the contour border. If the pattern is very small, you can use a trowel.
- The decorated element must dry completely. Only after this can the next detail of the drawing be joined to it. Step by step, the entire surface of the image is filled with decorative mass.
- If the kitchen decoration allows for a pattern on the wall consisting of clear contour lines, they can be drawn with a marker on already dry wallpaper. People who are not afraid to create use beads, metallic threads, miniature and large beads, etc.
Finishing your kitchen with liquid wallpaper according to your individual design can exceed all your expectations. A diverse palette of liquid wallpaper allows you to mix abstract paintings from the most unusual colors. When mixing liquid wallpaper of different colors, you never know what will happen - the final shade will appear only after the decorative mass has completely dried, but the result will pleasantly surprise you in any case. You can also create different structures of liquid wallpaper: for example, decorate a smooth surface with a relief pattern or “cut” the wall into stripes and waves of different thicknesses with a notched spatula. By experimenting with the texture and density of liquid wallpaper, kitchen walls can be decorated with borders and impressive images imitating marble, stone or brickwork.
