Liquid wallpaper for the ceiling is a wonderful option for ceiling decoration, which has become increasingly popular in recent years. Such ceilings look not just stylish, but luxurious. The environmental friendliness of the material captivates the consumer who is at least a little concerned about his health. A long service life of the coating is also important for a person who does not want to turn his life into endless repairs. In a word, this material has plenty of advantages, and as for the difficulties of the production process, within half an hour after the start of work, you will already be confidently working with a trowel, improving the appearance of your home.
Liquid wallpaper for the ceiling: cheaper with your own hands
In our difficult times, inexpensive repairs have become relevant. You can, of course, save on material. But such savings are questionable, because cheap material will most likely not last long.
As for hired labor, there is no guarantee that this repair will be done for you better than you can do it yourself. The fact is that in our age of total unemployment, many “teams” have appeared that are not specialists at all, but pass themselves off as such.
After watching 2-3 videos about applying liquid wallpaper to the ceiling, you will not only have a complete understanding of this work, but you will also be able to do this work perfectly yourself. You will also understand that this is much better and easier than gluing traditional paper, vinyl or non-woven wallpaper to the ceiling. In order to apply liquid wallpaper to the ceiling, you will need the wallpaper itself and a very simple tool.
Liquid wallpaper is a dry mixture used for interior decoration of various rooms.
The mixture may consist of the following components:
- From cellulose;
- Made from cotton;
- Made from wool;
- Made of silk;
- From CMC glue;
- Made from acrylic.
The last two components are the binder. The first four are applicable depending on the type of liquid wallpaper.
Kinds:
- Cellulose;
- Silk. The most durable and most resistant to fading.
- Silk-cellulose.
Cellulose and silk-cellulose wallpapers are somewhat inferior in quality to silk wallpapers, and, of course, cheaper.
Please also pay attention to the rules for choosing wallpaper for the bathroom:.
Tool:
- A container where you need to pour liquid wallpaper for swelling;
- Trowel, trowel or spatula;
- Plastic grater;
- Spray.
Of course, the spray gun will provide some savings in material, but... as a rule, this tool is successfully replaced with the same trowel.
Surface preparation involves removing old wallpaper or whitewash.
Liquid wallpaper can be applied to old surfaces painted with any paint, as well as to glass wallpaper. Before applying liquid wallpaper, the surface is primed.
Advantages and disadvantages
The main advantage of this material is its ease of preparation and use.
To work, you do not need a lot of space, as, for example, to spread glue on traditional wallpaper.
In addition, this finishing option is not too demanding on surface preparation.
On the contrary, it is even able to hide minor defects, cracks and irregularities, making your ceiling uniform and beautiful, and absolutely without joints.
You don't need to be a pro to apply liquid wallpaper; it's really difficult to mess anything up.
This allows you to avoid rework, and at the same time unnecessary hassle and financial costs.
This coating is very convenient to use.
Thanks to its porous structure, it is breathable: its use does not create a greenhouse effect, as, for example, when covering with vinyl wallpaper.
In addition, it does not ignite during a fire, is environmentally friendly, does not emit harmful substances during temperature changes, does not attract dust, and provides reliable heat and sound insulation.
It seems that such plaster has no disadvantages, but this is not entirely true.
The first and main disadvantage is the relatively high cost.
True, it should be noted that every year more and more affordable offers appear on the construction market.
Another imperfection of this finishing method is that although such wallpaper is positioned as moisture resistant, it is still not possible to wash it from heavy dirt.
If you accidentally splash them with something, it will be easier to cut out the damaged area, dilute the rest of the same dry mixture and cover the area.
And the last thing worth noting is that there is less variety of shades and textures than classic roll wallpaper.
It seems that leading manufacturers of liquid wallpaper will be able to overcome this shortcoming over time by coming up with new technologies and design solutions.
How to apply liquid wallpaper to the ceiling: do it right
The technology for applying liquid wallpaper to the ceiling is not fundamentally different from applying it to the walls.
Preparing liquid wallpaper for work is as follows:
- Soak the material from the bag in water at a temperature of 25-30 degrees 12 hours before starting work;
- Each package is prepared separately. Glitter is usually poured in first. Then, after preliminary shaking the contents of the package, in order to thoroughly mix the components, pouring the mixture into water, we achieve a homogeneous mass. It is best to do this with your hands, without fear for your own skin - wallpaper is made on the basis of natural substances. Glitter, by the way, is often not used at all.
- The resulting mixture is again placed in the bag and left to swell for 12 hours.
- After 12 hours, the material can be mixed, divided into required portions and stored, if necessary, for two weeks.
- The walls are primed shortly before wallpaper is applied. The primer is applied in two layers, ensuring the necessary drying. It is not necessary to level the walls perfectly. As for the primer, it is first applied along the ceiling area, and the second layer is applied transversely.
- The finished material should stick well to the wall, without slipping or peeling. If the mixture is not wet enough, you can add water per liter per package. The material is applied with a stainless steel trowel (spatula), in a layer of 1-2 mm.
If you need to renew part of the coating or re-glue it completely, a layer of new coating is applied directly to the old layer. This quality of the material allows you to apply patterns, as well as designs of a different color, and in general, use all sorts of techniques for applying liquid wallpaper of a different color, boldly changing the familiar interior. Anything is possible, as long as everything is done correctly!
During work, the trowel (trowel) should be held at an angle of about 15 degrees, and not with its entire plane.
The next new portion of material must be mixed with the previous one in order to avoid different colors of the coating.
When the ceiling is ready, you need to lightly smooth the material applied to the ceiling with a trowel soaked in water.
What comes first - liquid wallpaper or suspended ceiling
A stretch ceiling is a complex suspended structure made of fabric covering and profile. When asking the question: “what to start with first, liquid wallpaper or suspended ceiling,” you should decide on the amount of work planned in this room.
Namely:
- If you plan to completely renovate both the walls and the ceiling, then it is wiser to first start with installing a stretch ceiling.
- If the walls are already covered with liquid wallpaper or replacing them is not included in the plans at all, then there are no options; the ceiling is installed on finished walls.
In the latter case, it is wise to cover the walls with film to prevent dust and debris from settling on the wallpaper.
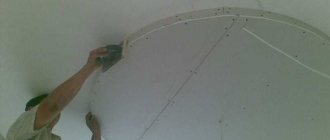
Typically, the base for leveling walls is made of plasterboard.
Stretch ceilings can only be installed on completely dry walls.
Liquid wallpaper for the ceiling: consumer reviews
A relatively “young” material called liquid wallpaper has been successfully “conquering” more and more living spaces in apartments and houses for several years now.
Due to the great many positive qualities of liquid wallpaper, there are a lot of reviews, and all of them are practically positive.
Liquid wallpaper for the ceiling is a very successful material that can significantly change the interior of your home.
So, reviews:
- Easy to apply to the surface, although this has not been done before;
- It is very easy to repair damage caused by children or when rearranging pieces of furniture that have a large height;
- It is easy to repair cracks that appear in the ceiling;
- Not only sound insulation has improved, but also the acoustics in the room;
- They dry quickly, are not afraid of drafts, and this quality speeds up drying;
- The ceiling surface has no joints; it seems that one huge sheet is glued to the ceiling;
- No cracks or small unevenness in the ceiling are visible;
- Dust does not settle on the ceiling;
- If necessary, it is easy to remove a layer of liquid wallpaper;
- There is no need to remove the old layer before applying a new one. A new layer can be applied on top of the old one.
To all the reviews, we can also add that this wallpaper is an environmentally friendly material, as it contains only natural ingredients.
Liquid wallpaper perfectly withstands temperature changes and shrinkage of the house, which is important for dachas and country houses.
Liquid wallpaper is not subject to fading or peeling for a long time - up to 15 years.
You can find out what wallpaper to choose for decorating your kitchen in the following article:
How to prepare the ceiling?
Before you begin preparing the ceiling, you should remove all unnecessary items from the room or move large furniture to the side. Next, you need to remove the chandeliers and dismantle the ceiling lights. Electrical wiring must be insulated. It is better to turn off the electricity in the room.
If the ceiling is made of plasterboard, then the gap between the sheets should be filled with putty and rubbed with an abrasive tool. After this, apply a primer to improve the adhesion of the plaster layer.
If the ceiling was previously covered with wallpaper or paint, this old layer should be cleaned, washed from dust, apply several layers of primer and after it has dried, you can begin laying the liquid plaster layer.
Liquid white wallpaper for the ceiling: reasons for popularity
The vast majority of consumers are accustomed to seeing white ceilings, and this stereotype is firmly entrenched in the subcortex, especially among conservative people.
However, everything depends not only on conservatism or stereotypes that have developed over almost centuries. It also comes down to such an aspect as design.
Fortunately, in construction and online stores there is an ample selection of wallpaper of any color. White color is no exception.
So, the main reasons for choosing:
- White liquid wallpaper on the ceiling visually expands the rooms.
- Not everyone likes colored ceilings.
However, as an intermediate (between color and white), there is a variant of light colors: light gray, or pale beige, etc. It's all a matter of personal perception, basically. And one more thing: before choosing wallpaper, it’s not a sin to look at photos with different color options, as well as videos.
You will find even more information about the benefits of liquid wallpaper in the following material:.
Features of the material
How to glue with your own hands
The versatility of the material lies in the fact that they look equally good on any surface in the room - on the ceiling or walls, and they can also be combined with other finishing materials. The plasticity of the composition, which resembles the method of application of plaster, makes it possible to finish structures of complex shapes.
If we talk about the ceiling, then these are multi-level plasterboard structures of bizarre shapes. After drying, liquid wallpaper creates a durable monolithic coating without joints or seams, which is its distinguishing feature from ordinary roll wallpaper.
How to apply it yourself, photo
Liquid wallpaper is sold in the form of a dry mixture, which includes cellulose or textile fibers and various additives. Some manufacturers offer a ready-to-use solution. It will be enough to dilute the dry color mixture with additives with water.
Instructions are indicated on the packaging. The third option is when only the dry raw materials themselves are sold, and the color and additives have to be added to the composition with your own hands.
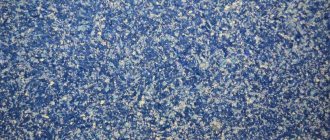
Variety of colors and textures
Liquid wallpaper received its second name - “silk plaster” for its silky coating that is pleasant to the touch (with silk fibers in the composition) and the method of applying the material.
Ceiling liquid wallpaper: how to glue
There are several external features of this material:
- The texture of the coating depends on the size of the fibers that make up the dry mixture - it can be almost smooth or have a pronounced texture;
Structure, learning to glue
- As mentioned earlier, the dry mixture can be sold already colored or white , which allows you to give it any desired shade using color;
Package
- The dry mixture may contain additional additives that enrich the texture and give the coating a more expressive appearance;
Colored liquid wallpaper is sold as a ready-made dry mixture
- Depending on the type of fiber, products can be cellulose, cotton, silk or combined.
The roughness of the finished coating depends on how high the expressiveness and size of the fibers that make up the material are. You can also add originality to the appearance of the finished coating using various additives. It can be stone chips, metallic sequins, silk or cotton threads.
Application options
The relief can be enhanced by using a special technology for applying liquid wallpaper, when tools in the form of a texture roller are passed over the wet layer of the laid material, creating the necessary pattern on the coating. As for the color range of the material, manufacturers offer a wide range of shades.
Liquid wallpaper on a wall decorated with moldings
Important! When applying liquid wallpaper to a wall, do not be afraid that the wet layer differs from the color of the dry mixture - as it dries, the coating will lighten to the stated shade.
In cases where problems arise with choosing the required shade, you can use special water-soluble colors, with the help of which the white mixture acquires the desired color.
Color
Important! The material at the base of the mixture of liquid wallpaper affects not only the decorative effect of the coating, but also its performance. The price of the material also depends on the selected components.
Colored additives for home preparation
Positive traits
Liquid wallpaper on the ceiling
Among the positive qualities of liquid wallpaper, used not only on walls, but also on the ceiling, the following can be noted:
- When choosing a finishing material, special attention is paid to its decorative effect, which liquid wallpaper undoubtedly has. They have the same structure due to the homogeneous fibers used in their production. Different appearances can be achieved due to the fact that fiber fillers have a rich color palette and different shade saturations. The most expensive, included in the line of exclusive liquid wallpapers, are those that, after application, create a canvas with some pattern, thanks to the special distribution of fibers in the composition. Conventional liquid wallpaper is characterized by a chaotic distribution of fibers, which does not reduce the effectiveness and decorativeness of the finished result;
Decorative surface
- The unique quality of this finishing material is its high maintainability. If the integrity of the coating is compromised due to mechanical impact or the fragment has received impurities that cannot be removed, then repairs can be performed on your own. The damaged area is moistened with plain water and removed with a spatula, then a new layer of wallpaper is applied to this area and smoothed. Once dry, the repaired area will be completely invisible. If there is a cat in the house, scratches sometimes appear on the wallpaper. In this case, you don’t even need to remove part of the material - just moisten the damaged area with water and smooth it out.
On the ceiling, liquid wallpaper can be combined with stretch fabric
Advice! In order to promptly restore the damaged fragment of the coating, it is necessary to leave a small supply of the finished mixture. It will dry out over time, but it can always be restored to working condition by diluting it with water.
- Due to the fact that the texture of the working mixture resembles a plaster composition, there is no need to carefully level the ceiling surface before applying liquid wallpaper. The material fills minor depressions and cracks, leveling the surface. The only thing that is required is to pre-paint the ceiling with white water-based paint so that the shade of the coating has the necessary saturation and color;
- Liquid wallpaper is an environmentally friendly material due to the use of natural ingredients in its production. This allows them to be used for finishing bedrooms and children's rooms;
Wallpaper for the ceiling
- The creation of optimal microclimatic parameters in a room is also influenced by the vapor permeability of the material;
- Liquid wallpaper has heat and sound insulating qualities, which is important when using it to decorate the ceiling in a multi-story building;
- Removing dirt from the ceiling is quite problematic, however, with liquid wallpaper such work will have to be done less often, since static tension and, accordingly, dust do not accumulate on their surface;
In the children's room
- Liquid wallpaper has a long service life of 15 to 20 years, which is important when using it on the ceiling, since repairing this surface always involves a lot of physical effort. When exposed to sunlight, liquid wallpaper does not fade and does not react to temperature changes;
- Thanks to its elasticity, this material can be used in newly built houses without fear that it will deform during the natural shrinkage of structures;
Using liquid wallpaper, you can apply any color image to the surfaces of walls and ceilings.
- Working with such material does not require special construction skills and knowledge. The material is easy to apply and also easy to remove if necessary;
- Using stencils, you can create unique designer patterns and ornaments on the ceiling surface;
Liquid wallpaper pattern
- The coating is smooth and monolithic, with no seams or joints. Thanks to its liquid texture, the solution is easy to apply to hard-to-reach places and corners of the room.
Disadvantages of liquid wallpaper
Ceiling decoration with liquid wallpaper
Among the disadvantages of liquid wallpaper, it can be noted that the material is not moisture resistant, but when used on the ceiling in living rooms this is not a problem. If liquid wallpaper is intended to be used in the kitchen, then the surface of the finished coating is treated with acrylic transparent varnish.
In this case, the ceiling can be wet cleaned, but the vapor permeability of the material is lost. Also, liquid wallpaper is a fairly expensive finishing material.
Important! The cheapest option for liquid wallpaper are those that contain cellulose, but over time such wallpaper fades and loses its visual appeal. Compositions with cotton or silk fibers (30 - 40%) are more durable.
Technology of applying liquid wallpaper to the ceiling (video)
In conclusion, I would like to note that even a completely inexperienced repairman can work with liquid wallpaper. In addition, during renovation there will be no odors that irritate the sense of smell in the rooms, which allows you to carry out renovations without causing any inconvenience to your household. The process of applying liquid wallpaper is clean, that is, there will be no usual debris during work. You can ventilate the room immediately after finishing work, without waiting for the wallpaper to dry completely - this will not have a negative effect on it. In a word, such a renovation has a lot of advantages! Liquid wallpaper is used in the living room, hallway, and bedroom. It is not advisable to glue in rooms with high humidity! Go for it, and everything will work out great for you!
What types of liquid wallpaper are there?
There are two main types: professional mixtures and amateur ones. The first ones are without dye, but they are much more affordable. But the master needs to know exactly how much paint to add to the mixture.
The second option is completely ready for use, has a specified color. That is, just add water.
In addition to this division, liquid wallpaper differs in the types of main filler:
- Cotton
- Silk
- Cellulose
- Blend of silk and cellulose
That is, the more natural the material, the more expensive these coatings are. Silk ones are the most expensive, but they are worth spending money on. This is a fairly durable coating and the cotton version is much inferior to it.
Cellulose mixed with silk is an alternative option, it is more affordable, has all the advantages of natural fillers, but is not a completely natural substance. However, this option is no worse and can also be considered an environmentally friendly solution.
Examples of liquid wallpaper on the ceiling (interior photo)
Preparation of wallpaper composition
Advice! Shake the packet of mixture before use. This step will prevent the appearance of small lumps when diluting the composition.
Prepare a container with a capacity of about 8 liters and dilute the contents of one package in it (Choose round-shaped dishes, no more than 30 cm deep).
You can use any utensil; after work, all remaining mixture can be easily washed off with water. To dilute the composition, use clean warm water. The water temperature does not play a key role, however, it is more pleasant to knead in warm water. Water is added in portions, the mixture is thoroughly mixed with hands until the required consistency. Lumps are removed.
Find out everything about liquid wallpaper and its types
It is not advisable to use mechanical devices and stirrers. The mixture is mixed by hand, wearing rubber gloves. You can mix the contents of several packages at once, but this is quite difficult. If you have packs from different batches, pay attention to the shade. So that there are no visible differences.
Attention! Decorative additives are poured before the other components.
Leave the solution for 20-30 minutes. The finished solution should resemble thick sour cream. A mixture that is too thin will run off the surface, while a mixture that is too thick will make it difficult to apply.
Advice! If the solution turns out to be very liquid, set aside work for a couple of hours. Excess moisture will evaporate and the mixture will be ready for use.
Designer's comment
The ceiling finished with liquid wallpaper looks original and beautiful. The material is not afraid of fire and temperature changes. But he is afraid of water. Therefore, it is necessary to apply an antifungal composition before coating. If you want to hang liquid wallpaper in a room with a high level of humidity, then after applying the wallpaper you need to add several layers of varnish.
The material is absolutely safe and hypoallergenic. Suitable for bedroom and children's room. When working, the masters do not use respirators or gloves, which confirms its harmlessness. Does not attract dust. The material is universal when creating an interior; you can decorate it however you like.
Liquid wallpaper is durable and does not deform. The presence of pets will not be a problem for finishing. But depending on the price and composition of the mixture, it will differ significantly in properties. Expensive types are not subject to fading, and cheap ones are better not to be used in rooms with windows.
Liquid wallpaper is easy to care for: wipe it periodically with a damp cloth. The coating can even be vacuumed.
Preparing for work
Before applying any finishing material, it is necessary to first prepare the working surface. When examining walls or ceilings, it is necessary to correctly determine:
- Uniformity of the previous layer and surface structure.
- How well the coating absorbs moisture. It is necessary to establish the speed and uniformity of drying.
- The color scheme of the surface on which the wallpaper will be applied. The need for additional painting or the use of liquid wallpaper of a different color is determined.
- Surface texture: its evenness, whether there are minor or significant defects, to eliminate which you will need to carry out a number of additional processes to level the walls or ceiling.
- The level of retention strength of the previous coating.
After analyzing the condition of the working surface, you can begin preparing it. First of all, it is advisable to remove all old coatings, which include damaged plaster mixture, paint and varnish materials and various types of wallpaper.
In general, you need to remove from the surface everything that can spoil the final result or reduce the service life of the fresh finish.
At the next stage, it is necessary to check the presence of fasteners, which may include screws, nails and other metal parts. They need to be removed. The only exceptions are those elements that hold the base of the working surface together. In this case, they should be masked using a special plaster mixture or primer.
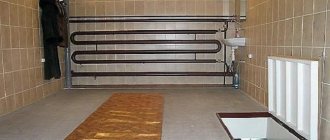
Objects of larger sizes should be sealed. These elements can be heating systems, water supply, wiring, fittings or pipes. The structures that hide them also need to be masked with putty (2 mm layer) or with oil paint.
Before you start applying liquid wallpaper, it is advisable to pre-level the working surface, bringing it to the most even state. When using them, walls or ceilings, even with minor defects and various slopes, can be visually disguised. When further applying liquid wallpaper, the surface is not necessary, although it is advisable to pre-level it, so if you don’t want to spend money on it, it can be neglected.
Correcting the existing distortion of the walls is not only difficult, requiring a significant amount of time, but also quite expensive, since there is a need to purchase plaster and additional finishing materials. Taking all this into account, the main task is only to remove small and medium-sized potholes, which can be quite easily eliminated by applying a 2 mm layer of plaster. Ultimately, it will be possible to significantly reduce the consumption of liquid wallpaper and avoid the occurrence of various stains. Basically, color spots form in those areas where the material does not fit tightly.
As a putty, the best option is to use gypsum-based materials, since they lie more uniformly on the surface and set faster, promoting faster drying.
When working with plasterboard floors, it is necessary to apply putty over the entire area of the wall, and not just at the joints and seams.
Padding
At this preparatory stage, a primer is used. It is best to use a material with a high permeability coefficient
It is important to remember that the primer should be applied in 2-3 layers, and the intervals between each application should not exceed 3 hours. After this, you can begin to cover the base on which the liquid wallpaper will soon be located, using a thick white putty mixture
If you cannot find a suitable type of putty, then it is permissible to use façade water-based paint of a similar shade instead, since only thanks to it the color of the liquid wallpaper used is not distorted.