What's next for us? Let's look at the contents)
| Video master class on making flowers | |
| Step-by-step instructions for making flowers | |
| Paper rose | |
| Paper orchid | |
| Lush paper flowers | |
| Sweet bouquet of paper and candies | |
| Master classes on flowers made from paper in silence, napkins and paper towels | |
| Paper flowers with rounded edges | |
| Paper flowers with pointed petals | |
| Paper flowers. Chrysanthemum | |
| Paper towel flowers | |
| Paper flowers (we use napkins) |
Paper napkin flowers
The simplest and most affordable type of crafts are products made from napkins. The accessibility of this method is surprising - it can be used at a holiday, in the yard, or even at barbecues.
This way, any party with children can easily turn into a master class for beginners on making paper flowers. The kids will simply be delighted.
An example of making a simple flower:
- Take some red napkins. Use scissors to shape each into a semicircle or rounded triangle.
- Gather the lower ends into one point to form an accordion fluffed at the top. Cut the top edge a little, making it uneven.
- Secure the bottom edge of the flower with thread. Several flowers can be collected into a composition, secured with a napkin ring.
- An option is to wrap the thread with a green napkin, thus making a stem.
Manufacturing instructions:
To make these paper flowers, we will need:
Tools and materials:
- Double-sided colored paper (possibly with patterns) or pages from newspapers, magazines, books
- Scissors
- Glue
1. First, take scissors and cut out a square from colored paper (the larger the square, the larger the flower will be).
We twist the square so that we get a rhombus. 2. Fold the diamond in half diagonally. We have a triangle.
3. Once again, fold the two corners of the triangle into the middle to form new corners, as in the photo below. We have a rhombus again.
4. Now let's start creating the core. Thanks to the core, our paper flower will look more natural. To do this, carefully straighten the two side corners. The bend line should be exactly in the middle on them.
5. We bend the side corners of the triangles (F and G) inward so that they do not extend beyond the boundaries of the sheet.
6. Next we need to fold the two side triangles in half. The corners remain inside. After this, apply glue to the sides, as shown in the picture, and glue the petal.
7. We have one petal with a core.
8. To make one flower, we need five such petals. We already have one, we need to make four more of these petals. To do this, repeat the previous steps four times.
9. We got 5 petals. Now, to make a flower out of them, spread glue on the sides of the five petals and glue the petals together.
To make paper flowers more vibrant and original, you can use colored paper with patterns.
If you want to give a vintage look to your paper flowers, you can make flowers from newsprint or from book pages.
By showing your imagination, these paper flowers can be used to decorate almost any holiday or gift!
Flowers made of colored paper
The easiest way to work with this material is appliqué. This technique is accessible even to the youngest children.
Procedure:
- Cut out a circle from paper. Fold like an accordion. Make slits.
- Cut the accordion without reaching the middle.
- Cut out leaves from colored paper.
- First glue the leaves and then the flowers onto the A4 sheet.
Paper rose
Let's make such a wonderful paper rose together. For this we need:
Tools and materials:
- Scissors
- Ruler
- Threads
- Scotch tape (preferably colored or double-sided)
- A piece of wire
- Stretch Crepe Paper
- Ball or candy
Step-by-step instruction:
1. First we need to prepare the preparations. To do this, you need to choose the color for our rose and cut crepe paper of the desired shade measuring 7 x 5.5 cm - these will be our petals. The more preparations we prepare, the more magnificent the rose will look.
2. Now we need to stretch our blanks across. This is necessary in order to give them a bend and shape.
3. Next, we make a blank using green paper (look at the picture). This trick will make our rose look more realistic.
4. At this stage you need to connect the stem of the rose with its petals. Carefully wrap the petal blanks around the ball or candy and attach them to the stem with a thread.
5. Now you need to make the wire more similar to the stem. To do this, take green paper and wrap it around the wire. After this, we attach the green leaf blanks to colored or double-sided tape.
That's all! The paper rose is ready. If you want to make a whole bouquet of such roses, then repeat all the steps as many times as necessary.
To make the bouquet look more fun, you can use paper of different colors.
DIY paper orchid
Such wonderful orchids can be used for decoration or you can make a branch and put it in a vase.
Tools and materials:
- Scissors
- Color printer
- Glue
- Paper
- Clothespin (if we want to decorate gift wrapping)
Paper orchid templates
Download and print these templates on a color printer
Step-by-step instruction:
White phlox from office paper
Look how beautiful white paper phloxes look in a vase on the window. It’s not difficult to make such flowers from ordinary office paper or white glossy paper. You can involve children in the work - let them color the white flowers to their liking. For coloring, pencils, watercolors or acrylic paints, gouache are useful - just choose not bright colors: blue, lilac, pink. For the leaves you need green cardboard.
Sweet bouquet of paper flowers
Such a bouquet of flowers with a sweet surprise inside will be a unique gift for a loved one!
Let's start making it.
To make such a bouquet of flowers from paper, you need to prepare the following tools and materials:
- Corrugated paper
- Wide tape
- Narrow ribbon (0.5 cm)
- Wire
- Green type tape
- Scissors
- Wire cutters
- Wooden skewers
- Wrapping paper or mesh for a bouquet
- Sprigs of greenery
- Bow for decoration
Well, and, of course, chocolates
Step-by-step instruction:
1. First you need to take wire cutters and cut the wire for the stems into 10 cm pieces. In our case, you need 7 pieces of wire.
2. Take scissors and cut a thin ribbon (0.5 cm wide) into pieces about 25 - 28 cm long.
3. From corrugated paper we make seven blanks in the form of rectangles, measuring 18x12 cm.
4. Then cut out small rectangles in the bottom corner of a sheet of paper, measuring 9cm x 5cm. These will be our future flower buds.
5. Place the smaller piece on top of the larger one and place the candy on the smaller piece.
6. We twist our blank together with the candy into a tube, forming a bud.
7. We take the wire and place one end of it in the middle of the bud. We wrap the bottom of the bud blank around the top of the wire, forming the stem of the flower.
8. Now you need to wrap the tape around the top of the wire to secure the stem and bud well.
9. We take the previously cut ribbon and tie it around the bud with the candy.
10. Now we need to fluff the flower and give it a wavy look. To do this, gradually turn away the edges of the paper at the top of the bud, pulling it a little so that the paper stretches and bends like a petal.
11. We carry out all the above steps with all the buds.
12. We take a wooden skewer and, using tape, attach three flowers and decorative greenery to it. Then we add other flowers and continue wrapping the stem with tape.
As a result, we should get a bouquet like this:
You can stop here, or you can continue and beautifully package the composition.
13. We take the packaging, which should be longer than the stems of the bouquet, place the bouquet diagonally and wrap the flowers in the packaging.
14. We tie the bouquet with a ribbon and decorate it with a bow.
The bouquet of flowers is ready!
Benefits of working with crepe
Corrugated paper is an excellent material for creating original flower buds, figurines, and panels for wall decoration. The structure of the crepe is soft and very pliable, which makes it possible to give finished products a realistic look. In addition, a number of advantages of choosing should be noted:
- Affordable cost per roll.
- Ease of working with crepe.
- There is no need to acquire special knowledge and skills.
- Working with crepe is a good opportunity to develop your creative inclinations.
- Large selection of models for independent work.
You can decorate wedding and banquet halls, school parties, and the interior of your own home with crafts made from corrugated paper. Lush gift bouquets, greeting baskets and sweet presents are prepared from crepe.
Paper flowers with rounded edges
Quiet paper usually comes in large sheets, in a stack of 8-10 layers. This is exactly how many layers we need for the flower.
1. Take a stack of eight sheets and cut out a rectangle of any size. The diameter of the flower will be equal to the width of the leaf.
2. The next step is to fold our rectangular sheets into an accordion. The height of the fold was about 2 centimeters, but you can also experiment with this parameter.
We fold the sheets into an accordion until the very end, turning the sheet over after each movement.
This is how it should turn out.
3. Cut a piece of rope, ribbon, fishing line or thread
4. We tie our accordion in the middle. It should look like this.
5. Use scissors to round the edge to form a rounded petal.
It is difficult to cut through all layers at the same time, so try to cut in several steps.
6. On the other side we do the same.
This is how it happened:
7. If you buy ready-made pom-pom flowers from tishu, then you will be given exactly such a blank, which now you need to open, forming the flower as follows: starting from the top, lift all layers of paper to the middle.
At the same time, rotate the flower, grabbing the paper in turn from one side to the other.
After a while, you will have a stunning paper flower in your hands!
You can also watch all the steps in this video:
It was a flower with round petals. Go ahead!
Paper flower with pointed petals
1. We repeat all the same steps until the petal formation stage.
2. At the stage of petal formation, we do not round the edge, but make it sharp.
3. We make sharp edges on both sides.
4. Now open the flower and see what happens.
This is what a miracle turns out to be like in the end!
Paper flower. Chrysanthemum
The next version of paper flowers that we will learn to make resembles a chrysanthemum.
1. We take the workpiece, but now we do not round or sharpen the edge, but cut it into thin strips.
2. We do the same on the other side.
3. Opening the flower.
As a result, we got such a flower.
Very cool!
What kind of paper can you use?
To make flowers, you can take a variety of materials: from simple improvised napkins to colorful corrugated paper.
For origami, it is better to purchase special colored dense material. And for applique, it is better to take materials of different density and texture: thin tracing paper, regular, corrugated and velvet textures.
Note!
DIY fruit bouquets - TOP-200 photos with instructions for creating a bouquet of fruits with your own hands. Unconventional ideas with simple diagrams and work overviews
Crocheted flowers: TOP-160 photos and step-by-step knitting pattern, review of finished products with your own hands. Crochet master class for beginners
Paper lily - TOP 100 photos of the best product options. Master class with step-by-step diagrams and drawings for creating an origami lily with your own hands
In general, for this type of creativity you can use any paper, even newspaper. Packaging materials work well. An interesting option might be colors from old geographical maps. Products made from humorous banknotes from a joke bank will look stylish.
Flowers made of paper (paper towels)
Let's now look at how to make these paper flowers using paper towels. 1. Tear several rectangles from the paper towels.
In our version, the paper towels came with perforations. It needs to be cut off.
2. Now divide each sheet into several layers, depending on how many layers it consists of. They are usually two-layer or three-layer.
Thus, we obtain a fairly thin and durable paper suitable for making flowers.
3. Take 8 thin pieces of paper and stack them on top of each other.
4. We fold the sheets into an accordion, bend them in the middle and tie them.
5. We make sharp edges on both sides.
6. Opening the flower.
We made such a beautiful flower from paper towels in just a couple of minutes!
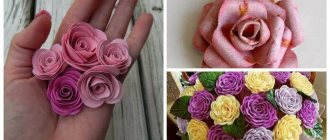
Simple patterns: rose
It is a very beautiful flower, and at the same time quite simple to make. In the photo of hand-made paper flowers, it looks quite picturesque.
Manufacturing procedure:
- Make a spiral pattern from colored paper. Cut out the spiral.
- Twist the spiral into a rose shape.
- Glue the flower and attach it to a wire wrapped in paper.
- Cut out petals from colored paper.
Paper flowers (we use napkins)
Now let's look at creating flowers from paper napkins.
In our version, we took a multi-colored napkin. Let's make the lower layers of the flower yellow and the middle white.
1. As with paper towels, we also divide the napkins into layers.
2. Stack the yellow layers of napkins and cut out a rectangle of the desired size.
3. Stack the white layers of napkin and cut out a rectangle slightly smaller than the yellow rectangle.
4. We place the yellow layers with the colored side up, and place the white center just below the main petals.
5. We fold the layers into an accordion.
6. Open the accordion and carefully separate the yellow layers from the white ones.
7. We put the layers back into an accordion, only the white ones into a separate accordion, the yellow ones into a separate one.
8. Take a white accordion and cut its edges into thin strips.
9. Take a yellow accordion and make rounded edges.
10. Open both accordions and combine them in this way: put the white one on the yellow accordion and assemble it back into the accordion.
11. Bend it in the middle and tie it.
12. Layer by layer we open the flower.
This is such a wonderful flower! Agree, napkins make no less original flowers!
Finally, one more master class: