Greetings, my dears! We continue the magical theme of preparing for the New Year. Let me remind you that earlier we made Christmas trees from pine cones, sweet gifts and considered gift ideas for children. That's not all, and today we are figuring out what kind of New Year's toys you can make from felt with your own hands. This material is accessible and easy to use, so even a beginner child can handle it.
It is not expensive and comes in many shades. And what kind of crafts they can come up with just from it. Last year I wrote and gave patterns for different fabric dogs.
Today we’ll look at Christmas trees, fawns, mittens and other New Year paraphernalia. Of course, let's pay attention to the symbol of 2021 - the pig.
Let's talk a little about the nuances of working with this felt:
- It comes in different thicknesses; if your craft does not need to have a solid frame, then choose sheets up to 2 mm thick. It is most convenient to work with this density;
- There are two techniques: gluing parts or stitching. For gluing, take transparent types of glue: PVA, hot-melt gun. After drying, they will not leave stains on the toy and will not spoil its appearance.
If you decide to sew all the details, then let's look at what types of seams there are.
You can see that the edges of the crafts are beautifully finished. This can be done either by machine or by hand. If you prefer the latter option, then here is a loop stitch for you to consider.
You can also see that the internal parts are finished with a needle-forward stitch.
Or “over the edge.”
The “chain” type of seam looks beautiful.
Of course, some even embroider with satin stitch on their products, but the seams listed are enough for a novice craftswoman to create a very beautiful craft.
DIY felt Christmas toys for beginners
So, we considered the types of seams in advance. Practice them a little, but don't put off creativity until later. After all, initially the toy can be glued together.
What simple and easy thing can inexperienced craftswomen or children make? In my opinion, snowmen, mittens, balls and Christmas trees are the most suitable options.
Here is an idea of where the parts are glued.
Well, let's continue about snowmen. First, a few simple ideas for inspiration, and then step-by-step master classes.
Here we will use a buttonhole stitch to join and finish the edge.
Now let's look at the master class itself on how to make such a cute snowman face for the Christmas tree.
Master class No. 1 . Snowman
You will need the bare minimum: three sheets of felt in white, red and orange colors; scissors; threads; filler; decor.
Cut out 2 ball parts from a white sheet (you can use a cotton pad as a template). On the face we draw or make little knots of eyes and a mouth. Glue a carrot from orange felt.
Let's cut the hat, we need two parts. Its length is equal to the diameter of the face. We glue 1 side of the hat onto the blank with a face, and glue the second side onto an empty white round blank.
Now we put a loop of ribbon or thread between them and sew the edges with a buttonhole stitch. We leave a small part unsewn to fill the toy with filler. Then we sew up the edge and decorate the craft.
Master class No. 2.
Another simple step-by-step master class. All steps are shown in the photo instructions.
If you are not yet very confident in your abilities, then choose simple shapes - a ball, a triangle, a heart. Already from them many ideas for creativity come out - take a look.
Master class No. 3. Christmas tree
These holiday trees are also very simple. But let's look at how to make such a craft.
So, we will take felt, a triangular paper template, curly scissors, pencil, filler, thread and needle and decor.
Transfer the template to the fabric. We cut out two parts with curly scissors.
On the front side we make knots for beauty. You can replace them with decor. Then we connect both parts with a “forward needle” seam, after inserting a loop of ribbon or cord inside. We leave the very bottom unsewn and stretch the filler there. We sew the cut and enjoy the craft.
Let's also watch a video that shows step by step the entire process of making the simplest toys.
I think that almost every person can follow the actions of the craftswoman.
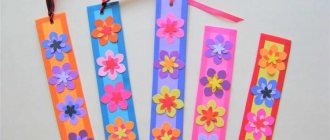
Felt Christmas garland
Garlands made from felt toys look very bright and festive. They are great for decorating any room, and the color palette of the material allows you to make various options for garlands. A design made from felt boots that even a child can make looks great. Carefully study the master class with step-by-step photos and try to make garlands to decorate your home yourself.
Tools and materials:
- scissors;
- white wool thread;
- felt;
- pencil;
- pattern.
Manufacturing technology:
- Place the pattern on felt and trace it with a pencil. We cut out the first felt boot along the lines, carefully align the edges and smooth out the sharp corners.
- We cut out six more blanks of the same size and lay them out on the table. A glue gun or superglue is suitable for connecting the elements.
- For better fixation, we use two layers of glue, first apply the first layer, let it dry, then apply the second layer.
- We distribute the blanks evenly along the thread, forming a garland vertically.
For the garland you can use various figures, snowflakes or the image of the patron saint of the year. The elements can be made voluminous, decorated with sparkles, and the thread itself can be supplemented with a light garland.
When working with felt, do not forget to stitch all the elements well, use sharp needles and carefully select glue. To make the toys bright and original, use various decorative elements. In craft stores you can find multi-colored ribbons, metal threads, stones, beads and all kinds of appliqués.
Master class on making three-dimensional crafts “Ball”
Now we will greatly complicate the task so that you don’t relax. Let’s take and sew soft three-dimensional Christmas tree balls for decoration. They can act as pillows and even...
Let's take: thin felt, threads.
The pattern is attached after the description of the work process. There are two schemes for the ball: large and small.
So, we transfer the selected pattern onto the fabric and cut out the details. You need to take 6 pieces. Then, from the wrong side, we sew all the blanks with threads, leaving a space on one edge.
We turn the part right side out and fill it with holofiber or padding polyester.
We cut out the remaining parts from the pattern from silver fabric and make a pendant for the ball. We sew all the blanks together and fix them on our three-dimensional craft. Use a cord as a hanger.
Patterns for the ball.
That's all. You can repeat this craft from different types of fabric.
Felt Christmas balls
To make such elegant New Year's toys from felt with decorative elements with your own hands, it is not necessary to use patterns. To make spectacular balls for the New Year 2021, you will need a compass or glass.
Progress:
- You need to circle the glass to create round elements. For the toy you need to use felt of three colors. Cut six circle shapes to make two circles of the same color. Fold the parts and align them.
- Using a paper template, as in the photo above, mark on all the round elements where the beads and sequins will be, as well as other decorative details. This must be done both from the bottom and from the top.
- Mark the middle, sew the circles with one line. Straighten, forming a ball.
- You need to sew on beads like this: fasten two balls with a bead at the top. Then attach the decor to each subsequent part. Thus, it turns out that each semicircle is attached at the top and bottom to the neighboring elements.
- Finally, you need to make a loop.
The result will be a voluminous Christmas ball decorated with shiny decorative elements.
New Year's toys "Christmas tree" for children, master classes
Christmas trees are also quite simple to make. And they have many configurations, decoration ideas.
for example, you can make a craft with eyes, or with arms, legs, a hat, etc.
Master class No. 1. Christmas tree with eyes
Using the instructions below you can make such a beauty.
For naughty crafts, you need to take green and brown felt sheets, stuffing, scissors, a pattern and decorations.
So, we cut out two identical parts. We decorate them with thread knots, crosses, and stars. We sew on the eyes and mark the mouth with a “Forward needle” stitch in one thread. Now we sew the edges together using a buttonhole stitch or “over the edge”. We fill the toy through the barrel and close this hole with threads.
Pattern - Tree made from parts. All branches are marked with numbers, so you don’t get confused, you need to cut 2 pieces of each part.
Master class No. 2. Simple Christmas tree
Here is a very easy toy idea. Cut out a four-pointed star and sew the rays together. Fill the craft and decorate it with decor.
Master class No. 3. 3D Christmas tree
How to make a tree for decoration? Yes, just my dears. It is important to see the entire stage of work just once.
Two identical parts are cut out. Then cuts are made. One side has the top exactly to the middle. The other side goes exactly to the middle, but from below. The blanks are inserted into these cuts and the tree is almost ready.
Decorate the branches and praise yourself for their beauty.
Master class No. 4.
Another step-by-step instruction. Shown in great detail.
Master class No. 5 . Garland
Here we show you step-by-step how to make a multi-colored felt garland. I think there is no point in explaining here, everything is shown very clearly. To ensure that the cord that connects all the parts is not visible, use two sides of the Christmas tree. Pass the lace through them and seal the edges. This will work out very neatly.
Patterns
A very unusual craft made from different types of felt. The diagram is attached.
Master class No. 6.
Another detailed master class. Let's take: felt, threads, filler, decor and ribbon.
Using this pattern, we will cut out two parts from the fabric.
We decorate both sides of the pendant with knots or decor.
To one we glue a ribbon or cord folded in half.
Cover this side with the second piece and sew the edges. We push the filler through a small hole and stitch the edge.
Using this scheme, you can make many variations of toys. Look here, there is a machine seam.
But here it comes manually.
You can combine colors to get a more unusual craft.
Flat toys also look interesting. You only need to decorate one side of the workpiece.
Buttons look interesting on such homemade trees.
Here is a diagram of a funny Christmas tree made from two types of felt.
You can even make toys on a leg, in the form of a topiary.
Show your imagination and sew to your heart's content!
Cones make such a wonderful thing for design and decoration.
A few more types of crafts for inspiration.
Not difficult right? I think it’s important to understand the whole process, and only then look at the details that have already been implemented.
Basic recommendations for creating felt Christmas tree decorations
The Internet is full of bright and beautiful toys. At first glance, it may seem that making them yourself is very difficult. But this one is not like that. Choose any felt Christmas tree toy you like and, armed with tips from Joy-pup, get down to business.
Where to start, how to do and what to have:
1. Start with a good mood and creative inspiration.
2. Get everything you need:
- felt of different thicknesses and colors;
- to sew parts together - threads, needle;
- glue gun – it’s convenient for gluing small parts;
- scissors, in some places it is more convenient to use a stationery knife;
- for decoration you may need buttons, beads, sequins;
- satin ribbons, strings, with which you can hang the toy on the Christmas tree.
3. You will need the ability to draw a little.
4. Having decided on a Christmas tree toy, start by breaking it down into parts and counting how many pieces of each you need.
5. Make templates of each part on paper. Cut them out. Trace onto felt.
6. In order for the toy to look good, the main parts need to be made double - that is, 2 pieces are sewn together.
Let's start practicing.
How to make a soft angel and New Year's gnomes
At Christmas it is customary to give angels and, for some reason, gnomes. Well, let’s support this idea with our creativity. Using the pattern below, you can make different configurations.
Pattern.
That's how lovely it turns out.
Of course, this is a difficult option and requires skill and diligence. But there are also simpler ideas.
Now let's move on to the gnomes. We also cut out two pieces for each part. We sew them together and fill them with cotton wool. There are only three important elements: the hat, legs and body.
See how you can decorate your home with garland this Christmas. The diagram is attached.
Another template that you can use to sew such funny helpers.
Garland idea.
Well, some gingerbread men for inspiration. Of course, they are also made of felt.
You can add wings to them and you will also get very cute angels.
Tips from needlewomen
In order to make a high-quality New Year's toy with your own hands, it is recommended to use medium-hard felt. It will hold its shape well, but at the same time this material is quite pliable. Small parts are usually cut out from sheets of hard felt.
The toys are given volume by stuffing them with padding polyester; in extreme cases, you can use cotton wool. There is also a specialized filler for homemade products, which can be purchased at a craft store. But it is quite expensive, and the difference from ordinary padding polyester is minimal.
Advice! To create embroidery on New Year's toys, you can place it in a hoop before cutting out a whole sheet of felt - it will be easier to work on stretched fabric.
Some of the simplest Christmas tree decorations can be used when setting the New Year's table. To do this, a small ring of felt, similar in color to the craft itself, is sewn to the back of them. The result should be an elegant napkin holder.
A good combination would be red and green felt.
Blanks for felt snowflakes can be used to make coasters for glasses. To do this, cut out two identical bases, after which a beautiful hole is made in one of them. Then the figures are sewn together, after which the craft is used to decorate the festive table during serving.
It is better to use patterns for snowflakes with smoothed shapes so that the sharp ends do not bend
Stencils and patterns for New Year's toys in the form of mittens
No winter would be complete without mittens. We always need these helpers. Therefore, you can make a toy in this simple version.
Scheme for crafts with a snowman.
Flat idea of mittens and felt boots.
In general, the mitten pattern is very simple, but I’ll give you a couple more.
Use the one that is more convenient for you.
DIY soft toys
Working with soft toys will require patience: many models have small parts that require processing. The seams must be strong, because the product will be used often and not always carefully.
Deer
You will need:
- felt;
- a piece of beautiful fabric;
- beads;
- button;
- ribbon;
- bead with a hole;
- padding polyester;
- floss;
- needle;
- washable marker;
- scissors;
- pattern.
Prepare the base, mark the front part: do embroidery, place rhinestones, a fabric patch or bow. Embroider the eyes or sew beads in their place. Start stitching, paying attention to the stuffing of the antlers. If you want to hang the fawn on the tree, thread the ribbon through the bead and secure it to the top of the toy. A small button will do as a nose.
Giraffe
You will need:
- felt: yellow, brown;
- padding polyester;
- beads or ready-made eyes;
- threads;
- needle;
- scissors;
- glue;
- marker;
- pattern.
Place the giraffe's muzzle on the front, and ears and horns on the back. Stick stains on both sides. The parts are sewn together so that the fastening is inside.
Hare
You will need:
- felt: pink, white + any other color;
- padding polyester;
- threads;
- needle;
- buttons;
- pattern.
Sew a white square and a semicircle to the base.
Divide the square in half with a black line or thread, sew two small circles on top. These are cheeks, they can also be made in the form of clouds. Sew on the pink nose and button eyes. Embroider a mustache. Place the ears on the back. Sew two blanks and stuff them with padding polyester.
Penguin
You will need:
- felt: black, white, yellow;
- ribbon or piece of fabric for a scarf;
- blush;
- padding polyester;
- threads;
- needle;
- scissors;
- glue;
- pattern.
The components of a penguin are black wings and base, yellow legs and beak and a white shirtfront. The penguin can be made more voluminous by stuffing not only the body with padding polyester, but also the wings, paws and beak.
The cheeks painted with rouge and a scarf around the neck will give life to the figure.
Owls
You will need:
- multi-colored felt;
- pieces of fabric;
- padding polyester;
- buttons, beads;
- threads;
- needle;
- scissors;
- glue;
- marker;
- pattern.
When making an owl, pay attention to the details: the bird's eye consists of a circle (sometimes two) and a pupil (you can draw it, sew on a button, or a bead). Mark feathers on the wings or make fabric overlays. Light-colored overlays on the belly and ears are possible.
The order of sewing an owl is as follows: first sew the belly, ears and paws to the body, then the wings. If the bird is depicted in flight, insert the wings between the parts of the body. Next comes the eyes. Lastly, glue the beak, and fasten the tail on the reverse side. Connect the halves of the body with overlock stitches.
Typewriter
You will need:
- several sheets of felt;
- 4 dark buttons;
- padding polyester;
- threads;
- needle;
- scissors;
- glue;
- pattern.
The peculiarity of the machine is that both sides should be identical and symmetrical. This will require special care in overlaying and stitching parts. Before you start basting, place a small button in the center of each wheel - it will give life to the craft.
Theater
You will need:
- multi-colored felt;
- threads;
- needle;
- scissors;
- glue;
- scheme.
In general, the technology for making a home theater is the same as for other toys. The difference is that finger puppets are made from stiffer felt and are not stuffed. The bottom is not stitched so that the toy can be put on your finger. As decoration, take a piece of felt and glue trees, flowers, houses onto it - whatever you see fit.
Books
You will need:
- a lot of felt;
- cardboard;
- textile;
- laces;
- padding polyester;
- thick threads;
- gypsy needle;
- scissors;
- glue;
- pattern.
More difficult to manufacture, they require time and labor, but the result lives up to expectations. The book consists of a cover and several pages with appliqué. When stitching, padding polyester is placed between the sheets. The resulting page should look like a pillow.
Books made from one sheet of paper folded in four. Depending on the topic, you can place on the sheet: numbers and letters, fruits and vegetables, animals and plants. The more details on the page that can be folded, moved, or twisted, the more interesting the book.
If you cut off the top of an old sneaker and carefully sew it to a sheet, you will get a lacing task. If you cut out several geometric shapes from a sheet, select the shape.
Having prepared the required number of pages, sew them together over the edge. Attach a clasp to the cover.
Simple craft “House”
Of course, fairy-tale houses where comfort and festive mood reign! This is also a great idea for a craft! You can use any templates. The basis, of course, is a square and a triangle for the roof.
Houses can be fantasy and fairy tales, but we believe in magic and fairy tales.
Yes, contrasting colors harmonize very well with each other.
Use sequins, beads, beads as decoration.
I provide a template according to which you can create an entire composition.
And here the fairy houses with rounded corners look very cute.
I think that such a toy will not leave anyone indifferent. My hands are just itching. sew something already.
Gingerbread toy
These sentimental little Christmas Gingerbread felt ornaments are sure to create a magical mood. Suitable as a gift decoration or Christmas tree decoration.
Prepare materials for making gingerbread
Necessary materials
- felt;
- white thread and needle;
- small buttons;
- thin ribbons;
- hot glue gun;
- pen/pencil and scissors;
- cotton wool or padding polyester for stuffing;
- stencil or cookies.
Step 1
For the Gingerbread you will need two identical pieces of felt
For each Gingerbread you will need two identical pieces of felt. I used the cookie itself as a stencil, but you can draw a man on a piece of paper and cut it out, tracing the resulting figure onto felt.
Step 2
Decorate one figurine - this will be the top part of the Gingerbread
Cut out your felt, decorate one figure - this will be the top part. You can decorate it to your liking, add various embellishments, I just trimmed the edges with white thread, added a red bow and two buttons using hot glue.
Step 3
Glue two pieces of Gingerbread
Before assembling the two pieces of my cookie, I applied a little hot glue to the back of the top of the head to insert a ribbon loop for easy use of the finished craft (you can use it to attach it to gifts later or hang it on the tree).
Step 4
Trim off excess glue
Then I drew glue from the wrong side along the contour: first the head, then the arms, torso and legs. I also added the padding gradually: after the glue had dried on the head, I filled it with cotton wool, then added the padding to the arms. Always let the glue dry before filling a specific area with cotton wool.
Step 5
When the entire small gingerbread was glued together and stuffed with cotton wool, I waited for it to dry and cut off the excess glue.
Decorate the Gingerbread with white threads using a simple stitch
Step 6
As you already understand, the thread on the craft is decorative - just sew the gingerbread along the contour using the simplest stitch that we were taught at school during a craft lesson. New Year's cookies are ready!
Schemes and templates for New Year's boots
The idea of putting gifts in felt boots, socks and boots came to us from the West. And it really caught on. Moreover, this symbol of New Year and Christmas is very bright and funny. You don't see it on store shelves every day.
Here is a diagram of a gnome boot with cuffs.
And here is a felt boot with Morozushka.
Step-by-step diagram for making a boot with a snowman.
Using the same scheme, you can make such a boot, only with a different decor.
In general, it showed the direction of thought. All you have to do is a flight of fantasy and its implementation.
How to sew a snowman with your own hands
Making a snowman is a favorite children's pastime, and therefore a holiday is not possible without a snowman, look at how charming the snowman is as a curtain holder, it creates a New Year's, fairy-tale mood. How to sew a snowman with your own hands, the patterns are simple even for those who don’t know how to sew.
Patterns of the 2021 symbol of pigs and piglets
I decided to give you a couple of piglet patterns. This is the symbol of 2021. And they themselves are very cute little animals. Especially if they are made of fleecy felt.
I thank all the masters and craftswomen for sharing their works! Thanks to their golden hands, we can create on our own without worrying about making templates and stencils.
Who decided that the pig had to be pink? And we'll make it green!
Of course, these are not all the ideas, but these are the simplest and cutest ones I've ever seen.
How to sew Santa Claus with your own hands
The most important magical character, the most long-awaited of course, is Santa or, as we are more familiar, Father Frost. The kind old man from whom everyone expects gifts, according to legend, rarely comes through the door, but increasingly through a window or a chimney, so you can seat a handmade Santa (Father Frost) not only under the Christmas tree, for example, decorate a fireplace, window, door, etc. .
Master classes “deer” made of felt for school
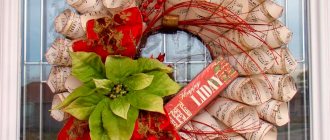
Have you been given an assignment at school? Make a craft for the New Year. Of course, someone will run into the forest for pine cones and branches. And you and I will take felt and make a New Year's wreath. Let's make it with Santa Claus and a deer. Teachers will definitely love this craft.
Well, if you are not afraid to start a real soft toy. So I propose such a deer as an idea.
To decorate a class or group in kindergarten, make these beauties.
Kids will love smiling crafts with bright accents.
Another Bambi idea.
Many small figures make an excellent garland.
Another detailed pattern with a diagram of how the parts are connected.
We definitely won’t pass by such sadness.
Another idea with a deer.
In general, animals are also a great theme for New Year’s decor.
You need a lot of perseverance and patience. After all, if you sew the seams manually, then you need to maintain the distances between the seams, then the craft will turn out neat and decent.
Valenok
DIY felt Christmas toys look interesting and unusual. If there are patterns, then even children can make a toy. If you want to make felt boots, the work will take a minimum of time, and the result will not be long in coming. The photos will show you step by step how to do the job correctly.
Materials:
- ribbon;
- patterns;
- decorative elements;
- braid;
- needle;
- threads;
- felt;
- scissors;
- cotton wool;
- glue.
Step-by-step description of the process:
- Let's prepare the patterns. The base is made of white material, and the nose, heel and upper part are made of red.
- We sew small parts to the base. We make 2 identical blanks.
- We take 1 piece and sew decorative elements to it. We make them from felt or take ready-made decorations.
- We form a bow from the ribbon. We attach it to the front side of the product.
- We connect the blanks together.
- We fill the felt boots with cotton wool, sew the braid on top, and sew up the hole with a simple seam.
The result is a felt boot that can be used to decorate your home. This toy will take a prominent place on the Christmas tree. It will fit well into the New Year's decorations and will remind the whole family of the upcoming celebration.
It’s so easy to make New Year’s toys from felt with your own hands, and if you manage to find patterns, then the task is simplified several times. As a result, funny and cute souvenirs for the holiday will be ready. All that remains is to give them to a loved one. Surely both adults and children will appreciate such a gift.