Surface preparation process
Let's look at step-by-step instructions on how to prepare a wall for wallpaper.
Preparing walls with oil paint
If you have to make repairs in an old house or apartment, inherited from your great-grandmother, then you need to know how to prepare the walls for wallpapering if there is oil paint on the surfaces. It was this finishing material that was used 50-60 years ago for renovations, so you can still find a “miracle of design thought” to this day. What to do? Firstly, you can use a hair dryer - it heats the surface (the paint begins to bubble and rise above the wall), then the unwanted material is removed with a spatula. But keep in mind that heated paint releases toxic substances into the air, so you should keep the windows open while working.
Secondly, you can remove the paint from the walls with a sander, but in this case you need to close all the doors and plug the cracks so that dust does not get into neighboring rooms. You can only work in a special mask, because it is very difficult to breathe while sanding walls.
Thirdly, there are special solutions on sale for removing paint from walls - they are a little expensive, but they quickly get rid of the unwanted coating.
Sometimes none of the above methods for removing paint from walls “works” and in this case you need to either prime/putty the wall or make notches on the surface.
Stages
The step-by-step process includes:
- Removing boring finishes.
- Cleaning the surface from dust, debris and other contaminants.
- Initial application of the primer layer. This stage involves treatment with a special compound to disinfect and prevent further absorption of moisture.
- Repairing defects. Elimination of visible defects is carried out with a mixture of gypsum, after which the surface is puttied.
- Alignment. To carry out this stage, you will need a special abrasive mesh material. You can level it with sandpaper.
- Final priming. The final stage of preparing the wall for wallpaper. Necessary to ensure good adhesion of the surface to the finishing material. In addition, re-priming will additionally treat the walls with an antiseptic.
Between the main stages of preparing walls for wallpaper with your own hands, there are intermediate ones, such as treating the surface with an antiseptic, wetting, collecting tools, preparing a solution, etc.
Important! The listed steps must be performed strictly in order; the sequence of work cannot be changed!
Why do you need to prepare walls for wallpapering?
The purpose of preparing walls for wallpapering is to achieve surface quality that will satisfy the following requirements:
- Precise geometry. No wallpaper will hide the curvature of the walls; a high-quality finishing result can only be obtained with even planes and right angles. Dimensional accuracy is achieved, usually by plastering or plasterboarding.
- No defects, smooth. There should be no protrusions, even the smallest ones, on the surface of the walls. Depending on the type of wallpaper for which the surface is prepared, a certain number of small depressions may be present. The thinner the wallpaper, the smoother the gluing surface should be. Smoothness is achieved by puttying.
- Low absorbency properties. If the material has high absorbent properties, then the wallpaper glue is absorbed into it, and the adhesion of the wallpaper to the wall turns out to be fragile. To reduce the absorbent properties of materials, a primer is used.
- Uniformity of color. It is necessary when the wallpaper is thin and the surface of the wall is visible through it. A white primer helps achieve an even tone.
Having fulfilled all these requirements, you will receive perfectly prepared walls on which the wallpaper will look good and stick firmly.
Materials and tools
To carry out high-quality repairs, you first need to acquire important tools and various mixtures:
- putty, gypsum mortar to level the wall plane and apply the base layer;
- primer for initial surface treatment;
- finishing putty to complete the preparatory work.
For information! It is better to choose a universal primer that can penetrate deeper into the wall.
A product purchased in a store contains instructions that must be followed unconditionally in order to carry out the repair efficiently.
The nuances of preparing various types of rolled material
Depending on the type of material, the preparation of walls for pasting may also vary. Non-woven fabrics require this the least. The main thing is that the old finish holds up well and does not bleed bright colors from previous coatings or painted walls. These can be glued on top of paper ones or on paint.
If you plan to glue photo wallpaper, you will have to try: they require a flat surface, since any bulge or depression can distort the design.
What and how to do so that the liquid coating is ready for use?
Liquid wallpaper combines wallpaper rolls, paint and decorative plaster. They hide unevenness well (you can learn more about what liquid wallpaper is, how to dilute and apply it correctly, here). Surface preparation begins with removing old paint, tapestry and glue. Screws and nails are removed if they are not needed in the future for fasteners.
If the wall has recesses less than 3 mm, it does not need to be leveled - after application, liquid wallpaper will hide minor imperfections. If the protrusions exceed 3 mm, they must first be sealed with plaster. The primer for them must be selected with a high level of hydrophobicity:
- deeply penetrating - penetrates deeply into the wall, preventing the formation of fungus, moisture penetration, improves adhesion;
- quartz - creates a rough coating, makes the application of liquid wallpaper high-quality;
- acrylic - easy and evenly applied, dries quickly.
Attention
All of them are colorless, applied in 2-3 layers, each after the previous one has dried. A foam roller is used for application.
Tools
You will need to prepare the tools in advance so as not to waste time and simplify the process. The availability of tools depends on the nature of the old finishing layer and the quality of the coating.
Note!
Glass wallpaper - what is it? Pros and cons, types, features, characteristics, photos of design and combinations in the interior
Plain wallpaper - 150 photos of modern design. Rules for choosing and combining wallpaper in the interior: kitchen, bedroom, living room, hallway
Wallpaper framed on the wall in the interior: photos of original design and beautiful decor
Need to purchase:
- floor protection film;
- knife, it is better to choose a stationery knife, sharp;
- tape to avoid dirt;
- container for diluting mixtures;
- a brush for priming in difficult places;
- roller for applying the mixture to the wall;
- spatulas for leveling and applying the mixture;
- construction drill mixer for kneading.
Getting rid of old wallpaper layers
Before gluing new material, it is necessary to get rid of outdated finishes, be it paint, decorative plaster or faded wallpaper. Without this process, the preparation of a concrete wall for wallpaper is considered incomplete.
Several arguments why it is necessary to clean the surface and remove the old layer:
- Wallpaper that has been in the house for a certain time has practically no adhesion. If you apply glue to such a layer, it will soften and fall off. Even under slight pressure or weight, old layers cannot withstand the load.
- When gluing wallpaper onto an old coating, you will have to wait a long time for it to dry.
- After waiting for drying, unevenness will be revealed, the appearance will be spoiled and the work will simply go down the drain.
- The clutch will not be of high quality, which means you won’t have to dream of a long service life.
- Under the old layer, dirt, dust, and microbes that have accumulated over the years of operation will remain.
Features of concrete surface preparation
The concrete monolith must be leveled; when preparing the surface of the walls for pasting, priming and puttying are carried out. Instructions for carrying out operations are above.
The concrete monolith must be leveled; when preparing the surface of the walls for pasting, priming and puttying are carried out.
In order to properly prepare wall surfaces for gluing, it is worth considering which steps are required. The degree of adhesion of the substrate and building materials used in construction depends on the readiness of the surface.
Removing paint
You will also have to get rid of outdated paint if you need to thoroughly prepare the walls. The process is complex and will take a lot of effort and time.
Important! Painting will not interfere with the installation of the selected wallpaper, without preparation: primer, putty, etc. If the surface requires leveling, i.e. carrying out preparatory work, you will have to remove the paint.
Experts advise using one of 4 methods to thoroughly clean the surface:
- Manual - using available tools.
- Electromechanical - using electrical devices and tools, such as a drill, hammer drill, etc.
- Chemical - using special compounds.
- Thermal - using hot air. This is a burning method.
Primer of walls
Priming before gluing is a process that helps get rid of cracks, pits and other defects. The primer is suitable for all surfaces. It can be used to prepare a wall made of plasterboard, concrete, or other material. The mixture strengthens adhesion, eliminates excess moisture, and gets rid of debris.
There are several types of primer. The choice largely depends on the financial capabilities and requirements of the owners of the premises. When selecting, the characteristics of the surface and its properties are taken into account. Sellers from specialized stores or instructions that come with the product will help you with your choice.
There are many primer compositions on the market, but there are mixtures that have proven themselves and are popular. They are recommended to be used in repairs by professionals:
- Acrylic solution (universal). It tends to penetrate deep into the wall. Dries in 5-6 hours, has no odor, and can be used on any surface.
- Contact composition. It has all the properties described above, but in the contact type they are more pronounced. Thanks to quartz particles, the solution penetrates deeper, and therefore seals unevenness and other defects more efficiently.
- Griftal solution is recommended for treating walls in rooms with high humidity. Drying time is a day.
Regardless of what kind of wallpaper you plan to use on a surface, priming is a mandatory step. It prepares wall surfaces for wallpapering for painting, non-woven, paper and other types.
To apply the mixture you will need a roller. They can easily cover the entire surface, but for the corners it is appropriate to use a brush.
Wall cleaning
The complexity of the process will depend on what is in the “source” - a completely new apartment in a new building, walls with remnants of old wallpaper or oil paint.
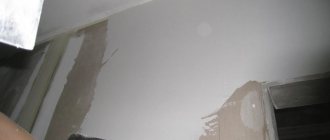
Preparing the walls in a new building
Entering a new apartment, the newly minted owner of square meters sees absolutely gray/rough walls, poorly installed sockets/switches - with this condition of the surface it is impossible to glue wallpaper right away. To prepare the walls for wallpapering with your own hands you will need:
- Spray - this way, absolutely all the unevenness/cracks/ on the walls are filled with liquid. The thickness of the spray on the walls should not be large - do not overdo it, the maximum permissible layer is 6 mm.
- Apply a primer to the surface - its layer should also be 6 mm, but if the walls are too uneven, then several layers can be applied. The main purpose of using a primer is to level the surface.
- Apply a finishing layer of plaster to the primed surface - its thickness is only 4 mm; finishing plaster is a thin layer that can be easily rubbed off.
- Sand the prepared wall with fine sandpaper to make the surface as even as possible.
Only after all the above stages of preparatory work have been completed before wallpapering in a new building will it be possible to begin finishing work.
Leveling the plane
After the primer has dried, proceed to the leveling stage (plastering). This process is not necessary if, despite its “old age,” the plaster layer lies flat and does not crumble.
When leveling is unavoidable, the walls must be plastered before gluing. This is done with a high-quality gypsum composition. It is used to fill recesses, pits and other surface imperfections. To begin with, apply a centimeter layer with a spatula and level it. You will have to wait until it dries, and then, using sandpaper, sand the surface.
Next comes puttying. The solution is prepared and applied with a spatula. The putty must be given time to dry. It is then carefully sanded to ensure a smooth surface.
Need to know! If you plan to prepare the wall for liquid wallpaper, then puttying can be skipped. They will be able to withstand uneven surfaces, but will definitely brighten up dark spots. Before applying liquid wallpaper, it is better to cover the wall with a light water-based emulsion.
The entire preparatory process completes the stage - re-priming. This is a mandatory intermediate procedure between gluing and puttying.
You should know! One of the important preparatory stages is disinfecting the wall and treating it with an antiseptic. It can be carried out together with priming, which will protect the surface from mold, fungi and other unpleasant formations.
Preparatory steps before pasting
Paper, vinyl and non-woven wallpaper require special preparation before pasting. If the material is thin, then the surface is prepared for painting to match the wallpaper. Finishing putty best serves these purposes.
Removing an old layer of materials
Dismantling the old finish must begin with softening the surface . The preparation process depends on the type of old layer of material. If wallpaper is being applied in a new building, the walls will need to be degreased, then a layer of finishing putty must be applied.
For degreasing, use a deep penetration primer.
Methods for dismantling old finishes:
- Removing paint by sanding . Stock up on latex gloves and a respirator to protect yourself from construction dust. Using a sanding machine in a circular motion, the paint is sanded off the surface.
- Working with a construction hairdryer . The painted layer softens under heat and is then removed with a spatula or scraper.
- Washing with an acidic, organic or alkaline composition . Manufacturers produce gel, aerosol or liquid washes. Remover solutions are applied with a brush or roller, left for 5–10 minutes, then the paint is removed with a scraper. Follow the precautions and instructions on the packaging.
- Removing old wallpaper . The material is moistened with water, to which a little vinegar is added - it dissolves the glue. After 5–7 minutes, without waiting for it to dry, the wallpaper is removed with a spatula.
- If the plaster is crumbling in places, moisten it with water, then knock it down with a hammer and chisel.
- Wallpaper can be removed with special compounds or by steam treatment. In the second case, a steam generator is used, which acts on the glue. As an alternative, wallpaper tiger is used. It perforates the surface, cuts the top layer without damaging the plaster.
Advice
When choosing a remover, give preference to organic compounds. They are versatile, environmentally friendly, and low in price.
Wall condition assessment and priming
Initially evaluate the surface to be treated . Measure the height of the wall in increments of 1–1.5 m. If differences of 3–5 cm are observed, a leveling layer will be required. Metal beacons are installed on these fragments of the area, along which plastering is carried out.
If the difference is more than 5 cm, then the walls are sheathed with plasterboard. Before this, the surface must be primed.
Peculiarities:
- choose a universal colorless primer with deep penetration;
- concrete walls are treated with concrete contact;
- the primer is applied row by row in 2 layers with a break for drying;
- pour a little mixture into the bath, dip a fur or nylon roller;
- treat the entire surface area, moving horizontally or vertically;
- leave until completely dry - check the instructions on the package for the period;
- apply a second coat.
After priming, the wall is ready for wallpapering or creating a leveling layer . The drying speed of the soil is 1–12 hours, depending on the composition. It does not need to be diluted with water, unless otherwise provided in the instructions. For 1 sq. m of wall, the consumption is 0.1-0.8 liters of composition.
Choose formulations with modifying additives, for example, an antiseptic. It prevents the formation of mold and mildew.
Plastering for defects
For rough finishing you will need:
- painting spatula 70 mm;
- gypsum rotband;
- starting putty;
- reinforcing mesh;
- low expansion polyurethane foam;
- silicone sealant.
Fill large seams with polyurethane foam, cover with a layer of plaster, and seal small seams with silicone sealant. Dents are rubbed over with a layer of starting putty . Then the serpyanka is embedded in the composition, which is covered with a second layer.
In case of significant unevenness, complete plastering and leveling of the wall will be required:
- mix the gypsum rotband according to the instructions on the package;
- mark longitudinal mortar lines for fixing the beacons;
- install profiles in places of significant differences with a minimum step of 1–1.5 m;
- cast plaster into the space between the beacons using throwing movements;
- the layer thickness should not exceed 5 cm, optimal - 3 cm;
- align the tent along the beacons using an H-shaped rule, moving from the bottom edge of the wall;
- remove excess mortar with a wide spatula, level again with the rule;
- check the vertical position of the mantel with a building level;
- pry up the upper end of the lighthouse with a chisel and slide it towards you;
- dismantle all profiles and fill the resulting gaps with plaster;
- remove excess mortar along the seams with a wide spatula, level with the rule;
- after 25–30 minutes, rub the plaster with a sponge dipped in water;
- after complete drying a day later, apply a layer of finishing putty.
Before gluing the wallpaper, apply a primer to the leveling layer. Before applying the finishing putty, it is recommended to sand the surface with a sander. Use #320 sandpaper.
With a layer thickness of 3 cm, the consumption of gypsum is 5–6 kg per 1 sq. m. m . It is suitable for leveling and rough finishing. However, in rooms with high humidity, give preference to moisture-resistant cement-based compounds.
Attention
Experts recommend always dismantling metal beacons. They significantly make the structure heavier and, over time, lead to cracking of the plaster and rust.
Sticker of liquid and photo wallpapers
The photo wallpaper pattern is adjusted on the floor . Markings are created on the wall with vertical lines according to the dimensions of the canvas. Trim off the white edges of the panels to create a seamless finish. The glue is applied to the wall and to the wallpaper, which is fixed to the wall strictly according to the marks. A slight overlap is allowed to align the pattern. The process is no different from gluing conventional materials.
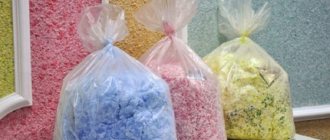
Liquid wallpaper requires some skill when applying and is applied in a similar way to putty. Technology:
- at least 12 hours before starting work, soak the composition in water at room temperature;
- first add glitter to the water, then the rest of the ingredients, mix thoroughly with your hands;
- transfer the composition to a plastic bag and leave for 12 hours;
- apply 2 layers of primer with a break for drying (1 - horizontal, 2 - vertical movements);
- transfer the material to a metal trowel, and then randomly move it to the surface;
- hold the trowel at a gentle angle of 10–15 degrees;
- after treating the entire area, the material is rubbed with a trowel or polyurethane float dipped in water;
- leave to dry completely for 12–24 hours.
The optimal thickness of the liquid wallpaper layer is 1–2 mm. To work in rooms with high humidity, choose moisture-resistant materials. The wallpaper does not require a protective coating and is completely ready after drying.
Advice
Liquid wallpaper will hide minor unevenness of the walls, but the base must be plastered or puttied.
Wallpaper of any type requires careful surface preparation. It extends the finishing time and significantly simplifies working with the material. The surface must be cleaned and primed. Minor defects are eliminated with starting putty, but significant unevenness requires the creation of a leveling layer. If possible, choose wallpaper adhesive from a wallpaper manufacturer and carefully follow the instructions on the packaging.