Repair and decoration
04/22/2018 Anastasia Prozheva
The stages of preparing walls for wallpapering may differ, depending on the characteristics of the rough surface. Before you start finishing the walls, you need to decide on the material and prepare the walls for wallpaper, the order of work and other nuances. The variety of assortment allows you to make your walls extraordinarily beautiful. In order for the wallpaper to fit well on the wall, it is necessary to prepare its surface. The process of preparing walls takes place in several stages. Each stage is very important, so you should strictly follow a certain order of work. Preparatory work should be carried out efficiently, otherwise the wallpaper may fall off.
Preparing walls for wallpapering
Before you begin the process, you need to understand why it is needed. Each process helps not only to properly glue the wallpaper, but also to get rid of significant shortcomings. Wall preparation is also necessary to get rid of fungi and extend the life of the finishing material.
There are several main disadvantages of walls that you should get rid of:
- The porosity of the walls does not allow the wallpaper to properly adhere to the surface, this provokes the edges to come off and the canvases to peel off;
- Irregularities, holes, and bumps cannot be hidden even under the thickest wallpaper. And under certain lighting, they become more noticeable, which spoils the appearance;
- Cracks in the plaster cause the development of fungus and the penetration of dampness;
- If the surface is not treated with a special solution, the ability of materials to stick together is reduced; failure to comply with this process can lead to complete peeling of the wallpaper from the wall.
If there is old finish on the walls, it must be carefully removed
Wallpaper is a wall decoration that has weak strength and wear resistance. Thanks to proper preparation of the wall surface, they last much longer.
When gluing wallpaper, it is worth remembering that the canvas must be glued joint to joint, and this is another reason to properly prepare the walls. If you carefully study the stages of work, the preparation process will not be too tedious.
Concrete, brick and panel walls. How to properly prepare for wallpaper.
There is practically no difference in preparing concrete walls for wallpapering with your own hands and the steps described above in preparing for wallpapering. Once again, we strongly recommend that you follow the entire cycle and order of work before the last stage of decorating the walls. Concrete has a porous surface that is completely devoid of adhesion, and in this situation you should not expect the wallpaper to hold tightly until the moment when you want to renovate the room again - they will fall much earlier.
In panel houses the situation is no easier. In addition to the disadvantage that concrete gives us, the evenness of the walls in such buildings raises a big question even without resorting to careful measurements. Just look carefully at the corners and protrusions. And when covering panel walls with wallpaper with their own hands, many noticed that the wallpaper fanned out in the corners or that the paper web was skewed due to the broken line of the walls and differences in size at the joints. In such cases, in addition to following all stages of preparatory work before wallpapering, you should also level the walls and corners as much as possible.
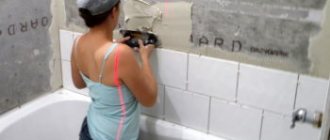
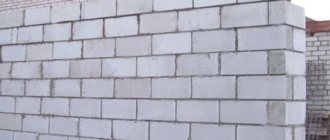
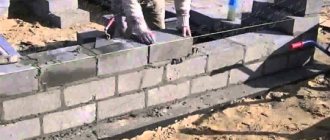
Brick walls can also present many unexpected surprises before work begins on preparing the walls for wallpaper. And in this case, professionals advise paying special attention to the puttying cycle in order to achieve maximum evenness of the walls and protect the brick from destruction, fungus and mold, and allow the wallpaper to last as long as possible.
Stages of preparing walls for wallpapering
All stages of wall preparation are quite simple and do not require special skills or abilities. The main thing is the correct sequence of processes and high-quality performance of work.
Related article: Toilet height from the floor: installation standards and types
The main preparation work is carried out in the following order:
- Dismantling the old finishing coating. Ordinary paper wallpaper can be removed with a soap solution. It is necessary to moisten the wall with it and, while the canvases are not dry, begin to remove them. If the old wallpaper is thick or washable, the removal process may be slightly more difficult. To do this, you need to make small cuts and thoroughly moisten them with soapy water. When the solution is absorbed, you can begin dismantling using a spatula. If the old coating is enamel or paint, you should purchase coarse sandpaper. With some help, the paint can be quickly removed without leaving any traces. Whitewash can be removed with hot water and a cloth. It washes off easily, you just need to change the water more often. It is better to remove the old plaster completely and apply a layer of fresh plaster, otherwise the resulting cracks will allow cold air to pass through and condensation will form.
- Elimination of irregularities and defects. For this stage you will need a spatula and putty. First of all, all nails, screws, wires, etc. should be removed from the wall. All cracks and holes must be covered with putty. The putty is applied in several thin layers horizontally and vertically.
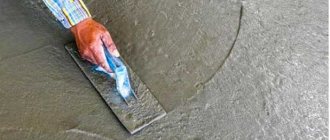
- Leveling the wall surface. After the putty has hardened, you can begin the process of grinding the surface. To do this, use special sandpaper or sanding mesh. The process must be carried out from the corner in the direction from left to right and from top to bottom.
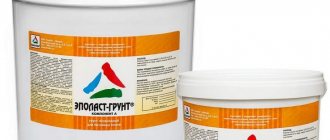
- Applying primer. It is simply necessary to treat the walls with a primer solution. To do this you will need a wide roller or brush. If the wall has poor absorption properties, then the primer is applied in several layers.
Applying a primer will ensure good adhesion and also prevent the possible appearance of fungi and mold
Only after all the necessary stages of work can you begin gluing the canvases.
Sequence of work
Cleaning surfaces of old materials
As mentioned above, you first need to remove the old finishing material, otherwise it will be difficult when gluing and subsequent use of the wallpaper. If you have to rip off the old layer of wallpaper, proceed as follows:
- Prepare a solution of warm water and a small amount of detergent;
- Take a rag and generously dampen the area of the wall you plan to clean;
- After a few minutes, allowing the wallpaper to absorb the solution, pry it off with a spatula and begin dismantling;
If you have to remove water-repellent wallpaper, before carrying out the procedure described above, first make cuts in the wallpaper, otherwise they will not absorb moisture. If you have to remove so-called liquid wallpaper, then you should arm yourself with an industrial hair dryer and preheat it.
If we are going to clean the wall of old paint, then depending on the type of paint we will need different products. Since it is likely that you do not know what kind of paint was applied by the previous owner of the apartment, you will have to try different methods and see the effect. In general, there are three main methods:
- Mechanical, that is, a banal physical impact on the coating using a scraper or hammer drill with a special nozzle;
- Heating, here you will need a heat source like an industrial hair dryer;
- Chemical - using special paint removers.
Primary primer
Regardless of the type of wallpaper you plan to apply, you must first treat the walls with a primer - this will make the gluing procedure easier, and will also help the walls absorb moisture less and protect against the formation of mold. It is applied with a brush or roller, the main thing is to do it carefully and conscientiously, without missing hard-to-reach areas. If you see that the composition is absorbed into the wall almost instantly, apply another layer.
After this, the walls should dry thoroughly, the time required for this depends on the type of primer, but it is better not to rush and not start plastering earlier than a day later.
Plaster
Unfortunately, the walls in a standard Russian apartment leave much to be desired, and therefore we cannot achieve it without plastering and leveling the surfaces. The choice of plaster mixture depends on the type of walls - brick walls should be covered with cement-sand, and concrete walls should preferably be leveled with gypsum mixture. If you are going to glue thick, for example, vinyl wallpaper, and the unevenness of the walls is insignificant, you can do without plaster, but serious curvature will not be masked with wallpaper. The plastering process is as follows:
- We prepare the solution from the purchased mixture according to the instructions; this is most conveniently done with a drill with a special attachment;
- We apply the resulting mass to the wall and tear it into a thin layer using a fork or a large spatula until all cracks and irregularities are eliminated;
- Let the plaster dry, after which you can proceed to the puttying stage.
putty
This stage is extremely important, because putty will reduce the roughness of the walls, which will have a positive effect on the adhesion of the wallpaper. Before starting work, it is worth protecting the floor from the inevitable dirt, and therefore we lay down oilcloth or other unnecessary material, now we can begin:
- We carefully sand the wall, then apply a layer of putty starting from the bottom, with a spatula helping us, and then level it.
- We wait for it to dry, after which we sand the wall again, making it as even and smooth as possible;
- Shake off any dust that has formed on the walls or remove it with a vacuum cleaner. The wall putty is finished.
Re-priming walls
At the end, it is worth repeating the priming process described above. Now this will be easier to do and less primer will be needed, because the walls have already been prepared. Often, glue well dissolved in water is used as a finishing primer, which will subsequently be used to fix the wallpaper. Having thoroughly coated our surface, we will complete the preparation of concrete walls for wallpapering. As you have seen, the technology for preparing walls does not require any unique skills at all, and therefore anyone can prepare walls for wallpapering with their own hands.
How and with what to treat the walls before wallpapering
Preparation of the wall surface is carried out at the very beginning of work with wallpaper. If painting or any other finishing is necessary, the walls will require treatment. This process helps eliminate many problems that can ruin the quality of the repair.
Before finishing the wall, it must be coated with a primer solution. This promotes better adhesion of the wallpaper and the wall surface, prevents the peeling of small particles, eliminates excess moisture from the wall surface, and removes dust and various types of contaminants.
Related article: How long does a heated floor warm up when first turned on?
You can coat the walls with primer using a roller, wide brush or sprayer. The primer is sold in two versions - dry and liquid
There are several types:
- Acrylic;
- Alkyd;
- Mineral;
- Deep penetration;
- With coloring pigment.
The primer solution is selected taking into account the condition and properties of the wall surface. You can choose a suitable variation using the annotation on the package or ask the seller.
How to cover walls before wallpapering
At the very beginning, the walls must be treated with special solutions.
They have a lot of useful properties, such as:
- Water repellent;
- Deep penetration;
- Anti-corrosion;
- Fire protection;
- Antiseptic;
- Antibacterial.
Such solutions make wallpapering much easier.
The solution should be applied one day before the expected day of starting work on the wallpaper.
Today the construction market is simply overwhelmed with a huge assortment.
Experts identify several main compositions:
- Acrylic universal solution. It is in great demand as it is suitable for any wall surfaces. It is odorless and also has the ability to penetrate deep into the layers of the wall surface. This solution dries within 5-6 hours.
- Griftal composition. A less popular composition, as it is used only in rooms with high humidity. Can be applied to walls that have metal inclusions. The drying process takes place over 24 hours.
- Contact solution. The most popular composition that even a beginner can use. The composition has the same properties as for acrylic wallpaper. The only difference between them is that contact solutions contain fine quartz sand. It improves the penetration of the solution into the wall surface, and also evens out unevenness and minor imperfections in the wall.
Need for preparation
Several decades ago, it was believed that preparing walls for wallpapering should only be done as a last resort. Covering walls with newspapers was widespread, thereby trying to increase the adhesion of materials to each other. The lack of preparation at that time can be explained quite simply: there were no special products for such work on the construction market or they were very expensive. Today, the situation has changed radically; now there are many products for different stages of wall treatment before wallpapering.
For what purposes is wall preparation necessary?
- Improving the quality of adhesion of canvases to the surface. Walls, regardless of material, have many pores. If they remain open, then numerous voids are formed under the applied coating, amounting to up to 50% of the total area. This is clearly noticeable when dismantling old paper wallpaper - they literally come off in strips. This means that at any moment they could simply fall off. Also, the lack of adhesion leads to the appearance of seam divergences between the strips.
On a note! Some manufacturers claim that liquid wallpaper can hide many surface problems. In reality, they can only correct minor elevation differences. Vinyl varieties have a similar property.
It is imperative to properly prepare the walls for wallpapering, otherwise the resulting decorative coating will quickly lose its original appearance.
How to prepare concrete walls for wallpapering
Concrete walls have many defects, for this reason many experts do not recommend wallpapering them. Concrete walls must be plastered or covered with plasterboard. Irregularities and the rough structure of concrete quite often show through the wallpaper, and the appearance of the wall is greatly deteriorated due to this.
But, if you decide to glue wallpaper specifically to a concrete surface, then you should strictly follow some rules for carrying out the work:
- Selecting the right materials. This process consists of choosing very dense canvases that can hide minor imperfections in the walls. Wallpaper must also be purchased in dark shades.
- Cleanliness is the key to success. Concrete walls must be thoroughly cleaned of dirt and dust. Dust can impair the adhesion of materials.
- Level out what is uneven. All uneven concrete joints should be thoroughly sanded.
- Well-impregnated walls hold wallpaper more tightly. When the wall is dry after washing, it must be treated with a primer or wallpaper glue. This process increases the adhesion of the materials. And priming the surface eliminates dampness and fungal growth.
Related article: Inspiration of the day: Homemade gifts for February 14 (90 photos)
For pre-treatment of concrete walls, you can use wallpaper glue or primer
Only after all the work has been done, it is safely possible to glue the canvases.
Do it yourself: preparing walls for wallpapering
In order to save on repairs, you can prepare the walls yourself. You just need to approach this matter with full responsibility. It is worth remembering that all dusty work on the walls is carried out before laying the floor. Also, do not forget about protective equipment and your own safety. Be sure to wear goggles, a respirator and gloves. This will help you breathe calmly during dusty work, and will also protect your eyes from foreign objects. After thorough preparation, you can proceed directly to work.
You should not skimp on auxiliary tools such as rollers, spatulas, brushes, etc.
The stages of finishing walls for wallpapering by professionals are absolutely no different from doing the work yourself. The main thing is to thoroughly familiarize yourself with the above instructions on how to smear the walls and how to glue the wallpaper. After carrying out all the basic processes, glue the wallpaper from the door joint to joint.
Puttying plastered walls
Almost the same types of work are performed as in preparation for painting. Glue, casein, lime paint must be thoroughly washed off. To avoid white spots remaining, the water should be changed more often. Then rinse the walls with water and leave to dry. If you stick wallpaper on a damp surface, it will fall off. Sometimes paint leaves stains on the walls. To prevent them from showing through the canvas, they need to be painted with nitro paint.
The next stage of work is puttying. For deep cracks, it is recommended to add dry gypsum to the solution. It is better to do this in a separate small bowl. The mixture sets quickly, so you won't have to wait long for it to dry.
Sometimes cracks are filled with polyurethane foam.
First, the crack is moistened with water. Using a narrow spatula, apply the solution onto a wide one and distribute it over the wall. The spatula is held at an angle of 30 degrees to the wall, lightly pressing on the left edge. A corner spatula will help you handle the corners. To avoid the appearance of stripes, the putty is applied in a thin layer: first vertically and then horizontally. Irregularities that arise during puttying with your own hands can be eliminated after drying by scraping them off with a spatula. Then level with oil-adhesive putty. Each layer must be primed.
After drying, the prepared surface is treated with sanding paper: first coarse-grained, then fine. This process is accompanied by a large amount of dust, which a respirator will help protect against. Start grinding from the corner, moving the tool up and down, left and right. The result should be a smooth surface. A powerful light source will help identify remaining imperfections. By placing it on the side of the wall, you can clearly see the unevenness.
Preparing walls for wallpaper with your own hands (video)
Having familiarized yourself with all the nuances of wall preparation, gluing wallpaper becomes not scary. The main thing is to follow all the rules and recommendations. You should also purchase high-quality building materials, which, due to their properties, make the work easy. If you yourself find it difficult to understand the wide range of products offered, you need to seek advice from professionals.
The best posts
- Painting drywall - step-by-step instructions
- Sealing drywall joints - recommendations from professionals
- How to join drywall in corners and the process of building a decorative niche
- How and how to glue a foam plastic ceiling plinth
- How to seal a doorway with plasterboard - installation diagram
- How to make a plasterboard ceiling in the hallway yourself
- DIY orthopedic rugs for children
- We make chic rugs with our own hands