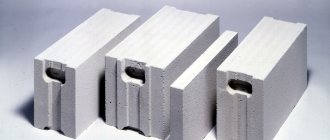
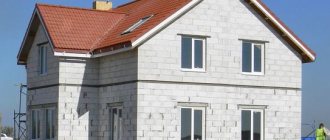
Cinder block is a versatile material that allows you to quickly build a large stone house. At the same time, these huge blocks are not suitable for every climate, so it is often necessary for such houses to insulate the walls from the outside. This material is made from the so-called slag concrete - a mixture of cement and slag crumbs, which is formed when iron is smelted from ore. The slag itself is durable, porous, and the block itself has a sufficient number of holes to provide high-quality thermal insulation. Often, due to violations of construction technologies, the house does not meet the owner’s expectations, so additional insulation is required. This is worth doing in any case, if only because it will result in significant savings on energy resources. This article will describe how to insulate a cinder block house, namely, the main steps, as well as materials and construction technologies.
Material selection
Let's look at the two main types of insulation that are most suitable for cinder block walls.
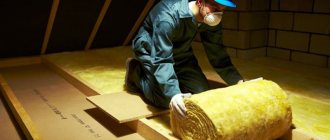
The first type is mineral wool or glass wool. Using this insulation, you can cover walls both outside and inside, and you can also use it to insulate floors in rooms on the basement side. It is stuffed either using special staples, or into a network of boxes, which are then sheathed on top with some material. The main advantage is that there are no pests in it, and the area closes very quickly. This is a budget option that is much more affordable than the next type of material.
The second type is foam polymer materials made in the form of sheets of varying thickness. The most popular are polystyrene, polystyrene foam and penoplex. Experts often consider them to be one and the same material; the only thing that stands apart is ball foam, which is the cheapest of these materials for wall insulation. These materials are often used to insulate only the outside.
The second type is preferable, but usually people look at their financial capabilities. All these materials are good.
Selecting insulation thickness
Insulation of a cinder block house will be successful only when the correct thickness of wall covering is selected. Exact calculations are quite complicated, but based on experience, we can say that the best thickness for insulating the outside of houses in Russia is a thickness of 10 centimeters. In this case, it is necessary to take into account not only the thickness of the insulation, but also the thickness of its coating - plaster or sheathing panels. For the southern regions of our country, you can make a thickness of 5-7 centimeters. The best advice will be obtained from those who already use such a house and have lived in it for at least one winter. The thickness of the walls of the house also plays a role. A house made of slag concrete can also be cold due to an improper foundation, and then it will also have to be insulated, but this is a completely different area of work.
Before starting insulation from the outside or inside, it is necessary to check the walls for cracks or uneven filling of the seam, and correct all this, otherwise the procedure will not give the desired effect.
Step-by-step instruction
In order to insulate walls made of slag concrete, it is necessary to perform a series of works sequentially. Let's consider the procedure for performing work for sheet materials.
- Preparing the walls outside. It is necessary to brush off the dust, remove lagging fragments with sandpaper, holes and potholes must be carefully leveled. After this you need to start priming. The primer must be viscous, otherwise the cinder block will absorb it, and then you will have to fork out for this simple step.
- Applying glue and pasting the walls with sheets of material. You need to press the sheets tightly, and after the glue dries, you need to carefully coat all the seams.
- Installation of fasteners. Using special dowels, foam sheets are pressed against the wall for greater insulation strength.
- A fiberglass reinforced mesh is glued to the surface, which should be applied to the entire plane of the insulation. A special glue is used for it, and it is rolled out from rolls with a roller over the surface.
- Applying a protective layer. It is usually a flexible, cement-based polymer mixture. The surface is leveled.
- Plastering the surface. This is just a decoration; usually it does not carry any power load or thermal insulation functions.
- As for mineral wool, a frame is assembled using quick fasteners, which is filled with pieces of insulation, and then the entire frame is covered with decorative finishing - clapboard, thin siding or even profile laminated iron sheets.
Houses built from cinder blocks, unlike their wooden and brick counterparts, need additional insulation from the outside. The thermal conductivity of a cinder block varies between 0.35-0.6 W/(m 0C), which means that to ensure normal temperature in the house in our harsh climate, it would be necessary to erect a building from cinder block slabs with a thickness of about 1.5- 2 meters, which is extremely unprofitable. That is why buildings made of cinder block slabs of standard thickness are additionally insulated from the outside.
Should you choose external or internal insulation? Professional builders recommend insulating a cinder block house from the outside, since after laying the thermal insulation layer inside the room, the dew point, located between the coolant and the wall, shifts. As a result, moisture will accumulate on the walls, facilitating the spread of moldy fungi.
Another disadvantage of internal insulation is that the thermal insulation material “steals” centimeters of room area. That is why it is rational to insulate a cinder block house from the outside.
Pros and cons of mineral wool and fiberglass
Both types of these materials are available in slabs and rolls. The performance and practical characteristics of mineral wool and fiberglass are almost identical. That is why both of these materials will be considered together.
The main advantage of these materials is their excellent thermal conductivity (about 0.041 W/(m 0C)) and sound insulation. Another indicator worth noting is fire resistance. Mineral wool and fiberglass practically do not burn and spontaneously extinguish in the absence of open fire.
The structure of fiberglass and mineral wool allows these materials to be laid even on uneven surfaces.
Perhaps the only drawback of these materials is that after getting wet they almost completely lose their thermal insulation and sound insulation properties.
Cinder block house. Insulating a cinder block house and strengthening the foundation. Kharkiv
I repeat once again that insulation work can only begin when the cause of the cracks has been eliminated. I’ll explain why: if the house is “crackling,” then the finishing (the upper layers of the facade, which are on top of the insulation, this is plaster or cladding) will crack, and the insulation will become unusable.
Now I will explain what insulation options are available.
1. External insulation option with plastering over the insulation.
The insulation is nailed to the wall with dowels, a primer is applied on top, then mesh, then plaster layers. For this insulation, the following insulation materials can be used (I will immediately list the required insulation thicknesses):
- Eps (extruded polystyrene foam) 60mm, density 30-35 kg/m3
- polystyrene foam 70mm, density 25 kg/m3 and above
- mineral wool 100mm, density from 140kg/m3, special position for plaster
There is no need to specially level the wall for this insulation, there will simply be a difference in the fastening of the insulation. The insulation is attached to a flat wall (without differences) as follows: the adhesive mixture is applied to the entire sheet in a thin layer using a comb (like a spatula with small slots). In addition to the adhesive mixture, the insulation sheet must be secured with dowels (in the middle and in the corners). There are 3-5 dowels per sheet, the outer dowels grab two sheets at once. This type of fastening, I repeat, is for a flat wall (covered with lighthouse plaster, for example), differences in “evenness” are no more than 5mm.
If the wall is not level (differences of more than 5mm), then the insulation is attached as follows: with the same dowels as written above + adhesive mixture. In this case, the adhesive mixture is applied in “splashes” in the middle and at the corners of the insulation board. Or in the middle, and sort of dotted around the edges. The main thing is not to apply the mixture completely to the entire edge (necessarily in a dotted line, or only in the corners).
2. External insulation option with insulation cladding.
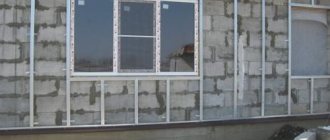
Eps, polystyrene foam and cotton wool can be used in the construction of such insulation. The thickness and density of Eps and foam are the same as for Option 1 (under plaster). The thickness of the cotton insulation is 100mm. This can be mineral wool or fiberglass insulation. The density of mineral wool is 40-60 kg/m3, the density of fiberglass wool is 14 kg/m3, you need to use slabs, not rolls (for both mineral wool and fiberglass wool). When insulating with Eps or polystyrene foam, wind protection is not needed. When insulating with cotton wool insulation, wind protection is required. In the case of Eps and foam plastic, a frame (wooden or metal) is nailed to the wall to secure the cladding, then the insulation is attached (to the wall, with dowels), then the cladding. In the case of insulation with cotton wool, a wooden or metal frame is attached to the outside of the wall, insulation is inserted into it, a windproof membrane is laid on top, and cladding material is placed on top. There should be an air gap of 2-4 cm between the membrane and the cladding.
The option with cladding (2) is easier to implement (you can do it yourself) than the option with plaster (1), and cheaper if the cladding is made of materials such as siding or lining.
When insulating a house, it is important to pay attention to how the ventilation in the house is designed and how it works. I’ll explain in more detail: when insulating with Eps and polystyrene foam (they are not vapor-permeable) and with plastering over the insulation and cladding, the house must have well-functioning forced ventilation. Since when insulated with vapor-impermeable insulation, the wall becomes vapor-impermeable and ceases to participate in air exchange in the room, and therefore, with poorly functioning ventilation, the house can be stuffy and have high humidity. When insulated with (the same) mineral wool (it is vapor-permeable), the wall remains vapor-permeable, so there are no additional requirements for ventilation. I don’t know how your ventilation is done now, so I’ll explain what must be required. Hoods should be in the kitchen, bathroom and toilet, this is the minimum. They need to be equipped with fans. All doors in the house must have either a gap under the door leaf or ventilation holes - in general, not be airtight.
Note. If your windows are old, wooden, then part of the air exchange occurs through the cracks in these windows. Therefore, often when people change their windows to metal-plastic ones, the humidity in the room increases. I don't know what kind of windows you have. If they are old, then if you replace them with new ones, be prepared for the fact that you may have to “add” ventilation. I’ll explain exactly how below.
Before installing fans, you need to check the draft in existing air ducts; they must work normally (not be clogged). If the air ducts are not clogged and the draft is weak, then you may have to increase the height of the air duct pipe going to the roof.
If hoods with fans (in the bathroom, toilet and kitchen) are not enough, and there is still high humidity in the house, then you will have to add ventilation holes in the rooms. To do this, use a hammer drill to drill through holes (12 or 16 drill bits) so that they occupy an area of 100x100 mm. Cover the outside with a regular grille for ventilation, and the inside, such as blinds, so that it can be closed if necessary.
Diagram of the additional hood device
Ventilation involves the supply and exhaust of air into a room. I talked about the hood above, and the flow of air is carried out by ventilation, and simply by entering and leaving the house (opening the doors).
Ask if something is unclear, we will clarify.
Extruded polystyrene foam
What is the difference between expanded polystyrene foam and extruded polystyrene foam? The popular name for extruded polystyrene foam is polystyrene foam. It has a rather denser structure than expanded polystyrene. It also practically does not absorb moisture. However, the cost of polystyrene foam is higher.
The materials are produced in the form of slabs (expanded polystyrene in rolls is much less common).
Main advantages:
- good thermal conductivity - 0.039 W/(m 0C);
- ease of installation;
- fire resistance - some types do not support the combustion process at all.
A significant disadvantage of polystyrene foam boards is the low level of sound insulation.
How to use cinder blocks in your backyard
From this material you can build original stands for benches and tables. The presence of holes in them will allow you to store personal items or create original lighting for the structure.
You can also make stands for garden and indoor plants from cinder blocks. The advantage is that the shape of such stands can be regularly changed at your discretion. To do this, it is enough to rearrange the cinder blocks from place to place, add new elements, or, conversely, remove them.
Mineral wool insulation scheme
Mineral wool or fiberglass should only be laid on a previously primed surface. The best option in terms of speed is the so-called “wet” installation method.
First you need to prepare the surface - remove existing defects (cracks, chips) and prime it. You also need to build a base that will serve as a support for the first base row.
The next step is preparing the glue. In this case, it is important to follow the instructions on the package. After the glue is prepared, you can begin installing the insulation.
Please note: the glue must be applied in an even layer to the insulation using a spatula, and not to the wall! During the installation process, you also need to ensure that there are no gaps between the plates.
Thermal insulation is glued in a checkerboard pattern, like brickwork. Using a building level, we check the evenness of the masonry. Thermal insulation sheets are additionally secured to the wall using umbrella dowels. After the mineral wool has covered the entire wall, you need to lay a layer of glue, drowning the reinforcing mesh into it.
Wall insulation with polystyrene foam
Laying foam plastic is carried out in almost the same way as installing mineral wool.
The first stage is surface preparation. Elimination of defects and application of primer. Next, after preparing the adhesive solution, we proceed to installing the insulation sheets.
Important: there should be no gaps or cracks between the plates!
After laying the insulation boards on top of them, you need to fix the reinforcing mesh. Next, this entire cake is carefully primed and puttied, after which you can proceed to the final stage - applying a decorative coating.
Regardless of what material the house is made of, it always requires insulation. Therefore, taking into account the material of construction, one or another insulation material should be selected. To insulate a cinder block house, you must first decide on the possible options, their installation technique and, of course, cost.
Here it should be taken into account that when coming from the inside, the dew point will move and stop between the wall and the coolant. As a result, moisture will appear on the surface, which will inevitably lead to fungus. And this, in turn, has a detrimental effect on the quality of thermal insulation of the house, not to mention the loss of usable space inside.
Therefore, by insulating the house from the outside, all these negative aspects are avoided. In many cases, experts note that this method is even better compared to work on internal walls.
Cinder block: quantity calculation
To calculate the required amount of material per cubic meter, it is most convenient to use an online calculator, which is available on almost any website dedicated to construction topics. Calculations can also be done manually using the formula V=L×W×H, where:
- L—length;
- W—width;
- H is the height of the cinder block.
After some simple calculations, it turns out that the consumption of a standard cinder block per cubic meter. m approximately 75 pcs. In this case, 72 pieces are usually delivered in a pallet. wall (400×200×200) and 142 pcs. septum (400×120×200) material. It should also be taken into account that some blocks may be damaged during transportation, and 15% must be added to the required quantity.
Main types of insulation
Today there are two optimal options: mineral wool (or glass wool) and polystyrene foam. Each of these materials has its own positive and negative qualities.
Mineral wool is produced either in rolls or sheets. The material has the following positive aspects:
- the thermal conductivity indicator has a value of 0.041 W/(m°C), this characteristic may vary depending on the density of the material itself, but such a change will be insignificant;
- good sound insulation, here the density is of significant importance;
- fire resistance: if a fire occurs, then in the absence of open fire the material will quickly extinguish;
- ease of fixation: the structure of mineral wool allows you to easily cope with uneven surfaces, and it is also easy to eliminate voids.
But this material also has disadvantages:
- poor moisture insulation: if such cotton wool gets wet, the thermal insulation will deteriorate by 2 times;
- the installation technology itself has more complex features;
- rolls tend to roll, this factor is influenced by the dishonesty of contractors or improper insulation of cinder block walls on their own.
Polystyrene foam (extruded polystyrene foam), unlike the first option, is more dense in structure, which makes it more durable. The level of moisture absorption is approximately 10 times lower than that of mineral wool. But all qualities are significantly reflected in the price of the material.
Polystyrene foam can be presented in the form of slabs, less often in rolls.
The positive aspects of this material include the following:
- good resistance to moisture: even if water gets on the surface, the walls will not lose their thermal insulation properties;
- applicable on flat areas and covers them well;
- depending on the use of certain brands, it may have good fire resistance, therefore, like mineral wool, if there is no open fire near the source, this material will quickly extinguish.
Among the negative aspects, the following characteristics should be highlighted:
- low level of sound insulation;
- some types of foam plastic absolutely do not tolerate fire, therefore, when insulating the walls of a house, you should carefully select the brand, otherwise during a fire it can emit acrid smoke and support the fire itself;
- This material of the usual type has a rather fragile structure, this, in turn, leads to certain installation problems.
There is an opinion that rodents like this material. But it is not so. Rodents do not eat polystyrene foam, but they make their home in it, since it is warm enough.
Return to contents
Proportions of solution components for making cinder block
In the construction of small buildings, outbuildings, and garages, inexpensive building materials are used. For walls, the best option is cinder block. This is such a cheap and easy-to-produce artificial stone that you can easily make it yourself. The main thing is to maintain the correct proportions of the solution.
Features and scope
Cinder block is an artificial stone that consists of a mixture of water, cement and filler. The latter is used as slag - crushed waste resulting from:
- metal production in blast furnaces and open-hearth furnaces;
- some chemical processes;
- combustion of different types of solid fuel (coal, peat, oil shale and others).
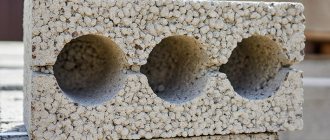
Slag concrete is a lightweight type of concrete with a density of up to 1800 kg/m3, since granulated slag has a voidness level of up to 60%. However, it has a high degree of heat and sound insulation, relatively low weight and, unlike aerated and foam concrete, sufficient strength to hold any hardware in the body.
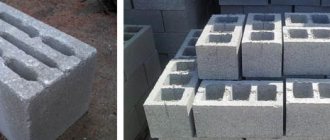
In factory conditions, the proportions of the solution are observed very precisely, because the quality of the cinder block depends on this. The finished mixture is poured into molds and sent for vibrocompression, less often autoclaving (steaming and pressing). Thanks to this technology, production time is reduced to several days. Standard dimensions: 39x19x18.8 cm.
If the cinder block is made with your own hands, then the emphasis is on the correct recipe and natural ripening conditions for the so-called cement minerals:
- Drying period is at least 28 days.
- Humidity – minimum 60%.
- Temperature – from +15 to +25 °C.
Often, for self-made cinder blocks, slag substitutes that are cheap and available for a particular region are used: granite crushed stone, screenings, broken bricks, concrete chips and much more. Despite the different recipes, the resulting products are conventionally called the same term - “cinder concrete blocks”.
Areas of application: in the construction of warehouse buildings, temporary buildings, garages, utility rooms (barn, boiler room), basements, gazebos and the like. The material has a high level of hygroscopicity, so the structure needs complete waterproofing.
Component proportions
The solution for the production of cinder blocks is prepared from the following components:
1. cement grade not lower than M350. Otherwise, the product will not be strong enough and will quickly begin to collapse;
2. medium- or fine-grained slag;
3. sand or screenings - used to increase the density of the cinder block;
4. plasticizers (UPD) or modifying additives - improve some properties of concrete or accelerate the cementation process. Mix with water in the proportion specified in the instructions;
5. industrial water.
The recipe for slag concrete varies depending on the composition and size of the slag and silicate grains. The solution in the average “cement-slag-water” version has a ratio of 1:7:0.7. More precise proportions are given in the table below.
| Components | Quantity | Density of slag concrete, kg/m3 | Brand of solid cinder block, kg/cm2 | Brand of hollow cinder block, kg/cm2 |
| Cement, granulated slag, water | 200, 720 kg, 130 l | 950 | 75 | 45 |
| Cement, granulated slag, silicate sand, water | 200, 500, 540 kg, 130 l | 1250 | 100 | 60 |
| Cement, ash slag (solid fuel), water | 200, 1080, 130 l | 1300 | 75 | 45 |
| Cement, ash slag, quartz sand, water | 200, 720, 540 kg, 130 l | 1450 | 100 | 60 |
Production of cinder blocks
The manufacturing process includes three stages:
1. Mixing the solution in a concrete mixer.
2. Loading into mold, vibrocompression.
3. Unloading finished but still raw products, stacking them for 1-3 weeks to dry.
How to make cinder block at home? Almost the same, with the difference that instead of a concrete mixer you can use a regular shovel, and compaction is done manually.
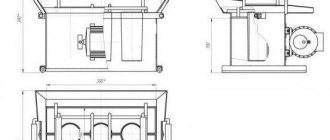
A vibration installation, which removes air bubbles and compacts the solution, is not necessary, although many craftsmen assemble the unit themselves from spare parts for cars. But to obtain blocks of acceptable quality, you need to leave them in the mold for at least 24 hours, periodically moisten and turn over. After unloading, it must be laid out on a pallet and after 4-5 days it can be stacked for final drying for 25-30 days.
How to insulate a cinder block house from the outside with mineral wool
Before you start insulating the walls, you should prepare them.
To do this, they are coated with a primer. If a cinder block house is already completely ready, and all that remains is to insulate the walls, then a method called wet laying is suitable.
In order to insulate a house, you need to follow these steps:
- Prepare the surface of the cinder block wall. It is cleaned of dirt, after which the cracks are removed by plastering and primed. At the same stage, you should take care of the base, which will serve as a support for the first row.
- Next, an adhesive solution is prepared onto which the insulation will be attached to the walls of the house. This process can be found on the product label. After the glue is ready, it is applied to the surface of the material, and then it is pressed against the wall. At this stage there is a very important point: it is best to overlap the masonry to avoid the formation of gaps between the slabs. Otherwise, you will have to take care to fill the cracks tightly.
- After the cinder block house is covered with material, you should take care of the reinforcing mesh. It is made from fiberglass. To attach it to the wall, it must be coated with glue and allowed time to dry completely (24 hours).
- The final stage of such work is the application of primer paint to the walls or plaster. In the latter case, both ordinary and decorative putty are used.
In general, there is nothing complicated about insulation. Everything is elementary and simple.
Return to contents
How to insulate cinder block walls from the inside
The steam room in the bathhouse is insulated from the inside.
Internal insulation of a cinder block house is not recommended, unless, for example, you can use special paint with ceramic hollow spheres or penofol as additional thermal insulation. They are ineffective as independent materials. Thermal insulation of cinder block walls from the inside is practiced in steam saunas, when it is additionally necessary to protect the walls from moisture. In this case, the main thing is to prevent moisture from the steam room from getting into the insulation layer. Naturally, you can only use mineral wool. Work method:
- a wooden frame is erected on the inside of the walls in the steam room;
- Mineral wool, preferably basalt, is placed between the guides;
- foil insulation is spread over the sheathing - it is very effective for saunas, as it blocks infrared radiation and does not allow steam to pass through;
- a second tier of sheathing is installed on top of the foam foam;
- A wooden lining is attached to the second tier.
Mineral wool needs to be laid in two layers and ensure that the joints do not coincide. The minimum insulation layer is 10 cm. The main thing is not to forget to glue the foam foam joints with special (not stationery) tape. Also, the ventilation gap between the penofol and the wooden paneling should not be neglected. Without it, reflective insulation simply will not work, and besides, the condensation on the foam foam must evaporate. Penofol foil often has small holes that are invisible to the eye. Therefore, to be on the safe side, you need to lay a vapor barrier membrane under the penofol.
How to insulate a cinder block house with polystyrene foam: features
The method of laying polystyrene foam is in many ways similar to the method of insulating walls with mineral wool. The sequence of actions is as follows:
- First of all, the wall must be properly prepared. As in the first case, the surface is completely cleaned, puttied and primed.
- Next, glue is prepared according to a similar scheme and according to the instructions on the package. It is also necessary to take care of waterproofing, as it will provide protection from water.
- The wall of the house is covered with overlapping material, without allowing any cracks.
- After the wall is ready, it is reinforced with mesh. Next, give it time to dry and prime.
- The last stage is puttying the cinder block walls. Then you can start painting.
The insulation procedure is important from the point of view of the comfort of life in the house, and also helps to save on heating.
Building a house from cinder blocks has a number of obvious advantages. Such construction is economically profitable, because the walls of such a structure are erected quite quickly.
However, when building a house from cinder blocks, you need to know how to insulate cinder block walls and perform this procedure as efficiently as possible.
Choosing material for cinder block walls
Without insulation, a cinder block house will be cold.
Before we talk about the method of insulating cinder block walls from the outside and inside, let’s decide on the materials:
- mineral wool (mats or heat-insulating cylinders);
- liquid thermal insulation (PPU, penoizol, insulating paint);
- expanded polystyrene (regular and extruded);
- penofol.
In addition to thermal insulation materials, special films are used. Before insulating a cinder block house, let’s look at the types of films (membranes) that are used to protect thermal insulation. There are three types in total:
- wind barrier - does not blow through, allows moisture and steam to pass through;
- waterproofing – protection from moisture, allows steam to escape from the thermal insulation;
- vapor barrier - does not let anything through.
It is important to lay the membranes on the correct side, otherwise they will not perform their tasks. In principle, the choice of thermal insulation largely depends on the conditions under which the thermal insulation will be used. For example, in a house or a bathhouse, because in the latter there is not only an increased level of humidity, but also very high temperatures, especially in the steam room. It is very important that the thermal insulation withstands high temperatures and does not emit toxic substances.
Modern quartz heaters for home, according to reviews, are very inert. They are positioned as economical, which is not entirely true, and the appearance leaves much to be desired.
You can read about which heater is more economical for an apartment here.
Insulation options
Ventilated facade
The ventilated system consists of stacked elements connecting to a single façade structure. A high-quality system is characterized by the ideal placement of existing finishing elements located in the same plane with the facade.
In this case, the gap that forms between two adjacent panels can be minimal or pronounced. Installation of panels with gaps will allow you to hide various flaws in the work, as well as, if necessary, adjust the finishing elements.
Some types of systems provide 3D adjustment, thanks to which you can perfectly align the plane of each element relative to the adjacent one.
Using a special material, façade sealant, you can seal the joints between ceramic tiles yourself. After this, the seams must be covered with ceramic chips.
It is especially important to correctly calculate the thickness of the ventilation gap.
Note! Different types of systems are able to provide gaps of different thicknesses.
This parameter directly depends on the thickness of the insulating material used. However, the limit norm is considered to be 100 mm; otherwise, too much traction occurs in the formed space. It is extremely undesirable in case of fire.
Note! The minimum gap width that can provide effective ventilation of walls is 20 mm. In the case of a one-story building, it is better to increase the gap to 4 cm, then the required volume of ventilation will be ensured.
The instructions for most systems for installing facades imply the following procedure:
- surface marking;
- fastening guides;
- installation and fixation of insulating material;
- installing a windproof membrane on top of the insulation;
- installation of sub-cladding structure;
- laying facing material.
Note! The insulation material must be securely fixed, otherwise the insulation boards are likely to slip, which will lead to the formation of cooling sections of the wall.
Two-layer mineral wool insulation materials are fixed with the harder side of the building, which ensures an excellent fit of the slabs with the soft side to the surface of the building wall. At the same time, the outer side of the structure will retain some rigidity.
Layered masonry
Since you can even insulate a cinder block house from the outside using this method with your own hands, such a three-layer construction is very popular.
In addition, it has a number of advantages:
- small thickness and weight;
- fire resistance;
- unique appearance.
Layered masonry during insulation work often has no external differences from monolithic brickwork. Therefore, experts consider such walls to be reliable and durable.
The most interesting thing is that apartments in houses whose facades are made of facing bricks are always in demand, because not many people understand that this house is not actually built of brick.
The layered masonry method stands out from other existing techniques:
- simplicity of the set of materials;
- standard installation method;
- as well as the opportunity to carry out work year-round.
Warm facade
Facade systems as a method of performing thermal insulation work for buildings are a multilayer structure and at the same time a structural element of the structure.
The purpose of using “warm facade” thermal insulation systems is:
- bringing buildings to energy and heat saving requirements;
- optimal microclimate characteristics for living and working;
- preservation of building envelopes for a long time;
- and environmental protection.
Don't forget about the aesthetic function.
The system provides for the following structural layers:
- glue used to install insulating material;
- insulation material (it can be façade grade polystyrene foam or mineral wool insulation for “warm facade” systems). Installation of insulation material using disc-shaped dowels after the glue has hardened (here it is important to choose the correct size of dowels, taking into account the thickness of the insulation and the thickness of the adhesive layer;
- glue with reinforcing alkali-resistant fiberglass mesh;
- a decorative plaster layer, characterized by a wide range of colors and a variety of textures (the price of plaster can vary significantly);
- facade paint used as an additional protective layer.
Cinder block: laying
To build strong walls, you must first prepare a solution. For this you will need:
- cement grade M400 or M500;
- sand;
- plasticizer (clay, washing powder or Fairy-type dishwashing detergent are suitable);
- water.
You can prepare the masonry mixture yourself using a trough and a shovel, or you can buy it ready-made. In order to achieve a high quality solution, you need to follow the correct dosage. If you are not confident that you can prepare such a solution yourself, then it is better to immediately buy a ready-made dry mixture and dilute it according to the instructions rather than experiment.
To calculate the amount of cinder block for masonry, you need to decide on the thickness of the walls being built, the bandaging scheme, and the thickness of the seams. And also how much solution will be needed.
Also purchase the necessary tools:
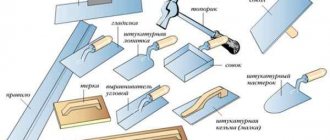
- trowel (trowel);
- level;
- mallet;
- plumb line;
- order;
- cord-mooring;
- shovel;
- container for mixing the solution.
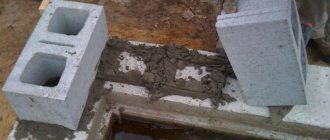
Laying cinder block, compared to brick, is not much different. It will happen much faster due to the dimensions of the material. You can use the same standard masonry, bandaging, and seam processing schemes. It is important to maintain evenness and draw out the corners initially. If difficulties arise with all this - kneading, laying, bandaging, leveling, then it is better to hire professional builders than to redo everything later.
Ultimately, choosing cinder block for construction work is a great decision. The material is convenient to use for decorative work without subsequent plastering. When building a shed or garage, laying cinder blocks will happen faster. And if the quality of the cinder block is also good, then such a structure can last a century!
Conclusion
We talked about the types of external insulation of a cinder block house. We hope that this information will be useful to you and you will be able to choose the appropriate insulation option. In the video presented in this article you will find additional information on this topic.
Most often, the developer thinks about thermal insulation of a house made of cinder blocks with his own hands after the object is erected. This is largely due to the fact that cinder blocks vary greatly in their thermal conductivity.
This indicator can be in the range of 0.35-0.6 W/(m K). Thus, it is very difficult to determine in advance how well cinder blocks can insulate the interior space.
Why does a cinder block house need insulation?
Based on the building codes reflected in SNiP 02/23/2003, only 1.5-2 m can be considered the normal thickness of walls made of cinder blocks. But such thick walls are extremely expensive. Suffice it to say that for such a structure it will be necessary to build a massive and expensive foundation.
In order for the walls of a house made of cinder blocks to retain heat in the home, the best option would be to perform thermal insulation. Then you will be able to save money, provide conditions for a pleasant microclimate, and also make the house more aesthetically pleasing.
Curtain facade
At its core, a curtain facade is a false wall on a metal frame, which is located at some distance from the main wall. It is on this false wall that the finishing material is subsequently hung. The positive aspects include the fact that you can insulate the walls of the house from the outside, without thus taking up the space of the room.
Also, such insulation options are very relevant for cinder block houses.
. In addition, there are a large number of finishing materials on the market, which is also a positive aspect.
When cladding, metal and vinyl siding are most often used; these are the most popular finishing materials
. Ceramic panels and porcelain tiles are used much less frequently.
Despite the fact that vinyl siding is an inexpensive and very practical way to give the facade of a house a decent look, it should be said that plastic has an electrostatic property that attracts dust. In addition, metal or vinyl siding will not help you create an aesthetically pleasing home, as the striped appearance of this siding does not look good enough.
The market for fiber cement and ceramic panels offers you a wide range of textures and colors, various imitations of the structure of wood, timber or decorative plaster
. You can find all this on the building materials market. Some varieties of metal siding and porcelain tiles are not far behind in this race. In this case it is not possible to provide any specific recommendation. In some situations, it is worth proceeding from the guarantees offered by the manufacturer and from personal choice.
Video: DIY siding installation instructions
From which side should a cinder block house be insulated?
There are two fundamentally different options for thermal insulation of the walls of a cinder block house. If you place the insulation on the inside, there will be a greater risk of condensation on the walls. This is due to the fact that the dew point will be between the insulation and the wall. As a result, the risk of condensation will increase significantly.
When placing insulation on the outside of a cinder block house, you will notice several advantages at once. With this method, there is a saving of usable space, a reduction in the risk of condensation, and an improvement in the appearance of the building. Usually the insulation is covered with a finishing cladding, which also protects the walls of the building. It follows from this that external insulation is more suitable.
How to insulate a cinder block house
There is a wide range of thermal insulation materials suitable for protecting a cinder block house from the cold. External thermal insulation can be made with mineral wool, glass wool, expanded polystyrene or penoplex. Each of these materials deserves some attention.
1. Mineral wool and glass wool
Both of these thermal insulation materials are available in sheets or rolls. Glass wool and mineral wool are similar in their qualities, so they can be considered together. The most serious advantage of these insulation materials is considered to be low thermal conductivity, which is at the level of 0.041 W/(m K). High noise insulation is also a plus. The increased fire resistance of mineral and glass wool also benefits them.
But such insulation also has disadvantages. The most significant is low moisture resistance. The thermal insulation capabilities of materials deteriorate if they get wet. The process of laying mineral and glass wool is associated with great difficulties. And due to the fact that insulation materials can clump into clumps, their density over a large working area turns out to be different.
2. Expanded polystyrene and penoplex
There are differences between these insulation materials, although they are not too fundamental. Expanded polystyrene is called ordinary foam. It is produced in thick slabs. Penoplex is more durable and thinner with similar thermal insulation capabilities. The materials are not afraid of moisture and remain in excellent condition for a long time. But penoplex is more expensive than polystyrene foam.
The main advantages of penoplex are considered to be low thermal conductivity, amounting to 0.039 W/(m K), the ability to easily resist moisture, and ease of installation. There are options for expanded polystyrene or penoplex, which are fire resistant.
However, there are types of insulation on the market that easily catch fire. Another disadvantage is the low sound insulation of materials. The cheapest polystyrene foam can quickly disintegrate into granules, deteriorate from exposure to chemicals, and can be eaten by rodents and insects.
How to install insulation on cinder block walls?
Depending on which thermal insulation material is chosen, the operating technology will vary. The specifics of handling each of the above-mentioned thermal insulation materials should be looked at separately.
How to work with mineral wool
Preparatory measures when using mineral wool consist of covering cinder block walls with a primer and plastering. Gaps and cracks must be completely sealed with plaster. There are several options for laying mineral wool. The simplest is the so-called “wet” method. It's worth taking it apart.
1. When the surface is completely prepared, a support for the first row of thermal insulation material is installed on the base. Thanks to it, you can protect the thermal insulation from rodents.
2. Preparation of the adhesive solution. It is better to use moisture-resistant mastic, which, after preparation, is applied to mineral wool slabs. Next, the insulation is applied to the surface of the cinder block wall. It is necessary to try to make the gaps between adjacent slabs minimal. If they are noticeable, an adhesive solution should be placed in them.
3. The fixed thermal insulation layer is covered with glue. A reinforced mesh is placed on it, which is additionally treated with an adhesive compound and left for a day to dry completely.
Having completed such work, the owner can begin decorative finishing. It uses plaster or putty, which is then painted in the desired color.
How to work with polystyrene foam
There are no fundamental differences when working with mineral wool and expanded polystyrene. The sequence of events here is approximately the same as in the previous case. The wet method of fixing polystyrene foam to the surface of cinder blocks looks like this.
1. Preparatory work. Cinder block walls must be thoroughly cleaned, and any cracks present in them must be plastered. Next, the working base is primed and left to dry.
2. As in the previous case, the prepared adhesive solution is applied to the foam. Expanded polystyrene sheets should be placed on the surface of foam block walls with bandaging. Any gaps are filled with polyurethane foam or adhesive.
3. When the foam is secured over the entire area, it can be additionally secured with dowels. Then the insulation layer is primed and covered with reinforced mesh. To secure it you need to use a large amount of glue.
After completing such work, the owner can proceed to plastering the facade. Plaster gives cinder block walls better thermal insulation and makes them aesthetically pleasing.
By responsibly carrying out the described measures, the owner will receive an excellent result. A cinder block house will be well protected from the cold. You don’t need to spend a lot of effort and money for this.
Video. How to insulate a cinder block house
Cinder blocks
Of all the building materials, cinder blocks are the most outdated.
They were popular about 15-20 years ago. The reason for this was low cost and lack of assortment. These are wall stones that are produced using a vibrating press that acts on the concrete solution in the mold. They may include: volcanic, blast furnace or fuel slag, broken bricks, ash, gravel, crushed stone screenings, sand, processed sawdust, expanded clay, perlite and other materials. Industrial waste can also be added here. The use of different fillers causes different characteristics of cinder blocks. Their density can be 500-2000 kg/m3. frost resistance is 15-35 cycles. The minimum thickness of a single-layer wall for the central region should be at least 0.9 m. and more. The calculated thermal conductivity of cinder block masonry is from 0.3 to 0.65 W/m-°C. The numbers given here can only be valid for cinder blocks produced in legal factories. But quite a large portion of materials produced by handicraft methods are put into circulation. It is very difficult, almost impossible, to predict their technical characteristics, because cinder blocks can contain any fillers. Some of them tend to quickly collapse, and this leads to a reduction in the service life of the cinder blocks themselves. Often, the professionalism of workers in the handicraft industry leaves much to be desired.
It is absolutely certain that cinder blocks categorically cannot be classified as environmentally friendly materials. Quite the contrary, walls made of cinder blocks can emit toxic substances that can affect the human respiratory system and increase the likelihood of allergic diseases. There is even a danger of exposure to radiation, since some of the fillers (for example, blast furnace slag) can “foul.” Before purchasing a material, it is necessary to measure its radioactivity level.
When laying, monolithic wall stones and cinder blocks with slot-like or large-sized through voids are used. The large weight of monolithic blocks increases transportation costs. In order to improve the thermal insulation of hollow cinder blocks, they need to be filled with slag. This complicates the construction process. Over time, dry backfill can settle, creating voids that impair thermal insulation.
The technologies for laying cinder blocks and bricks are different. When laying with cinder blocks, the process becomes more complicated, and construction costs increase. Naturally, thin-seam masonry from cinder blocks is impossible, since the blocks have an irregular shape. It follows that the formation of “cold” spots is inevitable, as is heat loss.
After the time when the cinder block house is not heated, it needs to be warmed up for several days. The walls of a house made of this material are always cold to the touch. Cinder blocks during construction must be arranged very competently. It is also important to ensure good waterproofing between the foundation and the walls. They are capable of not burning, and they also do not support combustion. Unfortunately, the material can quickly deteriorate from moisture, so low tides on the roof
It is not recommended to plaster cinder block masonry, since cement plaster does not bond well with the cinder block stone and falls off after a short period of time. Typically, high-strength mortars are used to finish cinder blocks. It is strictly forbidden to leave the walls completely without external finishing, as they will collapse under the influence of rain and snow. If possible, you can cover the masonry with clapboard or siding, or line it with brick. The facade must be ventilated, and the interior decoration can be absolutely anything. The tiles are glued directly to the cinder block wall. You can even wallpaper the walls without treating the walls, but the wallpaper should not be thin or smooth.
