Determination of water requirement and setting time of cement paste
Purpose of the work: to study the methodology for determining the grade (activity) of Portland cement.
As a result of performing laboratory work, the student must
know:
- classification of mineral binders,
— the role of water when using binders,
- properties of cements and its varieties,
— causes of destruction of cement stone by water and solutions of salts and acids.
be able to:
— determine the setting time and brand of cement binder.
Materials:
— Portland cement (or any other type of cement based on Portland cement clinker) — 0.5 kg;
— standard quartz sand with fineness modulus Mk = 2.5…2.7 — 1.5 kg (quantities are given per team),
- tap water.
Security:
- trading scales,
- spherical bowl for preparing cement mortar,
- round spatula,
- shaking table,
— three-cavity mold for making sample beams 4×4×16 cm,
— laboratory vibration platform,
- bath with hydraulic seal
Procedure for performing laboratory work:
1. The grade of cement is determined by the bending and compressive strength of samples - beams made from a cement-sand mortar of 1:3 composition of normal consistency and hardened in humid conditions for 28 days. at a temperature of (20 ± 2) °C.
The work of determining the grade of cement consists of the following operations: preparing a cement-sand mortar and checking its consistency, molding samples, their wet hardening and testing for strength after 28 days. after molding.
| Fig. 1. Diagram of the shaking table (a) and conical shape (6): 1- bed; 2 - table; 3 - test solution; 4 - eccentric |
2. Preparation of cement-sand mortar of normal consistency. To make three samples - beams, 500 g of Portland cement and 1500 g of standard sand are weighed (standard sand is pure quartz sand with a particle size modulus Mk = 2.5...2.7). If such sand does not exist, then it can be obtained by washing and sifting the existing sand on sieves and selecting fractions in the required ratio.
Cement and sand are poured into a spherical bowl wiped with a damp cloth and mixed for 1 minute. Then 200 g of water is poured into the center of the dry mixture - W/C = 0.4. This quantity is taken as a guide; the exact quantity is established during the work process, since it depends on the properties of cement and sand.
The water is allowed to soak into the dry mixture and then mixed thoroughly, grinding the entire mass for 5 minutes. The prepared mortar mixture is not masonry or plaster mortar, but is a kind of concrete model, so it is much less plastic than the traditional mortar mixture used by masons and plasterers.
At the end of mixing, determine the consistency of the mortar mixture. To do this, the solution is loaded into a conical mold (Fig. 1, 6) with a funnel installed on a shaking table (Fig. 1, a) in two steps (in layers of equal thickness). Each layer is compacted with a bayonet (Fig. 2) with a diameter of 20 mm and a weight of about 400 g. The bottom layer is bayoneted 15 times, the top - 10.
Bayoneting is carried out with a bayonet (see Fig. 2) from the periphery to the center, holding the shape with your hand. The excess solution is cut off with a knife, and the metal cone shape is removed vertically upward.
The resulting cone of cement mortar is shaken on the table 30 times, rotating the handle with a frequency of 1s-1. Then, using a metal ruler (or calipers), measure the diameter of the solution cone along the lower base in two mutually perpendicular directions and take the average value.
| Fig. 2 Bayonet for laying the solution in a cone shape: 1- handle; 2 - ring; 3 - rod |
The consistency of the solution is considered normal if the average value of the cone spread is 106...115 mm. If the spread of the cone is less than 106 mm or the cone crumbles when shaken, prepare a new portion of the solution with an increased amount of water. If the spread is more than 115 mm, then a new portion of the solution is prepared with less water content. The error in determining the required W/C ratio should be no more than 0.02, i.e., in terms of water 10 g.
3. Making samples. Prepared solution
normal consistency is used to make samples. For this purpose, detachable metal forms are used (see Fig. 3).
Before filling the mold with the mortar mixture, its internal surfaces are lightly wiped with machine oil. To make it easier to lay the mortar mixture, you can use a metal nozzle mounted on the form. The prepared form is fixed in the center of the laboratory vibrating platform.
First, the mold is filled to 1…2 cm with the mortar mixture and the vibrating platform is turned on. Then, during 2 minutes of vibration, all three cavities of the mold are filled evenly with small portions of the solution.
| Fig. 3. Metal split mold for making sample beams (a) and an attachment for it (b) 1 – clamping screw; 2 – pallet; 3 – transverse walls; 4 – longitudinal walls |
After 3 minutes from the start of vibration, the vibrating platform is turned off and the mold is removed from it. It is possible to fill the mold completely in advance with layer-by-layer bayonet and subsequent vibration for also 3 minutes. Excess solution is cut off with a knife moistened with water, the surface of the samples is smoothed, and then each sample is marked.
The sample in the forms is stored for the first day (24 ± 2) hours on a table in a bath with a hydraulic seal or other device that provides air humidity of at least 90% (for example, in a plastic bag with a damp cloth).
| Figure 3. MII-100 testing machine |
After 24 hours, the samples are carefully removed from the molds and placed for 27 days.
into water at (20 ± 2)°C. After 28 days (1 + 27) of hardening, the samples are tested for bending and compression.
To determine the grade of cement, sample beams at the age of 28 days from the moment of their manufacture are tested for bending, and then each of the resulting halves is tested for compression.
Beam samples are tested for bending using a MII-100 machine (Fig. 3) or a Michaelis lever device (see Fig. 6.8, p. 96). The bending test on the MII-100 machine is carried out as follows. Arrow 2 is set to 0 on scale 1 , moving the screw with weight 6 along slot 5 . The beam sample 11 is installed on the supports 13 of the bending device (the distance between the centers of the supports is 100 mm) and the flywheel 12 creates the primary tension of the roller 10 . When pointer 2 deflects to 4.5 on the scale, the tension is stopped. After this, by raising the control handle 7 , the electric motor of the machine is turned on, which moves a constant mass load along one rocker arm at a constant speed. The rocker arm 9 of this lever is connected to the shackle of the bending device. As the load moves, the force on the beam being tested gradually increases.
The machine is equipped with a counter 8 , which automatically, depending on the position of the load, shows the voltage in the beam at the moment of testing. At the moment of destruction of the sample, the rocker arm, falling, hits the washer 4 of the shock absorber 3 and turns off the machine. The meter displays the bending strength reading. Having removed the halves of the beams, the control handle is lowered to the lowest position, and the counter resets the readings to zero.
When testing bending on a Michaelis lever device, you should be guided by the methodology outlined above in the laboratory work. No. 8, described in the work “Determination of the grade of gypsum”.
To determine the grade of cement, calculate the arithmetic mean of the two largest results obtained during the bending test, and the arithmetic mean of the four largest results obtained during the compression test. The values of Ri and Rсz calculated in this way are compared with the GOST requirements for determining the grade of cement (both values must be no lower than the required ones (Table 8.2).
Table 1.
Previous6Next
Recommended pages:
Properties of cement and cement stone
Some of them are standardized, others are not, but they all have a noticeable impact on the properties of concrete. Currently, our country has two systems of standards regulating technical requirements for cements. The properties of cement are discussed below with a focus on the requirements of GOST 10178-85. The fineness of cement grinding is characterized by a residue on the sieve of 0.08 mm (clear hole size 80 microns), which should be, according to GOST, < 15%. This requirement today has largely lost its meaning, since cements are actually produced with a residue of less than 10% (usually 4-8%, and in finely ground cements - 2-4%). In addition, it does not provide information about the sizes of the main part of the cement grains, which are less than 80 microns. Therefore, another characteristic is usually used: specific surface area1 of cement. It is 2500–3000 cm2/g for ordinary cements, and 4000–4500 cm2/g for finely ground cements of high grades. The true density of cement is 3.1 g/cm3. It is used when calculating the composition of concrete, as it allows you to determine how much cement will occupy in the concrete mixture. When mineral additives are introduced into cement, its density decreases to 3-2.9 g/cm3; slag and pozzolanic Portland cements have a density of 2.7-2.9 g/cm3. Therefore, the density of cement can be used to determine the presence of mineral additives in it. The bulk density of cement (pH) is used in its volumetric dosing, calculation of containers or warehouses, to determine the mass of cement based on its known volume. It is 0.9-1.2 g/cm3. Water requirement of cement is the amount of water required to obtain cement paste of normal thickness. Not standardized by the standard. It fluctuates between 21-30%, increasing with increasing grinding fineness and with the introduction of a number of mineral additives. It is advisable to use cements with a reduced normal density, since as it increases, the water requirement of the concrete mixture increases. Cement paste of normal thickness is characterized by a certain consistency. Cement setting can be defined as the loss of plasticity of the cement paste (or otherwise as a state when there is no more plasticity, but no strength yet). Determined by a test of normal thickness. It is characterized by the beginning of setting - no earlier than 45 minutes from the moment of mixing the cement with water and the end of setting - no later than 10 hours. For practice, the beginning of setting is more important, which determines the “lifetime” of the mixture. It can be simplistically identified by the imprint of the rod (pencil) in a cake of dough of normal thickness. As long as it is plastic, it is correct. As it begins to set, cracks appear around it. For concrete mixtures, the onset of setting is usually noticeably greater than for normal density tests, since they use higher water-cement ratios (0.4-0.7). False setting of cement is expressed in the rapid thickening of the concrete mixture after mixing with water. When grinding cement, gypsum stone CaS04-2H20 is introduced to slow down setting. During the grinding process, high temperatures develop (up to 150 °C and above). This can lead to dehydration with the formation of building gypsum CaS04 • 0.5H20 (i.e. the gypsum is actually fired). When mixing cement with water, rapid hydration of semi-aqueous gypsum occurs (it can begin to set within a few minutes), which leads to a sharp thickening of the concrete mixture. You can check the cement for false setting by repeated determinations of the normal density of the dough at short intervals. Measures to combat false seizure:
- slowing down the hydration of gypsum by introducing plasticizing additives;
- destruction of the formed gypsum structures by longer mixing of the mixture.
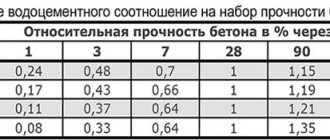
Uniformity of volume change. A uniform change in the volume of cement during hardening (shrinkage and swelling) is inevitable, but an uneven change is unacceptable. It occurs with a sharply slower quenching of burnt free CaO and MgO (limitations on their content - see above). The products of their hydration increase in volume, which leads to the formation of cracks in concrete, sometimes at a considerable age. The uniformity of changes in the volume of cement is determined on cement paste cakes of normal thickness according to GOST 310.3-76. Heat release from cement. Reactions of cement with water release a significant amount of heat. Moreover, the faster the mineral reacts with water, the more heat it releases. Aluminate has the greatest heat release, followed by alitite. The amount of heat generation depends on the mineralogical composition of the cement and the fineness of grinding. Mineral additives in cement reduce heat generation. The maximum heat generation is observed in the first day, during the process of setting and initial hardening of cement. Over 3 days, cements of various compositions emit heat of 110-380 J/g of cement, which is 60-80% of its monthly amount. Heat release leads to heating of the concrete. In massive structures, the temperature, depending on the type and consumption of cement, can rise to 60-70 ° C in 3 days. Due to the cooling of the surface layers, tensile stresses arise in them. This may lead to cracking. To eliminate it, low-heat cements are used: sulfate-resistant, pozzolanic, Portland slag cement. When concreting in the autumn-spring period, heat release already plays a positive role, as it increases the temperature of the concrete and the rate of its hardening. It is also useful for winter concreting. In these cases, it is advisable to use cements with increased heat generation (fast-hardening cements). Contraction When cement hardens, the volume of the solid phase increases, since chemically bound water is incorporated into the structure of the hydrated particles. But at the same time, it is “packed” more tightly, and its volume decreases compared to the original one. The total volume of reacting water and cement also decreases. This phenomenon is called contraction. Contraction begins from the moment the cement is mixed with water, i.e. simultaneously with chemical reactions. While the concrete mixture is plastic, contraction is accompanied by a decrease in the volume of the mixture, i.e., settlement (which can be observed visually). But during setting, the external volume of the mixture is fixed, and contraction is manifested by volumetric changes inside the cement stone. When the volume of reacting water and cement decreases, a vacuum arises in hardening concrete, which is easy to confirm experimentally. There are two points of view on the consequences of contraction. According to the first of them, contraction leads to the formation of a new type of pore in the cement stone: “contraction” pores. According to the second, no new pores are formed, since the water that goes into chemical reactions and reduces its volume is already in the capillary pores. The vacuum that arises in them is extinguished by suction from outside the environment in which the concrete hardens, i.e. water or air. This point of view seems more justified, since during hardening the porosity of the cement stone decreases. Question: what is used to extinguish the contraction vacuum? It is important for the frost resistance of concrete. The entry of air into the capillary pores contributes to its increase, and the entry of additional water - to decrease it. The amount of contraction depends on the mineralogical composition of the cement. On average, it is 6-7 liters per 100 kg of cement for 28 days of hardening. For concrete with a cement consumption of 300 kg/m3, this is approximately 20 l/m3. If concrete hardens in water, such a quantity of it will be additionally absorbed from the outside, and when hardening in air, the same amount of air will enter the capillary pores. Cement staleness. When cement is stored, it slowly hydrates with moisture vapor contained in the air, as well as interaction with CO2. Moisture condenses in narrow contacts between grains and reacts with cement minerals. Its activity decreases. The manufacturer must guarantee that the cement meets the standard for at least 45 days for quick-hardening cements and 60 days for other Portland cements. One of the characteristics that allows us to assess the condition of cement during storage is the loss of cement mass during ignition. Calcination of pre-dried samples is carried out at a temperature of about 1000 °C. In this case, hydrated compounds are decomposed, and chemically bound water is removed. Some stages of loss of cement activity can be observed visually: the appearance of grain aggregates (lumps), their enlargement, and an increase in strength. Decisive for the safety of cement is its sealed storage. In real conditions, the decrease in activity over 3 months can be 10-20%. The use of aged cements has an even greater effect on the frost resistance of concrete than on strength.
Grasping
The thickening time of the cement paste or mortar component is determined based on the setting time data. The characteristics of this process are the time before the start of setting and the time until the end of setting. When the cement paste reaches the initial setting state, it cannot be properly placed and compacted. The end of setting corresponds to the beginning of hardening of the dough. From the time it begins to set, the concrete mixture undergoes a noticeable loss of fluidity. Additives may affect setting times. By the time the cement paste begins to set, hydration of C3S begins. According to some researchers, recrystallization of ettringite is a factor that greatly affects the time to setting. The end of setting of the dough occurs before heat generation in it proceeds at maximum speed, i.e., until the end of stage III. False setting is also observed in the concrete mixture. It is noticeable in cases where hardening occurs in the presence of partially dehydrated gypsum. The workability of the mixture can be restored by additional mixing. False setting can be caused by the formation of excess ettringite - especially in the presence of certain retarders. False seizure has been reported to be caused by syngenitis formation (KCS2H) in some cases. In a concrete mixture, false setting can occur due to the C3A reaction to form calcium hydroaluminates and monosulfoaluminate hydrate. Workability cannot be restored once a false set has occurred. The setting time of cement can be determined using Gilmore or Vick devices. In the Gilmore method, a 75mm diameter, 12.5mm thick cake of cement paste molded onto glass is imprinted with a needle. To determine the time before the start of setting, a needle weighing 113.4 g and a diameter of 2 mm is used, however, to determine the time until the end of setting, a similar needle has a mass of 453.6 g and a diameter of 1 mm. The time before the start of setting is defined as the time when the first Gilmore needle does not leave a noticeable imprint, and the time until the end of setting is when the same happens when using the second needle. All standard cements must have a time before the start of setting of at least 60 minutes, and a time until the end of setting - no more than 10 hours; when using a Vicat needle - 45 minutes and 8 hours, respectively. The method of working with a Vicat needle is similar to that described above; Only the mass and diameter of the needle and the dimensions of the cement paste sample are different. In this method, the time to start setting is recorded when the needle penetrates the cement paste to a depth of 25 mm, and the time to the end of setting is when the needle does not noticeably penetrate into the cement paste. Cement mortar is used for testing. A penetrometer is used to determine the time before the beginning and end of setting. The force required to penetrate the needle to a depth of 25 mm was determined. The force per unit area created by the needle and withstood by the surface of the dough is called penetration resistance. Time before setting begins - the time from the moment of contact of cement with water, calculated for the preparation of cement mortar, sieved from concrete, until a penetration resistance of 3.5 MPa is achieved. Accordingly, the time until the end of setting is equal to 27.6 MPa.
The order of work. To prepare the cement paste, weigh out 400 g of the cement being tested.
To prepare cement paste, weigh out 400 g of the cement being tested and pour it into a spherical metal cup, previously wiped with a damp cloth. Then a depression is made in the cement, into which pre-measured water is poured in one step in the amount necessary to obtain cement paste of normal thickness. The amount of water for the first test mixing of cement can be approximately taken as 110–112 cm3, i.e. 25–28% of the mass of cement.
The recess into which the water was poured is filled with cement using a steel spatula and 30 seconds after this, it is carefully mixed, and then the dough is vigorously rubbed with a spatula in mutually perpendicular directions, periodically turning the bowl 90°. The duration of mixing and continuous grinding from the moment of mixing the cement with water is 5 minutes.
After mixing is completed, the cement paste is placed in one step into a ring, which is shaken five to six times by tapping the plate with the ring pressed to it on the table surface. Excess cement paste is cut off with a knife, previously wiped with a damp cloth. A ring on a glass plate is placed under the rod of the Vicat device, the pestle is brought into contact with the surface of the dough in the center of the ring and secured in this position with a clamping screw, then the clamping screw is quickly unscrewed and the rod, together with the pestle, is freely immersed in the dough. After 30 s from the moment the rod is released, the depth of immersion of the pestle is recorded on the instrument scale. The thickness of the cement paste is considered normal if the pestle does not reach the plate 5–7 mm. If, plunging into the cement paste, it stops higher, then the experiment is repeated with a larger amount of water, and if lower, with less, ensuring that the pestle is immersed to a depth corresponding to the normal thickness of the dough. The amount of water added to obtain a dough of normal thickness, expressed as a percentage of the mass of cement, is determined with an accuracy of 0.25%.
Processing of measurement results:
Cement___________
Cement weighing___
| №№ | Amount of water | Density indicator does not reach the bottom, mm |
| G | % |
Conclusions: _____________
___________________________
___________________________
Control questions
- What is Portland cement called?
- What is Portland cement with mineral additives called?
- How is the thickness of cement paste assessed?
- List the brands of Portland cement.
- How is the normal thickness of cement paste determined?
Laboratory work No. 16
Determination of setting time
cement paste
Goal of the work:
determination of the setting time of cement paste.
Theoretical provisions
Cement setting is the process of thickening of cement paste due to the interaction of cement with water.
The setting time of cement paste according to GOST 310.3-76 is determined using a Vicat device, but instead of a pestle, a steel needle with a cross-section of 1 mm2 and a length of 50 mm is fixed to the lower part of the movable rod. Since the total mass of the rod decreases when replacing the pestle, an additional weight is placed on the flat head of the rod so that the mass of the rod with the needle is 300 g.
The content of the work
Determining the setting time of cement paste
Equipment
: 1. Vicat device with a needle.
2. Spherical cup.
3. Shoulder blade.
4. 150 ml graduated cylinder.
Work order
Cement paste of normal thickness is prepared according to the method described earlier, and immediately after preparation it is placed in a Vicat device ring mounted on a plate and lightly shaken five to six times to remove air. Excess dough is removed with a knife and the surface is leveled. The ring with cement paste is placed on the device table, the rod is lowered until the needle touches the surface of the dough and the rod is secured with a screw. Then quickly unscrew the clamping screw so that the needle can freely plunge into the dough. The needle is immersed in the dough every 5 minutes until setting begins and every 15 minutes thereafter until the end of setting. The place where the needle is immersed in the dough is changed by moving the ring, and the needle is wiped with a soft cloth or filter paper.
The beginning of setting is taken to be the time from the moment the cement is mixed with water until the needle reaches 1–2 mm from the glass plate. The end of setting is taken to be the time from the beginning of mixing the cement paste until the moment when the needle drops into the dough no more than 1–2 mm. The beginning of setting of Portland cement, Portland cement with mineral additives, slag Portland cement and pozzolanic Portland cement should occur no earlier than 45 minutes, and the end of setting should occur no later than 10 hours from the moment of mixing the cement paste.
Processing of measurement results:
Cement weighing_____
Amount of water for normal thickness_______________
The beginning of the retreat___
Renaming within _____________________________________
| Grasping | Time |
| hour | min. |
| Start End |
Conclusions: _____________
___________________________
___________________________
Control questions
- What is cement setting?
- What is taken as the beginning of the setting and the end of the setting?
- How is the setting time of cement paste determined?
Laboratory work No. 17
Determination of uniformity of change