DIY cork board from scrap materials
A cork board can be a real boon not only for conveniently placing notes, but also as an interesting decor.
If you need space to plan, post notes, or visualize desires, you need to figure out how to make a DIY cork board. This handy accessory - decorating an empty wall - is incredibly convenient for placing small notes and photographs, drawings or wishes. It is impossible to imagine an office, school or kindergarten without a cork board on which plans, announcements, congratulations and so on are posted. This accessory is actively gaining popularity in home use. It’s worth finding out what it is and how to make a convenient cork board for notes with your own hands.
How to use the stand rationally
After you have made the stand with your own hands, you can begin to actively use it.
There are two main design methods. You can attach pockets to the surface of the board. These can be paper files, or transparent pieces of thin plexiglass, secured with double-sided tape.
This type of design is used for information stands.
The pockets contain sheets of paper with important information that parents should know about the working hours, routine, and rules of behavior for children in kindergarten.
Information can be updated daily (food menu) or as needed.
Stands are actively used by people of different ages both at work and at home. Reminders of important events, planning for the near future, pleasant memories captured in photographs, visualization of your desires, a convenient organizer - everyone will independently add the most relevant for themselves to the list of useful functions.
On demonstration stands made of cork, the necessary items - photographs, pictures, paper notes, small souvenirs - are attached using buttons, pins, tailor's needles.
The surface of the board does not suffer from this; there are no visible holes left. When setting up a stand for children, you need to make sure that sharp objects cannot harm the kids.
The stand on which teachers display the results of children's work for the day is always popular with concerned parents. And the children are happy to present new crafts and arrange mini-exhibitions in the apartment.
Take a photo of the filled stand as a keepsake, and let it be constantly updated - the world of children's imagination is inexhaustible.
Wall organizer
The material used to create a cork board is the bark of the cork oak tree. To create a structure, you can purchase a thin base on the construction market - a rectangular sheet made from compressed cork. It is convenient to attach photos and notes, posters and various information materials to the finished product using push pins or needles.
A cork board can be used to create panels from photos and children's drawings. The plane can be easily divided into sections according to the days of the week, transforming it into a convenient planner.
A creative approach will help you make an excellent decor out of a cork board with your own hands, using various additions and decorations. The article describes how to implement your plans in practice.
Pros of cork sheets
The material from which the board is made does not look as bright and “juicy” as it could, but with a designer’s approach you will get an interesting piece of furniture. Moreover, cork oak has the following properties:
- resistance to temperature, moisture;
- refractory;
- does not electrify, does not collect dust;
- resistant to fungus and chemicals;
- durable;
- punctures tighten;
- long service life.
And, perhaps, the main factor is environmental friendliness. Cork board is a natural, light, elastic material that does not cause allergies.
Material for creating a cork board
To create your own cork board, you will need:
- frame;
- sheet of cork board;
- ruler;
- pencil;
- sharp stationery knife.
As you can see, to create a cork board you need extremely simple and affordable materials. Perhaps you have an old frame lying around that you can use. Restore its appearance with paint.
The material from which the frame is made can be any: aluminum, plastic or wood, the main thing is that it is combined with the overall design of the room. And if you recently had a renovation, then perhaps there is a sheet of cork backing left in your bins - it is from this that the board discussed in the article is made.
Master Class
- Most often, cork base is sold rolled into a roll. The day before creating a cork board with your own hands, unroll it and press it with heavy objects so that the material straightens out.
- Measure the frame from the inside, transfer the markings to the cork. Clean the frame and coat it with paint or varnish. Leave to dry.
- Using the markings, cut out the required piece of cork sheet. While the frame dries, the measured section can be decorated with drawings, markings or paint.
- Frame a cork board, print out some nice pictures, family photos and attach to the board with pushpins. On this basis, notes also stick well on practical office sticks.
- Make several small boards and place them on the wall - they will serve as a bright homemade decoration for the room. Cork boards look harmonious in absolutely any room: in the nursery, living room or kitchen.
How to decorate a board?
First of all, it should be noted that cork boards are often used in interior design. This is due to the fact that it has a large number of positive characteristics. These include:
- light weight;
- elasticity and elasticity (even after mechanical stress on the material, it quickly restores its original shape);
- antistatic characteristics (due to these properties, dust does not collect on the cork board);
- long service life;
- resistance to various chemicals, etc.
In the process of decorating and designing cork boards, it is very important to focus on all the characteristics that were listed above
Special paint
Due to the fact that initially the cork board itself has a rather inexpressive natural color of wood, many people, trying to create a bright accent and add color saturation to their room, cover it with paint. At the same time, on the market (or in a specialized hardware store) you should purchase exactly the kind of paint that is suitable for painting cork boards (it is advisable to consult a qualified sales consultant on this issue). Depending on your wishes and preferences, you can use one or more shades of paint.
Textile
Another option for adding originality to a cork board is to cover it with decorative fabric. Thus, you will not have to constantly use such a method as painting, and if possible and desired, you can change the fabric quite often. In this case, it is advisable to choose a material that will fit well and harmoniously combine with the overall interior of your room.
Frames
In order to give the cork board a finished and neat look, it can be decorated with a frame. Thus, the decorative element can fit even into a serious, classic interior, for example, a study.
Other ideas
In addition to the options listed above, there are other ways to decorate a cork board. So, for example, you can give a standard rectangular canvas the desired non-standard shape: for example, simpler options include a circle or oval (or any other geometric shapes), and more complex options include the outlines of continents, plants or animals.
Thus, in the process of decorating a cork board, there are no restrictions. You have the opportunity to show your unlimited creative abilities. At the same time, remember that the design of the cork board should be harmoniously combined with the overall interior of the room.
Wine cork board
An excellent solution for wall decor would be boards made from wine corks. They are comfortable and look interesting, organically fitting into any interior. Wine corks can be collected after the feast or purchased at the winery for a symbolic price.
The article presents several interesting ideas for do-it-yourself cork boards for the wall; their creation will take a little time, but the result will certainly please you.
If you have accumulated enough wine corks, you can use them to create a cork board. First of all, inspect the craft material for traces of the drink. To get rid of stains, place dirty corks in a saucepan, cover with water and boil for about half an hour. Dry them and inspect them again. The cleaned plugs can be used, the rest can be boiled again. The material used to create wine stoppers is waterproof and will not swell from boiling.
Here are some ideas for making your own cork board using cork.
Manufacturing options
First, let's look at the simplest option for making a cork board from plywood and corks with your own hands.
- First of all, you will need to select the most suitable work surface and lay a sheet of plywood on it, and place wine corks on top. All sizes must be carefully adjusted. If necessary, you can trim the materials with a construction knife.
- After this, the cork and plywood are firmly glued together using a glue gun . After applying the mass, it is better to leave the product to dry, this may take about one hour. The cork layer will act as the front side, and the plywood layer will act as the back side.
- Later the fabric is taken, it must be thoroughly ironed and steamed . It is laid out on the work surface, a wooden blank is placed on it, and the cork should be at the bottom and in contact with the fabric. The woven base is well straightened, the surface should be perfectly smooth and neat. It should be pulled quite tightly without folds. It is better to first unroll the stand to make sure that the material is evenly distributed on the other side.
- Then you need to glue the fabric on the back side using a glue machine . In this case, it is necessary to ensure that the glue is distributed as evenly as possible over the surface, there should be no lumps. Instead, you can use a special stapler.
- The glue must dry completely, after which you can begin creating the frame . To do this, separate parts are formed from the slats using a jigsaw, and you must first accurately measure all the notes with a simple pencil.
- All cut out parts of the frame must be glued together into a single structure. After the entire product is completely dry, you can paint the whole thing with acrylic paint to give it a more decorative appearance.
The result should be a beautiful stand for notes and announcements. You can also attach several small hooks to the surface, and then the structure will act as a key holder.
Using such a cork board, you can also make an interesting calendar, one large photo frame, or a surface for placing many small photographs at once.
Read also: How to make an origami eternal flame from paper with your own hands.
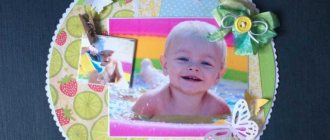
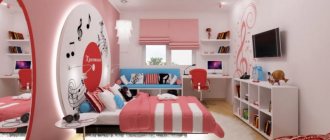
Using this pattern, you can make a cork board for a children's room. To avoid storing children's drawings in a separate album, you can simply place such a structure and attach several sheets of paper to its surface. You can additionally decorate it with stickers with images of your favorite characters.
Let's consider another option for making a cork board.
- You will need to prepare in advance a shallow cardboard box and a lot of wine corks . You will also need a satin ribbon of any color depending on your personal preferences.
- First you will need to adjust the wine corks with a construction knife. They must be the same length.
- After this, a mount is created on which the board will subsequently be fixed when it is placed on the wall . In order to create such a mount, you will need to form a small hole at the bottom of the cardboard box; this can be done using a stationery knife.
- A satin ribbon is carefully threaded into the hole made. It needs to be fixed in the inside of the box with PVA glue. At the same time, you need to thoroughly coat the bottom with the adhesive mixture. It is better to do this in several layers at once. At the same time, pay attention to the appearance of the product; everything should look as neat as possible.
- Later, in order, in several rows, wine corks are installed in the inside of the cardboard box .
- When they are all inside, you can paint some of them with acrylic paint to make the overall design more vibrant and unusual. You can use different colors at once, but they should all fit well with the shades in the interior.
Map
On such a cork board it is convenient to place photographs of places you have visited or would like to visit. Using a thin stroke, transfer the approximate outline of the continents onto a thick sheet of cardboard. Then place the corks on the card, gluing them on with a glue gun. To make the card less bulky, cut the corks in half with a sharp utility knife.
This is how you can quickly and easily create a cork board with your own hands - a convenient design for posting notes and cool home decor.
Bulletin board design - on nails...
If you do not intend to produce such “platforms” en masse, then in general you can get by with improvised tools: a saw, a plane (for unplaned boards), a screwdriver, a hammer. The structure we produced was completely fastened with nails. Only in the upper part of the box were grooves cut out, and a crossbar was inserted into them, creating a kind of canopy over the doors.
We consider the optimal board width for such a product to be 80 mm.
Having secured the back wall, create a fastening surface on it for a stationery pin. A wine cork cut in half and placed on glue is suitable for this.
Note board: 3 super master classes
Many people are familiar with the situation when a note with an important entry disappears or it is difficult to find a pen and paper to quickly write down a phone number. A DIY note board solves this problem, and it can also become an interior decoration. It is very convenient to have a specific place in the house where you can leave a message, grocery list, business card, phone number or birthday date on a piece of paper.
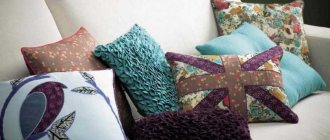
Master class “soft French board for notes”
A cute and functional board for notes and notes can be made in a couple of hours from scrap materials. Every needlewoman has cardboard, fabric with delicate colors, ribbon, buttons and threads. Make not one, but two or three soft boards - a functional composition for notes and a designer highlight in your home. The main thing is to choose the right fabric to match the upholstery and overall design.
- hard cardboard, plywood or fiberboard;
- an awl or drill with a mini attachment;
- fabric with an interesting pattern;
- material for the soft substrate – synthetic winterizer or thin foam rubber;
- knitting threads (acrylic or iris);
- braid or thin satin ribbon;
- glue;
- "gypsy" needle;
- furniture stapler;
- buttons, beads or other decor;
- scissors, ruler and pencil.
- Take as a basis a square of thick cardboard or plywood of the desired size. The easiest way to work is with a cardboard base - for beginners, a 15x15 cm format is suitable.
- On the base you need to make markings in the form of a grid - the lines should run parallel to the diagonal of the square.
- At the intersection of the lines you need to make holes with an awl, a needle or a drill with a thin drill bit.
- Cut the padding polyester the same size as the base and grab it through the holes made so that it does not slip.
- You also need to prepare the fabric in size with a margin for good bends under the base.
- Cut the ribbon to the length of the grid lines, but with some extra room for hems.
- Place the fabric on top of the padding polyester, securing it on the back side with a stapler (or glue).
- Now, using thick acrylic knitting threads, we fix the braid at the intersection points through special holes. Make sure the tape has good tension.
- On the reverse side, the tape also needs to be glued or secured with a stapler.
- At the intersection we sew or glue beautiful buttons or beads.
If you leave the clean fabric without the braid, you will get an original soft sign for notes that are attached to it with pins. Photos, notes, recipes, business cards and other valuable pieces of paper such as postcards are placed between the fabric and the braid.
We decorate the notice board and bring it to mind
Of course, you can do without a beautiful roof for a house, but without it the product loses its ambiance. To do this, it will be enough to take only three boards. Place one thicker one horizontally on the top of the box (it is also suitable for stand branding) and attach the lid directly to it. If desired, fill a piece of tin. If you want to decorate the structure with carved platbands - please! After the structure is assembled, it is necessary to coat it with varnish and leave it until completely dry.
PS Unfortunately, we cannot know all the possible conditions for attaching the resulting stand, but we are firmly confident that if you have generated it, then correctly attaching the product in a visible place will not be difficult for you!
Master class “modern board for notes”
If you want to make a convenient thing of modern design, then make such a tablet board for notes or photographs. How many of these tablets to make, decide for yourself - it all depends on the idea. When you implement several boards, it will be an exposition with interesting inspiring pictures, postcards and notes. Moreover, it is not at all difficult to make it from a purchased document holder tablet with your own hands.
- tablet holder for documents (buy at the office);
- acrylic paint;
- nails and hammer;
- Double-sided tape.