Facing — covering with facing material (porcelain stoneware), which gives the structure protective, sanitary, hygienic and decorative qualities.
Cladding can be characterized as a structural system with interconnected functional layers. Different layers have different internal stress coefficients. The strength of these layers is related to the stresses that arise inside, at which each functional layer reacts not as an independent element, but as a single structural system. Collected into a single system, functional layers lose their independence, and each layer and material becomes interdependent. It is the entire structural system as a whole that is subject to stresses associated with mechanical, chemical, temperature and humidity influences. Thus, compression of a layer of mortar, cement screed or supporting structure can cause the most common and dangerous situation in which the surface layer is subjected to stresses that cause swelling and peeling of the tiles. Therefore, in addition to choosing high-quality porcelain granite, it is necessary to choose the right cladding method, mortar and grout.
GENERAL TECHNOLOGICAL SCHEME
Laying is the practical execution of the project. Laying is carried out after the dry mixture has been selected, the screed has been prepared, the caliber and tonality have been checked, and the tiles have been defective. Work should be carried out in good lighting at an ambient temperature from +5º to +40ºС. During the installation process, you must follow the recommendations of the manufacturers of all related materials used: tools, adhesive mixtures, materials for filling expansion joints. From time to time it is necessary to check the correctness of installation, whether the seam between the tiles, the horizontal line are not broken, so that the edges and end sides of the tiles are not caved in, and there are no voids. Laying ceramic tiles is quite complex and painstaking work, so the tiler must be a highly qualified specialist. Work must be carried out in accordance with building codes and SNIP requirements.
The general scheme of preparatory work for laying porcelain stoneware consists of the following stages:
1. Study of the installation location and surface operating conditions;
2. Preparation of the base;
3. Waterproofing;
4. Selection of adhesive mixture and grout;
5. Direct laying of tiles;
6. Organization and grouting of joints;
7. Surface cleaning.
Stage 1: studying the installation location and operating conditions of the surface involves determining the required amount of ceramic granite for the selected area, drawing up a room plan and layout with a margin of 3-10%, depending on the technological layout of the installation.
Recommendations:
- Before you start laying, you need to make sure that the batch is the same in shade, size and is sufficient in quantity. Let us remind you that porcelain tiles can be laid in gauges of different tones that are similar in size, but it should be taken evenly from different batches, without laying one batch after another.
- To obtain a harmonious final pattern, porcelain tiles should be divided symmetrically. In order to get whole or cut tiles of the same width at the edges of the tiled surface, you must first draw a vertical line exactly in the middle of the wall/floor as shown in Figure 1.
- On outer corners and wall protrusions, installation should begin with whole tiles; cut tiles are attached to the inner corners (Fig. 2).
- In passages between rooms that have doors, the seams are drawn along one line from one room to another (Fig. 3).
If it is possible to freely determine the height of the tiles, installation should begin with a whole tile at the bottom and end with a whole tile in the upper belt.
- In niches for heating radiators, the laying surface is divided in such a way that cut tiles of the same width end up either in the middle of the surface or symmetrically along its edges (Fig. 5).
Stage 2: surface preparation
Before you begin installation, you need to prepare the surface.
IF CERAMIC GRANITE IS LAYED ON THE FLOOR , then the screed should be used when necessary:
- leveling the base surface;
- covering pipelines;
- distribution of loads on heat and sound insulation;
- creating a slope in the floors.
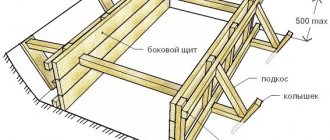
The screed should be:
- Strong, smooth and hardened . The drying period of the screed is about 7-10 days for each centimeter of thickness. For screeds more than 4 centimeters thick, the exposure period is at least 28 days. You can reduce exposure time by using special quick-drying compounds.
- Clean . There should be no fats, oils and other contaminants that create a layer between the glue and the screed, reducing its adhesiveness.
- No cracks . Cracks must be sealed with special epoxy resin glue.
- Durable. Mechanical strength, like thickness, must correspond to the purpose of the future coating. The compressive strength of the screed in residential premises must be at least 20 N/mm, in commercial premises - at least 30 N/mm.
The minimum thickness of the screed must be at least 2 centimeters; if the floor level is less, it is recommended to level it with a special floor leveler.
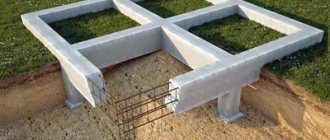
To strengthen the screed, it is necessary to increase the thickness of the layer to 4 cm and higher and reinforce it with metal mesh VR-1, mesh 50/50 (100/100) diameter 4. Reinforcement is also necessary if the base is not monolithic and is subject to deformation vibrations and increased loads. For better screed quality, you should use a solution with hydraulic additives. For warm floors, as well as floors with high humidity, we recommend adding elasticizers. The strength of the screed must comply with the limit values of SNiP 2.03.13-88. Floors.
When drying, the screed shrinks; in this case, you should check the evenness of the entire surface of the base. To do this, you need to attach a three-meter strip to the surface of the screed lengthwise and crosswise. The clearance between the base surface and the rail should not exceed 5 mm. Places where there are unevennesses above the permissible value should be filled with tile adhesive or filled with floor levelers. To use the leveler, the required condition for the screed is complete hardening with a moisture content of no more than 5%. If the moisture content of the screed exceeds the permissible value, it is not recommended to use a leveler, otherwise the bark will peel off. By using a floor leveler, you save on the consumption of adhesive mixture for porcelain tiles.
IF PORCELAIN TILE IS LAYED ON A WALL , it is important that the layer of plaster or putty does not peel off or crumble. To do this, using a hard and sharp object, you need to check the strength of the surface by drawing intersecting lines on it, as shown in Figure 6. You should especially carefully examine the points of intersection of the lines so that there is no delamination of the base in these places.
Old wallpaper, layers of paint and other decorative and facing materials must be completely removed.
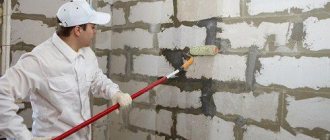
Before laying tiles or leveling the base, it is necessary to apply a primer suitable for this type of base or materials that increase its adhesive properties.
- Primer emulsion is an adhesive agent for preparing the base for putty, dry plaster, or adhesive mixture. The primer is especially recommended for the treatment of gypsum and anhydrite surfaces, plasterboards, seamless cementitious substrates and plaster. The primer penetrates deeply into the pores of the base and significantly reduces their absorption, and also binds dust and loose particles of material.
- gypsum plaster or hard putty is used to level the wall surface .
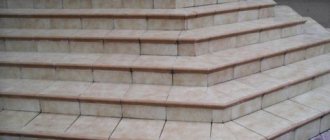
- To reconstruct steps and fill deep cracks, it is recommended to use a dry mortar for laying tiles and porcelain tiles with increased fixation.
- To fill deep cracks and scratches on walls, epoxy resin or liquid cement mortar with the addition of liquid glass .
- If the base consists of reinforced concrete slabs, then the seams between them must be sealed with cement-sand mortar or concrete of class B 7.5 or higher.
Stage 3: waterproofing Waterproofing against the penetration of sewage and other liquids, as well as acid-based solutions, should be provided only for medium and high intensity exposure to the floor (SNIP 2.03.13-88 “Floors”). In those areas of the room that are constantly exposed to moisture, it is recommended to use technological materials for waterproofing. The tiles themselves are waterproof, but moisture can penetrate under the tiles through the seams between the tiles and cause damage. In this case, for compaction you need to use materials and elements of the “KT” brand or materials of the “PENETRON” system. After applying technological materials and elements for waterproofing, porcelain stoneware can be laid directly on the layer of this surface. To protect against the penetration of water and aggressive chemical liquids, you should use isol, hydroisol, brizol, polyisobutylene, polyvinyl chloride film, and duplicated polyethylene. With a high intensity of exposure to liquids on the floor, as well as under drains, channels and drains within a radius of one meter from them, the number of layers of waterproofing from bitumen-based materials should be increased by two layers, and from polymer materials by one layer. All cracks, joints, seams, junctions, and communications entries must be insulated.
Stage 4: selection of adhesive mixture and grout The next guarantee of long-term operation of the floor is the correctly selected adhesive mixture. It must comply with the installation conditions and its purpose. Technogres requires an adhesive mixture that is intended for porcelain stoneware.
Key indicators for choosing adhesive for porcelain tiles
- The adhesion index to the adhesive base should be higher than 1.4 N/mm2. after 28 days, which will allow it to be used both outdoors and indoors.
- When laying porcelain tiles on vertical surfaces, the adhesive must have thixotropic properties, which allow the tiles to be laid without slipping.
- The compressive strength indicator is determined by the expected load on the base, which should be indicated in the technical recommendations for the use of glue.
- The choice of one-component or two-component adhesive depends on the climatic conditions in which the material will be used. Two-component adhesive is more resistant to changes in temperature and environmental humidity, which determines the durability of the coating.
- When laying porcelain stoneware formats larger than 30x30 cm and expected deformations of the base, the adhesive must have high deformation properties.
- The choice of adhesive depends on the temperature at which the porcelain tiles are laid or the time of year. At low temperatures (less than + 15 C) it is recommended to use a material with a rapid strength development time. At high temperatures, on the contrary, adhesives with a long life on the surface after application are required. This regulates the start-up time of the object and good working conditions when laying porcelain stoneware.
- Certified adhesives in accordance with the European Standard EN 12004 allow you to select the desired adhesive class - this is class C2. This class determines the required properties of the material for laying ceramic granite. Additional values: F - rapid strength gain, E - increased lifetime of the material on the surface, T - thixotropy.
- For laying porcelain stoneware on complex substrates - metal, plastic, wood, etc., it is recommended to use polyurethane or epoxy-based adhesive.
- When operating in a highly aggressive environment, be sure to use epoxy-based glue.
We recommend using solutions such as CERESIT, MIKSONIT and KREPS-reinforced for porcelain stoneware.
Stage 5: direct laying of the tiles. There are some nuances depending on where and how the ceramic granite is laid. Conventionally, we can distinguish: - laying small areas in private interiors (floor/wall); — laying tiles in rooms with heavy-duty flooring (supermarkets, warehouses, garages) and in medium and large areas (offices, restaurants, airports) (floor/wall); — laying tiles on the street; — lining of the pool bowl and spa areas; - laying on the fireplace.
Preliminary work
Choosing porcelain tiles
Today, manufacturers offer a wide range of porcelain stoneware. It has different colors, patterns and textures, and is available in the form of tiles, both regular sizes and large slabs with a side length of up to 1 meter.
Before choosing porcelain tiles, you need to decide for which rooms it is intended. In rooms with high humidity, frequent use of detergents and cleaning products, and high traffic, porcelain tiles with a matte and rough surface that prevents slipping would be preferable. Such premises include bathrooms, toilets, hallways, kitchens, and balconies. For living rooms, you can choose glossy porcelain stoneware. This material has a representative appearance, is usually produced in large slabs and is an excellent alternative to marble flooring. For greater comfort, a heated floor system can be installed under the porcelain tiles.
Porcelain stoneware is a high-strength facing material. Manufacturers offer a wide selection of porcelain tiles for all types of premises
In addition to many excellent characteristics, porcelain stoneware performs well at low temperatures, so it is successfully used not only on indoor surfaces, but also outdoors.
Deciding on the installation method and option
Two technologies have been developed for laying porcelain tiles:
- Laying in specially created fixing structures. Such structures are made for cladding ventilated facades and raised floors.
- Adhesive technology for laying porcelain tiles on the floor.
These are two radically different styling methods. They require different surface preparation and require different fastening of the slabs. The first technology involves the installation of special structures into which porcelain stoneware is inserted into special grooves without the use of glue or mastic. This method is quite complex and its implementation is best left to specialists. The second method is practically no different from laying ordinary tiles and is quite easy to perform.
Approximate diagram of laying porcelain tiles in the bathroom
There are standard options for laying porcelain stoneware, which are used depending on the purpose of the room and personal design preferences.
Options for laying porcelain stoneware
Preparing the floor surface
Before laying porcelain stoneware, the floor surface must be carefully prepared. The floor is leveled and cleaned. When laying on a concrete base, special mixtures are used to level the floors. After pouring, the floor must dry well, then it is primed and only after that begin laying porcelain stoneware. It is allowed to lay porcelain stoneware on top of old tiles. This method is used if the old tiles adhere well to the base. The surface is first leveled, degreased with lye and then treated with a special primer.
The concrete floor is carefully leveled before laying porcelain stoneware
When laying porcelain stoneware on a wooden floor, carefully prepare the base. This floor must be waterproofed. The logs are secured and leveled, if desired, a layer of insulation is laid, and sheets of fiberboard, thick plywood or OSB are secured on top with self-tapping screws. When laying such sheets, be sure to make a distance of 1-1.5 cm from the wall, which will avoid future curvature of the surface and tiles falling off due to changes in humidity. Before laying porcelain stoneware, the wooden surface is primed 2-3 times to achieve maximum adhesion.
The wooden floor is repaired and leveled before laying porcelain stoneware
Sometimes the surface is leveled with plasterboard. The surface of the drywall is perfectly flat, but it absorbs moisture well. Therefore, preliminary coating with a special primer is required. Drywall must be thick and moisture resistant. This method of leveling the surface is most often used for walls. It is not advisable to use it for floors, and it is unacceptable for bathrooms and kitchens.
After the floor is leveled, cleaned, primed and dried, the installation of porcelain tiles begins.
Choosing a tool and glue
The tool for laying porcelain tiles is practically no different from that used for laying tiles.
To lay porcelain tiles you will need the simplest construction tools
You will need: a tape measure, a level, a marker, a rubber hammer, a notched trowel and a rubber grout trowel, a tile cutter or grinder (especially for large slabs), and a set of cross stitches for the seams.
Porcelain tile is a very durable material, so to cut it you need a professional tile cutter or grinder
The choice of adhesive for porcelain tiles must be taken very seriously. The use of ordinary cement mortar for this material is unacceptable, since porcelain stoneware has an almost zero coefficient of water absorption, and the adhesion of the surfaces will be poor. Manufacturers offer special mixtures based on polymer fillers, the use of which will give good results.
LAYING PORCELAIN TILE ON THE WALL
1. Using a level, a straight edge and a plumb line, apply markings.
2. Prepare tile adhesive until creamy.
3. Apply a thin layer of the solution with a trowel, pressing it firmly against the base.
4. Apply the main layer of mortar and level it with a serrated edge (the size of the trowel teeth is selected depending on the size of the tile and must be at least 8 mm). Prepare a surface of 1-1.5 square meters in this way.
5. Apply ceramic granite in accordance with the markings. To do this, place the porcelain tile edge-on to the adjacent one, press it to the base and move it slightly to the desired location. This method prevents the mortar from being pressed into the tile joints.
6. Using crosses for laying porcelain tiles, keep the grooves of the same width.
7. Remove excess mortar from the grooves, which will then allow you to correctly insert the joint mixture into these places.
8. Wait for the adhesive solution to dry (6-8 hours at a temperature of +23ºС).
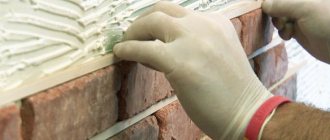
9. Prepare a solution for jointing grooves in accordance with the instructions for its use. Apply it to the tiles with a float.
10. Remove excess solution with a damp sponge. Remove any remaining water with a dry cloth.
Required tools and materials
The technology for laying porcelain stoneware involves the use of a number of special devices that speed up the process and facilitate the task of processing such a durable material. The following tools will be required:
- grinder or tile cutter;
- level;
- a set of spatulas with smooth and serrated edges;
- container for mixing the solution;
- construction mixer;
- SVP or plastic crosses.
Set of necessary tools
Another important issue is the choice of adhesive composition. Select a mixture that can withstand the load placed on it. In other words, make sure of its plasticity, tenacity and strength, as well as the appropriate setting time.
In addition, it must match the type of surface being coated. This is especially true if you decide to glue porcelain tiles to a wooden floor or plywood. In this case, the possibility of mass movement during expansion and drying of the material is provided. It is not recommended to install heated floors; it is advisable to limit wooden flooring from such temperature changes.
When finishing walls, more important is the ability of the solution to hold heavy porcelain tiles during installation and after drying. It is acceptable to use regular tile adhesive, but for optimal effect it is better to purchase a specialized mixture. Please note that you will need a lot of composition, due to the large weight of porcelain stoneware.
Related article: How to make beds for strawberries: examples and tips for arrangement
LAYING PORCELAIN TILE ON THE FLOOR
1. Determine the type of layout and make markings.
o Preferable for paving large spaces;
o With a rich textured tile surface, so as not to distract attention with additional decorative seams;
o To match the joints of the seams of wall and floor tiles;
o When taking into account the economic factor (fewer tiles required);
o When covering walls with rectangular tiles;
o When installing a ventilation façade and raised floor.
o If the overall dimensions of the floor and wall tiles do not match;
o To make the facing surface more decorative;
o When facing areas of complex shape.
o To make the surface more decorative with different color combinations, with combinations of different formats and textured surfaces.
o Stir the solution until a semi-liquid consistency is obtained. You should pour only the amount of solution onto the base that you will have time to use before a layer of crust forms on it.
o Use the smooth edge of the trowel to spread the contact layer of mortar on the base, and then, using the jagged edge, spread the “comb” layer. Depending on the size of the porcelain stoneware, a trowel with square teeth measuring 8*8mm, 10*10mm or a toothed strip for the middle layers is used.
o Apply ceramic granite in accordance with the markings. To do this, place the porcelain tile edge-on to the adjacent one, press it to the base and move it slightly to the desired location. This method prevents the mortar from being pressed into the tile joints.
o Using crosses for laying porcelain tiles, maintain grooves of the same width.
o Remove excess mortar from the grooves, which will then allow you to correctly insert the joint mixture into these places.
o Wait for the adhesive solution to dry (24 hours at a temperature of 23ºC).
o Prepare a solution for jointing grooves in accordance with the instructions for its use. Apply it to the tiles with a float.
o Remove excess solution using a damp sponge. Remove any remaining water with a dry cloth.
Rectangular layout is used:
Diagonal layout is used:
The combined layout is used:
IMPORTANT: we recommend laying by double spreading: apply a layer of glue to the tile and screed, after which the tile is pressed tightly and tapped with a rubber hammer. In places where there are higher loads, an “Elasticizer for cement mortars”, for example “Ceresit CC83”, can be added to the adhesive mixture, which is designed to impart elastic properties, as well as to increase the adhesive properties, crack resistance and moisture resistance of concrete, mortars and adhesives. mixtures. The introduction of an elasticizer into grouting solutions increases their adhesion, strength, and also reduces water permeability and the likelihood of efflorescence formation at the seams of wet masonry.
LAYING IN THE APARTMENT
This is the simplest type of installation from the point of view of surface preparation, since operation in such rooms always takes place at a constant temperature of about 20ºC, therefore no additional expansion or expansion joints are required. It is enough just to level out all surface unevenness and make sure that all surfaces are absolutely static and will not undergo deformation after installation.
Before starting work, it is necessary to provide the tiler with: - a complete specification of the selected materials; — drawing or laying diagram; - determine the size and color of the seam (as a rule, for private interiors this is 2-3 mm, unless the project provides for seamless installation, or maybe, on the contrary, with particularly large seams 5-10 mm).
IMPORTANT: Porcelain stoneware can be cut and drilled. To do this, use a special tool or hammer drill. For the most even hole, you need to start drilling in an aqueous environment and periodically wet the surface. Do not allow very strong pressure on the tool and distortions of the drill.
Choosing adhesive for installing ceramic tiles and porcelain stoneware
The reliability and durability of the finish as a whole depends on the quality of the chosen adhesive for installing porcelain tiles. Therefore, this stage must be approached with all seriousness and responsibility.
The choice of one composition or another is influenced by various factors. The most important of them:
- type of tile;
- fragment size;
- indoor operating conditions;
- internal or external masonry.
To install small fragments in dry rooms, you can use almost any brand of glue. When it comes to laying large pieces of porcelain stoneware, arranging a bathroom, or laying them on “warm floors,” the choice here is not so obvious. Based on numerous reviews of tile adhesives, we can recommend several of the most popular brands:
- EK 3000 UNIVERSAL. A simple and inexpensive adhesive for installing ceramic tiles and porcelain stoneware. Suitable for relatively flat and undeformed bases, for example, on a screed.
- Vetonit EASY FIX. Possesses frost resistance. Can be used indoors in damp areas. It has high plasticity and at the same time does not allow the tiles to slip during installation. For non-deformable bases.
- Knauf Fliesen. It is used for cladding floors inside and outside buildings, walls - only inside. Used on non-deformable substrates. It is allowed to use porcelain stoneware weighing up to 50 kg per square meter for installation.
- Ceresit CM 14 Extra. One of the universal and popular compositions. It can be used for cladding floors and walls indoors and outdoors, as well as basements. It is moisture resistant and frost resistant. Due to its elasticity, it is permissible to use heated floors on wooden floors and heating systems.
- Ceresit CM 16 Elastic. Product of the highest class. Reinforced with microfiber fibers. Has increased strength after hardening. Allows the laying of porcelain stoneware and stone fragments. Elastic: can be used on deformable floors (chipboard, fibreboard, OSB), gypsum plasterboard walls, as well as under underfloor heating systems. High adhesion of 1 MPa allows the adhesive to be used for masonry using the “Tile on Tile” method.
- Eunice Pool. A composition that has very good adhesion of 1.3 MPa. Suitable for porcelain stoneware with fragment size 60x60 mm. Characterized by water resistance, frost resistance, elasticity. Suitable for use in damp rooms, inside or outside the building, on freezing walls. On deformable and non-deformable surfaces. Can be used on underfloor heating systems.
LAYING TILES IN PROBLEM AND LARGE ROOMS
Thickened porcelain tiles in small formats (for example, 20x20) are ideal for floors in supermarkets, parking lots or warehouses where the weight loads per square centimeter are very high due to the use of heavy equipment and machines for moving loads. In such rooms, two interrelated factors play a major role: format and thickness, and, as a consequence, bending strength, which is approximately expressed by the formula “strength = thickness/format” - i.e. increases with increasing
thickness or reducing the size of the tile. For example, when the thickness of 20x20 porcelain tiles increases from 8.5 to 14 mm, its strength increases almost 3 times.
A properly prepared screed and a suitable adhesive mixture will also guarantee long-term operation without loss of aesthetic properties, with the correct material selected. The screed must be absolutely static and strong, as indeed in all other cases, but for such rooms it must also be further strengthened due to its greater thickness and reinforcement with special materials, and of course its top layer must be perfectly leveled for subsequent installation. If the room is very large, then it is also necessary to use expansion joints to dampen micro-vibrations, which, no matter how ideal the screed is, are nevertheless present in any building. The expansion joint can have different depths and, as a rule, goes 10-20 mm deep into the screed, and at the top it reaches the level of the surface lined with ceramic granite. The seam should be filled only with special plastic grouts or other materials (for example, polyurethane cord).
The mixture on which porcelain tiles are laid must also be carefully prepared and used in strict accordance with the manufacturer's instructions for use. Currently, there are a sufficient number of companies producing special adapted mixtures for laying and grouting joints in the most difficult conditions.
Particular attention should be paid to the application of the adhesive mixture. In rooms where there are increased loads on the floor, it is especially necessary to avoid the appearance of voids in the adhesive layer between the tiles and the screed. The presence of voids and voids makes this area potentially weaker, and the tile may crack when concentrated stress is applied. Therefore, it is recommended to install by double spreading: apply a layer of glue on the screed and then on the tile, after which the tile is pressed tightly and tapped with rubber hammers. It is also necessary to periodically check whether voids appear during the installation process. To do this, periodically remove the uncured tiles and inspect them from the back to make sure that the adhesive solution is evenly distributed.
The surfaces in such rooms are, as a rule, large, and therefore it is necessary to consider the entire facing area as consisting of many small segments, each of which is one tile. As noted above, ceramic granite, due to its density, is an absolutely undeformable and unbending material, while any surface, especially a large one, will experience micro-vibrations. Therefore, it is recommended to lay tiles with sufficiently large joints of 5-8 mm and grout them with special grouts, preferably epoxy-based. You can use cement grout, but mix it with the addition of latex, which makes the joint more flexible and water-resistant. We also note that the smaller the format of porcelain tiles, the more seams on the surface, which means the higher the anti-slip properties in a given room.
The use of special types of grout is also necessary because, as a rule, in such premises there is the presence of various pollutants, such as machine oil (warehouses and garages), aggressive chemicals, incl. and acids (industrial premises), strong detergents (during machine cleaning in supermarkets), make the operation of the floor covering even more difficult and subject to an additional risk of loss of appearance. These factors may not directly affect the tiles if porcelain stoneware is chosen as it is chemical resistant, but the impact on the grout can be very severe. Therefore, it is important to use grouts adapted to such conditions.
If the floor area is equal to or exceeds 500 sq.m., it is necessary to provide at least one expansion joint, which must be indicated in the general design. The design of the seam is designed to compensate for deformations of the base, which can be caused by shrinkage of the new building, changes in temperature conditions or vibration processes of man-made origin. The seam is grooved at the base to the concrete slab and filled with a special profile or elastic mass.
Subject to these conditions, the customer receives guaranteed quality and many years of operation, otherwise various problems may arise that will entail additional repair costs. Let us also add that a surface lined with ceramic granite can be repaired, so if one or several tiles are broken, then replacing them is not difficult and expensive; it is only important for such specific premises to have a small repair stock of porcelain tiles.
There are also a number of technical premises where, due to the nature of their operation, tiles with increased anti-slip (drainage) properties are needed (for example, pre-pool areas, car washes, etc.), where the abundance of water creates a danger of slipping and injury. In such places it is necessary to use appropriate tiles with various types of relief surface and with a very low degree of absorption - as a rule, these are relief or structural porcelain tiles,
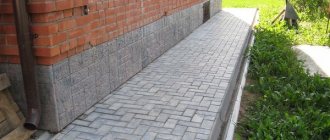
OUTDOOR LAYING
The use of ceramic tiles outdoors can be considered a particularly difficult type of operation, since porcelain tiles laid outdoors are always subject to severe atmospheric influences, which, in the end, can cause harm to any material. The main destructive factor is humidity, negative temperature, as well as temperature changes and, as a consequence, thermal expansion of the structure. Therefore, it is very important that any installation of porcelain stoneware outdoors and associated preparatory work, incl. and the selection of materials were carried out with an awareness of the importance of these technical problems, which, if properly addressed, would guarantee the longevity of the floor covering.
No outdoor flooring is used in conditions with an absolute absence of humidity. Therefore, it is necessary to prepare the base and screed in such a way that if moisture penetrates through the seams, water does not accumulate under the porcelain tiles, since if it freezes, the porcelain tiles may rise. In addition, long-term accumulation of water in contact with adhesive mixtures and with a concrete base leads to the formation of complex salts, which can greatly increase in volume and increasing internal pressure provokes lifting of the entire surface and peeling of the tiles.
When laying porcelain stoneware outdoors, it is necessary to provide expansion joints, the depth of which is not limited by the thickness of the tiles, but goes deep into the screed.
Where to begin?
As usual, any work begins with a project. In this case, it is necessary to decide on the laying scheme of porcelain stoneware. The required number of tiles and its dimensions will depend on this. The fact is that tiles can be laid in various ways, creating a real mosaic on the floor, and porcelain tiles of different colors can be used in it. Below are pictures showing some possible examples of laying porcelain tiles, as well as the required number of tiles and their dimensions.
Of course, the examples given do not cover all possible options for installing porcelain tiles; everything here will be determined by your imagination. You can do it simply and lay porcelain tiles on the floor in rows. But this is everyone’s personal choice.
Now, absolutely and forever, without registrations or SMS, you can follow the link and continue to enjoy the game and bets on your favorite team in the mobile application.
The most important thing here is different. It is necessary to determine the installation method - whether the porcelain stoneware will be laid without seams, or the conventional installation method with seams will be used. This choice determines which porcelain tile you need to buy - rectified or regular.
In addition, you need to estimate the required number of tiles per 1 m2 and determine the required amount of porcelain stoneware, and then increase it by (10-15)%. This is due to the fact that when porcelain stoneware is laid, there may be additional unaccounted costs, defective tiles, as well as trimming and adjusting the tiles in place.
It is also important to determine the laying technique - the thickness of the adhesive, the width and direction of the seams (straight, zigzag, etc.) between the tiles or to choose that the porcelain tiles will be laid without seams, as well as to determine the required amount of work to prepare the surface. The result of such elaboration should be a set of tasks, the result of which is the desired surface of porcelain stoneware.
Cutting porcelain stoneware. Conditions and methods of working with tiles DIY porcelain tile installation |
LAYING TILES ON FIREPLACES
Almost any type of ceramic tile is suitable for such work, because... its firing temperature is at least 1040? C, and the temperature on the walls of the fireplace does not exceed 100-120? C. The issue of using tiles for cladding largely concerns the design and the availability of various special elements of different shapes (corners, rounded borders) suitable for such work from the manufacturer in the selected series. From a technical point of view, you need to follow the recommendations of the manufacturers of adhesive mixtures on which the tiles will be laid, and consult with the seller whether they guarantee the preservation of their characteristics in conditions of extremely heated surfaces. You can use clay-based mixtures, which are traditionally used for work in such cases.
Stage 6: organizing and grouting the joints Laying can be with seams or “seamless”. Seamless installation is only possible when using retified porcelain stoneware in rooms where there are guaranteed to be no significant temperature changes all year round. Non-rectified porcelain stoneware, laid without a seam, looks somewhat sloppy, so the tiles are placed at a certain distance from each other, which should be greater the larger the size of the tile. The seams, in addition to compensating for errors in its dimensions, prevent displacement or cracking of the floor as a result of compression and deflection of the base and perform the following functions:
- aesthetic (they provide an additional opportunity to use grouts of various colors);
- technological (allows for waterproofness, hygiene and high chemical resistance);
- strength.
When laying ceramic granite, the seams must coincide with all joints of the base and structural elements of the floor surface. After this, the seams are filled with cement-based or epoxy composite grout.
Epoxy composite grouts are used to provide extra clean floors or to provide acid resistance. In the latter case, it is especially important to use high-quality materials, which should protect both the adhesive layer and the base of the floor itself. Modern cement-based grouts make it possible to walk on the floor approximately three hours after their application and do not lose their properties. In areas of heavy traffic, joints should be filled with elastic grout with high mechanical strength.
It is recommended to use fugues in gray shades on floors, as light shades quickly become dirty.