Advantages of a concrete base
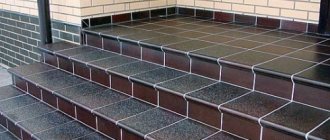
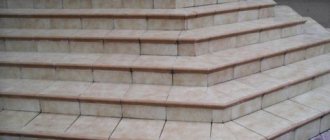
Stability and durability are two main advantages of a concrete base. Unlike soil or crushed stone-sand layer, which is easily susceptible to various atmospheric influences, concrete does not sag even under very heavy loads. Also, by laying paving slabs on concrete, the base can be used to obtain a perfectly smooth paved surface with clear shapes.
This technology has a number of other advantages:
- Strength. Concrete does not collapse under the influence of strong mechanical loads (it can last more than 30 years), which is extremely important for parking lots and areas with high traffic volumes.
- Effective resistance to precipitation. If paving slabs are correctly laid on a concrete base, the coating will not freeze (frost resistance is about 200 cycles, which is a determining factor in the harsh northern climate).
- No “shrinkage effect”. Sand and soil can sag over time, and this leads to individual or complete destruction of the tile covering.
- Reliability. Hardened adhesive for paving slabs (or cement) and a concrete base are many times more reliable than sand and crushed stone topping. This helps the tile “not move” and not fall out of its place.
- Environmentally friendly. When heated strongly, it does not emit carcinogenic substances.
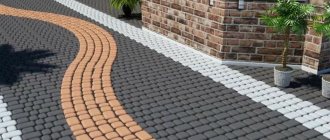
- Availability. Paving stones have a relatively affordable price, since they are made from inexpensive modern materials (the exception is granite paving stones).
It is concrete that ensures a high wear rate of the coating and long service life of the coating.
But in order for all these advantages not to be nullified, it is necessary to strictly adhere to the technology from the beginning of the work process to the very end. It should be understood that laying on concrete occurs completely differently than on a crushed stone-sand layer, but according to a completely different principle. Let's look at the features of the process to understand how to do it correctly.
Cement-adhesive mixture
For cladding and for laying floors, the cement mortar is prepared in the same way. We recommend mixing solutions using coarse washed sand and cement no lower than version 300. The ratio of cement and sand particles in the final composition is necessary: 1:5 for cement version 300-400; about 1:6 with cement version 500-600.
To make the tiles hold tighter, you can mix 1/25 of PVA glue into the cement mortar prepared for work; the glue will improve the contact of the ceramic tiles with the wall and floor. The sand needs to be dry, or it will be very difficult to sow through a fine sieve. It is necessary to sift the sand, otherwise unnecessary particles will remain
: pieces of shells and small pebbles, pieces of clay mass. They will interfere with installation and if our tile is tapped to secure it properly, it will simply crack.
It is better to take fresh cement
. If maintained, it loses about 5% of its active ability (quality) every month, and in a year - about 40%, in two - up to 50%. This means that when purchasing, carefully look at the preparation date indicated on the bag. If you didn’t find the date on the bag or the cement is sold in bulk, you can find out its quality yourself.
How to find out the quality of cement:
Take a piece of cement and squeeze it tightly. If it freely slips through your fingers, then it is fresh, and if it takes the form of a lump, the cement is old.
Cement mortar for floor and wall cladding
The solution is made as follows. Mix one part of cement and about 3-6 parts of sand (depending on the brand of cement). Then add water and mix the composition again until it acquires the consistency of a dough-like mass. If the specifics of the cladding force you to lay ceramic tiles on a thin layer of mortar, it needs to be made a little liquid. To use a thicker layer of solution, the admixture must be mixed thicker
. For better bonding of ceramic tiles to the wall, you can add PVA glue to the cement mortar.
Features of masonry on concrete
The main feature of the whole process lies, again, in the concrete base, which, first of all, provides the tiles with a long service life. However, many finishing specialists often do not want to take on this technology because of its complexity - just one small mistake made during work will not allow the coating to “overwinter” even for one season.
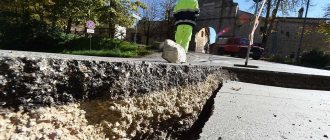
Laying paving slabs on concrete is possible only when drainage and drainage have already been done for the future site.
This will ensure effective drainage of water from the paved surface, and moisture, as you know, is the “sworn enemy” of tiles. Getting into its micropores and small cracks, when freezing, water increases in volume and destroys the material from the inside.
Additional Ingredients
When laying floor tiles, additional elasticity of the cement mortar is required. Why do you think factory mixtures differ for different types of surfaces (walls, ceilings, floors)? Because the plasticity of the solution differs depending on the place of application. The mortar for laying tiles on the floor must be plastic. In order to give it this characteristic, PVA glue is used. It can be bought at any hardware store.
Sometimes glue is replaced with powder and other detergents, but it is better not to experiment. The plasticity of the solution provides strength in this case. Paul is in constant contact with heavy things and people. If you lay tiles using poor-quality mortar, cracking of the seams may occur, and this will add additional costs to new repairs, since you will have to re-glue the tiles.
The mortar for laying floor and wall tiles in the bathroom must be able to resist moisture. That is why slaked lime is added to this mixture. It also needs to be added if there is fungus in the room. The fact is that fungus can actively develop even under a thick layer of glue and tiles. Its harmful properties for health have long been known. Adding lime will prevent fungus.
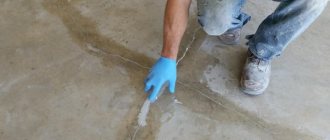
Preparing the concrete base for tiles
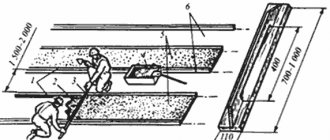
Preparing the base is as follows - step-by-step instructions for those who do it themselves:
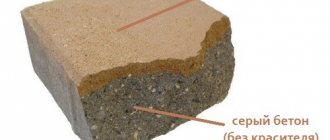
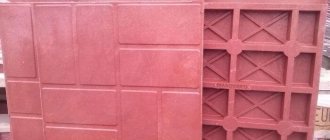
An example of a base for installation.
- Tags. Drive stakes to mark the boundaries of a walkway, sidewalk, or paving area. Pull the twine or threads taut, tying them tightly to the pegs.
- Make a hole in the soil. The top layer of soil must be removed (20-25 cm deep) and compacted well using special tools (manual or pneumatic tamper) and water. Wait until the soil is completely dry before continuing to work.
- Curbs (formwork). In the future, when laying tiles, they will help fix it and prevent bending and shifting. To stabilize the borders, fill in a layer of crushed stone about 5 cm thick.
- Laying crushed stone (15-20 cm). It is recommended to place a waterproofing film in the middle of this layer to further prevent moisture from penetrating upward from the ground.
- A small layer of sand. It must be laid out in order to fill voids and compact the substrate. If the site is very large, it makes sense to use special equipment for rolling or vibrating the soil.
- Reinforcement (rods or mesh). An additional reinforcement layer is required for driveways and very large areas. If you use separate rods, they should be tied together with wire and run perpendicular to each other. The finished mesh must be firmly secured to the side rods.
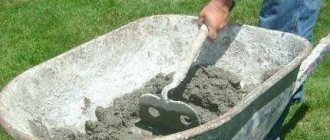
- Cement mortar. Mix cement, sand and crushed stone in a ratio of 1:3:2 with water until a homogeneous mass is obtained and pour it onto the prepared base. Level it well, not forgetting a slight slope, and leave to dry (for 2-3 days) under the film.
Summing up
When choosing a cement-sand or adhesive mortar, be guided by your own abilities and experience in working with mortars of one type or another. If you have difficulty using cement mortar, then it is better to opt for an adhesive mortar. You should also focus on the financial side, since the adhesive mortar itself is more expensive than cement-sand mortar, not including the cost of purchasing related materials for laying tiles. But, if you are not confident in your abilities, then it is better to entrust the work of laying tile material to specialized organizations directly involved in this activity. As can be seen from all of the above, tile material can be laid not only on adhesive mortar, but also on cement mortar. It all depends on your money
Tile laying algorithm
So, the preparation of the base is completed.
But the tiles should be laid only when the concrete has completely dried and hardened, and there are no defects left inside it in the form of voids formed. If for some reason the concrete becomes cracked, the tiles will become unsuitable for re-paving. The technology for laying paving slabs on a concrete base of one composition is not much different from other types. We will look at the process using the example of polymer-sand products, which are very popular today due to their unique properties: they are resistant to abrasion, do not absorb liquid, oil and gasoline, and are easy to transport, store and install. The tiles are also suitable for laying on a concrete blind area - it allows you to reliably protect your home from groundwater and precipitation.
How to mix ingredients correctly
First you need to mix cement and sand in the required proportions until a homogeneous dry mass is formed. After this, water is added in parts until a suitable consistency is formed. The thickness of the tile solution depends on its size and weight: the smaller the tile, the thinner the adhesive solution. The last step is to add additional ingredients if their use is necessary. Tip: if you poured too much water into the tile mortar, you can adjust its thickness by adding cement.
Compositions used to attach tiles to the floor
- Solutions with synthetic resins, latex resins;
- Dry mixes;
- Adding PVA glue.
1) Porcelain tiles have a smooth surface and poor adhesion ability. Synthetic resins are added to the adhesive mixture, which increase plasticity and increase the adhesion properties of materials. Latex resin will ensure reliable operation.
It is added to the prepared solution. There should be savings, but if the quality of installation suffers, it is better to use the necessary means.
If the base is made of cement, then you need to use a larger volume of solution than with a concrete field. Unglazed tiles are more expensive, the adhesion is worse, and more adhesive mixture is required. The glazed composition is more economical.
2) Dry mixtures are made from a special composition using the necessary substances. Great variety for species, surfaces and conditions.
Basic products for smooth surfaces, reinforced for larger tiles. Specific compositions for non-traditional floor bases: metal, glass.
3) The solution will be very strong if you add PVA glue to it. For 10 liters of mixture, use 200 grams of glue. Instead of glue, liquid soap and washing powder diluted in water are added. Slaked lime increases water resistance and elasticity. Primer EC-30 will enhance hardening in cold weather.