Types of adhesive compositions for assembling stairs. Nuances of performing work
Contents:
Just a few decades ago, wood was glued together only with natural compounds. Wood glue was made from casein, flesh, and bone.
In some areas they are still used, as a rule, where special strength is not needed - for example, for repairing musical instruments. The strength of the seam on natural compounds depended on the precise fit of the parts, and not on the characteristics of the glue itself. And in aviation or shipbuilding they were abandoned in favor of chemical ones back in the pre-war years.
Cost of the service: what does it depend on and how is it calculated?
Repair of a wooden staircase in a private house with sanding and other work options is always carried out by us on favorable terms and at the best price.
The final cost depends on:
- condition of the structure and its size;
- time spent on repairs and their complexity.
The calculation is carried out individually. The price of repairing your stairs is guaranteed to suit you.
Draw your attention to! Our prices for repairing any stairs are not the lowest on the market. This is due to the fact that the restoration is carried out by professionals. However, you won't have to overpay. You can plan your expenses in advance. Specialists will announce the price for restoring the stairs in your home before providing the service.
| Name of service | Price |
| Sanding stair treads | 1000 rub/piece |
| Sanding steps and risers | 1500 rub/piece |
| Sanding the area with oil or varnish | from 1900 rub. |
| Varnishing balusters | from 100 rub/piece |
| Application with colored oil or colorant | 300 rub/piece |
| Application with clear or yacht varnish | 80 rub/piece |
Gluing wooden parts of stairs
Three golden rules
The connected planes must be adjusted to each other;
Only well-dried wood should be glued;
To obtain a strong seam, glue should be applied to both surfaces to be glued.
Types of adhesives for gluing wooden elements
Carpentry (bone, flesh);
"Syndeticon" (based on bone glue)
2. Vegetable glue - “Dextrin”.
Polyvinyl acetate (PVA, GShZh-61, GIGZh-141);
Epoxy (EDP, EPO, ENTS-1);
Phenol-formaldehyde (BF-2, BF-4, BFR2, BF-6, 1 KMC, HKS, SKS, ORTO, YuKTs, adhesive sealant “Dubok”. “Moment”, “Mars”, 88NG, “Nomix”, “Unicum” );
Nitrocellulose (“Supercement”, “Bustilat M”, “Acrylox”, “Gumilax”, “Syntelax”).
Conventionally, in modern staircase adhesives can be divided into two types: viscous and liquid.
Features of using liquid glue
Liquid formulations are used on well-prepared surfaces. The parts must be tightly compressed in clamps or in a vime.
The connection is so strong that when deformed, the wood is destroyed first, but the gluing remains intact.
Liquid glue is made on the basis of polyvinyl acetate (well-known PVA) or polyacrylate water emulsions. Most industrial adhesives (Racoll, Klebit, Jowat) are produced in large containers; only a small part has to be used for work.
These compounds are used to glue lamellas together, so they are also perfect for joining individual parts. American-made Titebond II Premium comes in a small, convenient package.
All liquid adhesive compositions are similar in their characteristics - they are water-soluble, excess glue can be easily removed with a damp cloth.
There is a so-called “white point”. This is a temperature of +7 °C, below which the glue does not form a strong polymer compound, but simply dries into a fragile white crust.
Normal conditions for working with polymer adhesives are not lower than +15 °C. If it is impossible to achieve such a temperature in the workplace, it is better to switch to working with glue based on organic solvents - these include the well-known “Moment”. The glue sets quickly, but does not form such a strong connection compared to PVA compounds. The seams gain maximum strength only after 24 hours.
Subtleties of working with viscous glue
Viscous glue is very convenient for filling gaps in a thick layer. A classic of the genre – Titebond Heavy Duty. Below are some recommendations regarding its use:
Tubes should be stored vertically so that air bubbles are not squeezed out at the right time;
It is convenient to have a long nail on hand to pierce the neck of a new tube;
To obtain a strong seam, you must strictly follow the instructions - apply the glue in stripes or dots, and before compressing the two parts, move them slightly relative to each other. This will allow the glue to spread more evenly over the surface to be glued;
Excess glue that has squeezed out of the seam should never be wiped off. It is allowed to dry and carefully cut with a sharp knife;
The tube spout must be covered with a ballpoint pen cap. You can’t leave it open, and it’s inconvenient to screw the lid on every time.
Adhesive for wooden steps to concrete
We can provide you with services for the installation of steps, on-site consultation, or help with installation by supervising the installation.
The above recommendations, especially suggestions for the use and application of our products, are based on our knowledge and experience. We recommend that in each specific case you approach the installation and operation of products consciously, based on personal experience and responsibility. Neither these instructions nor any oral advice shall give rise to our legal liability unless we are guilty of willful intent or gross negligence.
© 2006–2017 “Studio of stairs and railings”
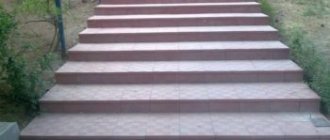
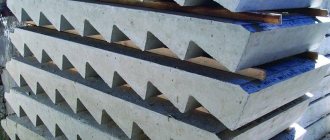
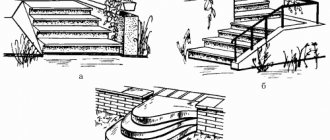
Spiral, marching, half-turn or extension staircases are often cast from concrete. High-quality steel reinforcement and high grades of concrete ensure the strength characteristics of the product. Thanks to reinforced concrete, the structure is not affected by moisture content in the air or various atmospheric influences. But the appearance of concrete stairs is not aesthetic, so additional finishing work is carried out. Natural wood is chosen as the facing material.
Many people believe that pouring concrete is the most expensive process when arranging a flight of stairs. However, using wood trim is even more expensive. Flaws in cladding masonry technology can increase costs. To avoid this, you should familiarize yourself with the main mistakes made when arranging cladding materials on concrete stairs:
- Wood should not be laid directly on stair steps. as this will shorten the service life of the cladding.
The minimum thickness of wooden panels is 3 cm. You should not save - this will reduce the strength.
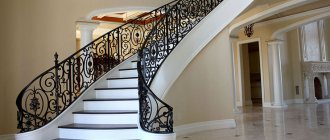
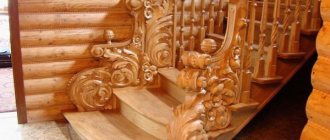
Concrete spiral staircase trimmed with oak - a favorite finish.
Wooden stairs on a concrete base must be durable and have an aesthetic appearance. The choice of wood material can be made according to grade, shade and economic considerations. Today, common and exotic species are offered. The most common are four varieties. But others also use:
- Oak is considered a favorite. Features of the material: strength, interesting texture, pleasant shade and pattern, accessibility. Oak is chosen to provide a respectable appearance. Oak stairs will last a long time without losing their appearance.
- Beech is distinguished by its uniform structure, high quality, pleasant shade and more affordable price than the first position.
- Larch is the most affordable and popular material. At the same time, the quality and reliability of products made from this wood are as high as those of oak.
- Ash has the highest strength among the listed varieties. It has a beautiful pattern, a wide range of shades from dark to light.
- Elite wood species are distinguished by higher cost, but also good strength characteristics. These include wenge, badi, dussie, yaroko, jatobo.
- It is possible to finish the concrete staircase with a cheaper material, such as linden or pine. These varieties are distinguished by light colors, which can visually reduce the bulkiness of the structure. However, they are significantly inferior in strength indicators, so this finish will last less and will quickly lose its attractive appearance.
When choosing a wood finishing material, you should pay attention to the main characteristics, not the cost. It is important to take into account the operational requirements for the flight of stairs. Another, no less important, selection criterion is the degree of drying of the wood plywood.
Its optimal value is 8%. There must be no defects, such as: To determine the amount of material required for arranging a concrete-based staircase, it is necessary to carry out a calculation. To do this you will need the following parameters:
- dimensions of one step: thickness, width, depth;
- dimensions of risers;
- number of steps and risers.
Adhesives and sealants for fastening parts of wooden stairs
The main condition for installing a wooden staircase is the reliability of fastening of its components. The method of connecting elements is determined by the material and the requirements for the product. The individual parts of the staircase are fastened together using fasteners and adhesives. Often, an adhesive connection is necessary to further strengthen other types of connections. With proper preparation of the surfaces to be joined and the choice of glue, the resulting seam is stronger than the materials.
In this article you will learn:
Cost of work
Typically prices depend on the complexity of the work performed.
In order to correctly calculate the cost of installing stairs, you need to take into account several conditions:
- The type of material from which the wooden structure will be made (for example, oak).
- Its height, width, slope.
- Additional installation work (varnish, paint, length of balusters, etc.).
Nowadays, you can calculate the cost of installing a wooden staircase on special online sites. This will not be difficult, you will need to enter all the necessary dimensions and design data into the table, then the computer will do everything for you. Everything is easy and quite simple. You can also entrust the calculation to a team of specialists who will handle the installation.
If you are not satisfied with the final result of the work, the installers will correct the errors, but this will require additional cash costs.
In order for a wooden staircase structure to truly give home comfort, it requires proper, careful care.
Conditions for strong bonding
During gluing, the glue fills the smallest gaps between the individual layers of wood, forming a film between the surfaces. When hardened, an adhesive layer appears that penetrates the surfaces and firmly connects them.
The strength of the connection is influenced by the following factors:
- Depth of glue impregnation of the surfaces to be joined. The strength of the seam depends on the thickness of the glue. The liquid adhesive composition does not form a film of the required thickness; it is used to fill the pores at the ends before the main gluing. Thick glue is used to connect the parts tightly, as it gives a thick film. The most suitable glue is of medium thickness, giving a seam thickness of approximately 0.15 mm.
- Uniform impregnation, formation of a film of uniform thickness.
- The tight fit of the surfaces to each other, the absence of gaps between the surfaces.
- The strength of the joint is affected by the moisture content of the wood, since this indicator affects the ability of the wood to absorb moisture from the glue. If the materials being glued have different humidity levels, then the product may become deformed when drying. The difference in humidity should not exceed 5%.
- The nature of the surfaces to be joined. Sanded, polished, dusty, greasy surfaces do not bond well.
Preparatory work
The finishing of concrete stairs begins with leveling the steps.
After pouring and drying, they almost never have the same height. But the building codes stipulate that within the same flight or interfloor rise, the steps should not have different heights. To meet this requirement, it is necessary to measure all steps and select the highest of them as a basis. Then all other steps are adjusted to its size using a self-leveling mixture.
If the difference is small, the composition is simply poured from above, and if the difference is large, formwork is made of moisture-resistant plywood. Its top edge should be flush with the intended tread surface. It is recommended to fasten plywood to concrete using dowels to a vertical plane.
Do not forget that before pouring the steps must be thoroughly cleaned of debris and construction dust, and the surface must be primed to improve adhesion.
The next stage of preparatory work is laying the plywood. In the design it will serve as a moisture-proofing gasket. Necessary:
- purchase sheets of plywood 1-1.5 cm thick;
- cut out the required elements precisely to size;
- prime the dried surface of the leveled steps;
- alternately apply ready-made or locally mixed adhesive;
- lay the appropriate piece of plywood and check with a level that its position is correct;
- secure the plywood with dowels (at least on both sides).
Bonding technology
To achieve the required strength of the stairs, the following rules must be observed:
- Dry the parts first.
- Clean the surfaces to be bonded thoroughly.
- Apply glue in an even layer on both surfaces.
- Press the parts tightly together and leave them under pressure until the glue completely hardens.
- Remove excess glue immediately.
For normal work with glue, a room temperature of at least 12–15 degrees is required. It is advisable not to subject the glued parts to stress for 1–3 days.
Installation of a wooden staircase: work order
To make it easier for non-professional craftsmen to navigate the stages of installing a wooden staircase, you can use the following information, which describes the procedure and provides a brief description of them.
Types of railing fastenings.
- First, determine the location for the staircase and choose its appearance. As an original option, if you have enough space, you can arrange a staircase in the center of the room. In addition to its direct functions, it will also serve as interior decoration. If there is not much space, then it is better to use more modest, compact options.
- Next, the marches and other necessary details are calculated, a project is made, an estimate is drawn up, the necessary materials are purchased, and so on.
- At the next stage, you need to prepare the beams and mark out future steps. Then carry out preparatory work regarding the processing of steps and risers.
- Now you can assemble flights of stairs and fix them, as well as connect them with risers and steps. At the same time, do not forget that you need to adjust all the parts to each other very carefully and carefully, achieving an almost ideal result.
- The next stage involves the installation of an intermediate platform. A wooden shield is usually used for this purpose. As already mentioned above, its width should correspond to a value equal to the width of the flight of stairs.
- Next, you can install and fasten the flights of stairs to the floor. To do this, use a cross beam. Fixation to the ceiling is carried out using anchors or bolts.
- Now it’s time to install the stair railing. To fix balusters and intermediate posts, grooved joints are used or metal pins are used. At the same stage, the pillars are installed, securing them with anchors to the permanent wall.
- The following procedure involves installing and securing the railings.
And finally, the staircase is equipped with decorative elements, if they are provided, of course, and is also covered with another layer of varnish or paint.
The best posts
- Decorative plasterboard - for effective decoration of premises
- How much does it cost to build a wooden gazebo - tenfold price range
- How to cover a wooden floor in a gazebo: protective compounds and their properties
- Self-strengthening rafters
- Gazebos and pergolas: what's the difference?
- How to fit a lock into a door with your own hands?
- Technology for replacing the crowns of a wooden house
- Making a wooden floor with your own hands
Related article: Concrete floors on the ground: pouring and concreting (video)
Adhesive for wooden stairs
When choosing an adhesive, it is necessary to take into account the characteristics of the wood, the nature of the loads, and operating conditions:
- Hide and bone glues glue all types of wood, the connection is reliable and is not afraid of moisture.
- One-component PVA adhesive is used for gluing parts installed indoors. The two-component composition has greater moisture resistance; it can be used when gluing parts of stairs located in conditions of high humidity.
- Liquid polyurethane adhesive has high strength and water resistance. Hardens quickly in a humid environment. The glue forms a brown film, almost invisible on the wood.
- Polyurethane hot melt adhesive is capable of connecting poorly processed wood and loosely fitting parts. Bonding occurs very quickly, but finished products should not be subjected to stress for 1–2 days.
- Epoxy glue not only connects wood to wood, but also dissimilar materials. The seam is durable and waterproof. The composition of two components allows you to adjust the thickness by selecting the properties of the glue.
Bone glue is most often used when restoring retro-style stairs. Using superglue, small parts are attached and shallow cracks on the wooden surface are sealed.
Installation of fences
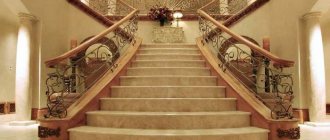
For safety and comfort of movement, stairs must be equipped with enclosing elements: railings, balusters, solid glass or metal. Fencing parts and handrails can be made in a variety of styles and shapes. Craftsmen can make carved wooden or forged metal elements.
When choosing balusters, specialists install them in accordance with safety standards. The distance between the enclosing columns should not exceed 15 - 20 cm. This installation method does not cause additional weight to the structure and guarantees the safety of using the stairs. In other cases, the project is discussed with customers individually. The installation of the railings is carried out at a height of about 90 - 110 cm. This value is optimal for the use of stairs by adults. In homes with small children, additional wall handrails can be installed at a height appropriate to the child's height.
By ordering the installation of wooden stairs from our company, you guarantee your household absolute safety when moving to the second floor. The installed structures will delight you with their magnificence and reliability for many years.
Application of sealants
During operation, any tree is subject to shrinkage, which causes the appearance of gaps, cracks, and crevices. This defect can be eliminated using a sealant.
- plasticity, the ability to fill all voids;
- elasticity;
- strong connection with wood;
- antiseptic properties;
- maintaining working qualities when changing temperature and humidity.
Wood sealants are painted in different colors, this allows you to seal defects without disturbing the overall color of the staircase.
When constructing and repairing stairs, the following types of sealants are most often used:
Sealants are produced in the form of special construction syringes with a thin spout, this ensures convenient use.
We “dress” concrete steps in wood. Part 1. Preparatory work
Today I begin a description of my work on installing wooden steps on ready-made concrete ones. Now, as a rule, wooden steps are screwed (nailed) to concrete, and then, in order to hide the top of the screw, the holes are closed with special plugs, matched to the color of the steps themselves. In my opinion, this is rather rude, although quite reliable.
Therefore, in several parts of this master class, I will tell you how you can install wooden steps using a slightly different method. Of course, this is a more complex and troublesome path, but the result of the work, in my opinion, is more attractive.
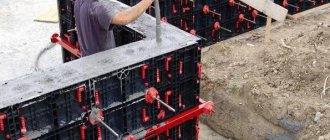
At the preparatory stage, you need to nail 12 mm thick plywood to the concrete surfaces of the steps using dowel nails and glue. For our case, the universal KS adhesive is quite suitable, as it reliably attaches the wood to the concrete.
It is clear that the concrete steps themselves must be made of very high quality.
Apply glue to the concrete base of the step.
We place a piece of plywood cut to the size of the step on the glue and use a hammer drill to drill a hole in the concrete for the double nail. I think it’s clear that you first need to drill a hole in the plywood for the dowel.
Nailed plywood sheets look like this.
In my case, I secured each sheet of plywood with six dowel nails.
During final finishing, the wall will be covered with carpet. For this purpose, it has a wooden frame, which is covered with 4 mm plywood.
Electrical wiring runs along the topmost step, so the plywood base recedes from the vertical edge of the concrete step.
The upper step on the right side has a small gap, which we need to seal at the preparatory stage.
We install there the piece of parquet board we need for sealing, check its verticality,
We draw a line on the plywood base.
We will use this line and the edge of the laid parquet as our guide when installing bars to secure a piece of parquet board. We nail the top block with dowel nails to the concrete.
And we fix the bottom block directly to the plywood.
Trying on the step shows that everything was done correctly. A gap is left between the right edge of the step and the plywood along the wall for further installation of carpet there.
To complete the preparatory work, all that remains is to coat our insert with parquet varnish.
Installation of wooden steps on a concrete structure
You may be faced with the task of installing wooden steps on a concrete staircase. First you need to prepare the base. If the work was carried out by professionals, then the surface has no significant defects. In this case, you will need to level the surface using self-leveling mixtures. If there are noticeable differences in height, you should start working. To do this, a substrate should be mounted under each step. It is made from plywood. This will protect the structure from mechanical damage and loads, in addition, the product will act as a shock absorber.
When installing a wooden staircase on a concrete structure, you should purchase plywood sheets, the thickness of which is 1.5 cm. Blanks are cut from them according to the size of the steps. The surface is primed, and wood glue is applied to the pieces of plywood on the reverse side. After this, the prepared elements are installed in place. The correct position of the substrates must be checked with a building level. Plywood is additionally attached. Glue will not be enough for this. Usually dowels are additionally used. Their installation is carried out on both sides of the steps. You can determine the number of hardware yourself.
What material to choose for steps
What material to choose for steps
When choosing pine, you definitely won’t overpay. This is the main advantage of this material. In addition to its inexpensive price, the advantages of pine include its pleasant appearance - light wood with a pleasant texture. Over the course of 5-6 years, pine will improve the microclimate of the room - its wood contains phytoncides that kill pathogenic bacteria (however, this does not matter if you varnish the products).
Unfortunately, the strength characteristics of this material are not popular - pine wood is soft, so it is better to install steps from it where there are no heavy loads: for example, in a country house for seasonal use. Pine steps are good for a temporary option: if in the future you plan to cover the metal frame with more expensive material, but now you don’t have the funds.
Larch
Larch is an excellent material that only gains strength over time. It has a beautiful yellow, wavy structure, which even over time will not lose its aesthetic characteristics. Larch is more expensive than pine, but cheaper than elite oak. If the house has high humidity and gets damp in the spring, larch steps are the best choice: they do not deform from excess moisture and do not rot. Do you want a staircase for a hundred years? Choose larch.
If the sound comes from the adhesive joint, then there is only one method for eliminating the squeak. You must first clean the seam of old glue, and then re-glue the parts. Moreover, it is impossible to fill the joint with a new adhesive without removing the existing one.
Otherwise, the new glue will not be able to bond to the base as it should; the old layer will not allow it to do so. The best option is to apply the composition from below from under the stairs. This way there is less chance that the glue will come out in unsightly streaks.
Creaking screws and screws must first be completely unscrewed and the nails removed. Then the steps and wooden fencing parts are inspected for integrity. And only if they are undamaged and without cracks, they can be put in place and re-attached. If there is a split near the hole for the fastener, then the wooden element of the staircase will have to be completely replaced. The destruction of wood here can no longer be stopped.
Larch
Ash and oak are very similar in strength, texture and price. This is an ideal material for making steps: gray shades, magnificent textures - such steps will last you a very long time. After a few years, the wood will nobly darken, adding an element of noble antiquity to the interior.
Beech is deservedly called ironwood. Its strength is similar to the mentioned material. Light, sometimes grayish, sometimes reddish-yellowish wood is not for everyone. The structure of the material is poorly visible, which not everyone likes. At high humidity, beech can swell, however, modern paint and varnish coatings, which will have to be renewed from time to time, will help solve this problem.
Exotic wood
1. Merbau - has a pleasant light brown color. Merbau is harder than oak, dense, moisture-resistant and has high wear resistance characteristics. Merbau is well polished and sanded. Has high resistance to fungi and rotting. 2. Rosewood has a spectacular and bright pattern and has excellent strength characteristics. Wenge is an elite material characterized by a rich dark shade and color tints. 3. Wenge is very popular, despite its rather high cost. 4. Sapele is equivalent to oak in terms of rigidity, strength and resistance to impact loads. Sapele is highly polished and processed and can last up to half a century. Thus, there is no single advice on what material to choose for steps. This depends on the characteristics of the room, interior style, intensity of use of the stairs and the budget component. The steps can be made of solid wood or laminated wood slats. The board must be completely dried, have hydrophobic protection, and coated with an antiseptic. If small children or elderly people will live in the house, it is better to choose steps with an anti-slip profile.
Independent work on installing stairs: what to pay special attention to?
When doing this work with your own hands, you should not forget that you must strictly comply with a number of requirements stipulated by GOST. This applies to the technical characteristics of the angle of inclination of the staircase structure, the recommended values for which are at least 26°, but not more than 45°. As for the height of the steps, they should be at least 12 cm and no more than 20. And finally, the parameters recommended for flights of stairs. This is the number of steps in one flight: the minimum value is 3, the maximum is 18.
The width of the march can be different, but not less than 80 cm.
Types of fastenings of stairs to the foundation.
In addition to the above values, there are a number of other mandatory requirements that relate to the installation of a wooden staircase with your own hands.
Now let’s look at the information regarding the technology for installing wooden stairs.
Firstly, you need to make sure that the floor and ceilings in the place where your stairs will be located are of high strength. When assessing this factor, you need to take into account possible loads that may appear during the installation of the stairs. This is a mandatory requirement, since very large weight loads can lead to damage (and in the worst case, destruction) of the support structures.
What can influence the occurrence of such a situation? Firstly, the stairs are very heavy. Secondly, an incorrectly assembled structure or a small number of support points. Thirdly, poor-quality fastening of parts or the use of defective materials when constructing floors or ceilings. There are a number of other factors that can affect the damage to the future structure.
It is in this regard that the preliminary stage of installing the staircase is carried out, which includes determining a reliable place for its location and support points for the entire structure. If necessary, all weak points must be carefully strengthened using transverse and longitudinal beams. To provide additional support for the stairs, you can use a special pole that will take on most of the load.
Related article: Substrate for water-heated floors
How steps are made
So, we buy a planed board from the material that we chose for making the steps. The amount of material is calculated according to the condition of 1 sq.m. boards for 2 steps. The board must be dried. If you install a damp board, it will deform over time and begin to creak almost immediately.
If you decide to make the steps yourself from unplaned boards, the material must first be treated with an antiseptic and then dried. A 3-4cm thick stair board will take 4 months to dry to the desired moisture level. Properly dried wood will have shavings that break in your fingers rather than bend.
Terminology
Installation of the staircase to the second floor takes place in stages: first, one element is installed, the second is added to them, then the third, fourth, etc. Therefore, before installation, you should familiarize yourself with the names of the staircase parts:
- steps - elements along which descent or ascent occurs;
- tread - the horizontal part of the step;
- riser - a vertical part of a step;
- kosour - a load-bearing beam on which the steps are installed from above;
- bowstring - a load-bearing element with cutouts for steps;
- railing - a staircase railing that prevents falls;
- baluster - the vertical component of the railing (in other words, a post);
- handrail - horizontal part of the railing;
- landing - free space dividing the staircase to the second floor into 2 or more parts;
- support beam (so-called zero step) - a beam or crossbar against which the load-bearing elements rest;
- stand - the main load-bearing element of a screw structure.
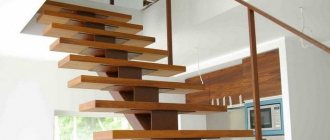
The structure of a wooden staircase on stringers.
Installation
Installation of steps can be provided in different ways depending on the type of staircase. If you have a staircase on stringers, then the tread and riser are attached as follows: a connection is made on the grooves: a groove is cut at the location of the riser; with screws flush, flush with the surface; with pre-installation of a triangular support; using steel mounting brackets.
All parts must be glued before fastening.
a connection is made into a groove: the groove is glued; on a metal corner that acts as a support; on bars - an alternative to a metal corner.
Fastening to a metal base is carried out through holes with a pitch of 15 cm and with an indentation from the edge of 2 cm. If the welding is uneven in some places, you can use a filling sealant. You can adjust the height difference using a plywood backing. When installing steps, each step must be checked with a level and adjusted. The tread with plywood must be glued, secured with clamps and fixed with self-tapping screws. Instead of the last step of the staircase, the floor surface protrudes.
The risers can be left open. This will not only give the structure a feeling of lightness and transparency, but will also increase the size of the step.
Carrying out cutting of material and assembly of load-bearing elements
When installing a wooden staircase to the second floor, you will need to cut the material. Making carved pillars and railings is quite a difficult task. Then you will be able to cut out the details. You should mark the string beam in the places where you want to make grooves for the steps. After checking the accuracy of the calculations using a hand router, you will need to make indentations. The supporting beams must have a cross-section equal to 50 x 250 mm. The thickness of the step is 25 mm.
The installation of a wooden staircase to the second floor is accompanied by the installation of a bowstring or stringer. The article will consider the second option. It is more complex, but reliable. To do this, take the beam and cut it so that the length is less than the length of the stairs by the thickness of the tread. Then the openings are cut out where the steps will be located. To do this, use a pencil and a building square. On the inside of the stringer, perpendicular lines should be marked along the height of the riser and the width of the horizontal element. You need to subtract 3 cm from this value. The excess part should be removed with an electric saw.
The supporting beam is installed in place. If all the calculations were correct, then the lower side of the workpiece will rest against the floor, and the upper side will rest against the ceiling. You will need 2 or more load-bearing elements, so you need to take another beam and make the same cuts. To simplify the process, you can use the first blank as a template. The product is then processed with a grinding machine, the edges must be milled and the beams connected at the top and bottom. To fix the latter, it is necessary to make cuts and strengthen the elements with bolted connections.
Basic groups of operations when making steps yourself
- Harvesting and drying lumber
- Cutting lamellas and preparing for gluing
- Gluing, trimming, sanding
Harvesting and drying lumber
Unedged pine boards are used as the primary material for making the steps. Which goes through several stages of drying (natural and artificial) until the moisture content of the rock drops to 10%. The dried board is sent to a warehouse, where it is stored for several more months.
Before processing begins, the highest quality board with the fewest defects is selected. Cut into pieces of 1 meter each.
Cutting lamellas and preparing for gluing
The workpiece is sent to the jointer to create a smooth base surface.
To make it clear why a jointer is needed, pay attention to the result before and after processing.
After jointing, the board goes to the surface planer, where the opposite planes of the workpiece are given parallelism.
On a formatting machine, the workpiece is cut into 45mm lamellas.
The finished lamellas are stacked on racks.
Gluing, trimming, sanding
PVA wood glue is applied to the treated lamellas using a roller.
- Used: PVA wood glue.
- Glue drying time is at least 8 hours.
After applying the glue, the lamellas are clamped into press clamps for gluing.
A properly prepared gluing area is stronger than the material from which the step is made. To test this, we conducted an experiment and tried to break the step with our own hands.
The glued shield is jointed and sent to a surface planer, after which it is trimmed.
The next step is chamfering. The operation is not complicated and can be performed with a hand milling cutter.
The chamfered workpiece is processed at the ShLPS. Using #16 sandpaper. Finish sanding is performed with finer-grain sandpaper. Sharp corners and ends are processed manually.
After all the operations, at the end we have a smooth and beautiful step that we made with our own hands. If desired, it can be painted and varnished.
DIY wooden staircase
A wooden staircase is one of those interior items that, in addition to its functional load, also carries an aesthetic one. Since ancient times they have been decorated with carved balusters, beautiful curved railings and other delights.
Almost any home craftsman can create a simple, but at the same time beautiful and reliable staircase. All that matters is time, desire and a minimum set of tools.
To build a staircase you will need:
- Circular Saw
- Chisel
- Rotary hammer or impact drill
- Set of clamps
- Wood glue or PVA
Installation of a wooden staircase. Let's assume that all your staircase parts are not homemade, but purchased. It would be strange to waste time on gluing treads (steps) yourself when ready-made ones are available for sale. It is also better to make the string from purchased laminated veneer lumber, or boards at least 40 millimeters thick and about 400 mm wide. The simplest, but not without minimalist charm, would be an ordinary straight staircase. They are built in two types - with mortise and overhead treads. Making a wooden staircase of any of these structures with your own hands is not difficult.
Mortise steps. To create, you will need a router, or a circular saw and a chisel. On the string (side support of the step), two cuts are made with a saw, 10 millimeters deep, long equal to the length of the step and with a minimum distance between them equal to the thickness of the tread. The wood between the cuts is selected using a chisel. The same operation can be done with a router. The step will be inserted into the resulting groove. A similar operation is performed for each tread, on both sides of the string. The distance between steps is carried out after calculating the wooden staircase.
The second option is overhead steps. Here, with a circular saw, rectangular ledges are cut out on the strings, on which the tread will subsequently rest. Any staircase is red with its balusters. In order not to bother with self-grooving, you can purchase and install them yourself. It is important to remember that the minimum height of the railing support must be at least 900 millimeters. They are installed along the edges of the tread - in the case of an overhead assembly scheme, or cut straight into the string if the mortise option is chosen.
Finally, we should talk about the sizes. So, the most comfortable for climbing are considered to be stairs whose steepness lies in the range of 20 - 36 degrees. Steeper stairs, to save space, are recommended for use in attics and basements. The minimum distance between treads is 190 millimeters, and its comfortable width starts from 250 millimeters. Having this data, you can easily calculate the required length of strings, as well as the number of steps. Self-construction of simple stairs is not difficult, and will be accessible to any craftsman with a minimum set of tools and modest experience in working with wood.
If desired, all elements for the staircase - steps, bowstring, risers, balusters, railings, pillars and columns - can be purchased from the LesMoroy company. Ready-made options are available. We also have our own carpentry shop, where you can order the same accessories in individual sizes and according to the customer.
Summarizing
Making a step with your own hands is a painstaking task. However, if the correct technology is followed, it guarantees high quality of the final product.
At large woodworking enterprises, the technology is slightly different. Semi-automatic and automatic lines produce lumber of various classes and qualities. We conducted an experiment and compared several stages from different manufacturers. The result was very unexpected.
Therefore, when using a board or timber for self-production of steps, we recommend paying attention to their suitability of lumber for fulfilling the intended purposes.
Methods for assembling wooden stairs
Currently, it is customary to talk about 3 main types of assembly of wooden stairs, differing in the method of fastening the load-bearing surfaces.
This is installation along stringers, installation along bowstrings and bolted flooring.
Installation of stairs along stringers begins with the installation of a massive and durable support beam (beams), onto which the steps are subsequently layered. This is a very reliable and durable design. If you plan to install a wooden staircase yourself, this option will be the most preferable.
The disadvantages of staircases on stringers include the large occupied area and the large total weight of the structure.
A flight of stairs on bowstrings has a more elegant appearance, but due to geometric laws, the staircase will take up a significant amount of space underneath. The essence of this technological solution is that first of all, 2 parallel load-bearing bars are installed, between which steps are subsequently mounted. There are several different options for attaching strings and steps. The choice is made depending on the tasks and the specific situation. Some solutions are available for self-execution. Others require a highly qualified master assembler.
Installing a wooden staircase on rails is the most popular type, significantly saving interior space. Bolts allow you to attach the working plane of the step directly to the railing, while withstanding heavy loads. Each step, despite its apparent lightness, can withstand a load of several hundred kilograms. The main condition for installing such a staircase is the presence of a load-bearing wall, which will make it possible to secure all structural elements with the necessary strength.
This type of assembly of wooden stairs is not recommended for incompetent workers. A long-term guarantee of the operability of the structure as a whole can only be provided by a qualified calculation of the fastening units. And also - a high level of accuracy during installation and fitting of all parts.