Building materials are constantly evolving, and this trend leads to the emergence of new types with different quality characteristics. One of these new products is OSB (OSB) board or oriented strand board. It is used for the construction of load-bearing structures of a building, laying floors, cladding facades or even ceilings. Since the material is new, the question arises: is laying tiles on an OSB board feasible?
Won't such a fantasy lead to a loss of quality characteristics and aesthetic design?
About the material
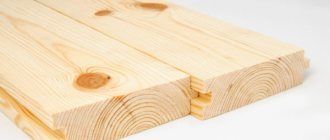
Most often, the need to cover particle walls with tiles arises when finishing frame houses. This technology has been actively used in country and cottage construction in recent years. It is oriented strand board that is the main building material in the construction of frame houses. OSB consists of several layers of compressed shavings glued together with a mixture of resins, synthetic wax and boric acid. The raw material is coniferous wood particles. The final product has a number of advantages:
- high strength;
- flexibility;
- ease of processing and installation;
- multifunctionality;
- moisture resistance;
- relatively light weight;
- price compared to plywood (main competitor);
- aesthetic properties.
But is it possible to lay tiles on an OSB board without first preparing the base? No. Despite its resistance to water, oriented strand board deforms under prolonged exposure to moisture, absorbing it. This is one of the factors that makes it impossible to glue ceramic tiles to a particle wall without special preparation. That's why the first stage is so important.
Possibility of facing OSB and plywood
Technically, it is, of course, possible to glue facing tiles to wood boards. But is it necessary?
Before deciding to veneer oriented strand board (OSB) or plywood with ceramic tiles, you need to make sure that it will not cause damage to the building structure. You did not indicate what kind of work you are talking about. Perhaps you decided to put facade tiles in the hallway, because they are universal and can be used indoors. And level the existing floor with a sheet of plywood or OSB. In this case there should not be any problems. But if we are talking about the external cladding of a frame house or an insulated and externally sheathed log house, there is reason to think about the correctness of the decision made. The fact is that wooden building structures and fiber insulation must be ventilated to prevent them from becoming waterlogged. Moisture is removed using two methods:
- Under the outer layer of sheathing (OSB, plywood, DSP, etc.) there is an air gap open for free air flow in the lower and upper parts of the walls. With this design of the external wall, there are no restrictions for external finishing, including tiling.
- There may be no air gap, and water vapor is discharged directly through the sheathing: the same OSB or plywood. By the way, this is how budget houses are often built in North America; Europeans prefer more efficient and reliable ventilation systems. If we cover a significant surface of the facade of a frame house with ceramic or porcelain tiles, the construction of the walls of which does not provide a ventilation gap, this can provoke a serious increase in the moisture level of the wood and wetness of the insulation. Which, in turn, will lead to rotting of the wooden frame elements, delamination and warping of the sheet material, and loss of the insulating properties of the fibrous insulation. It is impossible to cladding the external walls of such a house. We are, of course, talking about large areas; limited areas (frames of windows, doors, small inserts) can be decorated with tiles.
We strongly do not recommend covering the walls of a frame house, inside which there is a ventilated air gap (in the figure on the left), with ceramic tiles. If there is a ventilated layer (on the right) - please
Preparation
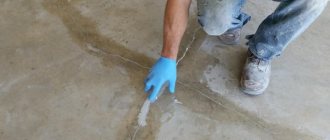
The main task at the first stage is to protect the surface from moisture, ensuring maximum adhesion of materials. There are several ways to achieve this result. Let's look at three of them:
- Primer. The polymer solution will protect the wood from moisture. Before priming the surface, it is thoroughly sanded with sandpaper. After this, the solution is applied with a roller. Do this in two layers, giving the first one about an hour to dry. The gluing of the tiles begins after 12 hours.
- Additional layer. The second method does not involve directly gluing the tiles to the OSB, but is quite popular. Logs are nailed to the base in half-meter increments, and plywood or moisture-resistant drywall is attached to them with self-tapping screws. At this stage, it is important to ensure that the plane is as flat as possible. Otherwise, the glued cladding may fall off.
- Reinforcement . One of the advantages of the third option is additional leveling of the wall. A special reinforcing mesh is used for this. Install it using fasteners or glue. In the second case, the mesh is pressed into the pre-applied composition and covered with it on top. The next day the wall is primed, dried, and after that it is ready for work.
If OSB boards are varnished, the glossy coating is removed from them, otherwise it will significantly reduce adhesion. Use medium-grain sandpaper for this.
Why OSB?
Due to their unique physical and mechanical properties and relatively low cost, OSB boards are becoming increasingly widespread in the construction industry every year. Numerous positive reviews from satisfied builders and clients also help promote this product.
Using OSB will allow you to level a wooden floor and require a minimum of effort, time and money. Below is a video that demonstrates that any man can lay OSB on a wooden floor if he so desires.
Selecting adhesive and tiles
The usual cement composition is not suitable for these purposes. The main difficulty lies in the features of frame buildings. Depending on weather conditions, they may be subject to shrinkage and slight deformation. These processes lead to cracking and peeling of rigidly fixed tiles.
Therefore, you should not skimp on glue. Choose a high-quality and sufficiently elastic composition. It should be suitable for use in rooms with high humidity and intended for problematic substrates. It will withstand minor deformation of the frame without consequences. The best options in this case are Ceresit CM 16, Ceresit CM 17, Soudal 24A and KNAUF-Flex. An alternative is liquid nails or silicone sealant.
Choosing the right tiles can also eliminate cracks. It is advisable that its dimensions be no more than 30x30 cm.
Tools
We assume that the first option for protecting OSB from moisture is chosen - priming. To do this you will need the following materials and tools:
- polymer primer;
- roller;
- metal spatula with teeth 6-10 mm;
- adhesive composition;
- hydraulic level and square;
- device for cutting ceramics;
- grout and a silicone spatula for leveling it (or a foam sponge);
- tile spacers;
- moisture-resistant impregnation for grouting.
If you choose the second or third option for processing the base, you will also need logs, plywood (or drywall), reinforcing mesh and self-tapping screws.
How to stick on walls
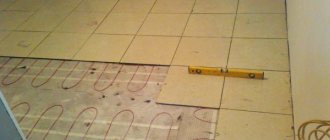
Surface preparation is complete, the primer has dried, you can start working. The most effective method for this is the use of “beacon tiles”. These are peculiar marks that are oriented towards to create a perfectly even masonry. In small rooms, beacons are glued to the extreme sides of the wall. In large areas they are fixed at a distance of 50-60 cm. To correctly position the tiles relative to the floor, use a hydraulic level.
At the next stage, markings are made using slats with plumb lines. They begin gluing the tiles from the bottom, laying out the entire first row, then the second, etc. To prevent disruption of the evenness of the masonry, place a long strip under the bottom tiles and do not remove it until the glue has completely dried. Unfortunately, the floor is rarely a fairly flat surface - you should not focus on it when laying tiles.
The adhesive is applied both to the base and to the tile using a notched trowel. It is designed to remove bubbles from the adhesive mixture. A rubber hammer is used to lightly tap the laid tiles. These actions will increase adhesion and allow the cladding to lie as tightly as possible in the adhesive. To create a perfectly even distance between the tiles, cross spacers are inserted in the corners, and straight spacers are inserted on the sides.
After gluing 4 rows of tiles, you should take a break and move on to the next ones after an hour. It is necessary to give the glue a chance to harden so that the cladding does not move down under its own weight.
Laying tiles on the floor
Is it possible to lay floor tiles on OSB? Many experts argue that floor covering is much more complicated than wall covering. In any case, there really are differences.
On the floor, work begins from the center, not from the edges. To do this, find the midpoint of the length of one of the walls and draw a line perpendicular to it from this point. The same operation is carried out for the second wall. The intersection point of these lines will be the center of the room. It is recommended to lay out tiles from here. To have fewer scraps, you can move the central tile slightly, having previously calculated the required distance. Another way: first lay out the cladding dry in order to more accurately calculate the location of the central slab.
Laying is done in the same way as on vertical surfaces. The glue is applied to the floor and tiles by tapping the laid tiles with a rubber hammer.
You can proceed to further manipulations with the finishing only after the adhesive mixture has completely dried. Considering the fact that we carefully protected the OSB from moisture penetration, it is more difficult for the glue to harden. Therefore, after finishing the work, you need to wait about 3 days before moving on to the next step. If the humidity in the room is high, this period is increased to 10 days.
Treating OSB before laying flooring
Table of characteristics of OSB boards.
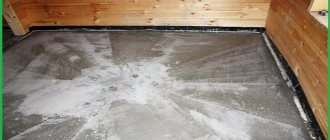
OSB boards should be treated before finishing the floor. The duration of the work will depend on whether there is a need for additional work on sheathing, insulation, and ensuring adhesion. Preparatory work includes:
Finishing the surface of the OSB board. It is recommended to use such a building material without additional finishing agents, since the slabs themselves have the required properties. Since the surface consists of glued chips, that is, it is not perfectly smooth, you will have to protect it from wear, traces of dust and various debris. The surface is treated with several layers of varnish. Each layer must dry before applying the next; for work you must use a regular brush.
After processing, the slab will become even and smooth, and will acquire an attractive appearance.
Ensuring a smooth transition between parts of the material if you plan to lay carpet, linoleum, vinyl tiles on OSB (not with glue).
It is best to take floor coverings with a minimum thickness; after installation, it is recommended to treat the gaps with sealant.
Laying vinyl tiles is a little more complicated, since, unlike rolled materials, vinyl is cut into large and medium squares. For OSB, it is recommended to take only large squares, the seams between which are connected with special glue, forming a continuous carpet. Near the walls, it is recommended to decorate the edges of the material with plinths, that is, the installation is similar to the installation of linoleum. It is recommended to leave compensation gaps near the walls.
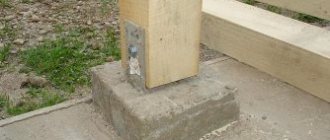
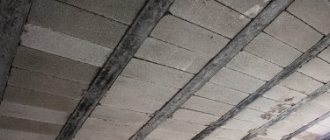
Scheme for installing joists under an OSB floor.
Ensuring the rigidity and immobility of the base sheathing before laying the laminate on OSB. The logs are placed as close to each other as possible, the slabs themselves need to be fastened to each other using the tongue-and-groove method.
Final stage
After the glue has completely cured, the spacers are removed and grout is applied. It is more convenient to work with a silicone spatula, but an economical option - a foam sponge - will also work. Excess grout must be removed immediately, since doing so later will be problematic. Next, a moisture-resistant impregnation is applied to it, preventing the appearance of mold and mildew. The corners between the floor and the wall are additionally treated with water-repellent putty, and a plinth is installed on top. Only after all moisture-proof coatings have been applied, the tiles can be washed.
Drilling small holes for interior elements in ceramic tiles is done using a drill without perforation, otherwise cracks may appear. Wide ones (for pipes) are cut out in advance, before gluing.
Now you know whether it is possible to lay tiles on an OSB board. This is only done if the above conditions are met. Proper surface preparation, consistent and uniform laying of tiles using a level will help create a beautiful and durable coating even on such a demanding building material as OSB. The main thing is to have patience and not proceed to the next step until the previous one is completed.
Laying process
How to lay tiles on an OSB board?
The first step is to mark the surface, deciding on the layout of the tiles and the pattern.
Direct installation begins; it is recommended to start from the center. In some cases, it is allowed to lay tiles from the far corner. To correctly calculate the amount of tiles and reduce the amount of scraps, it is recommended to lay the tiles out dry.
The adhesive composition is applied using a special spatula to the OSB board itself and to the ceramics. Adhesives should be added in small portions.
After this, the tile is applied to the floor or wall and pressed lightly. To achieve better grip, you can lightly tap with a rubber mallet.
Each laid row must be checked to ensure that the laying is horizontal and even, this manipulation will allow you to obtain an ideal surface and maintain the attractiveness of the pattern.
Creating a beautiful pattern is achieved by using special spacers in the form of small plastic crosses.
Crosses for tiles
Their installation is no different from a similar procedure when laying simple tiles on a wall or floor.
After installation, leave the surface for three days to allow the glue to dry completely. The spacer crosses can be removed the next day.