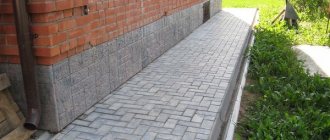
Paving stones are a popular building material used for landscaping pedestrian areas, blind areas, parking lots and platforms, and approaches to various outbuildings. Paving stone paving has a number of advantages over traditional asphalt:
- long service life;
- high load-bearing capacity;
- material strength;
- attractive appearance;
- environmental Safety;
- resistance to temperature changes.
The building materials market offers a huge selection of paving slabs for paving sidewalks, garden paths, and playgrounds. Manufacturers offer paving slabs of classic rectangular shape, hexagonal paving stones and the like.
In addition to the configuration, the consumer is provided with a large selection of sizes. The size of paving slabs is of no small importance; the smaller the dimensions of the paving stones, the more evenly the load on the pavement is distributed. Small tiles are indispensable when paving road surfaces with an arcuate configuration, but for arranging straight sections, the size of the paving stones does not play a special role.
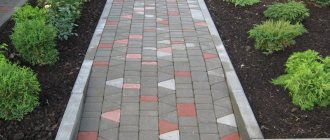
A variety of shapes and colors allows you to create your own original design. Patterns for laying paving slabs such as diamond, old city, and brick are in great demand.
The process of laying paving stones does not require the use of heavy special equipment and special professional skills; laying paving stones with your own hands is within the power of a home craftsman.
Types of paving slabs
Depending on the material used, paving stones can be:
- concrete;
- clinker;
- granite.
The technology for the production of concrete paving stones consists of vibration casting of concrete with the addition of pigments and other impurities that ensure the performance qualities of the material. Concrete paving stones are highly durable, but are susceptible to acidic conditions. With prolonged contact with acid, traces of corrosion appear on the surface of concrete paving slabs.
Concrete paving stones
Clinker paving stones are made from special clay rocks by firing in a blast furnace. The product is resistant to ultraviolet rays and low temperatures, mechanical damage, and does not absorb precipitation.
Clinker paving stones
Granite paving stones are made from natural stone; granite coating is the most durable and durable. The service life of granite road surfaces exceeds 50 years. Depending on the production technology, the following types of granite paving stones are distinguished:
- chipped - a product with uneven edges, obtained by splitting a block of stone into elements;
- sawn - machine-cut stone is distinguished by six perfectly smooth edges.
Granite paving stones
Methods for laying paving stones
There are several ways to lay paving stones:
- on a sand cushion;
- for cement-sand mixture;
- on a concrete base.
The method of laying paving stones on sand is used for paving walkways, garden plots and other areas with low traffic load. When constructing parking lots for passenger cars, paving stones can be laid on crushed stone or on a mixture of sand and cement.
The technology of laying paving stones on a concrete base is considered the most reliable; road paving laid on concrete is resistant to subsidence. The method can be used to cover heavily loaded road sections.
Important! Paving work should be carried out in dry weather.
How to properly lay paving stones on a concrete base
Laying paving stones with your own hands is done using the following tools and devices:
- shovel;
- mallet;
- building level;
- Master OK;
- pegs;
- cord;
- broom;
- rake;
- manual or vibration tamper;
- slats;
- Bulgarian.
Vibratory tamper
List of building materials:
- paving slabs;
- cement;
- sand;
- crushed stone;
- curbs.
The technology for laying paving stones includes four main stages:
- preparation of the base;
- installation of a concrete base;
- installation of curbs;
- installation of paving stones.
Preparing the base
At the preparatory stage, the land plot is cleared of roots and various types of vegetation. Mark the area for laying paving stones using pegs and a cord. The soil is excavated, the depth of the pit is about 25-40 centimeters.
At the stage of preparing the base for paving slabs, it is worth taking care of the drainage of atmospheric precipitation. Water flow can be organized in the transverse, longitudinal or transverse-longitudinal direction. The slope for water drainage must be at least 50.
Using a manual or vibrating rammer, the soil is compacted. To prevent weeds from growing through the seams of the paving slabs, the land area is covered with a layer of geotextile.
Geotextiles
The next step in the preparatory work is creating a sand cushion. A layer of sand is poured onto the previously prepared land area, the thickness of the layer is about 10 cm. The sandy base is moistened and compacted.
A layer of fine-grained crushed stone (crushed stone fraction 5-20 mm) is poured onto the laid sand. The surface is leveled and compacted using a tamper. A layer of crushed stone is poured with a cement screed. After the solution has dried, a second layer of crushed stone is applied, bringing the crushed stone cake to a height of 15 cm.
Construction of a concrete base
Preparing the concrete base is carried out in the following sequence:
- formwork is installed along the perimeter of the site to be paved with paving slabs;
- prepare the concrete mixture. The concrete mixture includes cement, sand and crushed stone in a ratio of 1/3/2;
- concrete mixture is poured onto the previously prepared crushed stone cake with a layer thickness of up to 5 centimeters;
- to strengthen the structure, a reinforcing mesh is laid on the concrete base;
- a second layer of concrete is poured on top of the reinforcing mesh. The thickness of the concrete layer is from 5 to 10 centimeters.
When arranging a concrete base, you need to pay special attention to the issue of drainage. Experts recommend providing point moisture inlets or storm drains.
The paving stones are laid out two to three days after the concrete coating has hardened, but before that the curbs are installed.
Installation of curbs
Before laying the curbs, the formwork is dismantled, a trench is dug along the concrete base, and the ditch is backfilled with fine crushed stone.
The height of the curb must correspond to the height of the finished road surface; to maintain the required level, a cord is pulled.
The curbs are placed on a concrete mortar; this method of fixation will ensure the durability and strength of the structure. The elements are placed at a distance of about 3 mm from each other and driven into fresh solution using a rubber hammer. The concrete curb must dry; after the solution has dried, the gap between the walls of the trench and the enclosing elements is filled with sand. The sand is moistened with water and compacted by compaction. Then you can proceed to the next stage of work.
Laying paving stones on a concrete base
There are several options for laying paving stones on a concrete base. One of them involves the installation of paving slabs using a dry mixture of cement and sand (prancing method), the second - using a cement-sand mortar.
To install paving, a layer of dry cement-sand mixture is laid on top of the concrete base. The thickness of the layer ranges from 5 to 6 centimeters. The paving slabs are laid on the edge, in accordance with the selected pattern, and compacted using a rubber hammer. Installation of paving slabs is carried out from the curb, moving from top to bottom towards the drain.
Paving with cement-sand mortar is considered more reliable and durable, however, it will no longer be possible to dismantle the coating without damaging the tiles. The technology for installing a coating on a ready-made mortar is as follows: a cement-sand mixture is prepared, which is laid out on the prepared base using a trowel. The layer of solution should be two to three centimeters. The paving stones are pressed into fresh mortar, and the position of the tiles is adjusted using a mallet. The distance between paving elements should not exceed 1-2 mm. Adjusting paving slabs to size is done using a grinder. During the work, the correct horizontal laying is checked with a building level.
Paving with cement-sand mortar
A paving machine is used for paving large areas. Laying paving using mechanized means can significantly increase the efficiency and speed of work.
After installation work is completed, the seams between the paving elements are covered with a dry mixture of cement and sand. With the help of water, the layer of prancing is compacted. The procedure is repeated until the seams are completely filled with the mixture. The pavement area paved with paving stones must be used in two to three days.
Filling paving joints with a mixture of cement and sand
Step-by-step installation instructions
Before you start laying paving slabs with your own hands, you need to take measurements of the future path, delimit the edges by pulling a strong rope along the sides. The next step is preparing the soil. It is necessary to dig a trench, going 10 - 40 cm deep, the depth will depend on what type of base cushion is planned. If thin tiles are selected, up to 30 mm, a trench 10 cm deep is sufficient.
Ordinary sand will be used as a pillow. A deeper base is necessary for a complex cushion consisting of a layer of gravel and sand; sometimes a cement-sand mixture can be used for greater strength.
Instructions for laying paving slabs
To prepare a complex cushion, it is necessary to lay a layer of fine gravel or crushed stone at the bottom of the trench. Sand or a cement-sand mixture is poured onto it. This layer must be at least 10 cm thick and compacted tightly. A tamping press is used for this; it can be replaced with a homemade one, for example, a heavy wooden beam.
To prevent the accumulation of excess moisture, which spoils not only the base, but also the tiles, it is better to use geotextiles. This is a fiber made from polyurethane or polyethylene. It does not allow moisture to pass through and does not accumulate it.
Another advantage of this fiber is the prevention of weed germination. This material is inexpensive (about 15 rubles per square meter), but it brings a lot of benefits; in addition to the above, geotextiles fix the sand layer, preventing it from losing its shape.
The next layer of the pillow will be loose sand, 10 centimeters is also enough. The tiles will already be laid directly on it. When preparing the soil and laying the cushion, you must maintain a longitudinal or transverse slope, which will ensure water drainage.
For convenience, rows of paving stones are laid in the direction “away from you”, so as to move along the already laid tiles
Next comes the most important part of the work - laying the tiles with your own hands. You need to start the first row along the stretched level, rope. An interval of up to 3 mm is maintained between adjacent sides of the tile. To ensure that all seams are the same size and even, plastic crosses should be used; they can then be easily removed and moved to new places.
The tiles are pressed into the top layer of sand by hand, helping with a rubber hammer; the same height must be maintained; here you will need a building level. For convenience, rows of paving stones are laid in the direction “away from you”, so as to move along the already laid tiles. The second row is made starting from half a brick, this will ensure a denser laying, besides, this is the simplest, classic pattern, it always looks stylish, but is used only for rectangular tiles.
Upon completion of installation, the resulting seams must be covered with a dry cement-sand mixture and moistened generously with water. Excess mixture is removed with a hard broom. If you intend to install a curb, then you need to use a concrete solution for it, this will prevent it from loosening. Concrete is prepared by mixing three parts sand and one part cement, adding water. The empty spaces formed between the border and the tiles are filled with cut elements. Cutting is carried out using a grinder with diamond blades.
Step-by-step installation instructions
Layout of paving stones according to the “old city” pattern
There are many types of patterns for laying paving slabs; one of the most popular types of paving stones is “old city”. Old Town paving tiles are a set consisting of 3 or 4 elements with rounded corners. The stones differ in size and color.
The layout of paving slabs depends entirely on the designer’s imagination. One of the options for the layout of Old Town paving stones is a combination of three colors (for example, yellow, brown and peach) in equal proportions, laid out in a chaotic manner. Another option is a paving scheme using a combination of two colors; stones of the same color are laid along the edges of the path, which turn into a different color towards the center.
We invite you to watch a video that shows the process of laying paving stones on a concrete base:
What you will need
First you need to stock up on all the tools that you will need during the work:
Tools you will need when laying paving slabs
- Bulgarian;
- shovel;
- ten-liter buckets;
- car (optional, but will be very useful);
- building level;
- tight rope;
- wooden or metal pegs;
- usually at least two meters long;
- rubber hammer;
- Master OK;
- compaction press;
- hard broom;
- protective gloves.
These are fairly simple and inexpensive tools that can be found in a good owner’s pantry or garage.
It will be much more difficult to choose the right tiles, since there is a wide variety of shapes and colors on the market today. This is where your imagination comes into play, but before purchasing, it is important to take measurements of the area on which the paving stones will be laid.
If a complex ornament is intended, you must first draw up a sketch in order to make accurate calculations of material consumption. But in any case, you should purchase tiles with a reserve. Of course, there is always the opportunity to purchase more, but in this case you may encounter the problem of the required tone.
There are a wide variety of shapes and colors on the market today.
Even in production, different batches of the same tiles may differ in color, albeit slightly, but on a sidewalk path this will immediately catch your eye.
When choosing a tile, an important point is its thickness. To determine its value, it is necessary to predict the future load on the sidewalk. If it is only for pedestrian use, then paving stones up to 30 mm thick are sufficient.
If a car or other agricultural machinery is expected to move along paths, then it is better to opt for tiles with a thickness of 30 to 60 mm. Paving stones over 60 mm are used for paving city streets with fairly high loads, but in the country there is no need for this.
To pave a garden path you will need building materials:
- sand;
- crushed stone;
- cement;
- water;
- geotextiles.
They will be used to organize the base for the tiles.


