Preparatory work
The best mash column must have a certain height. You can choose this parameter yourself, but ideally it should be 50 diameters. According to experts, this is not so important; the equipment owner himself must decide what strength the product will have, and also decide how good the separation will be. However, there is a certain objective criterion that determines the smallest height of the manufactured column. You must avoid the possibility of splashing. Based on this, mash columns are not made below 30 centimeters. Otherwise, carrying out the work will be inappropriate.
Work technology
When manufacturing the described structure, it must be equipped with a controlled reflux condenser. The design features of this element may vary depending on your preferences. The element can be created based on a shirt or dimrot. The main condition is the fact that the dephlegmator must have the ability to extinguish the power that is planned to be supplied. This element can be installed not in one quantity, but in quantity 2 or 3. In this case, the element will be primary or secondary. This structure allows for more stable operation of the column. You must understand that such additions are only possible on tall structures.
Work methodology
The mash columns must be able to adjust the cooling of the reflux condenser; this component must be quite thin. To do this, you should stock up on a tap that will allow you to use the liquid as accurately as possible. Experts recommend using the needle type, but you should avoid using a ball valve, as it is completely unsuitable. If we consider available household solutions, then the best option for carrying out this adjustment installation work will be a radiator tap, which is used when installing a heating system.
You can prepare the drawing of the mash column yourself. The column must be equipped with a place for installing a thermometer, which is mounted in front of the condenser entrance. This statement is true for structures that will operate according to a steam extraction scheme. If a liquid withdrawal dephlegmator is used on a film column, the location of the thermometer will be determined by the specific design of the system. The mash columns are equipped with a refrigerator-condenser, which will be responsible for condensing and cooling the supplied steam. If the design has liquid extraction, then a refrigerator will be required that will lower the temperature of the finished product.
Materials and tools for work
First of all, it is necessary to clarify what tools and materials should be stocked up before starting the construction of the column. You will need:
- construction knife;
- ladder;
- metal scissors;
- roller;
- square;
- screwdriver;
- perforator;
- roulette;
- spatulas;
- plumb line or laser level;
- compass;
- drill;
- pencil or marker;
- ruler;
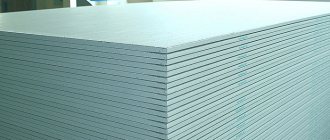
- plasterboard sheets;
- metallic profile;
- self-tapping screws;
- primer;
- starting and finishing putty.
Master's recommendations
It is important to take into account during manufacturing that the supply of liquid to the reflux condenser or to each of them, as well as to the refrigerator, must be done separately. The tubes that will be used for the outlet of the refrigerator and reflux condenser must be used exclusively on a silicone basis. This statement is true for hot water products. If we are talking about cold water, then you can use polyvinyl chloride-based tubes. The copper mash column must be manufactured taking into account the technical requirements described above, for which different design solutions are suitable. However, you can not limit yourself and come up with your own modification. The main condition for this is that in the end you will be able to get your drinks, which will have different qualities and organoleptic characteristics. However, in the end it will not be possible to obtain pure alcohol. The final product will not smell like moonshine, but it will not be pharmaceutical alcohol either. But for making vodka, this design is quite suitable; the master will be able to make the base for high-quality distillates.
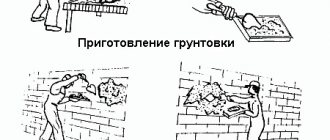
Square columns are plastered like this:
On any two adjacent faces of the column, they are installed plumb and strengthened with clamps or nails using well-planed rules so that their ribs protrude from the plane of the column to the thickness of the plaster, usually 1.5-2 cm
Between the rules, a solution is thrown in the form of spray and soil; the latter is leveled according to the rules with a wooden lath. After the soil solution has dried, a covering is applied and the surface is rubbed, and the rules are removed and hung on other sides of the column. faces of the column in this way , carefully rub the grooves.
Description of the manufacture of a column with a jacket reflux condenser
A continuous mash column can be made on the basis of a jacket reflux condenser. To carry out the work, you will need copper tubes, the length of which should be 500, 2000, 1000 and 300 millimeters. Each of them should have dimensions of 28 x 1.22 x 1.1 x 1.8 x 1 millimeters, respectively. Among other things, you will need a transitional double-socket coupling in the amount of 2 pieces, another transition coupling should have slightly different parameters, equal to 22 x 15 millimeters, 3 such elements will be needed. The master must prepare a single-socket corner, the dimensions of which are equal to 22 millimeters. It will be impossible to carry out the work without a tee, the dimensions of which are 15 x 15 x 15 millimeters. Be sure to make sure you have an adapter for a 1/2-inch external thread. You will need an adapter for 3/4" internal thread. The element will be required to attach to the cube, however, in each specific case there may be other sizes. If you make a continuous mash column using the elements described above, you will end up with a product with a maximum temperature of 92 degrees.
Features of manufacturing an air-cooled device
A piece of copper pipe will be used to make a coil. A roll of aluminum-based wire will be used without insulation. You can use a computer cooler, superglue and a 500-watt boiler during the work. The power may turn out to be less impressive.
First you need to take a copper tube, bending it to connect to the body of the device. That part of this workpiece that will go down must be included in the spiral. The aluminum wire should be wound onto the tube from above, leaving some distance between the turns. In order to reduce thermal resistance, the turns should be as dense as possible. This will increase the heat exchange area and the efficiency of the coil.
When making a mash column with your own hands, at the next stage you need to use any cone-shaped object, the diameter of which should be compared with the dimensions of the selected fan. You need to wind a moonshine coil onto this item. In this example, we will consider a regular beer bottle, the capacity of which is 0.5 liters. The coil must be bent so that it evenly covers the cross section of the fan. You need to try the element on the selected case and make sure that everything is in order. This concludes the work with the coil for now.
Now it’s time to move on to the lid of the device. To do this, you can use a regular polyethylene-based lid. The brass coupling must be heated to half an inch before fusing into the polyethylene cap. The structure must cool down; you can cool it in water. After the coupling is removed, it should be cleaned of adhering polyethylene, and the resulting burrs should be carefully cut off. You need to wrap a fluoroplastic tape around the coupling, which is essential for making a moonshine still. This way you will be able to get something like a gasket. When you make a mash column with your own hands, the next step is to install the coupling in a hole made in advance in the lid. The fluoroplastic should be between the coupling and the cover. The nut should be tightened from the inside without applying excessive force.
Professional recommendations
At the next stage, you can work on the heating element of the entire device. For this you can use a regular boiler. Having retreated some distance from the end of the wire, so that it is enough to reach the device, you need to cut off a part, you will have to screw everything back afterwards. The ends of the cord from the boiler must be threaded so that when the lid is closed, the element is inside the body. After stripping the wires, they need to be connected back. It is important to take care of high-quality insulation.
The boiler should not touch the bottom; it is advisable that it be completely covered with liquid during operation. Into the same hole through which the boiler cord passes, you need to insert the long end of the coil for the apparatus. The remaining gaps between the tube and the cord must be filled with pieces of cotton wool, making it quite tight. It is important to achieve the best sealing possible.
The resulting structure made of cotton wool must be filled with superglue, which is made on a cyanoacrylic base. This will allow you to obtain the most airtight connection using composite materials. After the glue hardens, you will be able to get a tight, strong connection. All that remains is to make something like a casing for the fan so that the air washes over the fins of the heat exchanger, represented by a coil.
To make the casing, you can use Tetra-Pak packaging. If you are making a moonshine still, then you can use the technology presented in the article. You need to cut a rectangle from the packaging, the width of which will correspond to the dimensions of the fan. These elements will be used to cover the fan on 3 sides. The end of the coil needs to be brought to the fourth side in order to drain the moonshine. In the remaining side wall you need to make a hole for this part of the tube and glue it with the superglue used earlier. The walls can be glued together with tape. When a moonshine still is being made, maximum safety must be ensured; it should be covered with a transparent protective screen.
At this point we can assume that the mash column is ready. You can use a computer power supply as a power source for the fan. To turn it on without using the motherboard, you need to connect the black wire with the green one. Experts use more compact 12-volt sources, which you can find yourself.
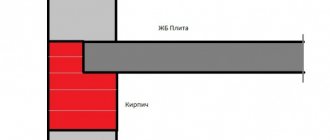
Cladding a concrete or brick column
This is a special case of a plasterboard column: in this case, the load-bearing function of the frame is performed by a concrete structure, and sheet material is used to level its surface.
To attach drywall, a special glue is used, prepared from a dry mixture packaged in bags. The mixture is diluted with water and applied to parts cut out of plasterboard, in large cakes in a checkerboard pattern and along the edges.
After this, the sheet is pressed against the concrete (brick) and leveled. After the glue has dried, the corners are formed, the column is treated with a primer, then with putty and decorative materials.
In conclusion, here is a video that clearly demonstrates the process of creating curved structures from plasterboard, including columns.
Deviation from the above requirements
If you are making a mash column with your own hands, the drawings of which you must complete in advance, then it is important to think about deviations from the mentioned requirements. The main one is an uncontrolled reflux condenser. If we are talking about the Malyutka column, then uncontrollability is sacrificed for compactness. To do this, the condenser and reflux condenser are located in a single container with running water. If you decide to use this scheme, then you will not be able to regulate the process using a reflux condenser, therefore, separation will not be achieved. If you are making a mash column with your own hands, you can borrow the drawings of this design from the article. It should also be remembered that the reflux condenser has low utilization capacity. You may encounter the problem of low column height. Some craftsmen cannot refuse to place the structure on a gas stove under the hood. In this case, separation will be quite difficult to achieve, which is especially true for tall columns.
How to make a plasterboard column with your own hands
Before you begin the construction of this structure, you should prepare the following materials and tools:
- Laser level or plumb line
- Screwdriver
- Metallic profile
- Fasteners
- Metal scissors
- Ruler
- Drill
- Pencil or marker
- Roulette
- Compass
- Portable ladder
- Construction knife
- Plasterboard sheets
Before starting work on the construction of the column, it is necessary to select its shape, on which the design of the frame will depend.
How to make a square column from drywall
Data-lazy-type=”image” data-src=”https://remontcap.ru/wp-content/uploads/2017/07/Pryamougolnaya-kolonna.jpg” alt=”how to make a square column from plasterboard” width= »800″ height=»600″ srcset=»» data-srcset=»https://remontcap.ru/wp-content/uploads/2017/07/Pryamougolnaya-kolonna..jpg 300w, https://remontcap.ru /wp-content/uploads/2017/07/Pryamougolnaya-kolonna-174×131..jpg 70w" sizes="(max-width: 800px) 100vw, 800px">
To make plasterboard columns with your own hands, you need to do the following:
- Determine the parameters and location of this decorative element;
- Then you should mark the base on the ceiling by drawing two parallel lines that connect a pair of opposite walls of the room. The column must have edges with a width equal to the distance between two non-intersecting straight lines.
The angle forming the sides must be straight; - Using a laser level or plumb line, the markings are transferred to the floor. It is worth remembering that correct calculation and accurate markings are a guarantee of obtaining an aesthetic and even structure;
- Then, using metal scissors, we cut out the profile and secure it at the top and bottom. The profile is attached to concrete surfaces using dowels. To wooden surfaces - using self-tapping screws. The height of the vertical posts must match the height of the future column. If the structure is planned to adhere to the wall, then two sections of the profile are prepared. If the column is located in the center of the room, then four segments will be needed;
- To strengthen the frame, special elements are used. A pair of profiles are installed in one of the corners of the rectangle and screwed on with self-tapping screws, having first checked that they are correctly positioned with a level. Then you can attach horizontal jumpers at a distance of 50 cm from one another;
- If you plan to place raster lamps in a column, you must first make holes in the internal parts of the structure and lay the wiring;
- Then the frame is sheathed, but work must first be done on supplying communications. If you plan to mask sewer and water pipes with a column, it is worth laying soundproofing materials inside the structure. The dimensions are transferred to plasterboard sheets and the components of the structure are cut out with a knife;
- Next, the frame is leveled and puttied. First, the joints are sealed with sickle tape and putty. All corners of square plasterboard columns should be covered with perforated corners before puttying. When the joints and corners are dry, they begin to level the entire surface of the structure;
- At the final stage, they begin to decorate the structure. To do this, you need to wait until it dries completely. There are many ways to finish a column. It can be covered with decorative plaster, liquid wallpaper, stone, tiles, or simply painted with acrylic or water-based paint.
In order for plasterboard columns in the interior of a room to look organic, it is necessary to follow two design rules: the column must either completely merge with the design of the room, or be a bright accent.
How to make a round column from plasterboard
The rules for installing round plasterboard columns are very similar to the rules for installing rectangular structures.
Jpg" alt="how to make a round column from plasterboard" width="600″ height="400″ srcset="" data-srcset="https://remontcap.ru/wp-content/uploads/2017/07/Kolonna -v-interere..jpg 300w" sizes="(max-width: 600px) 100vw, 600px">
The installation process of a round structure consists of the following steps:
- The markup, which in this case is simplified. It is enough to put a point on the ceiling. It will be the center of the structure. Then you need to make a compass. We take a strip or rope and attach a self-tapping screw at one end. We fix a simple pencil at a certain distance from it. Using this device, we draw a circle on the ceiling, and then use a plumb line to copy it on the floor;
- The frame is made of a metal profile. It is necessary to round the guide profile so that it matches the drawing. To do this, it is cut at intervals of 7-10 cm, leaving one edge intact;
- Then the profile is bent and fixed with self-tapping screws;
- At the next stage, you need to make racks from 60x27 mm guides. They are inserted into the spacer between the floor and ceiling;
- Then the column should be sheathed. First you need to prepare parts from plasterboard sheets. Their width should be equal to the circumference, and their length should be equal to the height of the column. There are two methods for bending drywall. If the column diameter is small, then the dry method is used. With this method, cuts are made on the sheet with a distance of no more than 5 cm, and the second side should not be cut through. Then they bend the sheets with their hands, placing them on the layout. The number of sheet folds must match the number of guides in the frame. After sheathing, the drywall should be puttied to hide any unevenness. And when the putty dries, sand the surface with sandpaper. For columns with large diameters, it is more advisable to use the wet method. With this method, a spiked roller is passed over a sheet of drywall, which will make the holes necessary for moisture to penetrate deep into the sheet. Then, using a sponge or cloth, the sheet is moistened, but not too much, otherwise it will simply fall apart. The wet material is given a curved shape and attached to a metal frame using self-tapping screws. With this method, there are no corners left on the column that need to be rounded with putty, but only smooth transitions;
- After the putty has completely dried, you can begin cladding the columns. It is possible to use various materials: wallpaper, water-based paint, stone. After completing this type of work, you can fix the ceiling and floor skirting boards.
Additional recommendations for work
The Rectify beer column has proven itself among lovers of strong drink. However, if you decide to manufacture such a design yourself, then it is best to use stainless steel-based parts. The fittings must be welded to the pipe, while an internal thread is installed on them on both sides, to which the necks of the kegs are fixed. Using fluoroplastic, you can machine a sleeve-coupling, which will be equipped with a gasket for the clamp. All this will form a single whole. The mash column “Baby” must be equipped with insulating material, which is first cut along the length, then put on the pipe, on which it is glued. You should put a dephlegmator stick on the top cover and secure everything with a clamp clamp. The liquid will be fed into a tube through which the phlegm returns. A piece of silicone hose should be put on it, which will prevent splashing to the level of the upper plate.
Types of columns
Before answering the question of how to make a column from plasterboard, it is necessary to study the types of these structures. According to the type of section of the structure, they are divided into the following types:
- Round
Suitable for classic style. They are usually decorated with stucco and relief plaster.
- Rectangular and square
Perfectly fit into the high-tech style. Inside these structures, shelves are often made on which photographs, souvenirs and even household appliances are placed. Therefore, they need a stronger frame than round ones.
- Semicircular
These columns are most often used to camouflage engineering structures.