Covering the screed with polyethylene
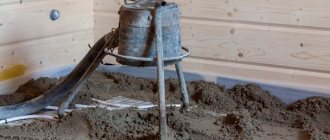
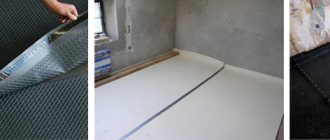
The new screed should be covered with plastic wrap and left for a day. This is done in order to limit the evaporation of water from the screed. The water should react uniformly with the cement in the mortar and also evaporate evenly from the mortar.
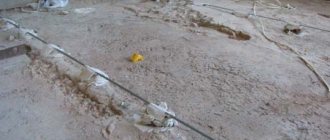
After 24 hours, the installed beacons must be knocked out of the screed. The grooves (grooves) from the beacons must be cleaned and sealed with the same solution that was used to make the screed itself. Filled furrows must be repaired immediately.
Arrangement of other types of floors
In the case where a concrete base or cement screed serves as a rough version, the finishing coating can be made with other materials. The easiest way is to lay linoleum, but there are others that are more effective.
Warm floor
Warm floors can be water or electric. The design is very convenient for arranging private houses and cottages. The electric version of heated floors is especially popular. It is easy to install and effective in operation. It is usually produced in the form of rolls of thin film with a heating cable. After laying on the surface, the ends of the cable are connected into a single chain. Warm floors can be made under any top covering: linoleum, ceramic tiles, as well as under the most modern solution - self-leveling floors.
Watch the video on how to install a self-leveling floor.
Wooden floors
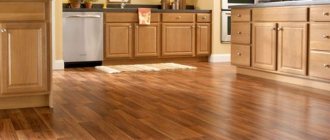
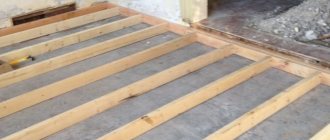
Wooden coverings can be made from floorboards, parquet, laminated boards, or decking boards. To install a floorboard covering, a special beam called lags is initially laid. The logs are distributed over the surface of the subfloor at certain intervals in the longitudinal or transverse direction to the foundation. And already on them, strictly perpendicular to the joists, floorboards are laid, as close to each other as possible, using a tongue-and-groove connection.
Attaching the boards to the joists should be done using nails or long self-tapping screws.
We recommend watching a video of how to lay a wooden floor.
Parquet, as well as all types of laminated boards, are most often laid either with special glue or dry, using the locks with which the dies are equipped. In both cases, one or two layers of waterproof gypsum fiber or asbestos-cement boards are first laid on the concrete base. In addition, the second option also uses a special soft substrate.
Tile floor
For the construction of such floors, ceramic and porcelain tiles are used. The material is durable, beautiful, and comes in a huge range of sizes, textures and colors. Tiles can be laid directly on concrete, on screed, on a heated floor, or on preliminary preparation made of thick plywood or plasterboard. Special glue and mastics are used as binding materials.
Watch the video on how to level the floor for laying tiles.
There is another method for installing a floor. First, a reinforced concrete monolithic foundation slab is made directly on the ground or on a sand-crushed stone base, and the walls of a strip foundation or plinth are built on this slab. In this case, the bottom slab can be made the base of the basement or basement of the house.
But such a decision is made extremely rarely and not for critical buildings. Can be used to build, for example, a garage.
Spraying the screed with water
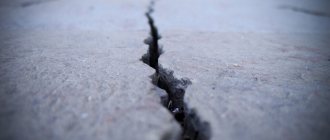
Within 3-4 days, the screed needs to be “spilled” with water. This does not mean that the screed needs to be filled with water from buckets. But caring for the screed requires generous wetting with a wet roller. This will also protect the screed from cracks.
Important! After each wetting, the screed must be covered with polyethylene. One day after the end of wetting, the polyethylene can be removed. If you are making a screed in the heat, then the period of wetting the screed needs to be increased; the screed needs to be wetted 2 times a day.
Screed drying time
- A cement-sand screed up to 4 cm thick gains full strength in 21-28 days.
- The drying time of a screed with a thickness of more than 4 cm can be calculated using the Faust formula: the thickness of the screed squared multiplied by 1.6. Obtain the drying time of the screed in 24 hours under ideal drying conditions. The resulting value will be averaged, but quite realistic.
- After 28 days, the screed gains technological strength and can be artificially dried.
Important! It is prohibited to use artificial drying when caring for the screed for a month.
©Opolax.ru
Film under the screed for waterproofing as a way to prevent moisture from penetrating into the screed
Back
Self-repair of a room is associated with the need to study the properties of the materials used and the technology of their use. One of the elements of the house (apartment) that is constantly under significant load requires special attention - the floor covering and its base. A mandatory technological requirement when pouring the base and finishing screed is the organization of temperature conditions, and in rooms above the first floor - a mandatory waterproofing device. It is unlikely that anyone would want to flood their neighbors due to burst pipes or other circumstances. This article describes how to use film under a screed, its consumer properties and sources of excess moisture.
Sources of dampness and consequences of its exposure
To build a house, land owners try to choose a location on a hill to prevent flooding and moisture penetration into the structure. But such a measure is effective if there are significant differences in the landscape; in other cases, the following circumstances are taken into account:
- Impact of groundwater. Without the use of special equipment, it will not be possible to determine the depth of underground interstratal rivers. The periodically occurring excess water pressure in their bed is sufficient for seepage in the immediate vicinity of the earth's surface.
- Wastewater. Heavy precipitation leads to the accumulation of moisture in the upper layer of the earth's surface. At the same time, the foundation walls and the base of the floor, which are in contact with the ground without the use of insulation, also gain dampness.
Consequences of lack of ventilation
- Dampness in the room and condensation accumulation. Both indicators apply equally to the premises of private and apartment buildings. They are associated with violation of technological requirements during construction. In the first case, in addition to the lack of waterproofing, a significant role is played by the malfunction of the ventilation systems. In the second case, the problem is attributed to the difference in temperature between the indoor and outdoor air. But without the occurrence of microcracks in external walls and window openings, the formation of condensation seems doubtful.
The use of waterproofing (polyethylene) allows you not to lose the water necessary for uniform drying of the screed material made from concrete or gypsum mixture, and to gain unwanted moisture from the air when using dry base materials.
Film for foundation construction
Important! Recommendations for following the technology of construction and repair of individual premises and the building as a whole eliminate the formation of dampness in residential and technical rooms. Waterproofing the base floor with film minimizes the possibility of flooding of the lower floors in case of accidents.
Consumer properties of film
For waterproofing measures, a film consisting of polyethylene of varying densities, up to 0.50 mm thick, is often used. The permissible operating temperature is from -50 to +60 degrees. Along with standard samples, manufacturers produce variants of reinforced film with a soldered mesh frame.
Main consumer characteristics of the film:
- the film reliably protects the screed from external moisture, while simultaneously creating comfortable conditions for the concrete, preventing excessive drying;
- the film is resistant to rotting, the formation of fungal colonies, and does not deteriorate for a long time;
- even a film coating assembled from several strips ensures tightness;
- the textured continuous sheet of film prevents slipping when laying or pouring the subfloor;
- the film is in an accessible financial segment and is presented in all construction stores, and competent sales consultants will help you buy the appropriate material.
Polyethylene film
The negative side of using polyethylene film to organize waterproofing under a screed is a weak indicator of the strength of the material. If the surface is poorly prepared before applying the film, tears are possible, and film folds that are not properly smoothed will ultimately lead to damage to the integrity of the waterproofing layer.
But the above disadvantage does not prevent the use of polyethylene film to limit the movement of moisture when creating strip foundations in individual construction. In this case, the film is laid after installing the formwork from the bottom and sides along the entire perimeter. This ensures uniform gradual drying of the foundation to its entire depth and achieves high quality of the final structure.
Important! Despite the simple method of laying plastic film, you should approach the process responsibly. Violation of the requirements for preliminary preparation of the protected surface and subsequent careless pouring of the screed can lead to deterioration in the quality of waterproofing.
Mode of application
The surface for laying the waterproofing film layer should be a previously formed floor screed or floor slab, pre-plastered and level. If they have a professional tool, owners carry out automated grinding of the base plane. The further procedure for preparing and directly laying waterproofing is presented in the following steps:
- Be sure to conduct a thorough inspection of the base plane to detect sharp protruding parts missed by pre-treatment and chips on the surface. Disadvantages are eliminated using improvised means.
Sanding the base for the screed
- If a significant number of defects are found on the surface of the base, then in rare cases a method is used that involves preliminary sprinkling with a sand mixture. This method is also used when there are significant differences in floor level, in order to evenly distribute the load on the waterproofing surface.
- If there are protruding mounting loops on concrete slabs, the latter are cut off and then the remaining parts of the elements are recessed or carefully ground.
- It is preferable to use a single piece of film for one room. In this case, its thickness should not be less than 0.20 mm. If the size of the room is significant and it is difficult to use a measured piece of material, it is laid with tapes overlapping each other by at least 150.0 mm and then sealed with construction tape.
- The film is laid without tension or effort on the base of the floor, extending onto the walls above the level of the intended pouring of the final screed up to 150.0 mm.
- Considering the low price of the material, it can be laid over the entire area of the room in two or more layers.
- Correctly executed installation of waterproofing material is a kind of shallow solid container.
Subsequent activities involve installing beacons according to previously prepared floor level markings and pouring screed according to technology, depending on the material used for this.
Important! To glue strips of polyethylene, you can use the old method of soldering such material. To do this, you will need a household iron and sheets of paper (newspaper). The places where adjacent strips of material are overlapped are covered with newspapers and glued together carefully and smoothly with a hot iron.
Practice shows that unjustified savings on the purchase and installation of waterproofing during the pouring of the screed, regardless of its composition, can lead to significant losses. Today, finding a suitable material to eliminate dampness in the room is not difficult. Even by using simple polyethylene as a protective layer, the owner prevents the occurrence of unwanted moisture. Thus, the organization of sufficient waterproofing is fully justified.
One of the options for organizing waterproofing is presented in the video below.
Video 1. Waterproofing.
Average score of ratings is more than 0
laminatepol.ru
