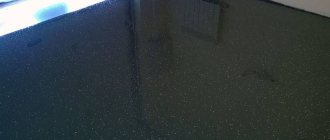
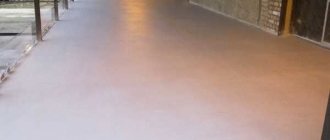
The self-leveling floor owes its name to the method of its installation - this is an option for making a screed by pouring a self-leveling mixture. A distinctive feature of cement self-leveling flooring is its thickness, which is about 3.5 mm. Sometimes cement self-leveling flooring is called liquid linoleum - in fact, its surface is perfectly smooth and even, like tiles, only there are no seams on it. This floor can be safely used in public and residential premises, it is environmentally friendly, its installation and operation are safe for people. Self-leveling, cement-based flooring is the optimal solution for creating a heated floor system.
General information about self-leveling floors
Self-leveling or self-leveling coatings are designed specifically for decorative floor coverings. In essence, they solve the problem of preparing a problematic rough surface for the future laying of linoleum, carpet, laminate or other coverings that must be laid on a flat floor. The distinctive qualities of such mixtures include the polymer base and the ability to be evenly distributed over the pouring area.
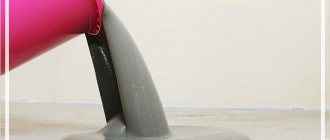
In a calm state, the poured mass will optimally spread across the floor, forming a smooth surface. What is also important is that the self-leveling self-leveling floor is cement-based and has the same strength characteristics as a screed. But at the same time, to create a uniform coating, a minimum consumption of material is required - in new premises with a small number of flaws and defects, it is quite possible to install layers 5 mm thick.
Some compositions also have decorative qualities, thereby eliminating the need for subsequent installation of the same linoleum or laminating panels.
Tools and materials
To carry out work on preparing the foundation and installing self-leveling floors, you will need:
- Raklya. Designed for uniform distribution of the building mixture. Canvas length 56 cm.
- Needle roller. Necessary for removing air bubbles in a liquid mixture. Width 24 cm, 30 cm.
- Straight, curved and side spatulas. The size of the spatula blade is 28 cm. For leveling the mass over the surface.
- A roller with a fiber length of 12-14 mm for distributing the underlying layer.
- Overhead plastic studded soles - paint shoes. For moving on uncured mixture without leaving any traces. The height of the spikes is 25 mm.
- Mixer - a drill with an attachment for mixing the mixture.
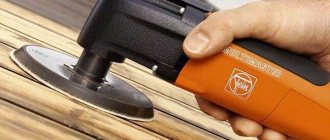
- LSHU grinding machine.
- Hammer.
- Laser level.
- Primer.
- Universal mortar M150 for foundation construction.
- Two-component mixture for pouring the underlying layer.
- Mixture for the final layer.
When discussing methods for installing self-leveling floors, undeservedly little attention is paid to surface preparation. It is important to know that a base constructed in compliance with all technical requirements actually saves up to 30% of the cost of installing a finishing coating. The amount of costs for purchasing the material directly depends on how accurately the base level is located along the horizon. The thickness of the self-leveling floor layer is usually 2-5 mm, so large differences in the horizontal level of the concrete base (slabs, concrete, cement-sand, prefabricated screeds) will increase the consumption of material for installing the self-leveling floor. Cash expenses will also increase accordingly.
Composition of the mixture for self-leveling floor
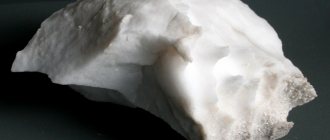
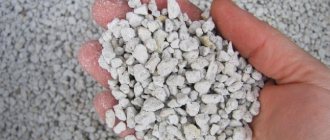
There are self-leveling mixtures that are self-sufficient and only require filling with water. But this flooring technique is very expensive, although it results in a coating of the highest quality. In most cases, a combined composition is used, a significant part of which is a cement base. This is not just a filler, but a full-fledged active component responsible for the viscosity of the mixture.
The second part is made up of a multi-component factory mass, which provides both the ability for uniform distribution and other technical and operational qualities. In particular, the composition of a cement-based self-leveling floor may include mineral additives, polymer fillers, modifiers and fractionated sand. Depending on the presence of certain plasticizers and modifiers in the composition, the mixture can obtain properties such as insulation, sound insulation, fire resistance, frost resistance, etc.
Preparation for pouring a gypsum-cement self-leveling floor
It is necessary to warm up the concrete floor to the optimal temperature not on the day of pouring, but to ensure that the temperature corresponds to the specified values 3-5 days before and after work.
The room itself should be warm enough, and drafts should be avoided when pouring. Compliance with temperature and humidity conditions affects the setting speed.
It is worth making sure that the screed is dry and free of dust, dirt and other substances that impair adhesion and the ability of the material to self-level. Experts also recommend that the base be treated with a primer.
Cement-gypsum self-leveling floor can be easily applied both manually and mechanically. If the priming stage was omitted, there is a high probability of cracks forming during the hardening period and a decrease in strength, which in general will negatively affect the appearance of the decorative material.
Preparation of the solution
To make the operation easier, it is advisable to prepare in advance a construction mixer or a screwdriver that supports working with nozzles for stirring viscous solutions. Next, water is poured into the container - on the basis that 200 ml will be needed per 1 kg of mixture. However, it is advisable to determine the proportions according to the manufacturer’s instructions. For example, the cement-based self-leveling floor “Starateli” involves pouring 5-6 liters of water into a 25-kilogram mass.
The mixture is mixed with a prepared instrument until a homogeneous mass is formed. Next, you need to wait until the chemical properties of the solution are of the appropriate quality for pouring. Exact flow rates will be determined by floor requirements and specific mixture characteristics. If a high-strength floor is needed, the thickness will be increased and, accordingly, the mass consumption will be increased. For thin 5mm coatings, consumption will be minimal.
Device technology
The entire workflow consists of three stages. Work begins with pouring the prepared mixture, during which the solution is distributed throughout the entire work site. The second stage involves manual leveling, which will help the natural process of mass distribution.
And at the final stage, the cement-based self-leveling floor begins the hardening process. At this stage, the user only needs to cover the surface of the future floor with a film to protect it from small foreign particles. Now it’s worth taking a closer look at the techniques for performing the first two stages of self-leveling coating.
Benefits of the mixture
The gypsum-cement coating is very elastic and plastic, which makes work easier. To obtain a perfectly flat surface, you just need to quickly distribute the mass and roll it with a needle roller.
Often, a mixture of gypsum and cement is much more fluid than cement mortar, which allows it to quickly self-level - that is, level the base by filling all the unevenness.
The material dries quite quickly. Technological passage is possible after 6 hours, and in some cases after 4 hours. Maximum strength is achieved after 28 days.
In addition, this type of screed can be used for floors even with low strength, which indicates excellent “binding”, strengthening and penetrating characteristics.
The highest mechanical resistance to bending and compression ensures the integrity of the screed and resistance to the natural shrinkage of the building. And extraordinary strength and adhesion are the key to the durability of the finishing material.
The absence of shrinkage is another advantage, justified by the good plasticity of the solution. Thanks to this property, the mixture can be poured onto a “warm floor” system.
You can buy cement-gypsum compound at any hardware store, which means it is generally accessible. The product is not expensive, unlike polymer analogues.
Environmental safety allows you to use the compound for leveling in absolutely any premises.
Pouring the floor
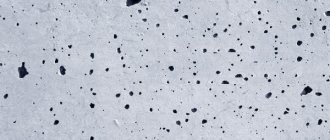
Before pouring, the boundaries of the area where the mixture will be distributed should be clearly marked. Sometimes mini-formwork made of wood with beacons is installed for this purpose. The mixture itself is poured so that as few bubbles as possible are formed - in the future you will have to get rid of them with a needle roller.
It is necessary to pour out the entire volume that was prepared for coating at once, since delays are inappropriate both due to the rapid crystallization of the solution, and because gaps in time between pouring will negatively affect the formation of a uniform structure. If you plan to use a cement-based self-leveling floor on a large area, then it is advisable to select several points for pouring. This will make it easier to evenly cover the entire space.
Installation
Filling a polyurethane-cement floor is not difficult if you strictly follow the instructions. However, there are some features that are worth considering when working with mixtures based on polyurethane resins. Due to the limited time of primary polymerization, the mixture must be applied quickly to a dry, cleaned and primed surface. Therefore, when filling large areas, it will not be possible to cope alone.
Self-leveling properties allow the polyurethane mixture to be poured onto uneven substrates with cracks, breaks and porous structures. To get a perfectly smooth surface, use a needle roller.
For durable flooring, contact. The cost of services and the price of polyurethane-cement floors are affordable, and we are responsible for the quality!
Leveling activities
Although polymer mixtures are called self-leveling, it is advisable to assist the leveling process manually. But before this, it is necessary to compact the structure of the poured mass. On the one hand, such measures make it possible to rid the mixture of air bubbles, and on the other, to remove foreign bodies.
As for tools, a vibropress is used for such tasks. This is a machine that compacts high self-leveling cement-based floors. You can do a similar operation at home with your own hands using the needle roller mentioned above. Direct leveling is also done with rollers, but with a wide coverage area. Next, all that remains is to wait for the complete crystallization of the laid mixture and its acquisition of the necessary strength qualities.
General tips on flooring techniques
Even at the stage of choosing a suitable composition, it is necessary to decide whether the coating provided will be a finishing coating or will create the basis for another decorative design. This will make it possible to more accurately determine the set of operational properties of the polymer flooring.
You should also provide for the possibility of installing a “warm” floor. If installed, the cement-based self-leveling floor should be as thick as possible so that a heat-insulating substrate remains at the bottom. Do not forget about the insulating qualities of the top part of the coatings. After crystallization, it is advisable to perform heat and sound insulation with special coatings. Waterproofing is realized through a film layer.