Assortment of materials for creating a lid
The roof for the well can be made of the following materials:
- concrete;
- tree;
- plastic;
- metal.
Each option has its advantages and disadvantages. You can make a shutter from the presented materials with your own hands.
Well cover projects
In order for a hydraulic structure to fit harmoniously into the existing landscape design, it must be beautifully designed. Ideas for a well cover made of concrete, wood and other materials can be seen below.
How to make a shutter from PCB
The best option for long-term operation of sewer and other wells is a cover made of textolite, but to make it, you will need step-by-step instructions.
So, to build the structure you will need:
- sealant;
- concrete;
- metal corners;
- loops;
- pens;
- profile pipes.
Shutter dimensions may vary.
The work is being carried out in stages:
- Metal corners are cut at an angle of 45°.
- By welding they are connected into a quadrangle.
- The corners of the structure are also welded.
- Welding marks are cleaned with a grinder.
- Profile pipes are cut so that they are a centimeter shorter than the corners and inserted around the perimeter of the frame. The pipes are welded, and the welding seams are cleaned with a grinder.
How is an insulated cover installed according to GOST? Again, the work process is carried out in stages:
- Two plates for the frame are cut from PCB.
- Insulation is fixed between the resulting sheets.
- The structure is assembled and fastened with self-tapping screws.
- The seams are treated with sealant.
- All that remains is to weld the hinges of the lid with the frame.
The installation of a shutter for a country well in accordance with GOST is carried out using formwork made of boards. It needs to be cemented. The final work consists of installing handles, a lock and painting the product.
Wooden cover
The first simplest version of a wooden lid is a round or square shield assembled from boards. You can decorate such a structure and make it decorative using paint and varnish material and correctly selected elements: handles, locks, etc. A wooden cover for a well can last 5-12 years.
To complete this design you will need:
- three beams measuring 4x4 cm;
- boards 2 cm thick, about 15 cm wide;
- wood sealant;
- nails, bolts;
- pens;
- varnish, stain.
The beams are placed close to each other, and boards are stuffed onto them. The length of the bars must match the width of the shield. The number of boards must be selected depending on the size of the lid. To strengthen the structure, a third one is placed between two beams.
The resulting structure is polished. To round off the sharp corners of the shield, it is cut with a grinder. Seal the gaps between the boards. Instead, you can use strips from the inside of the lid. At the end, the structure is coated with paint. To make the well device decorative, it is first coated with drying oil, then two layers of stain, and finally with shiny or matte varnish.
Advice! To give a beautiful, noble look to a wooden lid, it can be painted to match the color of alder, oak or mahogany.
This structure is not attached to the well; it is placed on the head and, if necessary, opened. To do this, metal handles are attached to the lid.
The second option - a double decorative cover for a well looks like a square or round wooden panel with a hatch in the middle, which has two doors. They are attached with hinges to the main fixed part. The doors are easy to open for water intake and close with a lock. This is especially important for families with children. To make such a structure, the following materials are needed:
- bars four-2×2 cm and four-4×4 cm;
- boards 2cm thick;
- swivel hinges;
- metal handles;
- nails, bolts;
- seal;
- enamel, paints and varnishes.
On two 4x4 cm bars, boards of different lengths are stuffed so that a rectangular hatch is formed in the middle. A couple more beams are nailed to the side walls. Then they make two identical panels from 2x2 cm beams, these will be the doors. They are put on hinges and attached to the walls of the hatch. Handles are screwed onto the doors from the outside, and the gaps between the boards are sealed.
To increase water resistance, the lid is coated with enamel. Then stain is applied to it, painted or varnished.
How to make a wood lid
Round well covers made of wood are very popular. Such shutters fit perfectly into any landscape design. Wood processing is not a problem, and the shutter can be any size.
Round and other shaped wooden well covers according to GOST are made from the following materials:
- 6 bars with dimensions 2030 cm;
- pens;
- plank with grooves;
- rubber belt and hinges;
- roof.
Installation is carried out in a strictly defined sequence:
- Measure the outer diameter of the well.
- The sheathing is made from bars.
- The sheathing is sheathed using planks.
- Round and other lids are reinforced with timber in the center inside.
- Mount the handle.
- If there are two lid flaps, one is attached to hinges or to a rubber belt on the lower part of the lid, the other - in the same way, but on the upper part.
- After installation according to GOST is completed, the cover is treated with varnish or paint.
Concrete cover
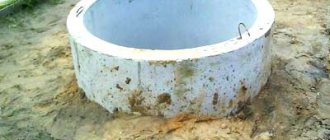
It is distinguished by its large mass and extreme reliability. It is used when installing a well based on concrete rings. The latter can be purchased at any construction market. But with the lid, everything is not so simple, and often you have to do it yourself, which is what we will do.
- First of all, you need to prepare the mold. To do this, measure the diameter of the rings and dig a shallow hole corresponding to this diameter. We will pour the cement mixture into this hole. So that the latter does not go into the ground and has smooth edges when frozen, the bottom and walls of the pit should be lined with a layer of thick polyethylene;
- In the center of the hole we place a wooden formwork corresponding to the width of the future hole. The height of the formwork should correspond to the thickness of the future concrete cover;
- After mixing the cement mortar, pour half (about 5 centimeters) into the hole. After this, we lay a metal mesh, which will act as reinforcement, and pour the remaining concrete.
The lid can be used after about 4 days. In this case, any cover can be mounted on the hole itself, from wood and plastic to metal.
Features of plastic caps
For sewer and other types of wells, Egida plastic valves are often used. The main advantages of the presented products are light weight and pleasant appearance. The lid weighs up to 7 kg, but can withstand significant loads - up to 200 kg. This is important in winter, when an impressive mass of snow and ice accumulates on the well.
The plastic cover “Egida” meets all GOST requirements. In its inner part there are stiffening ribs that, in addition to their main function, serve decorative purposes. The shape of the sphere that the valve has prevents water from accumulating, and the side located below the edge of the ring reliably protects the well from dirt and debris.
A plastic square or other shaped cover “Egida” allows the well to breathe. Plastic has low thermal conductivity, so the water in the well will not freeze in winter and will remain cool in summer. It is problematic to make a plastic shutter yourself, so it is better to purchase a finished product in a specialized store.
Question about sizes
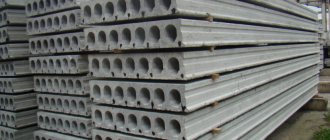
Concrete structures intended for pit construction require wall rings, bottoms and roofs for wells. The PP gate represents the upper element of concrete wells and has the shape of a circle with a hole. The hole in the tire well is necessary to enable descent into the well to inspect the pipes. PP valves are attached to the rings and serve to protect the shaft, and also contribute to the formation of the working chamber space.
Popular product sizes
PP well covers of various sizes are available on the market:
- The PP 10-1 valve is used for installation on wells with an internal diameter of 100 cm. The diameter of the outer concrete circle is 120 cm. The difference in size makes it possible to reliably install the valve on the well ring.
- The PP 10 cover is small in size. It is heavy - 250 kg, so installation is carried out using a crane.
- The PP 10-2 shutter has a square shape and is intended for meter-long wall rings. The shape gives the slab a lot of weight - 400 kg, but installing the well cover is easier.
- The PP 15 shutter, in contrast to the PP 10, has an internal diameter of 1.5 m. Product modifications are presented in two options - square or circle. The outer dimensions of cover 15 are 170 cm in diameter. The weight is 1 ton, if the lid is round - 700 kg. The designation for a square shape is 15‒1, for a round shape—15‒2.
The thickness of all listed plates is 15 cm. The internal diameter of the hatch, according to GOST, should be 70 cm.
The standard sizes of the covers correspond to the sizes of the concrete rings. The number that goes with the designation “coating plate”, for example, 10 or 15, is the diameter of the ring that fits the shutter. So, cover 10 is suitable for the bottom of a ring with a diameter of 1 m, 15 - for a 1.5-meter bottom. Accordingly, if 10 is for a meter ring, size 20 will be for a two-meter ring.
You may also be interested in an article in which we talk about how and when a well is repaired in a country house.
OCCUPATIONAL SAFETY REQUIREMENTS AFTER WORK COMPLETION
5.1. Remove tools and foreign objects from the workplace. 5.2. Close the well with a lid; remove the well fence. 5.3. Hand over tools and personal protective equipment to a designated location. 5.4. Tidy up your workspace. 5.5. Take off protective clothing, put away personal protective equipment, protective clothing in the designated place. 5.6. Wash your face and hands with warm water and soap or take a shower. 5.7. Inform the work manager about all malfunctions noticed during work and the measures taken to eliminate them.
Differences between slab rings and floor slabs
There may be valves for wells on the market with the abbreviation KCP. They are distinguished by a displaced center of the hole, which greatly facilitates descent to the bottom of the well during repairs. The KCP holes in the valve are also distinguished by the ease of installation of equipment for supplying water to the surface.
KCP covers are manufactured in accordance with GOST and are used for various engineering structures and covering wells with underground communications. Direct overlap gates are capable of distributing the load from vehicles passing over them and pedestrians. KCPs differ in that they have a quarter, which reduces the likelihood of the lid shifting. A do-it-yourself well cover does not have such characteristics.
It is very difficult to make a KCP yourself, since the requirements for the Ring Plate are high. To create the CCP, concrete grade B15 or higher is used, which is characterized by increased water resistance and frost resistance.
So, the installation of well valves can be done with your own hands, but only if you choose the material and size of the covers correctly. For concrete wells, the types of covers available on the market are 10 and 15. They differ in shape, weight and size. You can make a valve for a sewer and other types of wells with your own hands, but in this case you will have to act in accordance with GOST so that the metal or wooden cover lasts for a long time.
Well pumps
Today, water sampling from a well is usually carried out using pumps - both submersible and located outside the well shaft.
The first ones are used during seasonal (summer) residence in the country, the second ones are for use all year round.
Vibration-type submersible pumps are cheap and quite reliable. Centrifugal pumps are more efficient, but they cost 5-10 times more, and their reliability often raises questions. They are very sensitive to supply voltage, or rather to its fluctuations.
It seems most reasonable to use remote pumps; supply hoses must be laid below the depth of soil freezing. The remote pump must be installed in a place where the temperature does not drop below zero degrees. Moreover, it is always in obviously better conditions than submersible, and it is easier to access. The only negative is the noise produced during operation. The cost of such a pump (or better yet, a complete pumping station with an expansion tank and automation elements) ranges from 5 to 30 thousand rubles.
