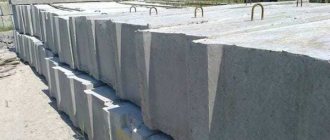
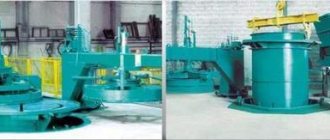
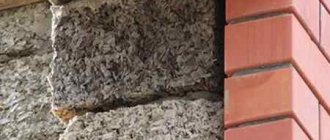
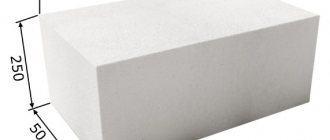
- Preparation of concrete composition
Concrete blocks have received well-deserved recognition from owners of private houses due to their performance characteristics and beautiful design. Decorative concrete blocks can imitate natural stone, brick or concrete, and can also have a smooth plastered or uneven structure.
Advantages:
- quick installation due to large dimensions;
- increased strength, durability, ease of installation;
- good resistance to mechanical stress;
- can be repainted;
- go well with any fences made of wooden picket fences, forged metal, brick fences, metal profiles and reinforced concrete structures.
What are decorative blocks
Before examining the construction technology, let’s get acquainted with the characteristics of the material. Decorative building blocks are most often made from concrete, although there are also varieties made from clay and artificial stone. To make blocks, cement mortar is compacted in special molds using a vibration press. To make the block stronger, gravel, screenings, crushed stone, slag, sand and other fillers are added to the cement paste.
The blocks are available in several standard sizes. The most common elements are with parameters LxWxH of 200x200x400 and 390x140x188. They are used to construct the main fence sheet. In addition, they produce special elements for creating corners, support pillars, roofs for spans and pillars, etc. Blocks are produced in two varieties:
- The solid block is characterized by high strength and durability. It is suitable for those who want to create a truly reliable wall around their site. However, such a block is more expensive and heavier than the hollow variety.
- A hollow decorative block is easier to transport and place. But its strength is somewhat less than that of a solid element.
Both solid and hollow blocks are available with smooth and embossed surface textures. The pattern can imitate brickwork, natural stone and other materials. Adding dyes allows you to obtain products of different colors, which creates additional scope for the designer’s work.
Painting it helps enhance the impression of the material. To make the block resemble natural stone, it is painted gray, imitation brick - red, slate - yellow. The coloring layer not only improves the visual impression of the material, but also prevents water from getting inside the concrete.
Block fences are distinguished by high strength and resistance to the vagaries of nature, fluctuations in temperature and humidity. Such a fence is not afraid of fire, does not lose its aesthetics over time and looks equally attractive on both sides. The main disadvantage is the need to build a foundation.
The positive properties of fencing made of decorative blocks will appear only if the construction technology is followed. If the masonry is built with irregularities and on an insufficiently reliable foundation, it will quickly become cracked and crack due to soil shrinkage and temperature fluctuations.
Molds for cinder blocks: options and their production
Cinder block is a universal building material for the construction of buildings and fences. Many developers prefer to make such blocks of convenient size and guaranteed quality with their own hands at minimal financial costs.
When making our own, we will limit ourselves to only a special form. Note that hollow blocks made of cement or granulated slag, that is, foundry waste, as well as other fillers, are multifunctional: they muffle sounds as much as possible and retain heat well.
Supporting fence system
Since the fence being constructed is heavy, a strip foundation will have to be poured for it. The quality of the future masonry depends on how responsibly all operations were carried out at this stage. Therefore, it is important to take your time and perform each action carefully and carefully.
Construction begins with markings. Using pegs and rope, mark the position of the spans and support posts of the future fence. Then the boundaries of the future foundation are marked with chalk. Its width is calculated by multiplying the width of the block used by 2 (with another 40 cm added as a reserve). The boundaries of the future trench are drawn with chalk.
Then they dig a trench with shovels. Its depth depends on the characteristics of the soil. If the soil is not prone to frost heaving, it is enough to go 70 cm below the surface. If the soil is wet and bulges when it freezes, you should go 20 cm below the soil freezing line. You can find out the exact values from the tables located in SNiPs.
The filling order is as follows:
- The bottom of the trench is carefully compacted, and then a cushion is poured. This is a layer of sand and crushed stone, each 10 cm thick. Before pouring a new layer, the previous one is watered and thoroughly compacted. Ruberoid or other sheet waterproofing is laid on the pillow. In this case, the sheets should completely cover the walls and come out of the trench on both sides.
- A solution of M200 cement, crushed stone, sand and water (ratio - 1 x 5 x 3) is poured into the drainage to a depth of 10 cm. After the supporting layer becomes hard, wooden formwork is installed.
To prevent the formwork from collapsing under the pressure of the earth, spacers must be inserted between the boards. - A frame of reinforcement bars with a diameter of 12 mm is placed in the formwork. The rods are connected in 4 pieces, every 20 cm. Vertical and transverse rods are tied with wire or attached by welding.
- To connect the future foundation with block masonry, reinforcement releases are made 15 cm upward. Hollow blocks of the first row will be placed on these rods. Also, pipes are attached to the frame, which will become a support for the fence posts.
- The formwork is poured with concrete. Carefully getting rid of voids.
After a week, when the concrete has hardened, the formwork boards can be removed. The side edges of the tape are coated with bitumen-based mastic, and the waterproofing sheets laid under the foundation are glued to it. The space between the walls of the trench and the tape is covered with earth.
Don't rush to start work! The curing time of concrete depends on the temperature and humidity of the air. Even on summer days it cannot be less than 6-7 days.
Production of cinder blocks
In order to save material, it is recommended to use molds for the production of four to six blocks at once. To create cavities, they must be equipped with cylinders .
Step-by-step process for making blocks in split form:
- The solution is mixed using a concrete mixer.
- The mixture is poured into the mold with a shovel. In this case, the matrix must stand on a flat surface.
- The container should be filled evenly with the solution. This needs to be monitored closely.
- After the mold is filled to the brim, the top layer is leveled with a shovel.
- For dry mortar, a special lid with holes is used that will cover the existing bayonets in the matrix.
- The building block, together with the container, is moved to an open area, where it will be stored in the future.
- After about half an hour or a little more, the bottom, side walls and lid are removed. To make it easier to remove the cinder block, you can use a regular hammer to knock out the longitudinal strip with the cylinders and the walls.
about three days for the building blocks to dry completely .
Starting row and cut-off waterproofing device
How neat the fence will look depends on how correctly the first row is laid. Therefore, all work when creating the starting row is carried out especially carefully.
First of all, it is necessary to cut off the path of water from the soil to the blocks. To do this, the tape is covered with sheet waterproofing or thoroughly coated with mastics. To improve the quality of the masonry, you can also use a reinforcing mesh, protecting it with a layer of mortar of 2 mm or more from corrosion.
To lay the first row, it is permissible to use only cement-sand mortar. Even if in the future it is planned to use other building mixtures, I put the starting row on the central fiber cement board.
Laying begins with the outer blocks. They must be carefully leveled, placed on a 2 cm layer of mortar. The block should slightly “overhang” the base (or at least not allow the base to protrude beyond the wall). Otherwise, rainwater will accumulate on the base, which will cause cracks to appear in the base.
A mooring cord is pulled between the outer blocks. The first row is laid out, guided by the cord. The cement mixture is placed on the tape at a distance of 3-4 blocks. The correct installation of each block is assessed in relation to its neighbors and cord. The ends of each block are coated with a solution. The recommended seam width is about 1 cm.
To reliably connect the starting row with the foundation, hollow blocks are placed on extended reinforcement bars. Voids with reinforcement missing inside must be carefully filled with concrete. In the future, the reinforcement outlets can be increased to obtain a structure with high strength. To learn how to properly make cement-based waterproofing, read this article.
Installation for the production of cinder blocks
The machine has a fairly simple design, so you can assemble it yourself. Its main element is the matrix (form) intended for the slag concrete solution. It is a metal box, inside of which limiters are located in the form of voids.
To create a DIY installation you will need the following tools and materials:
- about 1 sq. m. hardwood steel 3 mm thick;
- electric motor with power from 0.5 to 0.75 kW;
- 30 cm of metal strip 3 mm thick;
- bolts;
- nuts;
- one meter of pipe with a diameter of 7.5–9 cm;
- vice;
- Bulgarian;
- standard set of locksmith tools;
- welding machine.
Stages of work:
- A mold is made according to the required dimensions of the building blocks. Its side faces are cut from sheet steel. To make the matrix fit two cinder blocks at once, an internal partition is fixed in the center of the box.
- To design the voids, the height of which must be determined in advance, six pieces of pipe are cut.
- The pipes must be given a conical shape, for which a longitudinal cut is made to the middle of each piece. Next, the pipes are crimped in pieces and connected using a welding machine. Each cone is welded on both edges.
- Along the long edge of the matrix, limiters are connected in a row. For fastening with eyes, a 3 cm thick plate is added to the edges of each row.
- Cuts are made in the middle of each resulting compartment, and eyes are welded on the reverse side. Elements can be attached to them to create voids, which can then be easily removed. As a result, the matrix can be used for the production of monoblocks.
- To secure the vibrator, four bolts are welded on the outside of one of the transverse walls.
- On the loading side, the blades and apron are attached by welding to the edges.
- All elements of the completed structure are carefully cleaned, polished and painted.
- A press is made from a plate with holes that must coincide with the holes in the block. It should fit freely into the mold by 5–7 cm.
- Handles are welded to the press.
At the final stage of the do-it-yourself production of a cinder block installation, a vibrator is installed . To do this, you can take a regular electric motor, which is welded onto the eccentric motor shafts. You can simply weld the bolts, making sure that their axes coincide. The strength and frequency of vibration will be adjusted using nuts screwed onto the bolts.
Technology of laying decorative blocks
The second and all subsequent rows of blocks are placed offset. The seams between the blocks in the top row are offset relative to the seams in the bottom row by no less than a third of the length of the block. Before laying a new row, it is advisable to let the solution of the previous row dry. This is especially important for the starting layer.
To ensure connections at right angles, some of the blocks are rotated 90° relative to the bottom row. The horizontality of the blocks is checked using a building level. The more often the check is performed, the smoother the masonry will be.
I lay out the blocks row by row, each time giving time for the solution to harden until the fence reaches the desired height. If this is provided for by the project, decorative hollow blocks can be built into the masonry, giving the fence an elegant look. The final stage is the installation of elements equipped with sloping slopes, which will not allow rainwater to remain on the concrete surface for a long time.
Features of the container for cinder blocks
Dimensions
Standard cinder blocks measuring 390x190x188 mm are on sale side by side with semi-blocks of smaller dimensions - 390x120x188 mm.
But in homemade cinder blocks, we will choose the size that suits us most. However, such free dimensions should not enlarge and burden the products too much, otherwise it will be difficult to work. That is, let the mass of the block be no more than 20 kg .
We make a fence from decorative blocks with our own hands. Step-by-step instruction
In general, the technology for constructing a fence from decorative blocks looks like this:
- Fence design, cost estimate, material purchase.
- Marking on the ground, earthworks.
- Construction of a drainage cushion and waterproofing of the foundation.
- Construction of formwork, production of a frame from reinforcement, installation of reinforcing pipes inside the pillars. At the same stage, the embedded elements for future gates are attached.
- Pouring the foundation.
- Laying the edge blocks, and then the starting row.
- Construction of fence posts and fabric.
- Installation of protective roofs on poles and flights.
- Installation of gates, lighting and other service elements.
The finished fence should be carefully painted and treated with sealants to protect the material from moisture penetration.
Types of molds for making cinder blocks
Collapsible made of wood
In home production of these blocks, wooden forms are convenient, which are easier to produce.
- This design is a simple formwork into which we pour a cement mixture.
- To make a mold-equipment, you need planed boards as wide as the height of a cinder block. And their length is up to 2 meters - the boards are longer and more difficult to work with.
- Then, using crossbars from short boards, we divide the base into separate cells in which cinder blocks are formed.
- It is advisable to place these parts on clamps - sliding grooves. These spacer plates can also be installed in selections cut into long boards.
- In homemade molds for cinder blocks, we will put metal cylinders, pieces of pipes or ordinary plastic bottles filled with water (so that they do not float in the solution), heavy champagne bottles (9 pieces) with thick, durable walls to form voids in the blocks.
- The bottom of the mold can be covered with cellophane.
Advice! To ensure smooth removal of the raw cinder block from the container, a prerequisite for the void former is its taper.
Made of metal
We make welded metal cells with partitions similar to conventional formwork or a similar one made of wood. By the way, it is easier and easier to remove cinder blocks from such metal equipment, especially if you pre-lubricate it with waste oil.
Instructions for making a metal container and its use:
- it is advisable to use sheet metal from 3 mm thick;
- from it we will cut out a matrix according to the size of the cinder block, but with a margin of 5 cm for inevitable compaction;
- Next, we form a convenient end-to-end box without a bottom;
Note! We make all welds from the outside so that the cinder block is smooth.
- rubber padding around the perimeter of the base will protect the edges of the block from deformation;
- to increase stability to the box, we will weld thin profile pipes at the end;
- when making homemade blocks in these forms, we use a soft solution with an increased amount of water;
- After a couple of hours, the solution will set, and we will disassemble the structure, leaving the blocks to dry in a free state.
Homemade machine
Craftsmen have designed homemade machines for home production of cinder blocks. They are equipped with vibrating devices, which speeds up the process as much as possible: production without waiting for the concrete to harden.
Developers use 2 options:
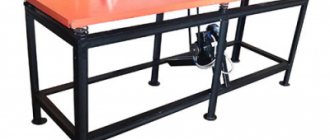
- vibrating table;
- mold with a motor, without even turning the mold over to get the formed cinder block.
The simplest such homemade block machine-box is assembled according to the “laying hen” scheme. It consists of a molding matrix - a box without a bottom and a vibrator on the side of the wall. This vibrator can be made from any low-power 150 W electric motor (for example, from a washing machine).
The box must have handles so that after the cinder block is formed, the form can be easily removed without damaging the cast itself.
Advice from professionals
We offer several videos so that you can see with your own eyes all the stages of foundation construction and block laying. In addition, these fragments contain many useful tips from professional builders. We hope that this material will help you better imagine all the steps in building a fence from decorative concrete blocks:
Although the construction of a fence from blocks seems at first glance to be labor-intensive and costly, the invested effort pays off thanks to the high performance qualities of the new fence. The fence will last for many years without requiring repair or painting.
What equipment will be required?
To start making blocks, you need to prepare the following tools:
- Block mold
- Water for wetting molds
- Vibrating plate (necessary for compacting the solution)
- Spatula for leveling the solution
- Master OK
- Shovel
- Buckets
- Container for mixing the solution
- Metal or rubber flat plate (for drying the finished product)
- Necessary components for the solution
The list of tools may increase depending on the types of blocks and their components. Independent production of various types of blocks The main component of any type of blocks is cement, water and fillers.
