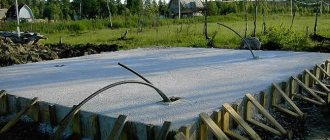
How to properly install waterproofing on a roof?
Moisture does not penetrate into the room thanks to reliable roofing material.
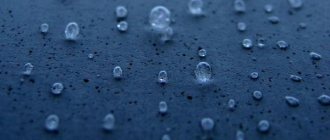
But don’t forget about the steam that rises from the living quarters. It penetrates into the under-roof space, precipitates and can have a detrimental effect on thermal insulation material, wood and metal. Therefore, it is necessary to ensure high-quality insulation of the roofing pie. To prevent the development of such events, you need to know how to lay waterproofing on the roof. Otherwise, this may negatively affect the condition of the insulation. It loses its properties when exposed to moisture or wind. Moisture can come from cracks in the roof surface or condensation precipitated by steam.
DIY roof waterproofing
In the process of installing a roof for a residential or industrial premises, an important and integral point is the installation of insulation. It is designed to protect its wooden elements from environmental influences and moisture. It also protects against the accumulation of condensation under the roof, thereby extending the life of the roof. Such insulation can protect the insulation from getting wet. It can also protect against wind, helping to save on heating costs, since cold air does not get under the roof.
Why is moisture dangerous for the roof?
Why is this happening? Everyone knows that warm air rises to the ceiling. Through miniature cracks it enters the under-roof space. In winter it is often cold here. Warm steam, penetrating into the insulation, precipitates and condensation forms. These droplets subsequently turn into ice. As a result, the thermal insulation material is destroyed.
As soon as the frost subsides, the ice begins to melt, which, flowing down, can penetrate into the layers of the interior decoration of the room. As a result, the finishing structure is destroyed, which means that repair work to restore the building and roof is not far off.
Features of installation of membranes and films
You need to start laying the film from below, heading towards the ridge. The next strip of material should overlap the previous one. The overlap width should be from 10 to 15 cm.
The first row should be laid so that the waterproofing between the rafters sag slightly. You should also leave 4 cm for an air gap. The film is laid in the same way, from bottom to top. The overlap in this case is no more than 15 cm, while between the rafters there can be a sag of up to 2 cm. The edges of the film are connected with a special adhesive tape. Fastening to the rafters is done using a stapler or nails with a wide head.
Then the film is laid with an overlap of up to 20 cm. Counter battens measuring 4 x 5 cm are stuffed on top of the laid film in increments of 15 cm. Then the lathing is installed. When laying waterproofing, you should remember that between the ridge axis and the edge of the film you need to leave a gap of about 5 cm.
In the places where the bars are located, the film is cut. The film is glued to them with double-sided adhesive tape or tape. In buildings with roof windows, the film must be laid taking into account the recommendations of the window manufacturers. Perforated film should be laid with the perforation facing up. This eliminates the possibility of possible leaks.
Features of roofing with waterproofing
To protect the roof and the entire building from the destructive effects of moisture is the main task of waterproofing materials, of which there are many on the construction market.
The installation of waterproofing is one of the most important stages, on which the performance characteristics of the roof, its reliability and service life largely depend.
Modern materials are distinguished by excellent technical characteristics and ease of installation. The most widespread in Russia is waterproofing, which since its introduction has become indispensable for roofing work.
This is a bioresistant, flexible and elastic material, while having good strength indicators. Its importance for the construction of building roofs cannot be overestimated; thanks to its qualities, it greatly increases the durability of the roof.
Gidroizol is also known as hydrostekloizol.
The standard structure of waterproofing includes:
- basis;
- modified bitumen on both sides;
- protective layer on both sides.
Marking
Different brands have some differences in structure. You can find out what the material is intended for and what it consists of by looking at the letter designations.
Hydroizol is available in two types:
- GI-G – waterproofing;
- GI-K - roofing.
The abbreviation of letters and numbers indicated on the roll has the following meaning.
The first letter of the marking indicates what base the material has: X – fiberglass, T – fiberglass, E – polyester.
The second letter indicates a face covering. K - means that the top layer of material on the front side is a coarse-grained coating that protects against ultraviolet radiation and mechanical damage: waterproofing labeled TKP and HKP is suitable for arranging the top layer of the roofing pie.
The third characterizes the lining layer. P - indicates the presence of a polymer coating: the popular KhPP brand has a fiberglass base and is covered with a polymer film on both sides.
The numbers in the name indicate how much 1 square meter weighs. m of material.
Hydroisol can be:
- roll - black, has a smooth surface;
- in the form of liquid bitumen mastic.
It is convenient to seal seams with Gidroizol M, which is produced in the form of a self-expanding cord of different lengths.
Application area
Due to the fact that the material can provide absolute waterproofness, its scope of application is unusually wide - waterproofing is used as a coating for pipelines, to insulate foundations, and to protect walls of basements, tunnels, mines and other underground structures from moisture.
The use of waterproofing prevents the appearance of rust on metal structures and does not allow rot to appear on surfaces that are not resistant to biological influences.
Without this modern material, it is unthinkable to carry out high-quality roofing work - it is used as a bottom (TPP, KhPP brands) and top (TKP, KhKP brands) layer on flat roofs and on pitched roofs - under a hard covering.
Preparatory work
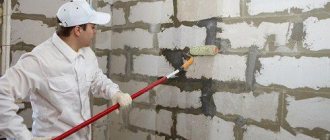
Preparation for installation includes cleaning the base from debris, dust, dirt, parts of the old roofing and eliminating all surface imperfections - covering up cracks and chips.
The next step is to apply a primer to the base - bitumen primer or bitumen diluted with gasoline.
Laying technologies
Installation is carried out in one of three ways.
Hot styling method
The roll is rolled out, heating the lower part with a high-temperature hairdryer, gas burner or blowtorch - for a small area.
To fix the waterproofing, you need to press it to the base.
The thermal effect allows the bitumen layer to securely adhere to the surface.
The second roll is laid on top of the first with an overlap of 10 cm - this way, the two layers of material are thoroughly secured.
You cannot heat the same area for too long: at best, this will lead to deformation, at worst, to fire, since the waterproofing material is flammable. For this reason, at sites with increased fire hazard, the other two installation options are preferable.
Mechanical laying method
The roll is rolled out starting from the lower edge of the roof, which must have at least a slight angle of inclination. The overlap must be at least 15 cm.
The seams are additionally protected from moisture using mastic or resin.
Installation using mastic
Mastic is applied to the prepared roofing base, after which the roll rolled out on top of it is crimped with a heavy roller.
In this case, it is not necessary to melt the bottom layer using a gas burner, but costs increase due to the purchase of mastic.
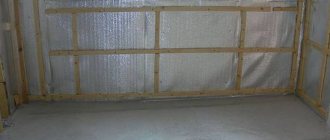
Installation of anti-condensation film
After the rafter system and the thermal insulation layer have been installed, you can begin installing the waterproofing film. The pitch between the rafters should not exceed 1.2 m. The anti-condensation film must be laid so that its absorbent surface does not touch the insulation.
The film is overlapped using mounting adhesive tape. In this case, the joints must be located on the rafters. It is necessary to ensure that the film is evenly stretched. Under no circumstances should there be folds. Between the rafters you need to leave 2 cm of sagging to protect the wood from moisture. Fastening is done with a stapler and nails.
A gap of about 5 cm should be left between the thermal insulation and waterproofing layers. Excess moisture should flow along the lower edge into the drainage gutter. After this, you can secure it with 3 x 5 cm slats using nails and insulation.
The lower and upper valves must be secured using a special sealing tape. This is done on the horizontal surface of the sheathing. The side flaps are secured in the same way, only they are pulled up. On roof slopes, horizontal strips of film should be laid overlapping on top. Diffusion and superdiffusion films are an ideal option for protecting your home from moisture. This material is able to “breathe”. In this case, only the upper gap is left between the membrane and the sheathing for ventilation.
The membranes are laid from bottom to top in strips with an overlap of 20 cm. They are secured with nails.
Before you begin any steps to install waterproofing, you should make sure that the antiseptic impregnation that was used to cover the wood has dried. Only after this can counter battens be placed on the sheathing to ensure the removal of water vapor. Further installation occurs in the same way as for waterproofing films. For fastening use galvanized nails or a stapler.
The membrane joints are connected to each other with double-sided tape. The joints with structural elements also need to be insulated using sealing tape.
Features of installing waterproofing film
No less difficult is the installation of waterproofing film, which also has its own characteristics:
Fastening superdiffusion and diffusion membranes
These materials are most widely used for the protection of roofing elements, since their vapor-permeable characteristics are superior to all other modern materials. Installation of membranes with the best performance characteristics is carried out directly on the insulation layer
without creating a ventilated space below.
Most often, a ventilation gap is made in the upper part at a distance of about 40 mm from the sheathing and membrane. During the installation process, it is necessary to comply with the horizontal requirement
relative to the bottom of the ridge part of the roof.
For final fastening of the membrane to the rafter structure, a construction stapler is used.
, galvanized nails with a large head or special glue for vapor barriers and counter battens. If the insulation is laid directly to the ridge, then it is necessary to comply with the requirement of overlapping the membrane by 200 mm.
After preparing wooden elements for installation of waterproofing by applying antiseptics and other protective compounds, it is necessary to give them time so that they can dry thoroughly. At the end of the work, they begin to install counter-battens on the sheathing
. Failure to comply with this condition will lead to the fact that steam will accumulate inside the roof space and will not be discharged outside.
Installation of waterproofing is an important stage in laying roofing. The quality of this work determines how reliably the internal elements of the roof structure and insulation will be protected. Therefore, it is important not only to choose the right waterproofing components, but also to lay them on the correct side
in accordance with current requirements.
When laying waterproofing, you need to remember the need to bring out special elements - a chimney, antenna, etc. These places must be treated especially carefully
, since you will have to create holes and use additional fixing elements to attach the waterproofing layer to the base.
Proper installation of waterproofing on the roof will help to reliably protect your home from moisture penetration and a decrease in the service life of the roof due to the formation of mold and dampness of the internal surfaces of the house.
Proper installation of waterproofing on the roof will help to reliably protect the house from moisture penetration.
However, you can even perform this task quickly and efficiently with your own hands.
Necessary materials:
Installation of volumetric diffusion membranes
Volumetric membranes must be laid on the flooring parallel to the cornice. Along the top edge you need to secure this material with nails. The next roll is placed in such a way that the fastening area is covered by approximately 8 cm. Using special glue, the intersection is glued together.
In the places where the counter-lattice is attached, a sealing tape is laid on top of the film. The membranes are laid around the chimney in the same way.
So we learned how to properly install waterproofing on a roof using modern materials.
Watch the video and find out which waterproofing is better for the roof and which has proven itself over time.
The need to install a waterproofing layer
Almost all rafter systems are constructed from lumber.
If you remember the school course, you can say with confidence that wood is a natural material that is easily decomposed. Therefore, to increase the service life, developers use special impregnations that do not allow microorganisms to spread in the wood structure, and their name is antiseptics. In addition, there are substances that increase the degree of combustion of the material, they are called fire retardants.
But the most harmful moisture in any wood can be attributed to an excessive amount of moisture. Surely you know that in construction you can use well-dried boards, beams and logs, otherwise during operation they will begin to lose water and, under the influence of gravity, will undergo a process of warping (curvature). Water can wash away all protective impregnations and thereby reduce the wood structure to a defenseless state. That is why most responsible developers conduct a preventive inspection of the entire roofing system and, if there are deviations, promptly eliminate them.
Moisture in the attic can enter either with air or through condensation from the floors below. If you didn’t know, then during the life of the human body it releases a fairly large amount of moisture, which is immediately distributed in the air and moisturizes it. You are doing this right now by reading these deadlines. When you breathe, a small amount of water gets into the air, much more of it gets when drying things or cooking.
Humid air can enter the room during ventilation. This is a natural process that cannot be avoided. But not everything is so bad, because you can create a ventilation system that is capable of drawing out humidified air, therefore, the amount of condensation will tend to a minimum. In this case, all lumber will be dry, and their service life will be maximum.
When talking about condensation, we should not forget about precipitation, which can penetrate into the roofing pie if it lacks a waterproofing layer. High-quality products can withstand large temperature changes and prolonged exposure to moisture. Waterproofing a soft roof is a fairly simple job, but requires serious attention.
Ruberoid as roof waterproofing
Surely you are familiar with a bitumen roll product called roofing felt. It is a heavy roll of bitumen with fiberglass at the base. More recently, the production technology of this material has changed and natural cellulose, which is the main component, has been replaced with fiberglass. Thanks to this, the service life of roofing felt has increased several times.
Despite the fact that roofing felt has excellent waterproofing qualities, it can rarely be found as a layer in the roofing pie of a pitched roof. The fact is that in the cold it becomes too fragile and can crack at the slightest deformation. This behavior is unacceptable for high-quality waterproofing. In addition, it is quite easy to damage the roofing felt material and it can tear under strong tension.
Cold roofs – do you need waterproofing?
The answer to this question will be unequivocal - a waterproofing layer is needed in any case. But since in this case there will be no insulation in the roofing pie and good ventilation of the materials will be ensured, you can use roofing felt or glassine, which will be cheaper than expensive film. But in this case, it is necessary to form a ventilation gap between the roofing felt and the metal tile.
How to calculate and arrange ventilation for a metal roof
Waterproofing is a very important layer in the roofing pie of a roof covered with metal tiles. You should not neglect it, so that later there will be no problems with leaks or a reduction in the service life of the materials used to create the roof.
Prices for metal tiles
Video - Installation of metal roofing
| A film with low vapor permeability, for which it is important to equip the so-called double-circuit ventilation, which will be located between the roofing and waterproofing materials, as well as between the film and the insulating layer of the roof. The gaps between them should be 3-5 cm. The material is ideal for constructing a cold roof or a roof with a simple design. |
| A material that also requires the creation of dual-circuit ventilation. The film is equipped with a moisture-absorbing fleecy layer that perfectly retains excess water. This is a fairly dense material, rough to the touch, durable and resistant to ultraviolet radiation. But the vapor permeability of such a film is low. |
| The best material for roof waterproofing, as it has increased vapor barrier performance and does not require dual-circuit ventilation. It is enough to leave gaps between the film itself and the roofing. Installation of this film is simple, it has a long service life. The main disadvantage is the high price. |
Which material is best suited as waterproofing?
In the construction field, it is difficult to understand the materials due to the large number of them, so sometimes it is useful to read these types of articles in order to stay up to date. Today, it is best to use the following products as waterproofing sheets:
- Polyethylene film
- Polypropylene film
- Glassine
- Diffusion membranes
So, now first things first.
Polyethylene film
This material is the most common raw material for the production of film waterproofing products. Over the past decades, manufacturers have learned to make several varieties of it, and this is what you can find today when studying the construction market:
- Thick polyethylene film. In most cases, its thickness exceeds 200 microns; as for other indicators, it is not capable of passing water and air, therefore, there can be no talk of any vapor permeability. If such material is laid on the roof, then make sure that natural ventilation will supply air to all corners of the roofing pie.
- Perforated film. There are a large number of invisible holes on the body of this material. Thanks to them, the canvas allows water and steam to pass through, but blocks access to water in its normal state. In the construction industry it has a second name - anti-condensation membrane. Due to the passage of steam, it will not remain on nearby products in the form of condensation. It is best to use this material as a waterproofing layer under metal tiles or corrugated sheets. It is worth noting that perforated film boasts a long service life, which with proper care can reach about 25 years.
- Reinforced film. Everything here is clear from the title. This fabric consists of three layers, the middle of which is a fiberglass mesh. It gives the material the necessary strength, but does not take away its elasticity.
If we talk about their application, reinforced membranes are much more popular than similar products. Due to their increased strength, they are also used on frames where it is planned to install an impressive thermal insulation layer. Due to its reliability, such a product can be firmly fixed to the rafter legs and there is no fear of damaging it.
Polypropylene films
Polypropylene was produced after ordinary polyethylene and absorbed its positive qualities. After releasing this product, developers immediately noted its improvement in strength and ultraviolet resistance. Private developers decided to use such qualities for good and sometimes cover an unfinished building with it, in this state it can stand for several months until the main construction resumes.
Materials used
We found out that waterproofing is the most important element of a roof covered with metal tiles. But what should a high-quality water-protecting layer be like? The requirements for waterproofing are as follows:
- it must have increased fire resistance;
- good steam flow;
- strength and reliability indicators must be high;
- the material should not deteriorate due to sudden temperature changes and should not be afraid of ultraviolet radiation;
- the layer must withstand a certain level of mechanical loads;
- waterproofing should not be susceptible to pest attack or mold development;
- it must also cope well with its main tasks and not cause harm to human health.
Laying waterproofing material
Various types of materials can be used for waterproofing. They all have a lot of differences from each other, including different resistance to light, strength, quality and durability.
In most cases, special roofing films having several layers are used for waterproofing metal tile roofs. There is a reinforcing and absorbent layer. The first provides protection from precipitation, and the second is able to absorb moisture coming from the inside, so that condensation cannot accumulate on the waterproofing and mold will not form. Also, on both sides the material usually has a polyethylene lamination.
This coating has special pores that allow the passage of vapors that form inside the house, but at the same time do not allow moisture coming from outside to spoil the materials from which the roof is made. This feature of the material, called vapor permeability, is especially important if the attic space is converted into an attic and is used as a living space.
Exiting vapor and waterproofing on the roof, screwing in metal tiles
Advice! When choosing a material for waterproofing, it is important to pay attention to its service life. It must coincide with the service life of the metal tiles, so that you do not have to dismantle the roof and lay waterproofing again if it fails, and the main roofing material will still be usable. The service life of the special film used under metal tiles is 50 years.
Table. Films recommended for use as waterproofing films when installing metal roofing.
Diffusion membranes
Among all the materials used as waterproofing, this product can be considered the most expensive.
If we do not take into account the price tag, we can highlight the great practicality due to which such membranes have become wildly popular.
A perforated membrane is able to protect the roofing system from precipitation for a long time and at the same time not prevent condensation from escaping outside. Vapor permeability is achieved through microscopic holes located throughout the canvas. This product is made from synthetic fibers that, when properly positioned, form a non-woven fabric. The diffusion membrane can be laid on the insulation, thereby eliminating the need to create a counter-lattice.
These membranes are divided into several varieties; they can be single-sided or double-sided. If you purchased the first of them, then you should be careful during installation, because if you choose the wrong side, then moisture will not be able to leave the roofing cake, but will enter it without problems. However, as already mentioned, today it is practically impossible to make a mistake in the design of waterproofing materials, but if you still doubt your abilities, you can turn to specialists for help.
Double-sided membranes are most often installed where there is a need to isolate moisture, but at the same time it is necessary to maintain the inflow and outflow of clean air. An example is the ridge knot. It always contains a large amount of moisture, but releasing humidified air is not enough, because the drying process will not proceed this way.
Breathable membranes meet every requirement imaginable today. The most important of them are waterproofing and heat conservation; here such a product has no equal. The disadvantage is the high cost.
In addition to the side, films differ in vapor permeability.
- Superdiffusive ones have the strongest steam permeability.
- Simply, diffusion materials are classified as materials with average moisture permeability.
- Pseudo-diffusion ones have a rather low transmittance, so when installing them it is necessary to create a special gap for ventilation.
Now that you know almost everything about waterproofing materials, you can begin to analyze their installation.
How to protect insulation from moisture and steam
The materials that protect the insulation are different. They can be simple and have anti-condensation properties. Coverage can be of the following types:
- Polyethylene.
- Polypropylene.
- Non-woven breathable.
As a rule, non-perforated films protect better from water, while perforated films protect from steam better.
Today there are a huge number of modern waterproofing materials on sale. These include films with various membranes, meshes with reinforcement, and special fabric coverings. The side that needs to be applied to the insulation is always marked either on the material itself or on the packaging. The sides must not be mixed up, as this will lead to damage to the insulation.
Material such as diffusion membranes is placed on the insulation itself. They are much stronger than various films. All membranes are one-sided, so it is problematic to mix up the sides when installing them. But membrane films need to be laid with cone-shaped holes on the insulation. This allows steam to escape and prevents water from entering. Insulation is always placed between the vapor and waterproofing to improve the reflective surface of the vapor barrier. Using polyethylene or polypropylene films, it is necessary to make a gap for ventilation from plasterboard.
How to install waterproofing on a roof?
Installation of waterproofing materials is not a complicated process, but some requirements must be met.
The biggest difficulty in laying a vapor barrier layer is that this work has to be carried out at height. Often, this causes many unpleasant consequences. Before taking on such work, it is best to repeat the safety precautions for working at height and acquire high-quality safety equipment and special tools.
As a rule, the waterproofing layer is located on top of the thermal insulation material, which is placed between the rafter legs. The fastening elements most often are the staples of a construction stapler or small hardware. Most developers save on waterproofing products and believe that this is profitable, but it’s not true. Condensation quickly “eats” the usefulness of the thermal insulation layer and you will need major repairs in just a couple of seasons.
To create a good gap you will need small slats. They are laid directly on top of the thermal insulation and covered with waterproofing. It is worth noting that their cross-section should be in the range from 30 to 50 millimeters. If this condition is violated, the roofing pie will not be able to perform its functions correctly.
As a rule, installation of waterproofing film is carried out in horizontal stripes, i.e. across the slope. All work should move from the bottom up, as the regulatory documents say, but here there are some nuances, namely:
- In the case where the waterproofing material is more than 1.5 meters wide, its installation begins from the eaves overhang. The film must be spread over the rafter legs. It is very important to do this so that there are no wrinkles on the resulting surface, but if there are any, it is better to eliminate them immediately.
- If you use anti-condensation film, then under no circumstances should it be stretched. As the absorbent layer becomes saturated, it will increase its own weight and may tear. To determine the optimal tension, you need to follow a simple rule: between the rafter legs it should sag by 1-2 millimeters.
It is worth noting that when installing the ridge element, one should take into account the fact that it cannot be completely covered with waterproofing material. Leave appropriate gaps for the inflow and outflow of air masses. If you still want to completely isolate this area, you can purchase a superdiffusion membrane. It is capable of passing steam in large volumes. In other cases, it is necessary to make a gap of at least 20 centimeters between the waterproofing strips.
Replacing waterproofing on a garage roof
If the soft waterproofing material on the garage roof has only partially deteriorated, then repair work is carried out as follows:
- Debris and dirt are removed from the waterproofing sheet. Leaky areas are cleaned with particular care.
Damaged areas of the roof are cleaned and cut out with a knife.
To repair a soft garage roof, use bitumen and several patches
When the garage roof needs a thorough, major overhaul, other measures are taken:
- The eaves and gable strips, as well as the gutters, are removed from the roof.
- Armed with a wall cutter, strips are cut out of the worn waterproofing layer no more than 3 cm thick, which will significantly speed up the dismantling of the old coating. Thick waterproofing is removed with a roofing ax. With this tool, the waterproofing sheet is divided into squares and torn off from the surface.
The old garage roof covering is removed with a special tool.
Defects in the base of the garage roof are eliminated with liquid concrete or sealant
Whatever the garage roof is - concrete, iron or underground, it is necessary to protect it from moisture with full knowledge of the matter. The type of waterproofing material, the degree of its compatibility with the roof base and the installation technology are subject to careful analysis.
Detailed instructions for waterproofing flat and attic roofs from A to Z
The process of insulating the roof and attic will not be successful without proper waterproofing of the roof. If you limit yourself to just installing insulation without providing it with the correct operating conditions, the result will be failure of many roof elements - the roofing material, if it is metal, the rafter system and the insulation itself.
That is, instead of creating a comfortable living space in the attic, which will not differ in quality from other rooms in the house, you can bring the condition of the roof to the point of needing a complete replacement. The main reason for incorrect actions is a lack of understanding of the physical essence of the processes occurring at the insulation-roof interface.
The way out of this problem is high-quality roof waterproofing . In this article we will take a detailed look at the roof waterproofing system, and also tell you how to properly lay waterproofing on the roof in steps from A to Z.
Waterproofing materials
Waterproofing the roof of a house is the creation of a layer that prevents the penetration of water and steam into the thickness of the insulation. The materials used for such purposes are either film-forming agents that harden upon application, or sheet membranes or films that are produced ready-made for installation in the desired location.
It should be noted that for waterproofing a pitched roof, the use of liquid binders is not always convenient, especially if strong heating is required (as, for example, when using bitumen). However, there are quite a few types of waterproofing materials (we examined them in detail in this article), let’s look at some of them.
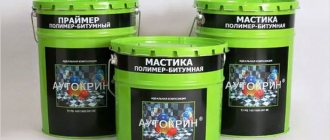
- Bitumen mastics (surfaced waterproofing). The material is convenient for old structures, as it does not require thorough cleaning of the surface. Works well on rust, damp or dusty substrates. Cleaning is only necessary if there is a thick layer of dirt, soil, ice, etc. If you carry out the coating process several times in a row, you can achieve a fairly thick layer. The disadvantages include the demanding nature of some types of application temperatures, reaching 160° ; in addition, the application of thick mastic is not always physically convenient in conditions of a pitched roof. Bituminous mastic is also well suited for waterproofing the joints of slate or
Features of installing waterproofing film
No less difficult is the installation of waterproofing film, which also has its own characteristics:
Fastening superdiffusion and diffusion membranes
These materials are most widely used for the protection of roofing elements, since their vapor-permeable characteristics are superior to all other modern materials. Installation of membranes with the best performance characteristics is carried out directly on the insulation layer
without creating a ventilated space below.
Most often, a ventilation gap is made in the upper part at a distance of about 40 mm from the sheathing and membrane. During the installation process, it is necessary to comply with the horizontal requirement
relative to the bottom of the ridge part of the roof.
For final fastening of the membrane to the rafter structure, a construction stapler is used.
, galvanized nails with a large head or special glue for vapor barriers and counter battens. If the insulation is laid directly to the ridge, then it is necessary to comply with the requirement of overlapping the membrane by 200 mm.
After preparing wooden elements for installation of waterproofing by applying antiseptics and other protective compounds, it is necessary to give them time so that they can dry thoroughly. At the end of the work, they begin to install counter-battens on the sheathing
. Failure to comply with this condition will lead to the fact that steam will accumulate inside the roof space and will not be discharged outside.
Installation of waterproofing is an important stage in laying roofing. The quality of this work determines how reliably the internal elements of the roof structure and insulation will be protected. Therefore, it is important not only to choose the right waterproofing components, but also to lay them on the correct side
in accordance with current requirements.
When laying waterproofing, you need to remember the need to bring out special elements - a chimney, antenna, etc. These places must be treated especially carefully
, since you will have to create holes and use additional fixing elements to attach the waterproofing layer to the base.
Rincer ou ne pas rincer? Bien souvent, au sein d'une même famille, on ne pense pas la même chose. Alors, voici de quoi réjouir tout ceux qui depuis des années clament que ce n'est pas par paresse qu'ils refusent de rincer assiettes et plats…
Ne pas rincer la vaisselle!!
Pour bien faire, on rince toutes les assiettes, les bols, les tasses avant de les déposer dans le lave-vaisselle. Pourtant, ce serait inutile, voire même une bien mauvaise idée!
Et ce sont des experts qui l'affirmation.
Notamment, la directrice du laboratoire au « Good Housekeeping Institute, qui nous recommande d'éviter le rinçage! Neu Sports Marccain Shirt 34 T N1
Oui, bien sûr, on doit toujours se débarrasser des restes de nos assiettes, mais on n'a pas besoin de les rincer complètement. Et pourquoi?
Parce que les détergents ne sont pas aussi efficaces sur une surface déjà rincée et lisse.Les enzymes dans les détergents s'attachent aux particules de nourriture qui restent dans nos assiettes. Mais, si les plats sont impeccables avant même d'être lavés, le savon n'y adhérera pas aussi adéquatement.
"Sans nourriture, les enzymes n'ont rien pour s'accrocher, "
a même déclaré un porte-parole du détergent Cascade dans le sérieux Wall Street Journal qui s'est également penché sur la question.
Respecter les cycles…
Aussi, si vous avez la chance d'avoir un lave-vaisselle moderne, ultra-sophistiqué, il semblerait – je n'en sais rien, notre lave-vaisselle va célébrer bientôt son 15e anniversaire…- donc, il semblerait que ces lave- vaisselle ont des senseurs ayant pour but de calculer combien de temps votre cycle de lavage doit durer. En évaluant que votre vaisselle est (presque) déjà propre, bien le cycle de lavage serait très/trop rapide. Et les senseurs en deviendraient un peu confus...
Et l'eau dans tout ça?
Enfin, il ya l'eau que l'on gaspille carrément. En rinçant abondamment nos plats avant de les mettre au lave-vaisselle, on utilise trop d'eau. On gaspille pas loin de 23,000 liters d'eau par année!
Il faut noter que les lave-vaisselles utilisent entre 11 et 19 liters d'eau par lavage. Un lavage à main? 30 liters d'eau!
Et imaginez si l'on fait pratiquement les deux…
Alors, si vous faites partie d'une grande famille qui ne s'entend pas sur le rinçage de la vaisselle, et que vous êtes plutôt du clan: "laissons le lave-vaisselle faire son oeuvre", vous avez ici de bons arguments...