The service life of the roof directly depends on a durable and high-quality fastened Mauerlat, which not only accepts the roof load, but also contributes to its redistribution to the load-bearing wall structure. For fastening to aerated concrete, it is advisable to use a traditional wooden Mauerlat. It is especially important to carefully prepare all components, including wooden beams, fasteners, reinforcement frame and high-quality waterproofing.
Functions of the armored belt
The armored belt under the Mauerlat performs the following functions:
- Provides rigidity to the entire structure;
- Evenly distributes the load created by the roof onto the surface of the load-bearing walls of the house;
- Aligns the wall structure horizontally and compensates for errors made during the construction of walls;
- The armored belt has high strength. Thanks to this, almost any vertical structure can be mounted on it. But it is usually used to secure the Mauerlat;
- Prevents the destruction of a building due to its uneven shrinkage, seasonal soil movement and earthquakes.
What is a Mauerlat?
All private houses with gable roofs have a Mauerlat. In the classical sense in construction, it represents a dried log or beam fixed to the upper belt of the external walls. It is only used in situations where the roof frame is made of wooden rafters or trusses. For metal structures, an armored belt made of concrete and channels or I-beams are used.
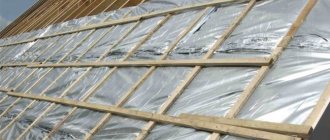
In the photo you can see the standard version of what the Mauerlat should be:
A popular bookmaker has released an application, officially you can click on the link without registration and absolutely free.
It is impossible to do without timber under the Mauerlat, as it performs a number of important functions:
- Uniform distribution of load on load-bearing walls. If timber is not used, the rafters can destroy the masonry, especially if it was made of fragile materials. We can say that the Mauerlat is the foundation for the rafter system of a gable roof.
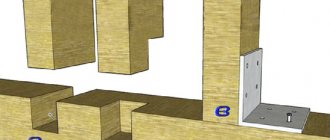
- They will allow you to firmly connect the roof to the frame of the house. This is especially true for regions where strong winds often blow. It is easier to connect a wooden roof frame with a wooden belt that spans the entire house. In order for the Mauerlat to perform this task, it is important to take care of reliable fastening to the walls.
Some builders decide not to use a Mauerlat on small buildings, for example, garages or summer kitchens. They decide that the rafters can be connected to the floor beams, thereby saving on material. However, such a decision threatens with dire consequences. The strength of the roof frame is lost and there is a risk of destruction in strong winds.
Belt sizes for Mauerlat and characteristics
When making an armored belt, it must be taken into account that it must have the same width as the load-bearing walls. But at the same time, it should not be less than 250x250 millimeters.
The manufactured structure must be continuous and, if possible, have the same strength. In this case, the concrete belt must be monolithic.
The reinforcing belt under the Mauerlat is poured with concrete at one time. Metal fittings must have a diameter of 12 millimeters. It needs to be securely and firmly fastened, and also tied together.
If the walls of the building are built of expanded clay concrete blocks, then the size of the reinforced belt under the Mauerlat depends on the thickness of the blocks.
If it is necessary to attach the Mauerlat to a wall made of aerated concrete, then its last row must be laid out from special blocks shaped like the letter “U”. This row will act as formwork when pouring concrete. For brick walls, the internal formwork is made of boards, and the external formwork is made of half a brick.
Production of formwork and laying of metal frame
You need to start making the armored belt after finishing the construction of the walls of the house. To fill the reinforcing belt, it is necessary to make formwork.
When constructing the formwork, it is important to ensure that its top side is positioned strictly horizontally. You can check this using a spirit level or a building level. Next, a reinforcement cage is placed inside the manufactured formwork. In its longitudinal part there should be at least 4 reinforcement rods with a diameter of twelve millimeters.
Longitudinal reinforcement is connected every 25 centimeters using intersecting parts made of reinforcement rods or wire with a diameter of eight millimeters.
It is also possible to manufacture the frame by resistance spot welding. When laying reinforcement, it should be taken into account that the thickness of the concrete from the reinforcement cage must be at least five centimeters.
To do this, you need to place broken bricks or boards under the reinforcement. However, it is better to use plastic supports of the required height. They are sold in almost any hardware store.
To prevent the formwork from bursting from the concrete, it must be secured as follows:
- Secure the top and bottom of the formwork using wooden blocks. When the concrete hardens, the top boards need to be dismantled and the bottom ones left.
- The formwork can also be secured using special diagonal stops. One end of them rests on a horizontal surface, and the other on the formwork.
- Reusable OSB formwork is fastened with threaded rods.
Next, you should install the fasteners that will secure the Mauerlat. For these purposes, it is best to use hairpins. They are fixed to a metal frame.
The diameter of the studs must be at least 12 millimeters. When fastening the studs, it should be taken into account that they should rise above the installed Mauerlat by several centimeters.
The interval between fastenings should be less than one meter. In this case, there must be at least one pin between the rafter legs. By means of a knitting wire, the pins under the Mauerlat are fixed in a strictly vertical position to the reinforcement frame.
Arrangement of a reinforcing belt
To construct an armored belt, you will need the following materials:
- Sand, crushed stone and cement grade M-400 for the production of concrete.
- Reinforcement with a diameter of 6 to 12 mm for the construction of an armored belt frame.
- U shaped blocks or boards for making formwork.
- Hammer and nails (for wooden formwork).
- A concrete mixer, since it is impossible to mix the concrete solution properly by hand.
The arrangement of the armored belt consists of the following stages:
- Construction of formwork. As has already been said many times, the formwork for the armored belt can be made using U-shaped blocks or wooden boards. If U-shaped foam concrete blocks are used, they are laid as the last row of the wall along the entire perimeter of the building. If the boards are wooden, then they are fastened at the top and bottom with wooden blocks using nails. Wooden formwork is installed in the same way as U-shaped blocks along the entire perimeter of the load-bearing walls of the building.
- Construction of a frame for an armored belt. To manufacture the frame, it is necessary to lay reinforcement in the corners of the formwork at a distance of at least 3 cm from its walls at the top and bottom, connecting them with metal bridges. Upon completion of laying the reinforcement, a rectangular structure should be obtained. The frame jumpers can be attached using binding wire or welded with a welding machine. It is also necessary to install jumpers in increments of no more than 1 meter. Thus, it is necessary to make a frame around the entire perimeter of the load-bearing walls of the building without breaks.
- Pouring the frame with concrete. After the frame of the armored belt is ready, it can be filled with concrete. Concrete for the reinforced belt is made at a ratio of one to four: 1 unit of cement, 2 sand and 2 crushed stone. Pouring concrete should be done at a time, that is, without temporary interruptions for more than 5 hours. After the concrete has hardened, you can remove the formwork (if it is wooden) and install the mauerlat.
If wooden formwork is used to make an armored belt, then the lower beams with which it is held together, its walls remain in concrete. This fact does not affect the quality of the belt in any way, so you don’t have to worry about it. You can make concrete for the armored belt yourself or purchase ready-made ones - this will make its arrangement easier.
Preparing a wooden structure
To make wooden formwork for an armored belt, you will need the following materials:
- A board with a thickness of at least 30 mm and a height of at least 20 centimeters.
- Hammer and nails.
- Wooden blocks.
- Hacksaw.
- Roulette.
Also, for convenience, instead of a hammer and nails, you can use a screwdriver with wood screws.
The construction of wooden formwork for the armored belt is carried out as follows:
- are laid across the width of the wall at a distance of 1 meter from each other.
- After laying the bars, boards are attached to them on both sides of the wall.
- The upper part of the boards is fastened together with wooden blocks, also at a distance of 1 meter from each other.
- The installed boards at the joints must be securely tied together using wooden blocks or a small piece of board.
It is recommended to fasten the top beams crosswise for reliable fixation of the formwork boards. It is important to securely fasten the formwork walls together so that when pouring concrete it does not push them apart.
How to attach the Mauerlat to aerated concrete?
Although most developers recommend using an armored belt when installing a Mauerlat on buildings made of aerated concrete blocks, you can fasten it without it.
In cases where the construction of an armored belt is impossible, the Mauerlat is fastened in the following ways:
- Fastening with mechanical anchors. In order to secure the Mauerlat with mechanical anchors, it is necessary to use wedge anchors. The principle of operation of such anchors is that its lower part has teeth, which, when the bolt is tightened, cut into the structure of the foam block, providing reliable fixation.
Also, the bottom of the anchor expands when tightened, forming a triangle at the end, which prevents unwanted protrusion from the wall.
To fasten the Mauerlat with mechanical anchors, you will need the following tools:
- Hammer drill.
- Wedge anchors.
- Special pump for removing chips from the hole.
Fastening the Mauerlat with mechanical anchors consists of the following steps:
- Holes are drilled in pre-marked locations on the wall.
- The finished holes are cleaned of concrete chips with a special pump.
- Wedge anchors are inserted into the holes and tightened.
- After installing the anchors on the walls, it is necessary to lay the waterproofing material and the Mauerlat can be installed.
Using wedge anchors, you can reliably and quickly install the Mauerlat. The only disadvantage of this method of fastening the Mauerlat is the price of the anchors, starting from approximately 2,500 rubles apiece.
- Chemical method of fastening the Mauerlat. To attach the Mauerlat chemically, liquid anchors (chemical anchor) are used.
Chemical anchor is a liquid mixture of polymer synthetic resin supplied in bottles for a gun as a sealant. The adhesive mass of the anchor penetrates deeply into the structure of the material and reliably fastens the metal element to the wall. The advantage of chemical anchors is that they do not create a bursting effect like mechanical ones; this feature allows them to be used in fragile materials such as aerated concrete, shell rock, etc.
To install the Mauerlat using chemical anchors, the following tools are required:
- Hammer drill.
- Drills for concrete.
- Gun for capsule of liquid anchors.
- Liquid anchor capsule.
- Metal anchor bolts.
- Compressor for supplying compressed air.
- Nuts with washers.
- Thick gloves to protect your hands from getting the adhesive mixture.
Instead of a compressor, you can use a special pump to clean the hole from debris.
The method of attaching the Mauerlat chemically consists of the following steps:
- On the last row of the wall , where the Mauerlat will be installed, you need to drill a hole with a diameter slightly larger than the anchor bolt using an impact drill.
- from the finished hole in the wall . This can be done using a compressor, blowing out all the dust and dirt with compressed air.
- Using a gun, pour the adhesive mixture of the anchor into the cleaned hole, and then insert its metal part. It is necessary to fill the hole 60% with the adhesive mixture to avoid leakage when inserting the anchor bolt.
- 45 minutes after installing the chemical anchors, the Mauerlat can be installed.
The number of chemical anchors must at least correspond to the number of rafters. Holes for the Mauerlat must be drilled in the middle of the block with a depth of 70% of its height.
It is also not recommended to carry out welding work with the metal part of the chemical anchor, since high temperature destroys the composition of the polymer resin. The chemical anchor has a long service life of more than fifty years and high resistance to atmospheric influences.
Pouring concrete
In order for the armored belt to be as strong as possible, concrete pouring must be done at one time. It is advisable to use concrete of a grade not lower than M200.
It is best to use ready-mixed concrete, since the amount of work is quite large. It should be fed using a concrete pump directly into the formwork. You can, of course, make concrete yourself, if possible. However, in this case you will need a concrete mixer and assistants.
To make concrete you will need:
- crushed stone - 4.8 parts;
- cement – 1 part;
- washed sand - 3 parts.
Air cavities (bubbles) may be present in poured concrete. To remove them, you need to take a regular piece of reinforcement and poke the concrete with it throughout the entire volume.
Plasticizers are also used to increase efficiency. They increase the mobility of the sweep and also reduce the water component. As a result, the armored belt hardens faster and becomes more durable.
Fastening the Mauerlat
The formwork is dismantled when the concrete becomes strong. You can attach the Mauerlat to the armored belt in 7-10 days. The timber must be pre-treated with special additives.
This measure will eliminate the possibility of rotting and damage to the timber by insects. The bars are connected to each other with an oblique cut or a straight lock. Due to this, the structure becomes monolithic.
Next, you need to mark the attachment points on the mauerlat beam, and then drill holes in it for the studs. The Mauerlat is secured with large washers and nuts.
All connections are secured using locknuts. The remaining protruding pins are cut off using a grinder. There should be a layer of roofing material between the Mauerlat and the armored belt.
Attaching the Mauerlat to aerated concrete
Mauerlat is a wooden beam that transfers the load from the roof to the walls. The section of the beam is selected according to the project, as a rule, from timber 100 by 100 or 150 by 150. The Mauerlat must be secured in such a way that the roof is not torn off. The roof must be securely fastened and withstand wind, snow and other loads. Previously, rafters were fastened with rods and inserted into the masonry seam. This is the so-called old-fashioned method.
There is a more modern and reliable way - to secure the Mauerlat with studs.
We drill a hole through the Mauerlat with a meter-long drill with a diameter of 14-16 mm, go through a couple of rows of blocks and drill a hole on the inside of the wall so that it is possible to fasten the stud. Pin diameter -12.
We insert the pin and tighten it with a nut and a reinforced washer on both sides.
Next, we can fill this hole that we drilled with polyurethane foam and plaster it on the inside.
We get a beautiful and reliable unit. Then it will definitely not blow the roof off anywhere. The pitch of the studs practically coincides with the pitch of the rafters (0.8 -1.0 m).
