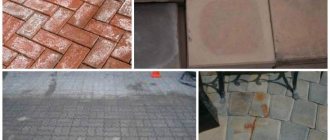
Arranging neat paths or platforms in a suburban home area can be done using any suitable stone, but according to expert practitioners, laying paving slabs is the most economical and rational option.
This method is especially useful for those who are short on funds. After all, tiles are distinguished from other materials by their low cost and ease of installation, even in the absence of practical paving skills. In addition, it is durable and wear-resistant.
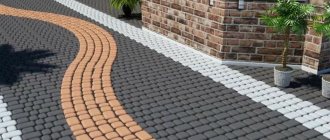
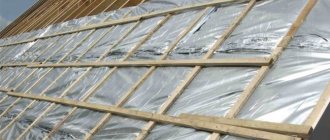
Laying paving slabs in a summer cottage
It is no secret that very often ordering a third-party service for laying paving slabs for any area on a summer cottage results in much greater financial costs than purchasing the building material itself. Self-installation allows you to significantly reduce this cost item and equip your dacha with durable, strong and very aesthetic paths, barbecue areas, a recreation area or a place to park a car no worse than with a professional approach. Especially if you follow simple and completely free advice from experts when working.
Parking at the dacha made of paving slabs
Tiled country paths
The recommendations of professionals concern the size of paving slabs, and the calculation of the required quantity for paving, and related building materials, and tools that significantly facilitate and speed up the process of laying them yourself. For those who decide to lay paving slabs in their yard, experts recommend using square elements 50 * 50 cm with a thickness of at least 5 - 6 cm. These sizes are the most optimal for people who have no previous experience in laying paving slabs, since this type of material very easy to paving. It also has many other advantages:
- With the indicated dimensions, it is very easy to calculate the required number of tiles based on a very simple mathematical formula: to decorate 1 sq. I will only need 4 pieces. And then you need to measure the area of the territory that is planned to be developed and calculate the number of tiles needed for this;
- laying material of such thickness can withstand significant loads (therefore, a car area is often paved with tiles of similar sizes);
- any structure - a path, a platform for a recreation area, a barbecue, a parking lot, lined with paving slabs, can be very easily repaired if damaged;
- Such dimensions and features of the paving allow you not to be afraid of possible voids and destruction of individual elements during operation.
When laying paving slabs with your own hands using related materials and tools, experts recommend preparing:
- pegs and cord or twine to mark the boundaries of the site or path;
- clean sand;
- a massive rubber mallet for pressing tiles;
- building level;
- a device for leveling a sand cushion (you can use a flat, wide board or use a garden rake for this);
- nail puller (suitable for lifting or moving tiles when you need to level a seam or add sand);
- tamper for compacting the sand cushion;
- a stiff brush or mop for grouting the space between the tiles.
Before we properly lay paving slabs with our own hands, we need to prepare the surface well. The service life of the coating depends on the correct shrinkage, compaction and backfilling. A poorly prepared surface will lead to surface deformation.
Paving stones
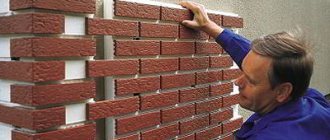
Unlike paving slabs, paving stones are made from natural stone and are more durable and last longer. Paving stones can be large or small in size and have a variety of shapes. Its advantages include:
- possibility of reuse of material;
- easy DIY installation;
- beautiful appearance;
- resistance to low temperatures;
- high load-bearing capacity;
- environmental friendliness;
- long service life;
- high strength of products.
Disadvantages of the material:
- quite high cost;
- the possibility of washing out the base, as a result of which individual modules fall out;
- processing complexity;
- It’s uncomfortable to walk on the cobblestones in heels.
Just like paving slabs, paving stones can be laid on sand, gritsovka (cement-sand mixture) and concrete.
Laying a paving stone path
Laying technology:
- The territory is being marked. It is necessary to make the path or platform so wide that the product does not have to be cut.
- For the base, 50 cm of soil is removed from above. The bottom of the recess is leveled using a manual tamper or vibrating plate.
- Hydrotextiles are laid at the bottom of the trench, which will ensure the integrity and strength of the structure. This will greatly improve the quality of the sidewalk.
- Crushed stone is poured onto the hydrotextile in a layer 10 cm thick. For entrances, the thickness of the crushed stone layer increases to 15 cm. Its fraction should be 20x40 mm.
- At the next stage, curbs are installed according to the markings. To do this, a cement-sand mortar is prepared in a ratio of 1:3. So that it gains strength and the curbs are well secured, further work is postponed for a day.
- The compacted crushed stone is covered with sand in a layer of 5–7 cm. The sand should not contain clay impurities, so it is recommended to use river sand. Otherwise, water will be retained in the bedding.
- A layer of sand is watered and compacted.
- Before laying the paving stones, the sand is covered with a dry cement-sand (1:8) mixture. Using a rake, it is distributed over the trench so that a flat surface is obtained. When water gets on this mixture, the cement will harden, which will ensure a strong fixation of the elements in place.
- Paving the paving stones starts from the corner and works towards itself. If necessary, the modules are cut with a grinder.
- The paving stones are compacted with a rubber mallet and checked with a level. It should be designed in such a way that water drains from it after rains and does not stagnate on the site or paths.
- The masonry joints are filled with a dry mixture of cement and sand. Its excess is removed with a broom or broom.
After all work is completed, the masonry is well watered . Once wet, the hook will subsequently harden and firmly fix the modules.
If the paving stones will be laid on a road that is used by cars, then it will need a reinforced concrete base . Products in this case should be six centimeters thick.
Having learned how to properly lay paving slabs and paving stones, you can begin to work with your own hands. At the same time, it is imperative to perform each installation stage correctly, efficiently and in compliance with technology . Only in this case will you get a durable and beautiful sidewalk that will last for many years.
0
( 20 ratings, average: 4.55 out of 5)
Back
How to properly cover roses for the winter
MORE
Preparing the paving area with paving slabs
Even if the dacha plot is already several years old and its entire territory is zoned, this is not a problem. Most owners of country estates determine the location for future paths or a recreation area in advance (usually at the initial stage of planning). Most often, when paving for some reason cannot be done right away, these places are sown with a regular lawn mixture.
Therefore, before studying the instructions for laying paving slabs with your own hands, you need to remove the resulting turf. The grown grass is removed along with the fertile layer, which is penetrated by roots, by at least 15 cm. The resulting recess will be intended for filling a sand cushion with a thickness of at least 10 cm.
sand cushion
All experts talk about the need for its arrangement, since in winter the soil freezes up to 60 cm even in the most average regions. The lack of a sufficient sand layer will allow winter to turn a brand new path into a pile of swollen and warped tiles.
Choosing paving slabs - what to look for
The popularity of this facing material is explained by the following factors:
- The strength and durability of such paths or porch cladding. If installed correctly, the paving path will last for over 15 years.
- Resistant to temperature changes and other weather conditions, that is, suitable for outdoor use.
- Easy to use and maintain. There will be no puddles left on the paths; dirt can be easily washed off with a stream of water that will go through the seams or drain.
- A large assortment. Road and paving slabs for dachas offer a wide choice of formats, sizes and textures, which allows everyone to make an informed decision and create their own architectural style.
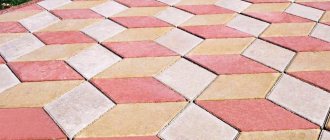
Paving slabs in the courtyard of a private house - beautiful photo
It is important that the tiled paths or porch fit into the overall interior of the yard and match the architectural style of the building.
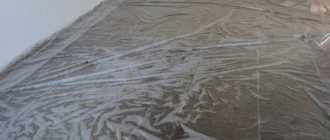
The durability of the coating or cladding depends on the quality of the preparatory work. You should not neglect surface preparation, otherwise you will end up with a result like in this photo.
Laying paving slabs with your own hands at the dacha: progress of work
After removing the layer of turf in the resulting recess, it is necessary to install guides with the help of which it will be easy to level the surface of the sand “cushion”. Before use, sand must be cleared of large and medium-sized stones and clay inclusions, which significantly complicate leveling. After filling the sand, it must be spilled, compacted and leveled using a board or any improvised material adapted for laying equipment.
It is not recommended to compact the sand too tightly. If you overdo it, it will make it difficult to adjust the level of each tile during installation, which will complicate the job and may negatively affect the result. After the sand has been compacted, it is very important to spill it thoroughly with water. This is best done using a hose with a watering can nozzle of the smallest caliber.
Compacting and moistening the sand before laying
Laying on a sand bed
After the spill, you can begin laying paving slabs. Paving each tile and setting it down with the tools at hand. During the work, it is necessary to remove sand that begins to come out in the seams. You should not lay the tiles end to end; the distance between adjacent elements can be up to 3 cm.
The technology for laying paving slabs with your own hands is quite simple. When paving, you must constantly check the slope of the laying and adjust it. Often, when laying out a long path, focusing only on the joints or each individual element, you can completely forget that the result should be an even coating. You can control the slope of the installation using a building level.
There are many assumptions about how to lay paving slabs. But we still recommend paving any area of your summer cottage with paving slabs flush with the lawn. This will increase the ease of use of the lawn mower when mowing overgrown grass, and will protect against accidental damage to the blades on the protruding edges of the tiles. Good dry weather is also considered an important factor for successful installation.
Surface preparation
Also, when laying tiles outdoors, it is important to comply with the requirements regarding the surface being tiled. If we are talking about paving slabs, you need to provide a depression in the soil with a slight drainage slope, and also fill in a compensatory cushion of sand and crushed stone.
When it comes to porcelain stoneware and similar materials that are mounted on mortar, it is best to prepare a perfectly flat surface by pouring a concrete screed.
It is important to remember that you can lay the tiles only after the base has completely dried, this can take from 7 to 28 days. If you are building a horizontal platform from scratch, you must use reinforcing mesh and rods to strengthen it. For surface screed, it is enough to use a liquid mixture.
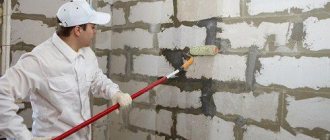
As for vertical surfaces, in order for the tile to be firmly fixed to it, in addition to removing serious flaws, a metal mesh should be fixed over the plaster. With its help, it is possible to improve the adhesion of the cladding to the base.
The reinforcing mesh will give you an additional guarantee of reliable fastening of the tiles
For street work, it is important to provide waterproofing. This is especially true for the porch floor and areas adjacent to the foundation of the house. To do this, you can use sheet roll materials or bitumen mastics.
The final stage of laying paving slabs
After laying paving slabs, it becomes necessary to seal the joints between the tiles. For these purposes, dry sifted sand or a ready-made sand-cement mixture is used. Dryness of the building material is the main condition for successful sealing of joints. In this form it will fill all the voids.
After backfilling, the sand is rubbed with a brush or mop with stiff bristles and spilled with water. Moisturizing will provide the necessary strength to the seams and the static stability to the tiles. You can begin to actively use the laid coating already on the second day after paving.
Filling tile joints with sand
Of course, the arrangement of paths, any functional or simply aesthetic areas using paving slabs immediately improves the area, making it neater and more convenient for living. If you don’t know how to lay paving slabs in your dacha, no problem. This can be learned in literally 1 hour or in a couple of square meters made. And you can save a lot, since the work costs the price of paving slabs or even more.
Now we have looked at how to properly lay paving slabs. All of the above recommendations confirm that independent paving does not present any difficulties. The main thing is to find some time and arm yourself with enthusiasm.
Preparing tools and materials
Before you seriously think about how to beautifully lay paving slabs, you need to stock up on tools and materials. So that nothing distracts you from doing your work later.
First of all, you will need a trowel, a building level, wooden or metal pegs, a long strong thread or twine, a rubber hammer, as well as a wooden hammer, a hand rammer, a channel or a long pipe, a shovel, a rake, a hose with a diffuser for watering, buckets and a broom .
The necessary materials are crushed stone or gravel, sand, dry plaster mixture or cement, curb stone and, finally, paving slabs. The latter comes in various thicknesses. If the tiles will be used for paths, their thickness can be no more than 30–40 mm. For vehicle parking, paving slabs with a thickness of 50–60 mm are used.
How to lay rubber paving slabs?
Probably not even everyone knows that such tiles exist. It turns out that it is made from old tires, or rather from the material that is obtained after recycling these tires. Its main advantage is that it is absolutely non-slippery, and, of course, it does not break. Abroad, it is often used for sports fields. However, it is also suitable for garden paths near country houses.
Such tiles are laid both on the ground and on a solid base. For summer cottages, the first method is preferable.
So, first the top layer of soil with turf is removed. After compacting the soil, a layer of crushed stone is poured onto it, which is evenly leveled (80–100 mm thick) over the entire surface of the area intended for laying tiles. Then follows a layer of cement-sand mixture, on which the rubber tiles are laid.
By the way, when laying it there is no need to provide for a slope, because such tiles absorb and evaporate moisture well.