Very often, when planning renovation work, property owners (whether it is an apartment or an office) have a desire to partially highlight or completely decorate the walls with marble, aged stone, metal, or achieve a glossy shine effect. But opportunities do not always allow us to achieve what we planned. In such cases, decorative plaster comes to the rescue, with which you can create various textures or patterns on surfaces. In the process of working with plaster, you need to have patience, accuracy and skill. But even a beginner who does not know how to make decorative plaster will be able to do this process; for this it is necessary to master some techniques.
Decorative plaster is unpretentious, it is easy to clean with any detergent.
This is a “breathable” finish, it does not emit any odors, it is fireproof, and over time it will not wear out, but only becomes stronger. Before applying decorative plaster with your own hands, the surface must be prepared:
- First of all, the walls are cleaned of the old coating, no matter what it was.
- Next, it is necessary to restore the integrity of the walls - all cracks and tangible irregularities are removed using putty.
Due to its thickness and texture, plaster does not require a perfectly prepared surface; it visually smoothes out defects. There are many types of decorative plaster, each of them is used to create a separate visual effect.
Types of decorative plaster
Structural plaster
When applied to the wall it acquires a grainy effect. It is considered one of the simplest types of DIY decorative plaster. The basis of the plaster, depending on its composition, may include lime or latex or potassium silicate. To obtain a grainy effect, granule-like additives are included in the plaster; these can be pieces of quartz or mica, crushed wood or small pebbles. The depth of the pattern depends on the diameter of the plaster additives.
Textured plaster
With this type of decorative plaster on the walls you can achieve the effect of aged stone, silk, leather, woven fabric or a cracked surface. A variety of reliefs is achieved using special tools and methods of applying material. The composition of textured plaster includes wax and resin additives, their presence ensures the fixation of reliefs.
Venetian plaster
Helps transform walls with marble tints. This type of plaster has been used since the times of Ancient Rome. In order to obtain a marble effect, the plaster included marble flour, slaked lime and an emulsifier, which, when water is added, turns everything into a thick mass.
Covering with flocks
This type of decorative plaster contains so-called flocks - colored pieces of acrylic, which help achieve the effect of a metallic, velor or suede coating. Before applying F11, the wall must be opened with a special acrylic base.
Structural paint
Allows you to achieve a similar effect as when applying decorative plaster with your own hands, only the reliefs are more refined. To create a plaster pattern, even finer fillers are added to the paint composition than in the plaster itself. For each type of decorative plaster there is an individual method of applying it. As already mentioned, structural plaster is the easiest coating to apply.
How to apply texture
Original, varied patterns on the walls can be made using a special technique for applying textured plaster.
The most commonly used application methods are:
- To work, you need special rollers with textured attachments (you can use regular rollers with long pile). The design is applied with a roller along the entire length of the surface, or with movements in opposite directions. To obtain a complex relief, the finished pattern is carefully smoothed with a construction spatula;
- The texture can be created using ready-made stamps with designs or fancy ornaments. Stamps, pre-moistened in water, are applied to the wall surface, pressed tightly, and the desired imprint is obtained on the wet plaster. The stamp set includes hard stamps, as well as soft rubber molds used on hard-to-reach surface areas;
- To imitate natural stone on walls, use a trowel, spatula, or brush. The spatula is used to make chaotic movements, creating random grooves on the wall. When moving along the wall with a brush or trowel, you can make wavy patterns;
- Rotational movements of the sponge are the easiest option for applying a pattern to the plaster.
Decoration option
To give the textured finish a finished look, you can use paints. The surface is covered with a dark base tone, the wall is dried. Next, light paint is applied to the wall with a rubber roller. When choosing colored plaster that contains pigments for decoration, you need to cover the wall with a colorless protective varnish.
How to apply decorative bark beetle plaster
Before applying the bark beetle, the walls must be treated with putty, not forgetting to sand it. Two layers of primer are applied to the putty and only after they have completely dried can you begin to apply decorative bark beetle plaster. It takes an hour for the surface to dry completely.
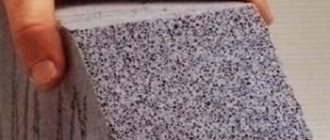
Decorative bark beetle plaster is commercially available in two forms - powder and ready-made mass. The powder, when adding water, is also brought to a paste-like consistency. The relief of the pattern depends on the size of the granular filler. Plaster with granules with a diameter of 1 mm is used for decorating small-sized rooms, and with a larger diameter - for public organizations or facades.
Apply the bark beetle plaster with a steel spatula, spreading it evenly over the entire wall. It is important to equalize the thickness of the layer with the grain size in the plaster, that is, a coating with 1 mm granules is applied with a millimeter ball. To properly apply the plaster with your own hands, slowly move the spatula with the applied mass along the surface until the granules begin to leave marks. The still damp decorative plaster is lightly sanded with a plastic float. If in some places the plaster sticks to the trowel, you need to remove the excess with a spatula. In places where the drawing is already beginning to be drawn, it is necessary to add it on the contrary.
Technique for applying bark beetle plaster
After 10-15 minutes, the wall is sanded again, but with a little effort, the pattern begins to emerge. Depending on the direction in which you work with the spatula, the furrows will appear in that direction. You need to sand carefully, the pattern should be evenly spread over the entire surface, but do not overdo it - it may wear off.
You can color decorative plaster yourself; this is permitted both before and after it is applied to the wall. Structural plaster is painted with silicate paint, acrylic or translucent varnish using the glazing technique; the dye is added before application. Decorated walls can be painted with acrylic paint after two weeks, and with silicate paint on the third day. The next day, only glazing is allowed, but before applying varnish, the wall must be treated with an acrylic primer.
The “bark beetle” effect can also be achieved using a fine-grained composition. It is applied in one layer, after waiting for it to dry slightly, the surface is treated with a damp sponge. The effect will be the following - spaces similar to pores open, they give the surface an aging effect. For beginners, it is best to use textured plaster; it does not require special skill in drawing.
Special formulations
There are many types of ready-made textures, so in some cases it is worth using special mixtures. Let’s say that to imitate a wooden surface that has been treated by a bark beetle, there is a mixture of the same name. This will reduce the time and effort spent on creating the texture. The bark beetle mixture may contain soft granules that will burst during application. Due to this, areas of the surface will have slightly different shades. The grooves can be made in different directions to add originality.
Decorating a room using textured plaster does not require any specific skills. It is important to choose the right material, tools and correctly distribute the order of work. Then the end result will be pleasing to the eye and give the interior originality.
Source: planken.guru
Recommendations for wall decoration
Before you start applying plaster to the wall, experiment with the technique on a sheet of fiberboard. Immediately before plastering, the walls must be treated with a primer; preference should be given to the manufacturer indicated as recommended on the container with a decorative coating.
The primer is applied in an even layer using a short-haired roller. You can start applying decorative plaster only after a day. But not all types of plaster require additional processing. The coating is applied with a sponge, a special roller or spatula. Each instrument creates its own decoration effect.
To create a texture, you need to use a trowel, a special mitten or a brush, and also study the recommendations on the plaster container. Make cross-shaped strokes evenly over the entire surface. After 10-15 minutes, we give the surface a textured effect using various tools.
To fix decorative plaster, wax is often applied; it protects the surface from damage and provides shine. It is applied a day after plastering.
Using textured finishes when decorating a kitchen
Two types of textures are suitable for the kitchen: mineral and synthetic. The difference lies in the substance used as a binding component.
Synthetic mixtures contain acrylic, styrene, mineral ones - gypsum, cement, lime. Decorative plaster contains various fillers: quartz, marble, granite chips. Before applying the mixture, perform preliminary surface preparation:
- alignment;
- cleansing;
- drying.
Do-it-yourself textured plaster
Decorative “veins” are obtained by using a plastic spatula. Apply a decorative coating to the dried two layers of primer with a brush, and after 10-15 minutes, use the end of the spatula to move it along the wall, pressing lightly.
It is possible to achieve an aged effect with the help of plaster, which can be diluted with water from seventy percent or more. It is applied using a sponge in a circular motion onto the primer. After the first layer, the second one is immediately applied, with a different color.
Smooth grooves are obtained by brushing the plaster with a special brush with hard fibers. For textile textures, walls are processed several times, first in one direction, for example horizontally, and then vertically. Manufacturers of decorative plaster offer a large selection of tools for creating relief on the coating, these include special brushes, rollers with textured patterns and applicators. Each of the tools transforms the decorated surface with a unique pattern.
The iridescence of colors can be achieved by treating the surface with a special sponge using circular movements. The plaster should also be applied using the same method. A very beautiful result can be achieved using this method on a metallized coating.
Applying a pattern through a stencil
Special stencils will help you decorate walls with textured designs. To do this, you need to wait until the main layer of plaster has completely dried (this is about twelve hours), then stick the selected stencil on it and apply the next layer on top of it, a different color from the main one. You can also polish the design a little when the plaster is completely dry.
An interesting, discreet effect of shimmering gloss and matte can be achieved using a steel trowel. To do this, after 10-15 minutes from applying the main layer of decorative plaster, rub it with a trowel. With the help of such decor, colors are muted, become softer and more restrained, this method is relevant for all types of rooms. And vice versa, in order to make the color of the walls sparkle, the following technique is used: the walls are first covered with one layer of plaster, after twelve hours we apply a second layer. Using a steel trowel, as soon as the surface begins to harden, polish it.
Method of obtaining relief with a trowel
After completing the covering layer, a small amount of plaster solution is applied to the trowel, and with careful movements the solution is transferred to the base, obtaining an interesting pattern:
- the textured option allows you to decorate the walls in the room in an antique style. Several layers of solution are applied to the surface and painted;
- bouffant - shading. With this option, you can create a decorative coating on fresh plaster. Treat the wall with a metal brush, dry it for 24 hours, then use a rag or spatula to remove grains of plaster that do not adhere firmly to the wall;
- stamping with a construction roller. You can apply a relief image with a roller having a pattern. If it is not available, a rope is wound around a simple roller, the roller is passed over the damp surface, leaving traces resembling grass.
In the video you can see the technology of applying textured plaster:
In addition to the above methods of applying decorative finishes to the surface, there are many other methods. In addition, construction stores offer ready-made mixtures that create a relief effect on the wall. As a result, decorative finishing should become a decoration of your room, a source of pride for the owner of the room.
Source: obrawa.ru
Details about Venetian plaster
In order to achieve the desired result in Venetian plaster, you need to fully master multi-layer wall coverings and conventional textured plaster. The main requirement of Venetian plaster is a perfectly leveled wall surface for its application. To eliminate uneven walls, putty is used, which is applied in layers to the walls until completely leveled. Each layer must be placed on a dry base. The evenness of the walls can be checked either with a special building level, or if one is not available, with the help of a lamp. Its light must be directed along the wall and where there are irregularities, a shadow will fall. With this method, you can detect various errors in the walls. Before applying marble plaster, the wall must be treated with a primer twice. Venetian plaster is applied with a steel trowel or spatula. To achieve the required marble effect, all layers of decorative plaster must differ from each other in color.
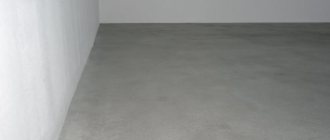
Wall covered with Venetian plaster
The first main layer is done in small, neat strokes until the surface is completely covered. All protruding moments of this layer will be clearly visible in the final result. In order to proceed to the next step, you need to let the plaster dry completely, the minimum limit is twelve hours. After drying, the surface is leveled using a so-called trowel and polished with hard sandpaper. Afterwards, the first layer of finishing is applied to the wall; it should not cover the entire wall, but in parts. After twelve hours, the surface is again leveled and polished, etc. On average, three layers of finishing plaster are enough for a marble effect. Twelve minutes after finishing work with applying the last layer, the wall is polished again. For a glossy shimmer, the surface is treated with beeswax. For matte finish, apply synthetic wax. Twelve hours after applying the previous layer, the finishing layer is applied to the wall. It will take about two days for Venetian plaster to dry completely.
Decorating walls with your own hands allows you to achieve a unique result, because everyone’s style of work is individual, and there are no identical surfaces.
Tools for forming textures
It is important to understand that no composition, no matter how expensive, will give the wall the desired look without the use of a specific tool. The more intricate the pattern is planned to be applied, the higher the labor costs of the finisher and the more serious the requirements for the tool used. Below we have provided a list of what you can buy in a full-fledged hardware store if you wish.
List of tools that can be used for textured plastering of walls
| Tool name | Required Note | approximate cost |
| Plaster trowel | Allows you to create both the simplest textures and highly artistic bas-reliefs | Priced from 100-400 rubles. |
| Brush | Using such an affordable tool allows you to achieve simple but stylish textures | From 100 rub. depending on size and purpose |
| Spanish brush | To achieve the effect of crumpled material. Convenient tool for artificial aging of surfaces | From 350-500 rub. depending on width |
| Curly spatula | As a rule, they are made of polymer materials, rubber or plastic. Allows you to imitate wood texture and create other textures | From 350 rub. depending on the manufacturer and the complexity of the design |
| Textured roller. Can be called structural, patterned, decorative, etc. | Easy to use, but allows you to achieve excellent results in the shortest possible time. Special attention should be paid to the biaxial roller, which allows you to form the texture and color it at the same time | From 300 rub. There are rollers at a price of 500-600 rubles. You can separately order an interesting tool on eBay at a price of 1000 rubles. Or professional kits, the cost of which reaches 10,000 rubles. and more |
| Flat iron | With its help, it is possible to smooth out the excess relief of the coating, remove sharp corners, and also decorate the wall surface with a “bark beetle” effect. | From 200-600 rub. depending on quality and brand |
| Natural or synthetic sea sponge | Using the tamponing method, it is possible to give the wall a spotted texture. If an artificial sponge is used, the relief will be correct. The use of natural materials is more creative | From 100 rub. Price is determined by size and quality |
Finally
Be sure to practice on a small surface area. This will allow you to evaluate the decorative effect and the complexity of its creation. In this case, you can always take a step back and choose a different direction.
Textured plaster of walls is often used in the implementation of various design solutions, since it is capable of creating a different relief. It is formed due to the presence of special additives in its composition. You can read more about the types of such coatings and methods of applying them below.
Required tools and materials
In order to apply textured wall plasters, you will need a grater or trowel. This is the name of a special plastering tool with a handle in the shape of the letter “G”. To set the mixture you will need.
If you want the resulting surface to be a different color rather than white, then you will need a color scheme. It can be selected according to the color card provided by the manufacturer.
It should be taken into account that a special dye is needed for the bathroom or kitchen. It must be resistant not only to moisture, but also to household detergents.
Color is usually added to the solution in a ratio of 1:12. To obtain a more saturated shade, this ratio should be reduced. You will be given more accurate information about this by the instructions located on the dye packaging.