About stairs
Website about stairs. We combine the experience of professionals and private craftsmen in one place
Popular
1 person discussing
Stainless steel staircase to the pool: characteristics, models, manufacturing instructions
4 people discussing
Staircases in Art Nouveau style: tips for creating a style
Wooden staircase on a slope - making your site comfortable and beautiful
How to assemble a wooden staircase - yourself and from ready-made elements
Finishing a monolithic staircase: considering possible options
Do-it-yourself staircase to the attic - installation of a stationary structure
Production of wooden stairs: ideas for small businesses and more
Iron staircase to the second floor - cold metal as an addition to home comfort
Do-it-yourself staircase in a wooden house - bringing beauty and comfort to the masses
Unusual and original stairs to a private house - choose your option
The steps must be securely held on the frame
If you don’t know how to quickly and correctly attach steps to a metal frame, then this review will tell you about two options for carrying out the work. Each of them has its own characteristics, so choose what is most convenient for you and repeat all the steps described in the corresponding section.
The installation process is not complicated, and if you wish, you can handle it without outside help.
- How to attach elements Option No. 1
- Option No. 2
Meet the Zipbolt 12.600
We present to your attention the Zipbolt 12.600 screw fastener.
Zipbolt 12.600
This tie is a kind of analogue of a conventional furniture eccentric tie and is used to connect parts of wooden furniture at the ends at right angles. However, 12.600 has a number of serious differences that allow it to be used for fastening the steps of a wooden staircase.
The operation of this screed is based on a gearbox. It consists of two spur gears located perpendicular to each other. One of these gears has an Allen hexagonal spline and is the drive, and the second, the driven, has a threaded hole for a stud. The use of a gearbox makes it possible to change the axis of rotation of the wrench by 90 degrees relative to the tightening axis, thereby eliminating the need to mill a groove for the nut, which must be turned with an open-end wrench.
Thus, unlike the eccentric one, the 12.600 tie has adjustable tightening force and allows the production of collapsible wooden structures using a threaded connection.
How to work with a screed
Mark the technological holes in accordance with the filler drawing. Drill the holes, for this you will need three drills: 5 mm, 6 or 7 mm (depending on how tightly you need to fit the pin) and a feather, or better yet a Forstner drill Ø 25 mm.
Make a hole for the countersunk screw
Make a hole for the stud and gearbox
To screw in the stud, you will need a PZ2 Phillips screwdriver, and to tighten the tie, you will need an Allen wrench or a 4 mm Allen wrench.
Screw in the stud
Align the parts and insert the gearbox according to the mark on the body
Tighten the tie
The connection is ready!
What are balusters
Without proper installation of balusters it is impossible to build a railing
Baluster is a vertical support in a fence. These are short (up to 80 cm) columns placed at some distance from each other. Without them, it is not possible to build railings of sufficient length.
It is believed that the inventors of balusters were Assyrian builders. At first, they served a decorative function: they decorated palace facades and window railings. Then the supports began to be used for fencing stairs, terraces, and balconies. At the same time, the balusters turned into a load-bearing element, but did not lose their aesthetics.
Standard template
To accurately and quickly mark holes, you can make a template. Draw it yourself, as shown in the sketch, or print it from AutoCAD at a scale of 1:1 (be sure to check the dimensions after printing, as the printer may distort the image when printing). After that, cut it out, fold it along the fold line, attach it to the part and mark the holes.
Link to download a zip archive with a template in .dwg format (23 Kb)
This tie is small in size (overall length is only 42 mm, while the length of the recessed screw part is 12 mm) and if you need a longer connector or need to secure steps made of soft wood, then see the detailed description of the hinged screw tie with Zipbolt 11.720 foot.
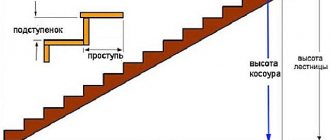
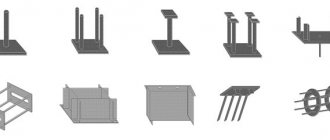
Calculation of parameters of stairs on stringers
In order for the staircase to be of good quality, aesthetically pleasing and safe, you need to know certain dimensions:
- Height (H1);
- Horizontal length (L1);
- Passage height (H2);
- Depth of the horizontal stair element (tread) (l);
- Height of the vertical stair element (riser) (h);
- Number of steps (n);
- Length of the flight of stairs (L).
Let's start calculating (watch the video):
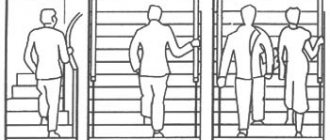
Pay special attention to whether there is enough space above the person’s head when lifting. The height between the ceiling and the stairs is at least 2 m.
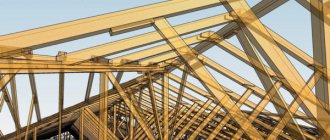
Installation of a spiral staircase
The compact design of a spiral staircase perfectly combines lightness and strength, gives the interior originality and unusualness, and also has a number of other practical advantages.
The ladder is attached in the following order:
- A support column is installed.
- Attach the elements in the required order.
- Install railings.
Having completed the installation, you can begin processing it: cover the system with paint or varnish, which will help create an original design. If there are difficulties in performing any tasks, you can entrust this process to a qualified technician.
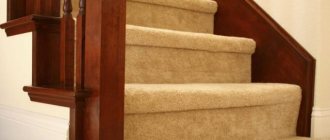
Wooden staircase repair: additional work
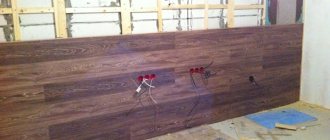
Practically yes, but there is a small nuance left. Theoretically, it is possible to select the length of the overlays exactly to the required size, but in practice this is difficult to achieve. There remains a small gap at the junction of the linings with the walls.
Seams between steps and wall
Use neutral silicone wood sealant or acrylic wood sealant to seal these seams. Select the color based on the color of the walls. Even before the installation of the stair caps began, the walls along the flight of stairs were repainted from pink to the purest white. Proper painting of the walls was done with matte latex paint. A little expensive, but reliable.
Filled joints between steps and wall
The installation process itself took about three hours. If you decide to repair a wooden staircase by installing special overlays for the first time, then do not expect an ideal result. Upon completion of the work, you may notice some minor imperfections here and there. But take a closer look at the stairs that professionals have worked on. To your surprise, a careful, meticulous, new look will also help you identify minor flaws.
General view of the staircase before and after renovation
Now take a look at your stairs and don’t specifically look for defects. Everything turned out really beautiful. Think about how much money you saved when renovating your stairs yourself. Moreover, you have acquired new practical experience and practical knowledge. And the price for work on stairs from specialized organizations is really not small at all.