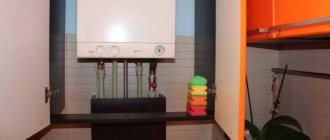
When finishing the kitchen space, we think about how best to decorate the work area on the wall - an apron. This is the area that is between the countertop and the upper wall cabinet. The peculiarity of this space is that it is susceptible to moisture and pollution.
As reviews and videos confirm, the most popular way to decorate this space in the kitchen is with tiles. However, we will consider a more modern option - installing wall panels. They, along with a glass apron, are very often used today for such DIY finishing.
Often, wall panels are MDF sheets lined with plastic. Such products are not only moisture-resistant, but also heat-resistant.
As for the glass apron, they are also called skinali. On such panels you can depict whatever you want. Therefore, the decor only benefits from such a solution. The picture is applied using special equipment on the back side of the glass. Therefore, the image will be additionally protected from environmental influences.
Advantages
If the installation of wall panels is compared with laying tiles, the following advantages can be identified:
- There are many colors and textures of such products. This allows, for example, to perfectly match the color of the wall panels with the color of the countertop. As a result, it looks harmonious.
- Installing the panels is easy, especially when compared to laying tiles. After all, installing tiles requires certain skills, experience and more time. This is especially difficult to do if the walls are uneven. But wall panels do not require all this, you only need some tools and a little time.
- It is no secret that tiles may fall off over time, especially if they were not installed professionally. There may be several reasons for this. But this will not happen with wall panels. After all, even if shrinkage occurs, it will not affect the structure in any way.
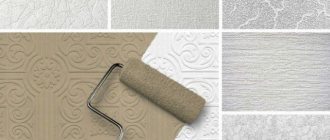
Kinds
There are several types of panels:
- Leafy. They are similar to plywood, but have an image on the surface. The joints between the products are filled with slats or sealant. The thickness of such panels ranges from 3 to 6 mm, and their size is 1.22x2.44 meters.
- Square. Sizes from 30x30 to 98x98 cm. Thanks to the use of tiles of different textures, you can combine panels to create a mosaic.
- Rack and pinion. Such products resemble the well-known lining. Such panels can be fastened in two ways: “groove-groove” or “groove-tenon”.
Often the panels are made to look like wood.
Materials
In addition to the mentioned MDF, products can be made from chipboard, PVC or specially treated wood.
As for chipboard and MDF, they are made using a hot press method, combining wood chips with synthetic additives.
The disadvantage of chipboard is its low strength and resistance to moisture, so it is not recommended for use in the kitchen.
In any case, all materials must be certified. It is advisable to have proof of fire safety. This is not a requirement, but recommended.
Installation
There are four ways to install such products in the kitchen with your own hands:
Lathing
Bars are used that are installed perpendicularly. They are secured with screws at a distance of up to 50 cm from each other.
Mounting profile
Well used if the walls are uneven. Also, the profile is not hampered by high humidity, unlike wooden sheathing, for example. First you need to install the metal slats, then the profile to which the panels are attached. The method eliminates warping.
Construction staples
Such elements can also be used as a fastening element.
Glue
Glue is a popular method of attaching wall panels in the kitchen with your own hands. If the surface is smooth and clean, nothing prevents you from fixing the panels with glue without using profiles and sheathing. It is applied with a roller or spatula.
Do not forget to use a level to ensure the quality of installation is at a high level. After completing the process, it is recommended to double-check the horizontalness of the structure, as well as the uniformity of the seams. This is especially true in corners. After completing the installation of the panels, it is recommended to wipe them with a damp sponge so that no dirt or glue residue remains on the surface (if the installation was carried out using glue).
Conclusion
Wall panels are a simple and effective way to arrange a kitchen workspace. Any housewife will appreciate the practicality of such a solution. The panels are easy to clean and do not absorb dirt and moisture. At the same time, they perfectly ennoble the space, creating comfort and coziness, which are also important in this room. And if something else is not clear, you can additionally watch the video instructions, and then the installation will be easy and quick.
Probably, you need to start with the fact that the wall panel in the kitchen can be made from different materials, each of which has its own advantages and disadvantages. And since the kitchen is the place where a lot of grease and other drops fall on the walls near the work surfaces, you need to approach the choice of material very carefully.
Let's figure out what can actually be used to install a wall panel in the kitchen, and only then consider the principles and sequence of installation.
Types of wall panels
To equip the space in the kitchen, a wide variety of materials are used. They all differ from each other in performance characteristics, sizes, and resistance to physical and chemical influences.
Among all the proposals, there are samples that are more popular and less popular. The most common types of materials include the following samples:
- MDF panels;
- PVC panels;
- plastic products;
- tile;
- mosaic;
- glass.
These materials are used more often than other varieties because they are considered reliable and proven. You can always find a suitable product at a reasonable price.
You can install wall panels of various sizes and shapes. The second criterion should also be divided into three types:
- rack and pinion;
- sheet;
- tiled.
Types of materials used
It is important to note here that the decision whether to use this or that material or not depends not only on its practical features, but also on the overall design of the kitchen. Try to choose the material so that it harmonizes as much as possible with the style of the room.
So, let's start reviewing the materials:
- Washable wallpaper or PVC film. The option is, of course, the simplest and cheapest. Because you won’t need much wallpaper, and you can paste it in a couple of hours. However, there are serious drawbacks - near the kitchen work surfaces, any wallpaper, even very good ones, will quickly become unusable, and a wallpaper apron most often does not look very chic.
- Plastic panels for the kitchen. In principle, the convenient thing here is that the material is inexpensive, you only need a little of it, and it’s easy to care for such a surface. If we talk about how to cover a kitchen with plastic panels, then there are unlikely to be any difficulties with this. Because the assembly technology is simple and fast. One of the disadvantages is that the plastic itself is not very strong. If it gets hit hard by something, a dent or crack will most likely appear on the apron. Therefore, if you are interested in how to decorate a kitchen with plastic panels and what nuances there may be, then remember that such a surface will require maximum care.
- Tile backsplash. Of course, this is a very good option, since the surface of such a wall will be both durable and beautiful, and it will be easy to clean. However, there are also some disadvantages - the total price of all the necessary materials will be an order of magnitude higher than in other cases. In addition, not everyone can do the installation themselves, since working with tiles requires at least some experience. In addition, it is unlikely that the tiles can be laid quickly, and they cannot be glued to any wall. Therefore, we will not consider the assembly of such an apron.
- MDF wall panels for the kitchen. Perhaps this is the “golden mean” between the price of the material, its quality, and ease of installation. The material is not afraid of moisture (due to the presence of varnish on the surface), quite durable, inexpensive, and you can choose almost any color and design of the panels.
It turns out that it is best to make wall panels for the kitchen yourself from plastic or MDF. The remaining options are either of poor quality or will cost more.
Let's take a step-by-step look at the instructions for assembling such panels.
Requirements for panels for finishing walls and kitchen splashbacks
The main function of an apron is protective. Many different processes are constantly taking place on the kitchen surface. Frequent use of any type of slab leads to the wall gradually beginning to collapse. Elevated temperatures have a detrimental effect on plaster.
Moisture also has a rather negative effect on the wall surface. This is, in fact, the most dangerous factor. Based on this, several basic requirements for panels should be highlighted:
- the material must not allow moisture to pass through;
- the surface of the panels must be of sufficient quality so that it can be washed using any cleaning agents;
- the material should not change its appearance and characteristics under various mechanical influences;
- panels must maintain their functionality during sudden temperature changes;
- the appearance of products made from various types of materials should match the design of the kitchen as harmoniously as possible.
Panel installation
It is worth noting that both materials are attached to the wall in approximately the same way, and there is no significant difference in technology (Find out how to attach a wall panel for the kitchen).
So, in addition to the panels themselves, we will need the following tools and consumables:
Advice: you can save money and not buy power tools. Rent it for a couple of days - it’s unlikely that installing a wall panel in the kitchen with your own hands will take more time.
- wood hacksaw;
- self-tapping screws and quick installation;
- wooden slats for the frame (usually slats 20 by 30 mm wide are sufficient);
- plinths for decorating the perimeter of the future apron.
In principle, with such a “gentleman’s set” you can begin the first stage of work.
Marking
First you need to mark where the slats will be located. These are the perimeter and vertical jumpers. In most cases, jumpers can be placed at a distance of 40-50 cm from each other - as a rule, this distance is sufficient.
But of course, if wall panels made of thin plastic are being installed in the kitchen, then this distance may need to be reduced so that the panels do not sag.
Let's start installing the slats.
Frame assembly
Advice: in order for the frame to last longer, before attaching the slats, treat them with moisture-proof and antiseptic impregnations. With this approach, high humidity in the kitchen will not damage the frame for a very long time.
In general, the frame is ready and the photo below shows what it should look like.
By the way, perhaps you are interested in how to glue a wall panel in the kitchen, rather than screw it. In this case, in fact, everything is like this - you can glue it, but it will not be so reliable, since over time, due to temperature changes in the room and high humidity, the glued panels will most likely “move away” from the rough wall.
And before gluing anything, the wall needs to be very well prepared - leveled with plaster and treated with a primer, plus be sure to wait until it all dries. It’s easier and faster to make a frame.
Sheathing
So, let's proceed to the last stage (as you already understand, as a clear example, we are considering the assembly of several horizontal panels - not a solid one). We assemble the panels from the bottom up, so that if the end panel does not fit and has to be cut lengthwise, it will be at the top of the wall - under the cabinets this point will not be so noticeable.
In principle, that's all!
Advantages of wall panels
This choice is supported by the following advantages noted by the experts:
- Light weight. The products are hollow inside and are easy to load, transport and install. The installation of wall panels in the kitchen can be done independently without much effort, without the involvement of hired help.
- Environmental Safety. The material is chemically inert, fungus and mold do not develop on it, and there are no harmful emissions, including when heated.
- Fast installation. There is no need to level the base before installing the slats. The planks can be attached over any covering without first removing it.
- Easy to install. To carry out finishing, it is enough to have a set of household tools and know how to use them.
- Presentable appearance. Panels for interior decoration fit perfectly into the interior. The room looks beautiful and well-groomed.
- Good insulating qualities. The hollow structure absorbs loud sounds, heat and cold from the external walls.
- Functionality. Electrical and communication cables can be laid under the cladding.
- Ease of maintenance. Plastic can be easily cleaned from contaminants with dishwashing detergents or wet wipes.
Another advantage of the material is its price. The cost of finishing with plastic is much less than with ceramic tiles or plaster with subsequent painting.
How to install an apron in the kitchen from MDF
There are several ways to attach an MDF kitchen apron, and each of them has its own advantages and disadvantages:
- Installing MDF panels with glue directly to the wall.
- Installing panels with glue to the timber sheathing.
- Fastening panels using self-tapping screws or dowels.
- Fastening panels using aluminum profiles.
The fastest way is to install an MDF apron in the kitchen using glue. The wall on which the panel is installed must have a flat surface.
If there are significant deviations in plane, then the wall should be leveled by any available means.
Important! If you replace a damaged panel when removing the adhesive from the wall, the plaster layer may be destroyed. In this regard, fasteners using baguettes, self-tapping screws and plastic dowels are preferable; replacement is easier and does not require additional costs. This point should be taken into account when choosing how to secure an MDF apron in the kitchen.
Fastener selection
A kitchen apron can be mounted in a variety of ways. Here are some basic fastening materials.
Glue
The first and most common type of material is special glue. It is designed to dry quickly and withstand large and heavy structures. It is not difficult to install panels on high-quality liquid nails. Proper distribution of the sheathing and accurate measurements will create a durable structure.
Self-tapping screws and nails
The second most popular fastening device is a screw. Moreover, the installation of a kitchen apron is carried out using hardware of various sizes. It all depends on the selected panel. Wood screws are often used. They are strong enough to support the weight of any kitchen backsplash.
Special profiles
When it comes to MDF panels and some plastic sheets, you can resort to another high-quality fastening - a profile. It helps level the wall, creating a little extra space behind the backsplash. Thanks to the use of a reliable aluminum profile, you can forget about kitchen renovation for a long time.
Marking and cutting MDF sheets
Often, a kitchen apron made of MDF consists of several panels, which can have different heights due to different configurations and sizes of wall cabinets.
In this case, the vertical joint between the panels should be in the same alignment as the junction of the walls of the wall cabinets. When measuring and marking, you should adhere to the golden proverb: “Measure twice, cut once.”
Important! Before marking, you should check the horizontal position of the kitchen cabinets and the plane of the countertop using a building level or a laser level. If necessary, adjust the position of the kitchen furniture.
Self-installation of a kitchen apron
To fasten products yourself, you need to acquire tools and some skills.
In fact, the installation process is simple and only requires attention. Firstly, it is the correct measurements of the wall and determination of the panel dimensions. Whether it is a solid structure or individual sheets, you can install any option yourself.
After the panel option is selected, you need to check the wall to see how smooth it is. Then follows the stage of creating the sheathing and marking the position of the sheets.
It is better to ask someone to help, because it will be very difficult to attach long sections with your own efforts.
Important! Using a building level is a critical factor.
If a profile is used, it is secured with nails. Wood screws are also used. It will be possible to mount a finished panel to it. Fastening with liquid nails is allowed.
If you have ever made a kitchen apron yourself, share your successes or tell us about your mistakes in the comments.
Did you manage to solve your problem using the recommendations from the article?
Yes!
46.2%
No. More answers required. I'll ask in the comments now.
38.03%
Partially. There are still questions. I'll write in the comments now.
15.77%
Voted: 355
Cutting MDF sheets
MDF is cut quite easily with any tool designed for cutting wood with a small and sharp tooth. The use of a large tooth leads to crumbling and delamination of the material, as well as unevenness of the cut end.
Recommended Tool:
- Hacksaw for metal.
- Hacksaw for wort.
- Electric jigsaw.
- Hand-held electric circular saw with fine pobedit teeth.
If there is an image on the panels, you should carefully adjust the details of the picture, both horizontally and vertically. The joint of a correctly fitted pattern will be less noticeable and, conversely, the displacement will introduce an imbalance in the image, which will be noticeable at first glance.
Using glue when installing MDF panels
Note. For those who do not know how to attach an MDF kitchen apron using glue: so-called liquid nails are used as the latter.
To apply the glue evenly, a special mounting gun is used. Liquid nails are applied to the back surface of the panel, sometimes additionally to the wall, after fifteen minutes the panel is pressed tightly and firmly against the wall. Thin wooden wedges inserted between the bottom of the panel and the tabletop will help prevent downward movement under the weight of the weight.
Fastening the apron with dowels and screws
Fastening an MDF apron in the kitchen with self-tapping screws or mounting dowels is done as follows.
- First, holes are marked on the panel blank and holes are drilled for the inserts of the decorative caps.
- Then, having positioned the panel at the installation site, mark the marks of the holes for the nylon dowels. This method will avoid displacement of the holes.
- Having removed the panel, drill technological holes and then install nylon dowels.
The panel is secured with self-tapping screws or screws through inserts onto which decorative chrome caps are screwed onto threads. Of course, this fastening method requires accuracy and more time, but in the future, if necessary, it allows you to quickly replace partially or completely the wall elements of the kitchen apron.
Required tool:
- Metric tape measure.
- Pencil.
- Screwdriver.
- Drill.
- Hammer.
First, a plastic dowel is installed in the technological hole flush with the wall surface, then a brass bushing with a silicone damper is put on, and secured with a self-tapping screw. The last thing to install is the chrome decorative cap.
Apron fastening with aluminum profile
Important. Using an aluminum profile as an apron fastener eliminates the process of drilling panels, which ultimately simplifies installation, but slightly increases the cost of consumables.
The profile is attached to the wall with dowels around the perimeter of the apron. Corner joints are made with an internal angle of 45 degrees. The profile has mounting grooves with a silicone seal, ensuring tight installation of the panel.
Installing a prefabricated panel splashback
Sometimes an MDF kitchen backsplash is made from prefabricated panels that can be arranged horizontally, vertically or diagonally depending on the design chosen. Metal clamps are used as fasteners (mainly when installed on a wooden sheathing).
Lathing is used when the wall has significant unevenness and deviation from the vertical. This allows you to hide wall defects much faster and cheaper. When the panels are installed vertically, the sheathing beam is positioned horizontally at a distance of 400 mm, and when installed horizontally, the beam is attached vertically.
Note. The timber must be treated with an antiseptic to prevent wood rotting, which can be caused by high room humidity and insufficient ventilation.
Prefabricated panels have grooves that provide a tight connection between the panels. The clamps are installed in the internal groove of the panel and attached to the beam with nails or screws.
This method is quite simple, which allows you to install an MDF apron in the kitchen with your own hands.
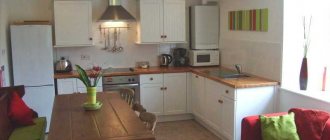
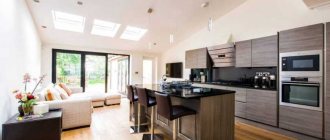
The kitchen is not just a room where food is prepared. But it is also a place where people communicate, solve everyday issues, and generally spend quite a lot of time. Naturally, everyone wants to equip it as best as possible, create comfort and ensure maximum ease of use. To do this, people usually start renovations.
Today, the construction market offers a fairly large selection of materials that can be used in kitchen decoration. One of the most acceptable materials are wall panels. With their help, your modest kitchen will take on a completely new and modern look.
This is a very good solution in choosing finishing materials. An undeniable advantage is that they are quite easy to care for, they wash well and will last for many years. Attaching wall panels is very simple and easy, but the kitchen will be transformed before your eyes. Even a non-professional can handle this. All you need is:
- hammer;
- drill;
- galvanizing sheets;
- self-tapping screws;
- dowels;
- roulette;
- level.
To mount the “apron”, a slab is used, the width of which ranges from four to ten millimeters. The film covering it must contain the same pattern and color scheme as the tabletop itself. You can see an example in the photo. To properly install wall panels you need to follow certain rules.
In order to attach wall panels to the wall, where necessary, liquid nails are used. You can also put it on dowel nails. Their dimensions are selected according to the thickness of the panel itself, and can be 6x60 or 6x40 millimeters. Then they can be disguised to match the color of the panel using caps. If dimensions allow, the upper edges can be hidden under the shelf that is located above.
Preparation for installation
First, the kitchen must be carefully measured. To correctly determine how many panels are required, you need to divide the length of the kitchen wall by their width. If there is a doorway or window, then their dimensions must be subtracted from the total length.
Before starting work, you should leave the panels in the apartment for at least 10-12 hours. After that, you need to unpack them and prepare the wooden slats. They are needed to make the frame of the sheathing. They are fastened using dowels and self-tapping screws. The width of the gap between them should be about 50-60 centimeters.
The slats should be fastened horizontally so that they are parallel to the floor. You can check this using a level. If vertical fastening of the facing panels is provided, then the sheathing slats must be installed vertically. The principle is that the sheathing should always be perpendicular to the panels, as in the photo.
To ensure that PVC panels are not exposed to the harmful effects of moisture, they should be protected using special impregnation. This must be done before you begin attaching them to the frame. Then you need to install the corner profiles.
After the preparatory work has been completed, feel free to begin installing the wall panels. This must be done from the left corner, moving towards the doorway or window.
Work algorithm
First, the edge of the panel must be inserted into the groove of the corner. Next, install the fastening edge of the panel on the slats. This can be done using staples. The next panel is attached to the groove of the first, and the edge for fastening is fixed to the sheathing. All remaining panels are attached in the same way. The final phase is the installation of skirting boards.
The free (bottom) edge of the wall panel should be secured to the baseboard using a wall bead. It needs to be attached to the tabletop with self-tapping screws. This will securely fasten and ensure good fixation of the wall panel. The color scheme here should also match the overall interior of the kitchen. The colors of the corner can be gold or silver. This is a matter of taste. It is advisable that they match the color of the roof rails or handles in the kitchen.
That's all. Your kitchen has changed. An example would be the kitchen shown in the photo. To better understand how to properly attach wall panels, you can watch the video.
As you can see, installing wall panels in the kitchen is not as difficult as it might seem at first glance. However, if you doubt your abilities, it is better to take the help of professionals.