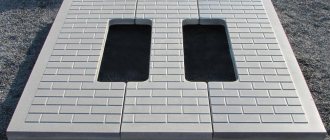
Can paving stones serve as a blind area?
To a first approximation, it may seem that there is really no difference between a concrete and paved blind area.
Well-laid paving slabs with the correct slope actually remove about 95% of precipitation over its surface, but this only applies to rainwater. The situation changes dramatically during unstable weather in winter. The fact is that the cap of snow and ice that forms in close proximity to the base tends to melt during the day. The seepage of moisture both into the soil and into the thickness of the bedding has sharply negative consequences and it does not matter at all that the volume of incoming water is simply scanty. The worst that can happen is that the soil becomes saturated with water and its heaving properties sharply increase. But even if water freezes immediately under the surface of the blind area, this will most likely lead to swelling and damage to the coating.
In order for the blind area to properly perform its function, it must work as a solid water barrier, and the upper layers of the bedding must be protected. This can be done either by ensuring their high hygroscopicity, or by organizing a water-repellent layer directly under the tiles. Both options are good in their own way and therefore will be fully discussed today.
Features of the construction of a strip foundation for a fence
The construction of a strip foundation includes the following steps: 1. Preparation of the trench. 2. Preparing formwork from boards 3. Laying reinforcement for the strength of the fence. First stage
Marking the area
At the very beginning, markings are made along the entire perimeter of the site. Pegs are driven into the ground and with the string taut, the location of their further installation is marked. The depth of the trench should be at least half a meter, and if it is planned to lay massive columns, then it can be doubled. As for the width, it should correspond to the width of the fence itself. And a little secret for uneven foundations: always start work from the lowest area. Now all that remains is to fill the bottom of the trench with sand or crushed stone and compact it. What should be the trench for the foundation? This trench can be a foundation up to 50 cm deep and up to two meters wide. And where we will install, for example, brick pillars for a fence, such a widening will be a square of 40 by 40 cm, and the depth can even reach up to 70 cm. However, all this, of course, is individual, depending on the type of fence . Second phase
Making formwork from boards
At this point in the work, it is necessary to make formwork from boards. We install it along the edges of the trench, and on loose soils you will need to also put it on the bottom. What should be the height of the formwork above the ground? In general, do not exceed more than 15 cm. The surface itself must be very smooth, so the formwork boards will need to be fastened from the inside. An important issue of waterproofing It arises already at this stage. In order to facilitate the removal of the formwork in the future, we cover the bottom and walls with polyethylene. While the concrete matures, it will be the one who will ensure that moisture is not absorbed through the soil, which means this will significantly increase the strength of the structure itself. Third stage
filling the formwork with reinforcement
Next, we will lay the reinforcement inside the formwork. Ideally, it would be a corrugated rod, but various scraps of metal, pipes and reinforcing mesh will also work. When reinforcing columns, such reinforcement lining will need to be done on all sides, that is, in fact, three-dimensional. A wire-tied axle would look good. What composition should be used to fill a linear foundation? For such purposes, it would be best to purchase M200 concrete. Or you can prepare your own mixture of sand, filler and cement (proportions 4:4:1). By the way, small pebbles or expanded clay are ideal for filler. This mixing must be carried out in a concrete mixer. The resulting composition will be poured into the formwork and leveled to remove air bubbles. How long will such a foundation take to harden? At least two weeks. During this time, this foundation will need to be protected from precipitation. It is best to use some kind of covering material. We will remove the formwork only after the concrete has hardened. However, it will gain full strength only after a month - during this time it cannot be loaded with anything.
Quality of paving slabs for blind areas
Using paving slabs for a blind area around the house has the following advantages:
- The strength of the material, its increased resistance to damage and mechanical pressure.
- An impressive service life of at least 50 years.
- No damage when exposed to low temperatures.
- Ease of use and relative ease of installation technology, allowing you to refuse the services of specialists.
- Environmental safety of the material.
- A variety of color options and shapes, which allows you to create unique and inimitable designs.
- Aesthetics that are much higher than most analogues.
No significant deficiencies were identified in the paving slabs.
Soft and hard types of blind area
A blind area made of tiles can be installed either using the usual laying method with a hydraulic barrier, or on a concrete base. These two types of device are called soft and hard, respectively.
The soft method is good because it does not require additional concrete work. However, in this case, the filling must be done strictly in layers, compacting each layer to the appropriate density. The main difficulty is to ensure the highest possible hygroscopicity of the material poured on top of the hydrobarrier. Also, the installation of a complex backfill requires the use of special means to prevent erosion and pushing of layers.
Soft blind area made of paving slabs: 1 - compacted soil; 2 - foundation of the house; 3 - gravel; 4 - sand; 5—hydraulic barrier; 6 - geomembrane; 7 - gravel; 8 — geotextile; 9 - sand; 10 — paving slabs; 11 — sand cushion; 12 - concrete base; 13 — drainage tray; 14 - border
The method of laying tiles on a concrete base is also quite viable. Typically, the installation of a rigid blind area is divided into two stages: pouring the concrete base and directly laying the tiles. The difficulty is that concrete work must be carried out along the entire perimeter of the building at one time in each of two stages. However, the preparatory layer can be poured without formwork, using the dump of soil remaining after excavation as the final layer.
Blind area made of paving slabs on a concrete base: 1 - compacted soil; 2 - foundation of the house; 3 - gravel; 4 - a mixture of gravel and sand; 5 - footing; 6 - reinforced concrete layer; 7 — corrective screed; 8 - mortar for paving slabs; 9 — paving slabs; 10 - curb; 11 - concrete base
Preparing for laying paving slabs
First, the required width is marked - at least 60 cm, and preferably 100-140 cm - this will allow the blind area to be used as a convenient path. Then the base is prepared using a shovel and leveled on a slope with a 10 cm layer of clay (if there is no clay, sand will do).
Installing waterproofing will prevent water from penetrating the foundation. Polyethylene (or roofing felt) is laid on top of the clay or sand layer. The edge adjacent to the wall should be secured with metal strips.
Selection of tiles for the blind area
When choosing tiles, it is recommended to use the following tips:
- It is best to purchase the vibration-pressed variety, as this eliminates the risk of purchasing low-quality or counterfeit material. This is due to the complexity of manufacturing, for which expensive industrial equipment is used. Its main analogue, vibro-cast tiles, is much easier to produce, which is why they are often counterfeited.
- You should first draw up a paper plan on which the location of the tiles will be displayed. This will allow you to correctly calculate the amount of material that will be needed for the blind area, as well as think through designs and possible patterns in advance in order to purchase multi-colored material.
- When calculating the amount of material, it is necessary to plan the blind area in such a way that the boundaries of the roof overhang exceed it by 15-20 cm - this option is considered the most optimal and common.
We suggest that you familiarize yourself with the thickness of the floor board and the distance between the joists.
Paving slabs are a common material, so there should be no problems purchasing them. You can buy it on the construction market or place an order through companies specializing in the sale of building materials: they usually offer home delivery services.
The cost depends on the color, shape and other parameters; on average, the price varies from 600 to 1300 rubles per square meter of tiles with a height of 60mm.
Concrete works
It is better to decide in advance at what stage of construction the blind area should be installed. The fact is that it is impossible to give an unambiguous answer to this question; it all depends on the type of substrate. As a rule, after laying the foundation, a mixture of clay soil forms around the building, which greatly complicates the movement of workers, the delivery of building materials, and the finishing of walls and bases.
On the other hand, setting up a blind area entirely and immediately is fraught with damage to the tiles, for example, from scraps of building mixtures falling from a height. If you improve the adjacent strip at least to the level of the bedding, the work can be significantly simplified. But, we repeat, you need to act depending on the type of blind area device.
If a rigid blind area is chosen as the preferred option, the only difficulty lies in correctly determining the zero mark. As a rule, they try to bring the blind area to the same level as the surface of the yard, which remains unknown until the roofing and glazing work is completed. Moreover, the sooner the foundation begins to be protected from incoming moisture, the better.
When installing a soft blind area, everything is somewhat simpler. A gravel embankment can be planned in any way at any time, without worrying in advance about the accuracy of reaching the general level. However, gravel itself will not protect against water getting into the ground, so it is necessary to install at least the simplest, but continuous waterproofing that can last until the finishing work is completed. The best option would be a regular polyethylene film laid under gravel with protection on top and bottom by thin layers of sand of 20–30 mm.
Concrete is poured along a complex profile. To ensure a smooth outer plane of the “tooth”, the trench wall should be reinforced with a board. This is why excavation is carried out over a wider strip, so that later it remains possible to easily remove the formwork. It is very important to separate the concrete preparation from the plinth with polyethylene foam tape.
Concrete work, as already mentioned, can be carried out in one or two stages. At the first stage, the footing is poured without reinforcement with a layer of at least 40 mm. Here you can use the lowest grade concrete that is available. The surface can withstand a passing load after a week of exposure, but it is better to install scaffolding on the blind area only 28 days after pouring. Please note that the formwork board is not removed until the second stage is poured, but it can be half covered with earth.
At the second stage, the filling is carried out with concrete of a class not lower than B25, optimally if anti-frost modifiers are added to the mixture. Before pouring, the surface of the concrete base must be thoroughly washed from dirt and a reinforcing mesh with a cell of about 100x100 mm and wire of 3.5 mm must be laid on top. In the second stage, it is necessary to fill to the approximate coating level minus the thickness of the tile and an additional 20–25 mm for the corrective screed device.
General information about the foundation, choosing the type for the fence
Foundations strip, columnar and tile
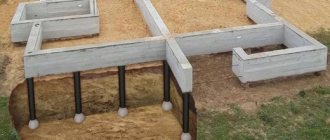
The foundation is designed to withstand loads - both of the fence itself and those that are applied to it during strong winds, problems with the soil and various mechanical influences (for example, when the gate is opened). Depending on what kind of fence design and all other supporting elements you have chosen for installation, the type of foundation itself will directly depend. Choosing the type of foundation The material from which the fence is built directly affects the work on the foundation being built. As for the types of the latter, there are two types - strip and pile. When is a strip foundation installed?
If the fence is planned to be large, block or brick, it is necessary to erect a strip foundation along the entire perimeter of the entire site.
If you chose tape
If the presence of heavy columns is expected, an expansion will need to be made in this place. The same measure will need to be taken in the place where the gate supports are located. When is a pile foundation poured?
In cases where it is intended to install a pile fence made of corrugated sheets, you can limit yourself to a pile foundation (and even then, only in the places where the supports are installed).
What should the depth of the piles be?
If you chose pile
One that could withstand the load of wind without the threat of the fence capsizing or tilting. But the actual supports of the gates and even gates must be buried at least one and a half meters.
Tile laying process
Soil preparation
All stages of laying paving slabs can be carried out independently; initially, preparatory work is carried out:
- At the very beginning, you should determine the boundaries of the blind area and drive wooden pegs into the ground along the perimeter.
- Noticeable marks are made on the pegs at a height of 5-7 cm; they are necessary for tensioning the cord.
- The construction site is cleared of stones and other debris, and the top layer of turf will also need to be removed.
- The site must be leveled; to do this, soil is removed from the elevations, which is then poured into the existing holes and depressions.
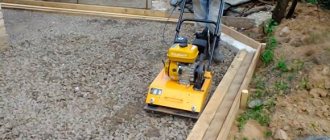
- The soil is thoroughly compacted, but it is recommended to thoroughly moisten it first.
- The depth of the prepared base depends on the thickness of the tiles, and you should always leave a few centimeters in reserve, since natural shrinkage will follow after compaction. In most cases, a depth of about 30 cm is required to create a blind area.
- A slope is provided on the working surface, which can be longitudinal, transverse or combined.
- Communications are laid if necessary.
We invite you to find out how many bricks are needed for a stove
After completing the soil preparation, you can proceed to the process of laying the selected material, instructions are given below:
- Initially, a layer of geotextile is spread on the prepared site, which will help to avoid the germination of weeds in the future.
- A layer of sand is poured on top; it will act as drainage and will have a positive effect on the stability of the tiles.
- The filled sand is leveled using a rake; during this process it must be watered abundantly. Leveling and wetting are completed only at the moment when noticeable puddles form on the surface.
- You need to wait 3-4 hours or a little more if the weather is cloudy and cool. After this, you can ensure the smoothness of the surface using a profile; for the same purpose, you can use any suitable pipe or beam.
- A distance of about 2-3 meters should be maintained between the installed pipes; the space between them is filled with sand. At this stage, it is important to ensure that the level is the same everywhere.
- Now you can proceed to preparing the mixture for laying tiles: you can get it by mixing sand and cement in a ratio of 3 to 1.
- Crushed stone is poured onto the site to give the structure strength, and the prepared mixture is poured on top. It is important to ensure that the pouring occurs in even layers throughout the entire area; You will also need to make a channel tie.
- If the blind area is being built on an area with problematic soil, then it is recommended to combine sand-cement mortar with concrete.
- The ordering cord is pulled along the chamfer, after which you can proceed directly to laying the paving slabs. Laying is carried out manually, work begins in the direction from the curb; you need to move forward “from yourself”, otherwise the risk of an undesirable increase in the width of the seams between individual elements increases. The first row of tiles is laid out strictly along a stretched cord.
- It is recommended to use crosses during the installation process; they will help ensure equal spacing between the tiles. The recommended distance between them is no more than 1-2mm.
- If it was noticed that the tiles in a certain area were crooked, then using a trowel you can remove some of the sand or, conversely, add it. After this, you need to remember to compact it.
- Alignment of already laid tiles is carried out using a building level and a mallet.
- After laying out all the rows and completing the main work, all the resulting seams should be tightly covered with sand-cement mortar and then filled with water.
- If the connection between the blind area and the house turns out to be of poor quality, then its edges can be trimmed using a grinder.
- At the final stage, you only need to clean the blind area from residual sand and other construction debris.
Laying must be carried out exactly with the described technology, otherwise the blind area will be of low quality and will have a short service life.
Violation of the basic rules can lead to subsidence, cracking, increasing the width of the seams and other negative consequences. In this case, it will no longer be able to perform the tasks of protecting the foundation of the house from moisture and freezing.
When installing a soft blind area, the tiles can be laid immediately upon completion of the top layer of the bedding; this is usually done, sequentially going around the perimeter of the foundation. But to lay tiles on a concrete base, you first need to accurately determine the level of the yard covering, or even better, lay it first, and only then proceed to complete the work with the blind area.
The technique of laying tiles on concrete is extremely simple. To do this, first a corrective screed is carried out, due to which the surface is brought below the finishing level by the thickness of the tile and an additional 5–7 mm. The material for the screed is high-quality cement with a high degree of hydrophobicity; usually for these purposes a set of chloride salts and surfactants are added to the mixture. The screed also ensures a slope of at least 20:1, so the solution must be thick.
We suggest you familiarize yourself with How to properly make a roof around a pipe
After the screed has dried, you can lay the tiles. Using a comb, a 10–12 mm layer of hydrophobic solution is applied to the screed, then the stones are loosely laid and recessed using the rule. To facilitate leveling, it is recommended to first lay the starting row, which is leveled along the longitudinal mooring and pressed down no more than half the height of the comb, and then pave the remaining plane.
rmnt.ru
13.09.17
Removing the soil
In the perimeter marked for the blind area, we remove a layer of soil to a depth of 25-30 cm. We act very carefully, achieving uniform depth along the entire perimeter. After this, carefully compact the bottom. If, after removing the layer of soil, you find large roots of various plants, it is recommended to remove them. This will reduce the harmful effect on the blind area.
If necessary, you should treat the soil with special herbicides, especially if you see fairly deep roots in the area. Plants, over time, can deform the blind area, and the reason will not be immediately clear, and repairing the structure will be quite difficult. Therefore, carefully get rid of large roots, even if you have to dig several holes.
In areas with heaving soil, even the construction of a conventional fence may require a foundation.
The peculiarity of frost heaving is that when it freezes, the moisture in the soil expands and begins to affect the supports of the fence, pushing them upward.
And in some cases, even a crushed stone cushion, prudently placed under the support during columnar concreting or backfilling, does not help. In this case, a high-quality and reliable foundation will help solve the problem for any type of fencing.
Fence on a shallow foundation.
Types of foundations
There are several types of foundations used for various fences:
- columnar,
- tape,
- strip-and-pillar,
- stone
- on stilts.
At the very beginning of the work, markings are carried out on the ground: pegs are driven in at the turns of the fence, and a synthetic cord is stretched between them. Places for installing pillars are marked with additional pegs. At the marking stage, it is imperative to decide on the place where the wicket and gate will be located.
It is necessary to mark the outer and inner sides of the foundation.
Strip foundation
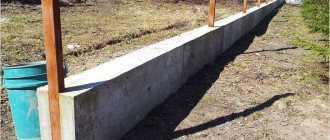
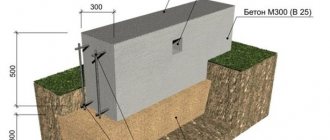
For heavy brick and stone fences, for combined fences and fences with a base, as well as for fences on heaving soils, it is necessary to make a shallow reinforced strip foundation. A strip foundation is a continuous monolithic strip along the line of the future fence. Marking for a strip foundation provides for the creation of an external and internal boundary of the fence.
Strip foundation for a fence.
A ditch with a depth of 60-80 cm and a width depending on the width of the fence is dug at the marked location. The bottom of the trench must be filled with 5-10 cm of sand or gravel, and the gravel bed must be compacted.
Digging a ditch for the foundation.
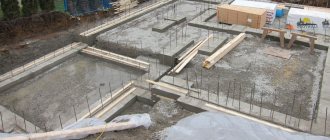
The foundation is reinforced: for this, a brick is placed at the bottom of the trench, on which 2 reinforcement rods rest. A frame is welded from reinforcing bars, which should not touch the ground. To form the above-ground plinth, formwork is installed.
The future foundation is reinforced and formwork is installed.
After completing this work, you can begin preparing the solution yourself. It is made from cement grade 300 (1 part is taken), sand (2 parts are needed) and crushed stone (1 part is taken). You can use a concrete mixer for mixing. The required amount of water is added to these components. It is necessary to achieve a thick and at the same time viscous consistency.
Preparation of mortar for the foundation.
Lastly, the concrete is poured. To prevent moisture from the solution from escaping excessively into the ground, the bottom of the trench must be moistened before pouring. The poured concrete is vibrated to release all air bubbles. 3 days after concreting is completed, you can begin building the fence.
Pouring the foundation.
Pillar foundation
For the construction of light wooden fences, fences made of corrugated sheets or chain-link mesh, and the construction of a fence on light, non-heaving soils, you can install supports on a pillar foundation.
Types of pillar foundation.
- For this type of foundation, holes up to 1 meter deep with a diameter of 20 cm are drilled in the places where the pillars are installed. The distance between the pillars usually corresponds to 2-3 meters.
- The bottom of the hole is filled with 10 cm of crushed stone to create a drainage cushion.
- Pillars are installed in them using spacers.
- The bottom of pillars made of any materials is treated with anti-corrosion materials. Primers are used for metal and impregnation for wood. Both can be treated with bitumen mastic.
- The verticality of the installed pillars is checked with a plumb line.
- The pillars are being filled with concrete.
Installed concrete pillars.
This is the most economical type of foundation.
A strip-and-pillar foundation is installed similarly to a pillar foundation. Additionally, the installation locations of the pillars are marked and wooden or metal supports are installed there on spacers.
Even if the fence design provides for brick pillars, a metal pillar core is mounted inside them, in any case, for rigidity.
We invite you to familiarize yourself with the Foundation for a polycarbonate greenhouse on stilts
This is the strongest type of foundation, which combines all the advantages of strip and pillar foundations.
Strip and pillar foundation.
A foundation made of stones looks aesthetically pleasing and attractive.
Rubble fence.
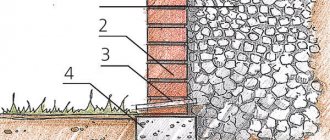
It looks especially beautiful with forged metal fences. The masonry is done using mortar, and the stones are adjusted so that the wall is level. The base of the stones should rise above the ground no lower than half a meter. This foundation is also quite economical, because all the materials for its construction can be collected in the fields.
Foundation made of stones.
Foundation on stilts
In order to use such a foundation as a support, you will need special screw posts with a blade or extension at the end, which will hold the support in the ground.
The pillars can be drilled to a depth of up to one and a half meters manually at any time of the year. The pile foundation will hold the fence well in wet, loose and peaty soils.
You can also use special tips for it, which are put on the poles and then screwed into the ground.
Incorrectly calculated fencing design.
Excavation
When all the work on constructing the blind area is well planned, you can proceed to implementation. The first stage is removing the top layer of soil around the foundation to a sufficient depth. It is determined by the desired final level of coverage and can vary between 150–200 mm.
The first step is to determine the width of the strip on which the soil will be removed. It should be 15–20 cm larger than the width of the blind area, which, in turn, is determined based on the depth of the foundation support. It is believed that the minimum width of the blind area is 80 cm, otherwise it will be extremely inconvenient to walk on it.
This width corresponds to a foundation depth of about 100 cm. For every 20 cm increase in foundation depth, the blind area must be expanded by at least 5 cm, that is, roughly 1:4. Of course, everything here depends on the so-called soil wettability cone. A comprehensive answer to this question will be provided by compiling a hydrogeological profile.
Excavation must be carried out to a variable depth, bringing out a common plane of support (bottom). Thus, it is better to start work from the lowest point of the plan, despite the fact that the width of the blind area is calculated based on the depth of the foundation at the highest point. The soil must be removed in such a way that the bottom of the pit is on average 20–25 cm below the desired coating level when installing a soft blind area and 15–20 cm lower when installing a hard one.
If the blind area is planned to be insulated, an additional 50–70 mm should be removed. It is better to dump the soil into the adjacent territory; in the future, part of it will be used for backfilling. When installing a soft blind area along the outer boundary of the pit, you need to dig a drainage trench about 15 cm deep.
How to properly make a blind area around the house and why it is needed
After the foundation has been erected and the main construction has been completed, an important stage remains in finishing the base of the house - installation of the blind area.
As a rule, this stage is not delayed for months or years, since the absence of such an important element can lead to the gradual destruction of the foundation.
In this article we will figure out how to properly make a blind area around a house to protect its foundation from destruction.
What is a blind area
The foundation blind area is a strip of concrete or other material located around the perimeter of the house with a slight slope from the base.
The main purpose of this structure is to drain rain and melt water from the foundation, insulate and strengthen it, as well as partially compensate for ground movements.
The structure of the blind area also includes drainage.
As a rule, ordinary concrete is used for its construction, but a blind area lined with paving slabs or porcelain tiles will give the area around the house an aesthetically complete look.
Most often, a strip foundation is poured under country houses - a reinforced strip of concrete on which load-bearing and internal walls rest.
Since concrete is a porous material, it actively absorbs water.
This is fraught with unpleasant consequences - the appearance of fungus on the base and loss of frost resistance of the foundation due to constant cycles of freezing and defrosting.
If no waterproofing work was carried out during the construction of the foundation or the materials have worn out over time, the base is waterproofed before installing the blind area.
Sometimes this requires digging out its entire height: a shallow foundation - within half a meter, a buried foundation - below the soil freezing line (in the middle zone more than one and a half meters).
If the basement of the building is in use, in addition to waterproofing, it is desirable to insulate the basement. If the groundwater level is high, foundation drainage is necessary.
To do this, perforated pipes are laid in a ditch prepared for waterproofing the base and making a blind area with a slope towards the sewer collector.
Before moving on to considering the types of blind areas, let's talk about the basic rules for installing such structures.
The width of the blind area recommended by building regulations is at least 20 centimeters from the projection of the eaves overhang to the ground. On average, the width is selected within 1 meter.
