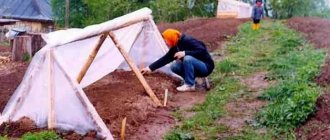
To get a larger harvest, it is not necessary to install a greenhouse; it is enough to build a small greenhouse. It won't take up much space and will be much cheaper.
An excellent solution in this situation would be to build a greenhouse from a profile pipe with your own hands, and you will find the dimensions and drawings in this article. This reliable and durable design will allow you to obtain harvests earlier.
We also suggest that you read the step-by-step instructions on how to make a greenhouse from polypropylene pipes with your own hands.
Advantages of a greenhouse made of profile pipes
In a greenhouse, the main role is played by the frame, so it must be durable and have stiffening ribs that will hold its shape and withstand various loads. The ideal material for making the frame would be profiled metal pipes.
They have a number of advantages:
- ease of processing;
- the ability to create structures of different shapes;
- long service life - metal profile buildings last up to 15 years, and as practice shows, much longer;
- do not require care or protection from pests;
- affordable;
- compatible with any material.
In addition, compared to a wooden structure, construction made from profile pipe-rolling materials is more compact, so placing it on the site will not be difficult.
The only drawback of this structure is the longer construction time.
Butterfly pipe greenhouse: how to make it yourself
The so-called “butterfly” greenhouse has a special design. It got its name due to its similarity with the insect of the same name. When the greenhouse is open, it looks like a huge butterfly that has spread its wings.
This form of greenhouse has the following advantages:
- free access to plants from almost all sides;
- increased structural strength, its ability to withstand strong winds;
- better ventilation;
- Quite easy to assemble and operate.
A “butterfly” greenhouse with flaps that open upward.
Making a butterfly greenhouse design has its own difficulties, and in this case, a drawing is a prerequisite for work. It would also be useful to watch a video on how to build a greenhouse with your own hands.
Selection of design type
Before you start making a greenhouse from profile pipes with your own hands, you need to decide on a design model and sketch out a drawing. After all, the angle of refraction of sunlight depends on the shape of the structure.
The main types of greenhouses made of this material:
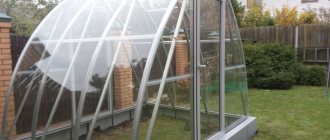
- Arched - construction requires special equipment to give the shape. Otherwise, having curved parts of the required size and a drawing, assembling such a greenhouse with your own hands will not be difficult. The arched design creates uniform lighting, regardless of the location of the sun.
The disadvantage of the model is limited functionality, since tall crops along the walls will not be able to grow.
- Single-pitch is a simple option, mounted to the walls of residential or outbuildings. Using this compact model allows you to save not only space, but also building materials.
- A gable or hipped roof is a separate building. In such a structure, better illumination is created for crops, in contrast to a lean-to structure.
Tent - simple design, no curved elements. Therefore, gardeners often install it themselves. In addition, the advantage of a greenhouse with a gable roof is the ability to plant crops of different heights.
It is worth noting that the hipped version of the roof will cost more than the arched one, since installation of the frame requires more material, both main and covering.
- Fedorov’s greenhouse is popularly called “breadbox”; it is easy to make it yourself based on the developed drawing. Suitable for growing seedlings, flowers and vegetables, the only drawback is that it is not intended for tall crops. The design is simple, equipped with a lid that provides access for caring for plants.
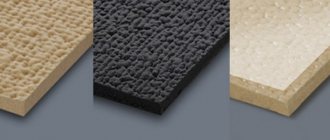
Types of profiles for a do-it-yourself greenhouse made of polycarbonate. Photo examples of frames
The frames for them are made from completely different materials, of which there are quite a large number. Often they make wooden frames, plastic, or metal, aluminum. Each profile material has its own unique characteristics, and the further functioning of your greenhouse will depend on which one you choose. If you are making a seasonal structure, then you can use a plastic or galvanized profile for its construction.
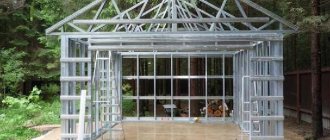
Greenhouse frame made of galvanized profile
If you plan to use it all year round, then, of course, it is necessary to use more reliable materials, because the galvanized profile is unlikely to withstand the pressure of snow in a snowy winter. Why is the profile pipe so popular:
- Lightness of the material.
- Stiffening ribs help this design carry heavy loads.
- Relative cheapness of the material.
- Versatility.
- It is enough to simply build any structure using a profile pipe.
Greenhouse frame made of metal profile pipe
To determine what cross-sectional size a profile pipe should have, it is necessary to clarify the purpose of the structure. Everything is very simple here, if you want good stability of the frame, choose a pipe with a large cross-section. Do-it-yourself drawings of a polycarbonate greenhouse made from a profile pipe, with dimensions of 2 by 6, you need to take into account the cross-section and for a lathing frame of 20 by 40 millimeters, use 20 by 20 to connect the structural elements.
If you choose the right profile pipe, you can build a greenhouse of any design
When choosing a pipe, you need to take into account the fact that if the pipe is bent, with different semicircle shapes, the weight of the weight will fall directly on the edges of the pipe, and in the middle, it will not bend. Thus, it can be stated that this is an ideal material for arched structures. The main thing is to have available the means with which you will bend the pipes. Manual work is fraught with negative consequences.
Therefore, in the absence of special means, it is best to take a rectangular frame and make a gable or lean-to greenhouse. To make such a frame, take a 20 by 20 profile pipe.
If you develop drawings of a polycarbonate greenhouse with your own hands, using a profile pipe, take the length of the profiles according to GOST as a basis. The main thing to remember is that when working with material, it is better to choose the dimensions so that as little as possible of unused material remains.
How to design polycarbonate greenhouses: calculate dimensions, price, and amount of material.
Due to the fact that polycarbonate sheets are quite easy to cut, they have become such a popular material for making greenhouses; they also bend well and get the shape that you need. In addition, this material conducts sunlight well and does not transmit harmful ultraviolet radiation, thus creating excellent conditions for the development of plants.
Next, you should choose a sheet of suitable thickness, this choice is made taking into account the weather conditions under which the greenhouse will operate, if you are interested exclusively in the warm season, then the sheet thickness can be no more than 10 millimeters, otherwise, the thickness should be taken no less 15 millimeters.
When developing drawings of a polycarbonate greenhouse with your own hands, from a profile pipe, you need to take into account the following:
- What are the standard sizes of slabs, and how should they be cut.
- How much the slab structure expands when exposed to cold or heat.
- What radius does the pipe have when bending?
- The ability to withstand certain extreme climatic factors.
- What components are included in the kit, and what components are suitable in combination with this material.
The standard polycarbonate sheet is 2.1 meters. Stiffening ribs are located along it. When you create drawings of a polycarbonate greenhouse with your own hands, from a profile pipe, take into account the fact that the edge of the sheet must be placed on profile supports. The space between the racks is also standard, either 1.05 or 0.7 meters. Then the slabs are joined using special strips.
The gaps between the joining points of the plate must also be taken into account. Make holes for self-tapping screws of sufficiently large diameter, since the material can expand and contract under the influence of the external environment and different temperature conditions.
If you have a polycarbonate greenhouse made in the form of a honeycomb, keep in mind that those same honeycombs must be vertically located, this will ensure that condensation, if formed, will flow out through the channels.
How to build a foundation for a greenhouse from polycarbonate and a profile pipe with your own hands.
The first thing when drawing up drawings, you need to understand whether a foundation under the building is necessary, or whether it will be a waste of time and money. If a foundation is necessary, then work on its construction must begin. But even if you don’t need a foundation, it is necessary to outline the scope of future work and take measurements. First of all, choose a suitable location. The main criterion should be distance from the garden or other trees that may shade and not provide enough light for the development of young shoots.
Approximate drawing of the foundation for a greenhouse
Most often, wooden blocks, wooden boxes, or strip foundations are used for the foundation. It all depends on the weight of the future structure.
If this is a seasonal greenhouse, and assembled from plastic film, then, of course, there is no need to build a permanent foundation for such a structure. But of course, in this case, you will not achieve sufficient protection from the cold wind.
If you choose wooden beams for the base, then treat them with special products for waterproofing and insect prevention. This way you will extend the period of operation of this greenhouse to 5 years. Metal structures must be treated with an anti-corrosion mixture.
Foundation for a greenhouse manufacturing example
When drawing up drawings of a polycarbonate greenhouse with your own hands, from a profile pipe, you should reflect the size, perimeter of the trench that you dug for the construction of the strip foundation, depth and width. Most often, the recess will be about 35 centimeters, the base height is slightly more than 22 centimeters. Calculate the amount of solution that will need to be poured. If the base is brick, then it is necessary to calculate the number of bricks. In addition, count the consumables.
Also read: Construction of a permanent greenhouse
If the greenhouse is assembled from lightweight material, then a foundation is not built under it, but the frame base is simply expanded, making the profile 75-85 centimeters longer, on both sides, these supports must be driven into the ground, thus ensuring the stability of the structure as a whole.
How to make a drawing yourself
To make a greenhouse from profile pipe-rolling material, you can use a ground-based or shallow-depth version. Ground-based is convenient because it completely eliminates darkening; it is intended for construction in middle and southern latitudes. In a shallow type of greenhouse, heat is drawn from the ground. However, dark spots form near the walls, which negatively affects plant growth.
When drawing up a drawing of a greenhouse made of profile pipes, it is worth taking into account the removable upper parts, which will provide air access inside. In addition, to make the frame more durable, it is necessary to provide special elements that are fixed along the walls.
A profile with a cross-sectional size of 40×20 mm or 40×40 mm is best suited for the frame, as it has high strength. The optimal wall thickness is 2 mm or more. To make a horizontal screed, you can take a profile with a wall thickness thinner than 1-1.5 mm.
The drawing must indicate the exact dimensions - width, length and height. In addition, the connection points of the main and guide parts should be indicated.
Below is a drawing with dimensions for various types of greenhouses.
In accordance with the greenhouse drawing, which indicates the dimensions, construction costs are calculated and a cost estimate is drawn up. During the calculation process, you should add a 10% reserve in case of damage during transportation or installation.
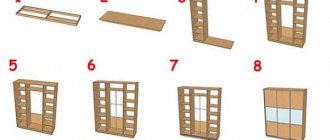
Drawing of a greenhouse similar to a breadbox
Preliminary preparation for work
Before you start making a greenhouse from a profile pipe with your own hands, you should pay attention to some additional conditions of your site. In particular, soil type may matter. It is preferable to install the greenhouse on dry soil, where excess moisture does not accumulate, which can affect the supporting structures. It is optimal to install a greenhouse on sandy soils, as opposed to clay soils that are prone to waterlogging.
The location of the greenhouse relative to the cardinal points also matters. So, it is best that the long side faces south so that as much sunlight as possible penetrates into the greenhouse, which will not be reflected from the polycarbonate sheets.
To prevent heat from leaving the greenhouse too quickly and to make it convenient to move around in it, the entrance door is usually located at the end. According to standards, the door width should be no narrower than 70-80 cm, but its height directly depends on the size of the greenhouse itself.
If you are planning to build a more or less permanent greenhouse from corrugated pipe, then you can additionally build a small corridor or vestibule in it. You can store tools and other small items in it. In addition, such a space will allow you to retain heat when opening the door to the greenhouse itself.
The frame for constructing a greenhouse from a profile pipe with your own hands must be placed on a strip or columnar foundation, the type of which will depend on the type of soil. In any case, you need to remove debris from the area under the foundation and remove the top layer of soil.
Tools and material
To make the process of installing a greenhouse easier, in addition to the drawing, you need to stock up in advance with the necessary tools that will be needed in the work:
- a shovel - it is needed to level the ground;
- auger - to mount the frame posts;
- grinder - you will need it to cut profile pipes;
- screwdriver - necessary for screwing in self-tapping screws;
- pliers and a hammer are an indispensable tool in any construction work;
- measuring accessories - corner, building level and tape measure;
- welding machine - if you are going to weld parts;
- with a hacksaw - if you plan to lay polycarbonate.
It is important to know! It is impossible to cut polycarbonate with a grinder, as it melts; a hand tool is required for cutting metal with small teeth
You will also need wooden pegs and rope.
The correct choice of material plays a big role in the construction of our structure. To calculate the required amount of profile, it is necessary to take into account that the measured length of pipe products sold in stores is 6.05 meters. Based on this value, a drawing of a greenhouse from a profile pipe of the required size is drawn up.
In order to correctly calculate the required amount of material, you need to take into account the design features and geometric parameters of the structure. The length of all frame parts is added up, then the resulting number is divided by the standard length of the profile pipe. This value will determine the meter quantity of the profile.
Foundation
In order for the greenhouse to stand firmly and not sag under the weight of the metal, it is necessary to create a reliable foundation. This can be a linear foundation with a reinforced structure inside. Even at this stage, you need to decide on the size of the future greenhouse. If it is made only for the needs of the family, then the “classic” option is 3 x 4 m. In the case of a large family, you can make a structure of 3 x 6 or 3 x 8 m. Since the length of the profile pipe is standard - 6 meters, the choice of size should be in favor even number to make dividing and cutting easier. Once the dimensions have been determined and your drawing has been drawn up, you can get down to business.
A trench is dug 300 mm wide and 500 - 700 mm deep. The formwork is assembled from the boards, which will hold the foundation walls. A frame of reinforcement is laid in it, which is tied with wire into a box. Crushed stone and gravel are added to the solution of cement and sand. All this is poured in and left for ten days to compact and harden.
The lower perimeter of the greenhouse is placed on the foundation, from which the entire structure will be built. The profile pipe is connected with one tack at each corner, after which the equality of the diagonals is checked. You will need a long tape measure. When the parameters are set accurately, you can put a second tack on each corner and weld these joints “cross to cross” to avoid deformation of the structure and dimensional errors.
When the lower perimeter is ready, you need to fix it on a concrete base. To do this, cut pieces of 50 mm wide from the corner, in which an 11 mm hole is drilled. The solid side of the corner is welded to the side of the metal profile so that the hole is located above the foundation. Fixation is done with an anchor bolt. The distance between fastening elements is 1300 mm.
Step-by-step instructions for building a greenhouse
Before you start building a homemade greenhouse from profile pipe products, you should decide on the site and prepare the place.
SUPER GREENHOUSE - DIY bread box. Part 2
Preparing the area
To build a greenhouse from profile pipes with your own hands, you should start by determining the location of its installation. An important role is played by the type of soil. It is better if the structure is located on sandy, dry soil, where moisture does not accumulate.
In addition, the location of the greenhouse according to the cardinal directions is of great importance in obtaining a good harvest. It is good if the long side is located to the south, so the plants can receive more light from the sun. Also, you need to take into account the design features of the greenhouse:
- single slope - slope of the slope to the south;
- gable and arched - the longitudinal axis of their structure is directed from north to south, the permissible deviation is 15 - 20 degrees.
After choosing a location, the area needs to be prepared. First of all, the perimeter of the future structure is indicated by driven wooden pegs onto which a rope is pulled. Regardless of the chosen model, you should dig a trapezoidal trench to lay biofuel; as it decomposes, it helps to warm the soil.
Foundation
A greenhouse made from profile pipes is a fairly strong structure that is not subject to deformation. To install a greenhouse, it is enough to make a type of columnar foundation from asbestos-cement pipes.
It is done as follows:
- wells are drilled in the ground at the same distance from each other, their diameter is larger than the size of the pipes themselves;
- asbestos pipes are installed in these pits;
- the gap between the pipe and the ground is filled up and compacted with a sand-crushed stone mixture;
- Cement mortar is poured inside the pipe so that there are no voids;
- A metal plate or a piece of reinforcement is immersed in the concrete composition; they will be the connecting link between the foundation and the frame.
It is possible to make a strip foundation or a light bulk foundation to protect the greenhouse from cold air entering inside.
We make arcs for a greenhouse from a profile pipe - 2 ways to bend corrugated pipes
To make your own arched greenhouse structure from a profile pipe, which is pre-cut to the required size, it needs to be shaped into a rigid arc. You can do this procedure by contacting a company that performs such work, where the profile is curved using special equipment. If you plan to do it yourself, then there are two ways you can use.
- How to bend a profile pipe in a “cold” way? There are two options for bending the profile in this way - with and without internal filling:
- If a profile pipe with a thickness of up to 10 mm is used, then the process can be carried out without filler.
- And if you take a profile that is thick, you will need a filler: sand or rosin. In winter, you can pour water inside the pipe and wait until it freezes.
A thick spring is used as a means of bending a profile in a “cold” way, but the diameter must be such that it can be inserted inside the pipe. This material has excellent spring properties, which allows you to easily bend the profile without changing the cross-section.
How to bend a profile pipe radius without a pipe bender. Bending device.
In addition, to give the workpiece an arched shape, you can use bending plates, in the holes of which rods should be placed; they will be a stop when bending. The pipe is placed between two rods, at a distance that corresponds to the level of bending. The profile is bent by moving the workpiece from the center to the edge. This method of “cold” bending is very labor-intensive.
You can use special factory-made pipe benders, manual or stationary.
- Bending technique with preheating. This bending technique is recommended if the thickness of the profile pipes is large. The method is suitable for use at any time of the year. The process looks like this:
- Two plugs are made of wood for both sides of the pipe. In length, it is made 10 times larger than the width of its base. The wide side of the plug should be 2 times larger than the hole in the pipe.
- After this, you need to make grooves in one plug to allow the accumulated gas to escape when heated.
- Now you need to heat up the processed part of the profile.
- Sift and dry the river sand. Then heat it on a metal sheet to 150 degrees until all the moisture has evaporated.
- Install a wood plug without grooves on one side of the pipe.
- Pour heated sand inside through the other end. You should constantly tap the walls of the workpiece so that the sand is compacted well.
- When the pipe is completely filled with sand, install a second plug.
- Mark the bend location on the profile with chalk.
- Firmly fix the pipe in the cleats, placing it on the template.
- Then heat the metal until its color turns red. In this state, it becomes softer and can be given the required shape. This is done with a movement that should be smooth and clear.
- After the profile has cooled, the workpiece is compared with the required template. If everything is done correctly, you can remove the plug and shake out the sand.
Important! The profile, which has welding seams, should be bent so that the connecting line is located on the side. It is not recommended to bend along the weld seam.
how to bend a pipe without a pipe bender for a canopy sugut.net
It is better if all hot bending work is done in one go. Excessive heating of the metal leads to a loss of its strength.
Installation of arches
If you plan to make a collapsible greenhouse with your own hands, then you can connect the arcs and vertical posts using bolts. Opening doors are also attached to them, for example, if the “butterfly” model is selected. For capital construction, it is better to use welding.
It is necessary to cut the posts to which the arcs will be attached. You will need longitudinal strips designed to connect the arcs inserted into the rack. The joints are also secured with crabs or welding.
Important! After welding, it is recommended to treat the seams with a primer, this will increase the reliability of the connections.
The manufactured frame is installed on the foundation and attached to the reinforcement that is fixed in it.
The easiest option is to place the arcs directly on the reinforcement sticking out from the foundation.
Stages of greenhouse construction
A drawing of a greenhouse, sketched with your own hands, should become the basis of construction. It must accurately display the dimensions of the structure and the number of elements. The construction process itself is divided into two parts: preparation and assembly.
Preparatory stage
Things to consider before starting construction work.
- Soil type. Preference should be given to dry soils mixed with sand. Clay soils are more likely to become waterlogged. They will cause increased humidity in the greenhouse, which is undesirable.
- The longitudinal side of the greenhouse should be directed to the south. In this way, the problem of increasing sunlight and, accordingly, lighting with heat is solved.
- The entrance should be located at the end of the building. The height is determined by the height of the greenhouse; the width is sufficient within the range of 70-80 cm.
Attention! If greenhouses made from profile pipes are constructed as long-term buildings, then it is recommended to make a vestibule in front of the front door. It stores gardening tools, plus the space protects the main room from cold air entering when the front door is opened.
Scheme of a greenhouse with a vestibule
Foundation construction
The preparatory stage also includes the construction of a foundation for the greenhouse frame from a profile pipe. The type of foundation can be strip or columnar, the owner decides here. More often they choose the second option based on pipes (plastic, asbestos-cement or steel).
- Using a garden drill for pipes, you make wells with your own hands strictly according to pre-applied markings. In this case, a drawing of a greenhouse will help. Well depth – 0.5 m.
- Pieces of pipes are installed in them, which are covered on the outside with soil and a tamper.
- Concrete mortar is poured inside in the proportion cement-sand-crushed stone - 1:2:3.
- An embedded part is inserted into the liquid concrete (into the foundation), usually a metal plate with reinforcement welded to it (2-3 pieces). It is to the mortgage that the greenhouse trusses from the profile pipe will subsequently be attached.
Types of embedded parts
Pipe bending
An operation included in the preparatory stage when an arched greenhouse is being constructed. There are several options for bending pipes into an arch:
- use the services of a workshop where metal structures are manufactured;
- purchase a pipe bender and bend the profiles on it;
- use other technologies: cold, hot.
A simple option is a template one. On a flat area, exactly according to the drawings of the greenhouse, or rather the arch, two rows of pins are installed, between which a profile pipe must be laid. The distance between the rows is slightly larger than the width of the profile. For example, the height of the arched structure is 1.9 m, then the first row of pins is installed along a radius of 1.85, the second at 1.9 m.
Attention! Typically, any hollow products are bent with the cavity filled (water, sand, etc.). In the case of profile pipe products with a wall thickness of up to 10 mm, there is no need to do this. This cold bending option is considered simple. There is one drawback - the quality of the final result depends on the physical effort exerted during this operation.
Bending pipes on a pipe bender
Hot bending of a rectangular pipe profile is not as simple as cold bending. Because it is carried out with filling, for which sifted sand is used. A template version is used here, only the pipe at the bends is preheated with a gas burner. The latter operation not only complicates the process, but increases the cost of construction. Not every owner of a summer house or country cottage knows how to use gas welding equipment, which is a rarity in the arsenal of home craftsmen today. Although we must pay tribute - the quality of hot bending is higher.
The first experience of bending a profile pipe usually leads to minor flaws. This mainly concerns inaccuracies between elements. If the distortions and differences are small, then there is no reason to worry. Everything will be covered with polycarbonate.
Preparing additional elements
Greenhouses made from profile pipes are not only arches. These are longitudinal profiles that fasten arched elements together. These are end walls in the form of several pipes inserted into the first and last arch so that polycarbonate sheets can be installed and secured on them.
The number of longitudinal frame elements is determined by the rounding radius of the arch. More often there are five of them: two at the lower ends of the arches, one at the very top of the greenhouse and two in between.
Five longitudinal elements of a greenhouse structure
Regarding the end walls, there is no standard number of elements. The design is based on the requirement of strength. For example, a small greenhouse, then the back wall is an arch with one vertical element in the middle. If the structure is large, then the walls will have to be reinforced with additional posts and cross members. This is clearly visible in the photo above.
There shouldn't be any problems with the front door. It must be made from a pipe profile separately from the arched structure, and after installing all the parts and assemblies, attach it to the first arch on hinges. The installation location must be taken into account. Usually this is the middle of the opening, so at the wall assembly stage it is necessary to install two vertical pipes, leaving between them a distance equal to the doorway. Afterwards, two loops are welded onto one of them.
Doorway dimensions
Frame assembly
Assembling a greenhouse from a profile steel pipe is a process that is carried out differently depending on the chosen fastening technology. Optimal and reliable – electric welding of profile pipes. There is an assembly option that is based on special connecting parts in the form of tees and angles. The pipes are inserted into them at the ends and secured with bolts. The photo below shows fasteners of this type.
Fastening profile-type pipes with special connecting elements
There are other fastening structures in which the connection is made not with bolts according to the clamping principle, but with roofing screws. A simplified version, no less reliable.
Connecting profile pipes to each other using special devices and roofing screws
Connecting profile pipes to each other using special devices and roofing screws Experts assure that electric welding is the best option in terms of the strength of the joined elements and in terms of the reliability of the greenhouse structure made from a profile pipe. But assembling a greenhouse with connecting devices makes the structure collapsible.
So, assembling the frame begins with installing the arches and attaching them to the embedded parts installed in the foundation. The arches are aligned exactly vertically using plumb lines. Their ends are welded to the mortgages. Usually two outer trusses are installed. Between them, a thread is pulled along the upper edge, leveling it horizontally. One of the trusses will have to be either raised or lowered. Therefore, it is welded to the foundation mortgages pointwise to make it easier to dismantle.
Intermediate arches are placed along the tensioned thread, after which the trusses are fastened with longitudinal elements. The latter are laid inside the space between the trusses. The connection is made along the side planes of the arches.
Longitudinal elements are connected to trusses along the lateral planes of the latter
Installation of polycarbonate
The metal base of the greenhouse made from a profile pipe is ready. It is firmly attached to the foundation. All that remains is to cover it with polycarbonate sheets. How to properly coat:
- Be sure to cover the upper surfaces of the trusses with self-adhesive sealing tape. It allows the polycarbonate to easily move along the frame during thermal expansion. Plus - the tape protects the plastic from damage to metal.
- Begin laying from any edge of the greenhouse from a profile pipe. The leaf covers three trusses. It is attached to the outermost and adjacent ones using metal screws with a press washer 19 mm long. The distance between fasteners is 40-50 cm.
- Next, lay the adjacent sheet with an overlap on the laid one. In places of overlap, self-tapping screws 25 mm long are used.
- After covering the structure, the side walls and door are closed. Why are pieces cut out of polycarbonate sheets to suit the shape and size of the sections? Self-tapping screws 19 mm long are used for fastening.
Attention! For better fastening of polycarbonate to the frame, it is recommended to use special washers with increased diameter with sealing rings with self-tapping screws.
Be sure to watch the video:
Choosing material for cladding
An important step when constructing greenhouses yourself from profile pipes is the choice of material for the coating. Not only the appearance of the greenhouse, but also the quality of the future harvest depends on it.
There are several main types of material:
- Glass - has high protective properties. A greenhouse covered with glass protects seedlings from frost, while retaining heat well and not blocking the passage of sunlight. All these qualities create excellent conditions for the growth of many crops (peppers, cucumbers, tomatoes). However, there are also disadvantages - high cost, complexity of installation and fragility. Therefore, this material is rarely used for greenhouses in garden beds.
- Polyethylene film is an inexpensive material, but it does not have high strength; in addition, it deteriorates in direct sunlight, so its service life is not long.
- Non-woven material - perfectly transmits sunlight and water, while providing plants with protection from negative atmospheric influences. It is not expensive, but such material is not durable, it will last no more than 5 years. In addition, it is not durable and can be damaged by strong gusts of wind.
- Cellular polycarbonate is a hard polymer that is light in weight and has high strength. It scatters the sun's rays well, which has a beneficial effect on the thermal insulation conditions inside the structure. Today it is often used to make a greenhouse from a profile with your own hands, since working with this material is not difficult if you correctly calculate the required size.
Preparing the greenhouse for winter
In order for the greenhouse to stand for several winter months without damaging the structure, it is necessary to take care of this in advance and carry out preliminary disinfection. This can only be done when all plants and auxiliary materials have already been removed. In this case, it is necessary to treat not only the soil, but also the frame itself in order to destroy all pathogens of mold, mildew and bacterial infections.
How to treat a greenhouse in the fall? Most often, sulfur is used to disinfect a greenhouse. Fumigation is carried out at a temperature of 10-15°C. In this case, the standard calculation is 40-50 g of sulfur per 1 m2. Small pallets with the substance are placed at some distance from each other and set on fire. Fumigation should be done by burning sulfur towards the exit to the street. When the last fire is set on fire, close the door tightly and leave the greenhouse in this state for several days. After this period has expired, open all windows and doors and allow the room to ventilate.
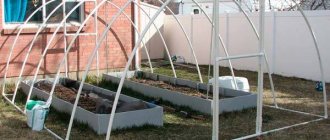
A greenhouse is an indispensable element in a summer cottage
As you can see, independent construction and maintenance of a greenhouse from a profiled pipe is a simple science. All you need is basic knowledge of tools and a little patience. However, if everything works out, you will be able to benefit greatly from the results of your work. And in order not to doubt the result, look at the photos of do-it-yourself greenhouses made from scrap materials. Some options simply amaze with their beauty and functionality.