How to properly operate an oil stove
You can buy an oil stove on the market or make it yourself. Such designs consume approximately 2 liters of waste per hour. This is quite cost-effective equipment. But for effective use, certain rules must be followed. During operation, certain difficulties may arise.
Problems when using oil stoves:
- Uneven heating of the room;
- The oil boils;
- Fuel burns too quickly.
The first problem can be solved by connecting a special labyrinth to the second compartment. A pipe with a fan at the end extends from it. This will direct the heated air in the right direction.
When manufacturing a furnace, problems with oil burnout should be taken into account. With a larger tank, fuel burns faster. To prevent boiling, oil is used that has been left for a certain time.
With proper equipment and use of the stove, the design will provide heat to the entire room. You can make a simple device yourself. And all problems associated with the boiler can be prevented at the manufacturing stage.
Waste oil furnace: types of designs
There are several types of oil furnaces that operate on waste oil. The classic model is the pyrolysis apparatus. It is made from ready-made containers in the form of barrels, pipes, cylinders or from alloy sheets. Oil is poured into the lower vessel, which splits when there is insufficient air. In the upper tank, intensive combustion of its vapor occurs, due to which a lot of heat is released.
Temperature regulation is carried out by air supply. Such a furnace requires constant cleaning of the chambers from accumulated fractions. It does not have mechanical temperature control.
Oil is poured into the lower vessel of the stove, which splits when there is insufficient air.
At the oil recovery stove, a guaranteed air supply to the second chamber is realized with the help of a fan. The combustion process is more efficient, so warm air evenly enters the room.
The operating principle of a stove with a drip supply of fuel is similar to the operating mechanism of diesel engines. It is economical. However, the independent process of manufacturing the device is very labor-intensive, so it is better to purchase a factory device of this type. In addition, it should be taken into account that homemade drip stoves are picky about the quality of the oil, which must be preheated before feeding into the stove.
The most efficient model is a supercharged waste oil furnace. It, in comparison with a potbelly stove, has a higher cost. Additional heat comes from blowing fans. Supercharging can be done using a car cooler motor, and the heater is blown by a 220 V home propeller.
Standard layout of a waste oil furnace
Under development: sketches and drawings
Exhaust stoves can be made of any shape and size. As a rule, to make them yourself, you use sheet metal, pipe scraps, or used oxygen cylinders. Several sketches with explanations are given below, and here you can learn how to make a burner from a blowtorch.
From a metal pipe with a water circuit
The design of such a stove resembles a samovar; its walls do not heat up to excessively high temperatures. Therefore, its installation is recommended for greenhouses, buildings for keeping animals and rooms with small dimensions, where accidental contact and burns from a hot stove are possible. The large dimensions of the tank allow you to create the effect of a heat accumulator.
From profiled pipe
To make a stove with your own hands, use a profiled square pipe of 180x180 mm and 100x100 mm. It is compact in size and easy to manufacture. The surface of the oven can be used as a cooking surface.
From a gas cylinder
The water circuit is made in the form of a boiler through which the chimney passes.
Another option for connecting the water circuit is a copper heat exchanger tube wrapped in several turns around the stove body. In this case, the heating will be weaker, but with this method of connecting the heat exchanger, the risk of water boiling in the system is reduced.
The dimensions of the presented ovens can be slightly changed. The main thing is to observe the location of the main elements and cameras.
Pros and cons of such ovens
The main advantage of oil furnaces is that they can use waste oil as fuel that would have been recycled. With the correct technology for making a furnace, after burning oil, virtually no harmful elements are released into the atmosphere.
Additionally, the following advantages can be noted:
- simplicity of design;
- high efficiency;
- minimal costs for equipment and fuel;
- possibility of using oils of any origin;
- oil may contain up to 10% impurities.
However, there are also significant negative qualities. Firstly, if you do not follow the technology, the fuel will ignite partially. As a result, harmful fumes can accumulate indoors, which can have dangerous consequences for humans. Therefore, it is mandatory to equip the room with an oil boiler with a ventilation system.
It is worth highlighting the following additional disadvantages:
- to obtain sufficient draft, the chimney must be at least 500 cm in height;
- the roof and chimney should be serviced every day;
- complex ignition: first you need to heat the bowl, and only then supply fuel;
- difficulty in manufacturing a boiler with the ability to heat water.
Due to the features described above, such stoves are practically not used for heating residential buildings.
Features of heating structures during testing
The devices described in this article are often referred to as miracle stoves, because they use used oils (motor, transmission), which cost very little. Thanks to this, the operation of this type of furnace is cheap. The other miracle stoves that interest us will not operate on gasoline, diesel fuel, kerosene and other highly flammable mixtures.
“Exhaust” devices heat rooms by directly heating the air in them. From a constructive point of view, such a unit consists of two combustion compartments. In compartment No1, the used oil is burned, resulting in the formation of flammable vapors. After this, the vapors are fed into compartment No. 2, where they are mixed with air and, having a sufficiently high temperature, quickly burn, which is why large volumes of thermal energy are released.
In most cases, both compartments will be connected to each other using a pipe
It is important that holes with a diameter of about 10 millimeters are drilled in the latter - through them air will flow into compartment No. 2 for mixing with flammable vapors
Below are the main advantages of “working off” units.
- They are quite safe, since in this case it is the oil vapor that burns, and not the used oil itself.
- It is quite possible to make such a stove with your own hands, using cheap and affordable materials.
- Finally, such devices are easy to install and use, which is good news.
But there are also some disadvantages that anyone who plans to make a miracle stove on their own should know about.
- Only a warm room should be used to store used oil. At sub-zero temperatures it will simply freeze and lose all its properties.
- In addition, this oil must be specially filtered. It is prohibited to use simple contaminated waste from car services. It is almost impossible to clean contaminated oil at home.
Do-it-yourself potbelly stove from a gas cylinder
Most often, oil stoves are made from an old gas or oxygen cylinder. Thanks to the optimal wall thickness, the structure is strong and durable. Moreover, such heating is quite effective, since the stove can heat a room of 90 sq. m.
For a potbelly stove during mining, there is no need to perform forced air circulation. The movement of hot vapors occurs by gravity. The work is carried out strictly according to the drawings. The materials and tools you will need are a gas cylinder for the body, a chimney pipe, a drill, a welding machine, an angle grinder, and heat-resistant paint.
The sequence of making an oil boiler from a cylinder:
- The upper part of the cylinder with the tap must be cut off with a grinder;
- Legs 20 cm long are welded to the lower part of the structure using the OLKh fastening;
- A hole is made at the top where the pipe is inserted and connected to the chimney;
- Another hole is equipped nearby into which the damper is mounted;
- A 6 cm hole is made in the cut off top for pouring oil.
When the oven is ready, all that remains is to paint it. The sequence of work is quite simple. A metal disk can be welded to the top of the structure. Its optimal shape is a circle or rectangle. This blank performs the functions of a plate.
Do-it-yourself waste oil stove from a pipe
The easiest way to make a furnace body is from a gas or oxygen cylinder, pipe or barrel with thick walls (read: “How to make an exhaust furnace from a gas cylinder - theory and practice”). Such a unit will be able to produce a maximum of 15 kW of heat. It will not be possible to exceed this threshold, since due to a violation of the thermal regime the boiler will begin to smoke, and this is quite dangerous.
First we need to create a body - this is done in the following sequence:
- We take a pipe with a cross-section of 21 cm, a wall thickness of 1 cm and a height of 78 cm.
- To make the bottom, we take sheet steel with a thickness of more than 0.5 cm. After cutting out the bottom with a diameter of 21.9 cm, we weld it on one side.
- Next, legs are welded to the bottom, which can be made from bolts.
- Now you need to make a viewing window, which is located at a distance of 8 cm from the bottom. It is necessary to monitor the combustion of the bowl at the start. The size of the window is determined based on personal preference. The door is made from a cut piece of pipe to which a thin collar is welded. To ensure that the door closes hermetically, an asbestos cord is laid around its perimeter.
- A smoke exhaust pipe with a cross-section of 10.8 cm and walls 0.4 cm thick is welded on the opposite side of the body, 7-10 cm from the top.
Making the lid:
- Take a piece of metal 0.5 cm thick and cut out a circle with a diameter of 22.8 cm from it.
- We weld a collar of 3 mm metal 4 cm high along the edge of the circle.
- In the center of the lid we make a hole with a cross-section of 8.9 cm, and on the side we cut a hole with a diameter of 1.8 cm. The second hole is necessary to obtain an additional viewing window. It requires a lid, which is also a safety valve.
Now, for a pressurized exhaust furnace, it is necessary to make a pipe for transporting air and fuel:
- You will need a pipe with a cross-section of 8.9 cm, a wall thickness of 0.3 cm and a length of 76 cm.
- We drill 9 holes around the circumference, with a distance of 5 cm from the edge, and their diameter should be 0.5 cm.
- Stepping back 5 cm, we make two more rows, 8 pieces each, of holes with a cross-section of 0.42 mm.
- After another 5 cm, 9 holes are drilled in the fourth row with a cross section of 0.3 cm.
- On the same side, 9 slits are made along the edge, 0.16 cm thick and 3 cm high. To do this, you can use a grinder.
- From the opposite end of the pipe, moving 0.5-0.7 cm from the edge, make a hole with a cross-section of 1 cm.
- We insert the fuel supply pipe into the prepared hole. The thickness of its wall should be 0.1 cm, and the cross-section should be 1 cm. It should be at the same level as the air supply pipe. Its bend and length are determined by the location of the fuel container.
- The air and fuel supply pipe is welded to the cover. It must be positioned in such a way that there is 12 cm left from it to the base of the body.
It's time for the supercharged stove to make a bowl for fuel:
- First, take a pipe with a cross-section of 13.3 cm and a wall thickness of 0.4 cm, cut a piece 3 cm long.
- Now we cut out a circle with a diameter of 21.9 cm from 2 mm sheet steel.
- By welding it to a piece of pipe, we get a bowl into which we will supply fuel.
Let's start assembling a garage stove for testing:
- We retreat 7 cm from the bottom of the body and mount the bowl inside it.
- We mount the cover together with the fuel supply device.
- We install the chimney on the smoke pipe. The chimney must be positioned strictly vertically; even slight slopes are prohibited. The part of the pipe that remains indoors does not need to be insulated, but the part that goes outside is better insulated.
After the oil nozzle for the stove and the oil block are installed, testing proceeds. First, a certain amount of paper is placed in the bowl, a flammable liquid is added and set on fire. The oil supply begins after the paper has almost burned out.
Taking into account fuel consumption of 1-1.5 liters per hour, it will be possible to heat up to 150 square meters of space.
What stoves can you build yourself using drawings?
A waste oil stove with a water circuit can have a different design:
The stove is round in shape, welded from steel sheet. The fuel tank is combined with the combustion chamber. The afterburning chamber is a perforated pipe and an upper chamber equipped with a dividing partition that cuts the flame. A hole is cut in the lid of the lower chamber into which the waste is poured, and air will also flow there. The principle is this: the wider the damper is open, the better the oil will burn. Two barrel oven. In one (bottom) there is a fuel tank, there is a hole for loading it. The upper combustion chamber consists of a pipe that passes through an upper barrel filled with water. It has fittings for supplying coolant water. Externally, the model is very similar to a samovar
Its body gets quite hot, so you need to handle the stove with care. Such a “samovar” is installed only in those rooms where accidental contact with the body of people or animals is excluded. This design has a big advantage: the large tank acts as a heat accumulator. Compact mini-oven made of square profiled pipes 18x18 cm and 10x10 cm
Simple in design, it is very easy and quick to assemble. You can cook food on it. A practical model of an exhaust boiler with a water circuit from a gas cylinder with a cut off upper part. Here you can provide an automated feed of mining. The oil line is located in the combustion chamber. The water circuit has the form of a boiler, through which a chimney channel is passed. Or it could be a copper heat exchanger coil that is used to wrap the furnace body.
This design has a big advantage: the large tank acts as a heat accumulator. Compact mini-oven made of square profiled pipes 18x18 cm and 10x10 cm. Simple in design, it is very easy and quick to assemble. You can cook food on it. A practical model of an exhaust boiler with a water circuit from a gas cylinder with a cut off upper part. Here you can provide an automated feed of mining. The oil line is located in the combustion chamber. The water circuit has the form of a boiler, through which a chimney channel is passed. Or it could be a copper heat exchanger coil that is used to wrap the furnace body.
Sizes may vary. But the location of the main nodes is unchanged.
How to make a stove for testing with your own hands: drawings, videos, photos
A heating device using secondary engine oil has the following main design elements:
- the first chamber with a hole for air and adding fuel;
- a second chamber for combustion of gases, having numerous openings for oxygen access;
- the third, upper chamber for smoke generation and afterburning of residual gases.
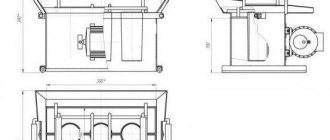
Drawing of a heating device using machine oil
Furnaces with a water circuit using waste oil
You can make an oil stove yourself. For this purpose, you will need a defective gas cylinder with a solid body.
To work you will need:
- arc welding machine;
- drill, tape measure, building level, grinder;
- pipes for the chimney and burner;
- fifty liter cylinder.
Related article:
Inverter welding machine: which one is better for home and garden? In a separate publication, we will talk about the right choice of this device for your tasks and budget.
How to make a stove for working out:
- Iron legs twenty to thirty centimeters high are welded to the cylinder.
- The body is cut in accordance with the diagram.
- The inlet for the radiator is drilled and the pipe is installed.
- A hole with a diameter of five centimeters is cut at the top of the tube for air movement.
The stove is painted with a mixture of chalk, silicate glue and aluminum powder.
Bottom of the firebox chamber and burner
Then I made the bottom for the top compartment of the stove. For this I used a sheet of steel 4 mm thick.
I cut the bottom out of steel. I’m trying on the bottom. Everything is cut out neatly and fits together with almost no gaps. The bottom is in place.
I decided to make the burner 20 cm long - that would be enough.
This will be a burner. Drill holes. Grind.
I made many holes around the circumference so that air could easily get to the fuel. Once all the holes were done, I sanded down the inside of the burner. You should definitely do this too, because... soot will begin to actively accumulate on the protrusions and other defects.
First, I welded the burner into the bottom of the upper chamber, and then installed them in their proper place. You can safely lay wood on such a stove shelf. Relevant for cases when it is not possible to replenish mining reserves.
First, I welded the burner into the bottom of the upper chamber. Installed the burner
Drip burner
A good solution would be a do-it-yourself drip burner using waste oil. The structure consists of the following elements:
- 5-10 liter containers with fuel located above the combustion site;
- a thin hose with a tap for supplying fuel to the burner;
- the burner consists of a metal pipe with a diameter of 5 mm and a length of 50 cm, a metal container with a recess for fuel combustion and a thick-walled pipe with a diameter of 10 cm with many drilled holes for air supply.
The burner design itself is located inside a potbelly stove or brick oven. The waste material flows by gravity onto a heated surface, where it ignites. It is necessary to provide a container to collect combustion residues.
Types and drawings of a furnace using waste oil with your own hands
Homemade devices for testing come in several varieties:
- structures made of a metal pipe or gas cylinder;
- devices with additional air supply;
- heating devices with oil drip.
Most often you can find heaters made from the body of a regular gas cylinder.
Drawing of a waste oil stove:
Oil furnace assembly diagram
Drip supply of oil is a rather complex process that is difficult to reproduce in artisanal conditions. Typically, such ovens are manufactured by industrial manufacturers and can be purchased. A drip-type stove is capricious in terms of fuel purity, so only purified oil is suitable for it.
Operating principle of a drip-type fuel supply furnace
In such furnaces, a special filter is installed for cleaning. Some craftsmen use automobile fuel filters for this purpose. The pump for drip feed can also be taken from the car, making a return line to eliminate excess pressure. To regulate the oil supply, a conventional medical dropper is used.
Installation of a furnace operating on waste oil
A foundation for such a stove is not required, since the structure is very light, but the surface on which the stove is installed must be strictly horizontal. Install the stove in such a way that it is convenient to fill in fuel. For ease of filling fuel, use a funnel (watering can). If the floors are wooden, then before installing the stove, a metal sheet is laid on the floor.
Among the important aspects regarding the design are the following:
- the internal diameter of the chimney must be at least 10 cm, the wall thickness must be at least 1 mm;
- steel thickness for tanks - 4 mm, for the bottom of the firebox and the lid of the upper tank - 6 mm;
- the length of the burner must be greater than its diameter;
- the optimal volume of the tank intended for fuel is from 8 to 15 liters;
- pipes are selected from materials such as: stainless steel, copper, painted tin;
- the chimney must be able to be dismantled for ease of servicing the stove;
- an inclined position of parts of the chimney located indoors is allowed (to improve heating of the room), however, outside the room the pipe must be strictly vertical (to prevent wind from blowing).
What you need for work
- drawing;
- welding machine and electrodes;
- grinder, cutting wheels for metal, file, sandpaper;
- steel corners or fittings;
- set of drills and drill;
- steel sheets 4 and 6 mm thick;
- pipes for the chimney and burner;
- hammer;
- roulette and level.
Preparing and assembling the furnace (drawing)
- We print out the drawing and begin preparing for assembly. We connect all the parts using a welding machine. An exception is tank elements marked “tight fit” on the drawing. We make them collapsible. We carefully check all welds for leaks. We clean off the scale with a grinder or file.
- We lay out the sheet steel on a flat surface, make markings and cut the parts with a grinder. We perform bending on a sheet bending machine, preparing parts - tank walls. We check the tightness of the parts.
- On the left in the photo is the finished lid of the lower tank, on the right is its lower part. We do not weld them together; the parts should remain collapsible, but fit tightly to each other. The hole for pouring fuel into the stove is about 5 cm in diameter.
- We assemble the upper tank (weld the walls to the bottom).
- We weld a baffle partition in the upper tank (closer to the burner hole). Attach the exhaust pipe. We will subsequently connect the chimney to it.
- On the pipe intended for the burner, we drill 48 holes with a diameter of 9 mm each. We connect the upper chamber and the burner by welding.
- Checking the dimensions of the parts. We install the sealing ring.
- We weld a tank designed for filling oil. We equip it with an overflow pipe.
- We cut out three legs 20 cm long from a metal corner and connect them to the bottom of the oven.
Making a waste oil furnace with your own hands - video tutorial
Some parts of this stove can be cut from a thick-walled pipe or a used gas cylinder. But if there are no cylinders, there is no possibility or desire to bend the metal into a radius, you can mount a similar oven, but with a square cross-section
. Cutting out the parts of this design is much easier. If you don’t have a grinder, we use guillotine shears for metal.
- Let's prepare the lower part of the oven. To do this, we connect together the legs, bottom and side walls of the fuel tank.
- The upper part of the firebox must fit tightly onto the lower part. We carefully check the dimensions of the walls before cutting the metal. We attach the fuel tank cap to a screw or steel rivet to make it possible to rotate the cap if necessary.
- We install a partition in the upper tank.
- We weld the pipe that will be connected to the chimney.
Since the chimney will have several sections with a slope of 45 degrees, we install special bends at the junctions of the pipes. Where the pipe passes through the ceilings, we additionally line it with non-flammable materials (mineral wool) and a layer of metal (in hardware stores, a special “roof passage” element is sold for this purpose, facilitating installation). In addition to bends, clamps and a metal mushroom are useful to prevent rain and snow from getting inside the pipe.
We finish here, we advise you to read an article about how to build a bubafon oven with your own hands, because its design resembles what we reviewed yours.
Operating principle of a waste oil furnace
The prototype for oil furnaces operating on waste oil is kerogas, which was previously used in villages and dachas. It used kerosene as fuel, the vapors of which were burned in a separate chamber. To save on fuel, a waste oil burning option was developed. It can be purchased for free or at a reasonable cost at any service station.
Components of a waste oil stove
Creating a homemade stove during mining is not a difficult process. The main task is to properly organize the system for a productive oil combustion process. To ensure complete combustion of vapors, heavy components must first be split into light ones, which is carried out as a result of pyrolysis. The oil must be properly heated for efficient evaporation.
The operating principle of an oil furnace during mining is as follows. First of all, the mining is ignited in the lower chamber of the apparatus. The combustion intensity is regulated using a throttle valve in the device body, through which air enters the chamber. Oil vapor mixed with oxygen rises upward through a vertical pipe. The pipe is connected to the upper tank, which is the afterburner chamber.
The mixture is mixed under the influence of the Coriolis force (force of inertia). The intensity of the process is achieved by choosing the correct diameter and length of the combustion chamber. To ensure complete combustion, air must flow through the damper in sufficient quantity. To do this, it is additionally sucked through holes made in a vertical perforated pipe connecting the tanks.
The combustion intensity is regulated using a throttle valve in the device body
The gas flow is directed to the final combustion chamber, in which the upper part is expanded. During its manufacture, a horizontal separation is made between the chimney inlet and the combustion chamber outlet, which is necessary to ensure a temperature jump between the nitrogen oxide and oxygen afterburning zones. At temperatures below 600 °C, nitrogen oxides are more active than oxygen. As they decompose, they oxidize fuel particles. With increasing temperature, oxygen acts as the main oxidizing agent. Harmful substances are released into the atmosphere through the chimney.
Important! To ensure efficient oil combustion, the temperature in the upper tank must be low.
Potbelly stoves - proven and simple designs
Potbelly stoves were a hit of the 20s of the last century. At that time, these stoves competed with brick stoves and were installed everywhere, even in apartments. Later, with the advent of centralized heating, they lost their relevance, but are used in garages, dachas, and for heating utility or outbuildings.
Sheet metal
Potbelly stoves from a cylinder, barrel or pipe
The most suitable material for making a potbelly stove for a garage is propane cylinders or a pipe with a thick wall. Barrels are also suitable, but you need to look for ones that are not very large in volume and have a thick wall. In any option, the minimum wall thickness is 2-3 mm, the optimal is 5 mm. Such a stove will serve for many years.
By design they are vertical and horizontal. It is more convenient to burn horizontally with firewood - longer logs will fit. It’s easier to make one extended upward, but the firebox is small in size, so you’ll have to cut the wood finely.
A potbelly stove for a garage can be made from a cylinder or pipe with a thick wall
Vertical
First, how to make a vertical stove for a garage from a cylinder or pipe. Divide the selected segment into two unequal parts. Below is a smaller one for collecting ash, above is the main one for storing firewood. The following is the order of work:
- Cut out the doors. Small at the bottom, solid at the top. We use the cut pieces as doors, so we don’t throw them away.
- We weld the grates in the chosen place. Usually this is steel reinforcement cut into pieces of the required length with a thickness of 12-16 mm. The reinforcement installation step is about 2 cm.
- Weld the bottom if there is none.
- We cut out a hole in the lid for the chimney, weld a strip of metal about 7-10 cm high. It is better to make the outer diameter of the resulting pipe fit standard chimneys. Then there will be no problems with the installation of the chimney.
- We weld the lid with the welded pipe into place.
- Using welding, we attach the locks and hinges to the cut-out door pieces and install it all in place. As a rule, potbelly stoves are not airtight, so there is no need to make seals. But if desired, you can weld a strip of metal 1.5-2 cm wide around the perimeter of the doors. Its protruding part will cover a small gap around the perimeter.
Overall, that's it. All that remains is to assemble the chimney and you can test a new stove for the garage.
Horizontal
If the housing is located horizontally, the ash box is usually welded from below. It can be welded to the required dimensions from sheet steel or a piece of channel of a suitable size can be used. Holes are made in the part of the body that will be directed downwards. It’s better to cut something like grate bars.
How to make a potbelly stove for a garage from a gas cylinder
Then in the upper part of the body we make a pipe for the chimney. To do this, you can weld a cut piece from a pipe of a suitable diameter. After the piece of pipe is installed and the seam is checked, the metal inside the ring is cut out.
Next you can make the legs. The best fit is pieces of a corner, to which small pieces of metal are attached from below so that they stand stable.
The next step is installing the doors. You can cut a piece of metal onto the ash pan, attach hinges and a lock. There are no special problems here. The gaps around the edges do not interfere - combustion air will flow through them.
There will be no difficulties if you are making a door from metal - welding the hinges is not a problem. Only here, in order to be able to at least slightly regulate the combustion, the door needs to be made a little larger - so that the perimeter of the opening is closed.
How to install stove casting on a metal stove
It is problematic to install furnace casting. Suddenly someone wants to have not a steel door, but a cast iron one. Then you need to weld a frame from a steel corner, attach the casting to it with bolts, and weld this entire structure to the body.
From two barrels
Anyone who has used a potbelly stove knows that very hard radiation comes from its body. Often the walls become heated to a red glow. Then it is impossible to be near her. The problem is solved with an interesting design: two barrels of different diameters, inserted one into the other. The gaps between the walls are filled with pebbles, clay mixed with sand (calcined over a fire, then filled in only after it has cooled). The inner barrel acts as a firebox, and the outer one is just the body.
This stove will take longer to heat up. It will not immediately begin to give off heat, but it will be more comfortable in the garage and after the fuel burns out, it will warm the room for another couple of hours - releasing the heat accumulated in the bookmark.
https://youtube.com/watch?v=PEWZxL2ebXE
Materials
To assemble a drip furnace with your own hands, you need to prepare:
- used 50-liter gas cylinder with a whole body;
- a two-meter metal pipe with a diameter of 100 millimeters with a wall thickness of at least 3.5 millimeters;
- for the heat exchanger and other small parts - the remains of an equal-flange metal corner with a thickness of 40–50 millimeters;
- a sheet of 4 mm steel or its trim of the required size;
- cast iron brake disc from a car, can be used;
- a regular-sized freon bottle with a needle valve;
- half-meter half-inch metal pipe;
- a hose of the required size, which is suitable for attaching to a ½-inch pipe and clamps;
- half-inch ball valve;
- door hinges and fire door latch.

