Drilling a hole for an outlet in the wall may seem easy at first. But as practice shows, not everyone can perform this action. Without special knowledge and special equipment, the work is doomed to failure. However, there are good old ways that help achieve positive results without much effort.
Hole drilling tool
Cutting or breaking with a hammer or chisel is considered common practice. A chisel is used to scrape soft or hard materials. To properly drill a hole for a socket in soft material, it will be enough to use a regular drill. If you are not working with wood, choose a concrete drill bit for all materials that will be processed.
Any building materials always contain sand. And this is an abrasive that is used for metal processing. Accordingly, ordinary drills are not useful. Special drills coated with an alloy of chemical elements (cobalt, tungsten carbide) are suitable for this work.
The drills themselves, in theory, do not always cope with the task. For more efficient work, crowns in the form of cylinders are used. The best options are those coated with diamond dust. They can operate in the impact mode of a hammer drill. If you can’t drill with a regular drill, a drill can handle a hole for a socket in concrete (it can be used for concrete in window and door openings).
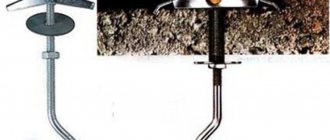
Circular drill bit "ballerina"
The tool is a guide drill, on which a rod is attached, holding a movable cutter. During rotation, the drill and cutter rotate simultaneously, making the necessary hole in the tile.
This product is good for its versatility, thanks to a movable cutter that can be adjusted to any diameter. Accordingly, if you are faced with the task of cutting a hole in a tile for an outlet, take a closer look at this method.
Pros and cons of a circular drill:
- This is a big plus - you don’t need to spend money on expensive diamond crowns, just buy a “ballerina” and you can cut any hole in the tile for sockets and more.
- But there is also a disadvantage of this tool - it is not suitable for professional use, since after 30 working processes the cutter will become dull and will no longer perform its functions efficiently, because of this the ceramics will suffer greatly.
We suggest you familiarize yourself with Water distribution in the bathroom, types of pipe layout.
All work consists of several stages:
- A hole for the socket is marked.
- The movable cutter is adjusted to the required diameter.
- The glaze is cut from the front side.
- Then the tile is turned over and cut from the back side, but not all the way.
- We finish the cut on the front side.
Using a “ballerina” as a tool for cutting a hole in a tile for an outlet requires certain skills. Before drilling, measure the diameter of the socket and divide by two. It is by the size of the resulting radius that the cutting edge of the tool is retracted from the center.
Ballerina bit for cutting holes
- Using a drill, a hole is made in the center of the outline.
- The nozzle is installed on the drill and the required diameter is adjusted.
- The centerpiece of the nozzle is inserted into the central recess, the drill is turned on at low speeds.
- Gradually, the cutting edges will deepen, drilling a rosette hole.
- Having reached the middle of the thickness of the tile, you should turn it over and continue drilling on the other side until a circle falls out.
The “ballerina” attachment is used only on horizontal surfaces, because the drill should be positioned at an angle of 90 degrees relative to the wall.
Drilling a hole in a tile using a ballerina bit”
Using a crown for socket boxes
If you have no idea how to drill a hole for a socket, buy a special bit from the store. It simplifies the workflow and is inexpensive. Its base is a pin that is attached to the hammer drill (screwed onto the flange), and it itself looks like a piece of pipe with a diameter of 68-80 mm. At its end there is a thread, thanks to which the product is secured. The other end is an alloy cutting element. By the way, sometimes parts of such crowns are coated with diamond dust to increase service life. The third part is the drill itself. Then the structure is secured with a screw. The drill bit helps center the bit while drilling the rosette holes. The cost of such an attachment is high, but justified, since the thing is literally an indispensable assistant for large and small repairs.
We carry out drilling
Now let's move on to the most important thing - making the socket box. If you have never performed these manipulations yourself before, we advise you to carefully consider each recommendation.
If we are talking about standard concrete walls, then we recommend using an impact hammer with a power of at least 2 J. You need a crown designed for working with these coatings with a diameter of 68 mm.
Tip: You can find different types of crowns in stores. Simple crowns (costing around 300–600 rubles) will allow you to make no more than 10 holes.
Professional ones will allow you to drill up to 500 holes, but their cost is much higher (1500 - 3000 rubles).
The drilling procedure is carried out as follows:
- We make a mark, in other words, we drill on the wall with a crown for a few (5–10) seconds. As a result, a notch is formed on the surface for the future socket box.
- Then we drill holes in a circle with a drill (size 10–12 mm) at a small distance from each other. Their depth should correspond to the thickness of the socket box.
- Then we drill with a crown into the concrete for the sockets (it is desirable that it be of good quality, otherwise you will have to replace quite a bit of it).
This is how the reinforcement is cut down
- The remaining concrete must be hollowed out using a hammer drill and chisel.
It would seem a completely simple operation that anyone can do. This may be true, but significant difficulties may arise. In particular, there is a possibility of hitting the reinforcement.
Let's consider the action plan in this case:
- If we are talking about thin reinforcement (3–5 mm), then it can simply be cut out with a hammer drill and a chisel. This is done like this: place a chisel (it must be sharp) as close to the edge as possible and break the reinforcement.
- If you come across thicker fittings (from 1 cm), then the most rational option is to move the sockets. But still, this is not always possible, and in such situations you will have to get rid of these metal elements. It's done like this
- We make punching in the middle of the reinforcement.
- Using a metal drill, we make a through hole in it.
- As a result, it will weaken significantly, which will allow it to be drilled out using a chisel and a hammer drill (as in the previous example).
Before starting work, wet the surface with water. This will reduce the amount of harmful cement dust
Using a hammer drill
Of course, there are situations when the necessary attachment for the tool is not available. There is a way to drill without a crown. All you need is a regular drill and chisel, or attach a special attachment to the hammer drill so that it works like a jackhammer. Follow these steps:
- Draw a simple drawing of a built-in socket on the wall. To do this, simply attach the socket box to the wall and trace its contours with a pencil.
- Further along the contour you need to drill more than twenty holes.
- We knock out the crotch holes with a chisel. Of course, at first glance, such a work process may seem very labor-intensive. But since there is no other option, this will be a ruthless alternative.
What to use to make holes in drywall for lamps - the issue is resolved
Drywall has proven itself to be a universal finishing material. Thanks to its excellent performance characteristics and comparative ease of use, it can be used to solve a wide range of problems. However, there are some peculiarities in handling it.
For example, when you need to cut a round hole in drywall, certain difficulties may arise. How to correctly carry out the necessary actions will be discussed further.
If for some reason the above methods are impossible to use, the problem can be solved in another way. So, for example, a series of holes are drilled using a regular drill according to the markings. They must be performed at a distance of several millimeters from each other.
Next, with a light blow of the hammer handle, the inner part is knocked out, and the remaining irregularities are removed using coarse sandpaper.
So, if there is a need to make a technological or decorative hole in a sheet of drywall, then you should take into account that the problem can be solved in several ways. The choice of option should be made based on specific conditions and the availability of tools.
Another option for making holes in drywall for lamps is to use a special tile drill. Despite the fact that such use of attachments of this type can be considered inappropriate, there are no difficulties in performing the task. The nozzle can be adjusted within a certain range, so its purchase can be considered a universal solution. In addition, you can use a simple stationery knife. As a guide, you can take a round object of suitable diameter, such as a saucer or bottle.
Several passes with a knife are made around the improvised template, resulting in a fairly neat hole.
Using a grinder
If there is no suitable tool, but you need the result, you can use a grinder. Naturally, this will be extremely inconvenient, but we will consider the detailed stage of work:
- First of all, draw a diagram for quality work. The outlines of the rosette can be drawn with a pencil.
- Next, get ready to cut with a grinder. According to safety precautions, you will need to wear goggles, a respirator or a gauze bandage. Also take care of your head (you should wear a special helmet).
- We draw the grinder along the drawn contour. We make each cut carefully so that it has a certain depth. In total, you need to make at least four cuts, but more are possible.
- Take a hammer or chisel and start hammering in the center of the radius.
How to cut round and rectangular holes in drywall
With this tool you can make a hole in a matter of seconds. You only need to select the desired diameter of the saw (the rest need to be removed from the mount) and accurately determine the location of the center of the future hole.
Using a square and a ruler or tape measure, measure the required distance from the bottom edge of the slab to the center of the future hole. Place a dot at this point. This will be the height at which the center of the future hole will be placed.
If you plan to make a rectangular hole on an old wall, use a narrow drywall saw. Don't forget about possible wires behind the wall. On new stoves, it is most convenient to use a jigsaw. Now take a drill with a large drill bit and drill 4 holes in the center of each drawn line, in the inner area of the rectangle.
This will make it possible to insert a hacksaw or jigsaw blade. If you're planning to make holes in an old drywall wall and don't know anything about cable and piping layout, use a metal detector to make sure you don't cut electrical wiring or anything else important.
Using a drill
With the help of a crown we get a more or less satisfactory result, but the process itself is not very simple. In some situations, the crown simply cannot cope because the brick or concrete is too rough. Therefore, you have to resort to an alternative, such as a drill.
- Mark on the wall the center of the radius of the socket box. Then start drilling the wall along the hole marked with a crown.
- Most likely, you will not be able to drill into the wall as needed. But there is a trace left on the wall from your attempts. Now it’s time for a regular drill: we drill holes with it along the edges of the mark - at least 20 of them.
- We return to the crown again, put it on and drill further. Now the result should be positive.
Features of working with tiles
To accurately cut a hole in a tile for an outlet, you should adhere to the following rules:
- Marking. You need to mark the area where you drill the hole using a marker - mark the outline on the outside of the tile.
- Pasting. If we are talking about glossy tile material, you should cover the cutting area with mounting tape or adhesive tape. This process will prevent the drill bit from slipping while cutting. You can make an outline with a nail by scratching the surface along the markings.
- Wetting. Professional craftsmen usually use special equipment that wets the tiles with water when cutting. But you can simply place the tiles in water for an hour to reduce dust formation and prevent cracking. You need to cut tiles at low speed. The diamond blade is used for dry cutting.
- Safe distance. It is necessary to drill with a distance from the edge of at least 15 mm to avoid spalling.
- Convenience. To make a hole conveniently, you need to guide the tool away from you from any edge. If you change the processing direction during drilling, the cut lines may not converge. Cutting must be done exclusively from the front side. If the tiles are already on the wall, you need to drill a hole with a hand drill.
Types of holes for connection devices
The shapes of the holes mainly depend on the supplied instruments. Today, the most common shapes are round, rectangular and square. Round ones are most often used: they are more technologically advanced, and the hole for them is drilled at a time. Square holes are made as a whole or in addition to a round hole. They are usually made if there is a need for a recessed socket. This is often practiced on tiled floors. The holes are made in them in the form of a rectangular recess. Round sockets are embedded inside.
How to cut a hole in drywall
When you come to the store, it’s easy to get confused by the abundance of crowns on offer. How not to make a mistake with the choice so that it does not break when making the first hole?
The most common need to drill round holes in drywall is to install electrical outlets.
The invisible part of the socket, the plastic round mounting box that is mounted in the wall, is called the socket box. There are socket boxes for concrete, wood and plasterboard.
- determining the location of holes on drywall;
- marking the surface material;
- attaching a core drill to a power tool;
- direct drilling.
At the third stage, a crown of the required diameter is taken and installed on the power tool. This could be a drill or a screwdriver. To use a hammer drill, you need to purchase an adapter chuck and remember to turn off the impact mode.
- Solid crowns are basically a drill bit with a single metal toothed cylinder on it;
- The collapsible crown device contains a universal disk into which cylinders of different diameters can be inserted. The cylinders themselves have an open shape and come complete with a disk. Like solid crowns, the collapsible edge is serrated.
Overview of drill bits
As mentioned earlier, preparing a recess in a wall may not always be easy. But diamond crowns can make this task easier. They are made from tungsten carbide alloy and diamond dust. There are two types of them that are most in demand in the construction industry:
- Made from hard alloy. The principle of operation is impact drilling on concrete. The crown looks like a cylinder with an edge to which metal working teeth are soldered. The “bowl” is secured to the drive using an SDS tail.
- Diamond. This is a more modern and technologically advanced solution, which in the future is designed for drilling in concrete. Diamond bits also have cutting segments coated with diamond dust. Unlike the previous option, this one is operated using a shockless method, which has a positive effect on the part and the structure itself.
Overall, the choice of crown absolutely depends on the current condition of your home walls. As you have probably already seen, in some cases you can do without them. Any of the above approaches requires care and adherence to a step-by-step procedure for completing the work.
Simple procedure
Indeed, figuring out how to drill or widen a hole in drywall for a lamp is not difficult. We suggest you use our hint and follow the following steps step by step:
- Specify the diameter of the lamp.
- Decide on the number of such spotlights.
- Determine the exact location of each light bulb.
- Make markings on the surface of the drywall sheet.
- Select a drill bit with a crown of the appropriate diameter.
- Install the drill on the drill (perforation mode or using a concrete drill is not required here).
- Place the bit precisely at the drilling site, position the drill in a strictly vertical position and press the drill start button.
- The drilling process takes approximately 5-10 seconds.
- The hole is ready.
As an additional recommendation, attention should be paid to observing basic safety precautions. The drilling process generates quite a lot of dust, so special safety glasses and a respirator should be used to protect your respiratory system and eyesight.
Making a hole in the tile for the socket yourself
In this regard, it significantly saves money and time. But for successful work you will need to follow some recommendations. We don’t need a switch, a socket, or holes, unlike the socket box and some other parts.
Installation of socket boxes is carried out using a hammer drill. With it, work will be more efficient. In addition to this, you will need:
- Crowns.
- Drill.
- Hammer.
- Chisel.
The work is performed in the following sequence:
- Determine a suitable location for the socket and switch (installation standard is from 30 cm from the floor, and the switch is up to 80 cm).
- Mark the locations of switches and outlets on the wall.
- Before starting work, cover furniture to protect it from dust.
- Do not neglect the rule of your own safety (wear a special mask and goggles).
- Let's start drilling with a crown. Switch the hammer drill to impact mode.
- During operation, do not press hard on the drill, this may lead to damage and breakage of the tool.
- We knock out the remaining piece of concrete with a chisel or hammer.
Installation of socket boxes (mounting boxes) for installing sockets
Installation of socket boxes for sockets on the tiles of the kitchen apron should be carried out before all tiling and finishing work is carried out.
socket boxes for hidden wiring
- Using a hammer drill and a special bit, drill holes along the contour to the required depth.
- The depth of the niche for the socket box should be slightly larger than the socket box. After installing the rosette, it should protrude from the wall by 6-8-10 mm. Subsequently, this protrusion will be covered with tiles. The thicker the tile, the more the socket box should protrude from the wall.
- If there is no drill bit, it can be replaced with a hammer drill with a ∅14 mm drill. Along the marked outline of the socket box and in the center of it, you need to drill a series of holes to the required depth.
- Next, using the same hammer drill and a pike attachment and a spatula, hollow out all the excess.
- Insert the bit into the drill.
- Drill a hole at low speed.
- Place the tile on a flat and hard surface. Place a piece of cardboard under the tile for minimal drilling cushioning. When drilling, wet the drilling area.
Using a tile glass cutter and pliers for making a hole in a tile
Content:
The wiring is mounted into the wall using two types of holes. Linear, or grooves, for routing wires in the required directions, and local recesses - for installing small, but necessary everywhere sockets, switches and junction boxes - internal connection (switching) devices. And these two types intersect, or rather, complement each other.
As a result of the work, the network, even the smallest one, even a small segment, is built or completed gradually. Of course, it must be thought out, calculated and marked in advance. After this, everything necessary is purchased, and only then the tools are picked up and the wall becomes a canvas for creativity.
How to secure socket boxes
The socket boxes are fixed with a solution diluted from putty, alabaster and water. After preparing the solution using the dabbing method, secure the device and wait until it dries completely. Then you can proceed to installing the socket.
Preparing holes for socket boxes in any type of wall, including concrete, will not be too labor-intensive if you use the right tools. However, even without special crowns, you can cut out a recess, but this will require more time and effort.
Hole on plasterboard ceiling for lighting fixture
This device is used by professional tilers to make holes in ceramic tiles, but it is also great for such pliable material as sheets of plasterboard. An example of drilling a hole with a ballerina circular drill. This tool can be used even if the drywall is already mounted on the wall, using adhesive. There is only one limitation - the diameter, which can only be set according to the length of the ballerina’s shoulder.
Holes for lamps in drywall are very easy to make. Drywall is a flexible material for finishing and special equipment for its processing is usually not required. You can cut a hole in several ways, using professional drill attachments or improvised means: Holes for lamps on the ceiling in plasterboard
The method is simple and not labor-intensive. Insert a wood drill into the drill and drill the maximum number of holes around the entire circumference. Almost every owner has this tool. The work must be done with a blade that is removed from the hacksaw. Several holes are pre-drilled in the drywall around the perimeter of the circle. Sawing a hole with a blade for metal A blade is inserted into one of them and a cut is made. If there are a large number of holes, you can purchase a special handle into which the blade is inserted, then the work will be much easier.
After this, knock out the perforated element with a sharp blow - the remaining teeth can be trimmed with a construction knife or sanded with sandpaper.
Types of socket boxes
Today, the material for making socket boxes in most cases is plastic (polypropylene). Compared to metal boxes, which were actively used when laying electrical wiring in old houses, the new models have a number of significant advantages. The main ones include:
- Resistant to corrosion.
- Ease of use.
- Dielectric properties.
- Reliable retention of the sliding legs of the socket.
The following types of socket boxes are distinguished:
Socket boxes for concrete. They are fixed to the wall using alabaster or gypsum mortar. The sizes of such products are standard. Their outer diameter is 68 mm, the center distance is 71 mm, the body length varies from 25 to 80 mm, with the most popular models being socket boxes with a depth of 40 or 45 mm. This size is perfect for installing most sockets and switches, while it is possible to conveniently locate behind the working part of the device a loop of wire, the length of which is sufficient to carry out work on replacing or repairing a socket or switch.
Socket boxes for drywall. To fasten such products, spacer legs are used. If it is necessary to install several sockets or switches in a plasterboard wall, special blocks are used, consisting of the required number of socket boxes.
How to drill a hole in drywall
The first method that will be discussed is using a special crown to make a hole in the drywall. It is the most correct of all, recognized as the fastest and most effective. The vast majority of craftsmen resort to it in cases where it is necessary to drill a circle in drywall.
This method is also perfect for making the circle larger if it is too small, or for straightening it out.
Drilling a hole in drywall is both simple and difficult. Despite the malleability of the material itself, many factors need to be taken into account. In most cases, this procedure is required to carry out various communications or install lighting in a room. This article will look at various ways to make a round hole in drywall. To summarize the entire article, we can safely say that doing the job of carving drywall correctly is not the most difficult task.
If you choose a good tool and carefully fasten the blade that you will need to work with later, you will get the desired result without much effort.
Cutting a round hole in drywall
Before you make a hole in drywall, you need to know what kind of material it is. Drywall is a material that consists of a two-layer sheet of cardboard and a core of hardened gypsum with fillers. This material is intended for cladding, creating partitions, and is used when installing ceilings in rooms with normal air humidity.
This method is very, very simple, does not require special tools, but its application requires skill.
It is quite dangerous; in the absence of experience, a beginner will have to ruin more than one sheet of drywall before working on it. The blow should not be too strong, otherwise the material will simply break, but not too weak.
Each of them is used for different cases. The most common method is to cut the sheet in a straight line. But it also happens that it is necessary to cut out a circle or other shape.
There are three types of drywall: regular, moisture-resistant and fire-resistant. The moisture-resistant type is used when working in rooms with high air humidity, for example, a bathroom. Fire-resistant, respectively, for fireplace portals and other places where there is an open fire nearby. In addition to the types listed above, there is also gypsum fiber sheet, which is highly durable, and acoustic sheet, which has increased sound insulation.
The depth of the slot made in the first stages of preparation is important. The deeper the slot, the less effort you will have to make to ensure that the sheet breaks off in the right place. If the circle you want to cut is large enough in diameter, then it will be better to cut the cardboard inside the outline into segments.
Installation in a concrete wall
It is most often necessary to install socket boxes in concrete or a brick wall, so the method of such installation has been worked out to the smallest detail and all possible methods have been tried for a long time:
Installation of socket boxes in concrete begins with markings. If there is only one socket on the wall, then plus or minus a centimeter will not make a difference, but when a block of sockets is installed, how evenly it will subsequently be positioned depends on the correctness of the markings.
There is a simple rule here - it is better to draw a mark with a pencil, the size of which is larger than the crown - if the hole turns out to be slightly offset from the center, it can still be aligned when it comes time to put the socket boxes in place.
- Next, the holes for the socket boxes are drilled in the concrete - when the markings are done correctly and you have the right tool, then there should be no problems. Correct installation of standard socket boxes in a concrete wall involves drilling a hole 5 millimeters larger than the socket box itself. If there is no crown for drilling concrete, then you can use a regular drill with a Pobedit tip - holes are drilled around the perimeter of the marked circle, and the inside is knocked out. If you don’t have a drill or hammer drill, but you have a grinder, then you can make a rectangular hole in the concrete for the socket boxes - they still need to be mortared into the wall.
- Trying on a socket box. It is necessary to install the socket box flush into the concrete wall, and also check that the cable fits freely into it. Since putty will be applied further into the hole, it is better to wrap the end of the wire with electrical tape in advance, if this has not been done before.
- A layer of putty is applied to the hole in such a way that the socket box is pressed in and part of it comes out. Leave everything in this position for a few minutes so that the solution begins to set and then carefully remove its unnecessary part from the wall.
Now all that remains is to wait until the solution has completely hardened and the installation of a standard socket box in a concrete wall is complete.
If for some reason it seems that the socket box will not stay inside the wall, then it can additionally be secured with dowels, under which 4 holes are drilled with a slope of 45° (at odds) to the plane of the floor and wall.
We also recommend watching these two videos with a story about the intricacies of installing socket boxes:
How to cut in tiles
Holes for future sockets and switches in the tile are made BEFORE laying it. If you decide to install a socket or switch on a finished tiled wall, then use overhead devices or remove a section of tile. There is no other way to do this job accurately. To cut a hole for a socket in a tile you can use:
- Drill/hammer with diamond bit
- "Ballerina"
- A hacksaw for metal with a diamond string instead of a blade
- Bulgarian
Drill+bit
Drill bit for tiles
The simplest option is to drill a hole in the right place using a tile/glass drill, and then insert a guide drill from a crown into it. Without pressing, make a hole to the full depth of the tile
Important. Both the drill and the hammer drill in this case should be in the “drilling” mode without impacts
Ballerina
Ballerina for tiles
Before starting work, measure the diameter of the socket box, divide it by 2 and move the cutting edge away from the center by this distance. This tool requires a little more skill. It is itself an eccentric and the hand may tremble during operation. Just the same - first make a hole in the tile using a drill, then make a “ballerina drill”. Drill a hole for a socket only in a tile that is fixed horizontally, because... The drill should be pointed at a strictly 90 degree angle.
Having drilled through half the thickness of the tile, turn it over and finish drilling from the other side. This will prevent cracks from appearing
Important. The ballerina should be operated at low speeds (up to 800 rpm)
Hacksaw + diamond wire
- Apply a glass of the socket to the tile and trace it with a pencil
- Cutting out
This is when we are talking about the junction of two tiles. If you need to make a hole in a solid tile, you will have to make a preliminary hole with an 8mm drill through which the string will be threaded.
Diamond coated string. Cut out a hole of any shape with a hacksaw
The method is a little longer, but it is preferable for beginners than using a “ballerina”, because does not require any skills at all and has the lowest percentage of defects
To prevent the drill from slipping on smooth tiles at the beginning of work, stick masking tape over the drilling site and make the markings directly on it.
Bulgarian
This is a method when you have nothing at hand except an angle grinder, and you need to make a hole for an outlet in the tile right now.
- On two adjacent tiles we draw half a glass under the edge;
- We make parallel cuts from the edge to the circle at a distance of 5 mm (diamond-coated disc);
- We break out the resulting strips with pliers, tongs, or whatever comes to hand.
The result is a clumsy hole, which in any case will be hidden by the socket casing and no one will know anything