Photo of a sauna on the balcony (see below)
Here you will find projects on how to make a home mini sauna in apartment rooms: on the balcony, in the bathroom and closet. All master classes will be accompanied by step-by-step photos (step by step) for making them yourself. We will provide reviews by the author and attach interesting videos of the construction of Finnish saunas indoors.
Infrared sauna
The interior decoration of infrared saunas is not inferior to other types of steam rooms. Only the stove is different. Infrared saunas use metal, quartz and ceramic infrared heaters. Ceramic heaters are optimal in terms of efficiency and radiation spectrum. You shouldn't take metal ones. The power consumed by an infrared sauna is 1.5-2 times less than the power consumed by a conventional sauna. Infrared saunas use about the same amount of power as an electric stove.
In addition to infrared saunas, there are SPA capsules. There are, of course, expensive professional models, but you can also find quite affordable ones. You can install the capsule directly in the bathroom.
Stages of work
Prefabricated sauna
After all of the above five issues related to the arrangement of the sauna have been fully and efficiently resolved, you can begin the construction process itself.
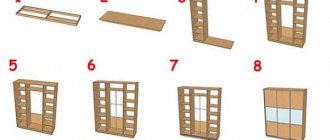
We are building the frame of the sauna. To do this, we will need wood (timber), a drill, dowels and screws for attaching the timber to the wall, glassine (it will act as an external thermal insulation layer), a tool for working with wood, a building level, a tape measure, and a pencil.
Sauna for a city apartment
The simplest option is to attach the frame beam horizontally directly to the walls of the room allocated for the sauna. In cases where this is not possible (the room is larger than the sauna planned in it), it is necessary to install sufficiently thick wooden spacers between the floor and the ceiling (it is to them that the horizontal timber frame will be attached in the future).
The distance between the timber horizontally fixed to the wall should be as follows:
- 1 row - 3 cm from the floor,
- 2nd row – 60 cm from the floor,
- 3rd row – 1 meter from the floor,
- 4th row - stepping back 5 cm from the ceiling,
- Row 5 – exactly between the 3rd and 4th rows of timber.
The entire beam is aligned in one plane along the side that “looks” into the future sauna.
The ceiling frame is made of wide boards in increments of 60-70 cm. And do not forget about the vertical posts around the opening to which the door frame will be attached.
Be sure to make “frames” of timber around the supply and exhaust ventilation openings.
Wiring. In addition to the electric stove, the sauna must have at least one lamp (the switch for it must be located outside the sauna). Engage an electrician to install electrical wiring, who must place it in a metal hose.
Advantages of a sauna in an apartment
Sauna finishing. First, the ceiling is covered with clapboard, moving from the entrance to the sauna to the opposite wall. The cladding technology is as follows:
- stretch and secure the foil using buttons (one sheet),
- we fix 3-4 rows of lining (using nails driven into the groove),
- We install insulation into the resulting space,
- then we continue everything in the same way - foil (overlapping), lining, insulation.
The insulation should only be non-flammable - mineral wool. You cannot use polystyrene foam to insulate a sauna - it melts at high temperatures.
Stalls. The support for the benches in the sauna is made of timber. If you are making a bench above the bathtub, it is better to make it folding or removable. The support for the bench is fixed on three walls, and if necessary, a vertical stand with emphasis on the floor is also installed.
The flooring of the bench is assembled from boards with a width of at least 80 cm and a thickness of at least 20 mm in two rows (longitudinal and transverse). The width of the bench on which they will lie should not be less than 70 cm.
Sauna stove
The next stage is installing the heater (sauna stove) in accordance with the manufacturer’s instructions and securing the lamps. Using screws, you should attach a thermometer, ventilation valves and, of course, an hourglass to the lining.
And the last thing is to prepare the sauna for use: on the first day it is heated with the ventilation valves and doors open to 50-60 degrees, on the second day it is kept at the same temperature (but the door and valves are closed) for 3-4 hours, on the third day it is heated up to 90 degrees and maintain it for 3 hours, on the fourth day the sauna can be heated to 100 degrees for 3 hours, and then at maximum heating for half an hour you should periodically pour water onto the stones.
If no deficiencies are identified during these four days, the sauna can be used as usual.
Obtaining permission to install a sauna in an apartment
The list of organizations that must give approval for the installation of a sauna may differ in each specific case. Russians in general need to obtain consent for installation:
- Rospotrebnadzor;
- State Fire Service;
- Sanitary and Epidemiological Service;
- Inspections of the State Architectural and Construction Supervision;
- HOA;
- Housing inspection, and other services.
The basic regulations for the design and arrangement of a sauna are specified in the regulatory documents:
- SNiP 31 – 01 – 2003, Residential multi-apartment buildings;
- SP 31-107-2004 Architectural and planning solutions for multi-apartment residential buildings.
When contacting the Housing Inspectorate before installing a home sauna, it is better to further clarify the list of necessary documents for the relevant organizations.
Most steam room lovers carry out installation without notifying any of the services. In this case, the apartment owner is responsible for the possible consequences of installing a sauna.
Types of mini saunas
There are several types of saunas for installation in an apartment. They differ not only in price, but also in design, volume, heating method and other additional functions. Let's look at the most common saunas.
With electric heater
The area of such a sauna is 1.2 m2. If you have a small family, then this is a great solution. Its main advantage is the simplicity of installation work. As a rule, the factory assembly consists of a wooden frame, which is supplemented with shields. Two people are enough to assemble it.
A sauna with an electric heater already has a vapor barrier and thermal insulation in its design. Therefore, in addition to assembly, it will be necessary to connect to the water supply and sewerage system.
Phytobarrel
This sauna plan will require a minimum of space. Moreover, there is no need to further strengthen the electrical wiring. Based on the name, the design resembles the shape of a barrel. The entrance is located on the side. If you sit on a bench in it, your body is completely immersed in it, and only your head is outside.
The use of a phyto-barrel is important when steaming the body with medicinal herbs and various aromas, which has a positive effect on human health.
Portable sauna
This type of sauna is represented by a frame that is covered with fabric. Based on the principle of operation, a portable sauna is similar to a phyto-barrel. In it, the head is not subject to thermal influence. This device is relatively inexpensive, lightweight and does not take up much space. The main advantage is ease of use. It is enough to have a working outlet near the device.
IR sauna
In this case, an infrared emitter is used for heating. Although the temperature regime in it is considered gentle, in the region of 40–60°C, it warms the skin quite deeply. Therefore, it can include not only adults, but also children, as well as elderly people with heart and vascular diseases. One of the advantages of the installation is that it consumes little electricity.
Finnish
If the room in the apartment is large, then you can seriously think about purchasing a Finnish sauna. Several people can be in it at the same time. It uses dry steam to heat the temperature to 90–100°C and this is the main difference from the other saunas listed above.
Turkish
This sauna can rightfully be called exotic. It is very rarely installed in an apartment, since this requires:
- install hoods;
- make high-quality waterproofing;
- install heated floors;
- finish the floors with tiles, etc.
To produce steam in a Turkish bath, a steam generator is specially installed.
Selecting a location: bathroom, closet or balcony
The first step in arranging a sauna in an apartment is choosing a location and developing a project. The following options can be considered for its placement:
- combining a bathroom and a corridor leading to the kitchen. You can also add a bathroom here;
- a pantry or balcony in cases where the sauna will have infrared heating. By the way, a sauna on the balcony is attractive because it does not reduce the living space of the apartment.
It is clear that the size of the sauna depends on the number of people. When making the appropriate calculations, at least 2 m2 of space should be allocated for each person. The ceiling height in the room being equipped should be 2 m or more.
If you decide not to purchase a ready-made mini-sauna, but to equip it yourself, then you can leave the floor that is already there. An excellent option would be tiles.
The room for the sauna must be at least 1.8 x 2 m. This will allow you to easily place a bed in it. This mini-sauna will be a convenient and practical solution for an apartment.
Legal subtleties and recommendations
Relatively recently, the idea of installing a sauna in an apartment had to be abandoned. However, today, if a number of requirements are met, this idea can be brought to life. So, to install a mini-sauna in an apartment, a number of the following conventions should be observed:
- Heating of the air in the sauna is possible only from the stove installed by the manufacturer. It provides automatic switches when the temperature reaches +130°C, as well as in the case of continuous eight-hour operation.
- To spray water in the sauna, install a perforated pipe or deluge. Connections to sewerage and water supply should only be made outside the sauna.
- The area of the room must be at least 24 m2.
- The wood used must be specially treated to protect it from fire and rot.
- It is prohibited to install a sauna in a residential area.
In order to approve a sauna in an apartment project, it is necessary to bypass such services as the housing inspection, fire service, homeowners' association, sanitary inspection service, etc. In different regions of the country, the number of authorities passed may differ, so in each individual case everything should be clarified in advance.
Wood for sauna
Of course, there are many who want to make a home mini-sauna with their own hands. In this case, it will be convenient if one of its sides is made at least 200 cm long. This will allow you to use the bathtub while lying on your back. The best wood for use in a sauna is:
- spruce,
- cedar,
- fir.
For walls, it is best to use wood with a small amount of knots and resin. The floors of a home sauna can be wooden, but not necessarily. It is important that the floors in the sauna are resistant to heat and moisture and are not slippery.
Which sauna is best for an apartment?
At first glance, it seems that apartment saunas are not in demand, therefore, the choice is not that big. In fact, thanks to the hot steam and dry heat lovers of the Scandinavian countries, the range of factory models is quite diverse.
Let's start with the fact that all structures can be divided into 3 large groups:
- ready-made prefabricated factory-made models (from lining or panels), with a technical passport, warranty and professional installation;
- frames made to order according to the provided sketch (indicating the dimensions, type of stove, number of seats, etc.);
- buildings made independently according to ready-made or personally drawn up drawings.
The manufacturer is responsible for the operation of the first type along with you, and the remaining two points are solely on your conscience.
If a flood or fire occurs, as a result of which the residents of neighboring apartments suffer, the administrative violation will gradually turn into a criminal case - we advise you to consider all possible risks.
It’s much easier for residents of the private sector - if anyone gets hurt, it’s only the owner of the premises and his family.
Recommendations from professionals are in the following video:
Benefits of a home sauna
We will talk about a city apartment, because with suburban housing everything is a little simpler. On a summer cottage they usually build a bathhouse - a separate house with several compartments, one of which is occupied by a sauna or steam room.
Urban housing extremely rarely involves having your own plot of land (unless you are the owner of a cottage in the private sector), so the only place where you can place a sauna or steam room is your own apartment
As a rule, typical housing is equipped with a bathroom with a shower or bathtub. Usually this is enough to monitor your own hygiene: those who like to soak in some water choose a bath, and those who are constantly in a hurry choose a shower.
Everything seems to be fine, then why do you need a sauna? Why does almost every second Finnish apartment have a separate room with temperatures reaching 100ºC?
In fact, a sauna is a place where you can put your body, thoughts and emotions in order. The relaxation that comes after visiting the steam room can be compared to a professional massage: all muscles and organs relax.
It has been scientifically proven that regulars of steam rooms have a stronger immune system, a positive attitude, excellent physical shape and are much less likely to get sick. Even the above is enough to understand why many cannot imagine life without a “hot” holiday.
A visit to the sauna is a great occasion to meet a friend or relative whom you haven’t seen for a long time, or, on the contrary, a great place to be alone
Do-it-yourself steam room: work order
A sauna in the bathroom of your apartment will require a significant investment of money and time. You will have to seriously prepare for the work: purchase building materials, choose a high-quality and economical stove.
The decision to make a sauna according to an individual project will allow you to take into account the characteristics of your home and the wishes of family members.
Depending on the area, you can choose different sauna options
. Work order:
- The walls that will separate the sauna from the other part of the room are assembled following the example of creating frame partitions;
- In order for the heating process to be as fast as possible and energy costs to be reduced, it is not recommended to make the sauna ceiling at a height of more than two meters;
- Installation of thermal insulation is required, and the most suitable material is mineral wool 5-10 centimeters thick;
- To protect the insulation from moisture, a vapor barrier film is used. The canvases are laid overlapping without tension and secured with a construction stapler, the joints are taped;
- For wooden cladding of the interior of the sauna, clapboard or block house is used. The thickness of the skin should be 10-12 millimeters. The wood is treated with antiseptics (inorganic, organic or mixed) to increase its service life in rooms with high humidity, and then, if desired, coated with heat-resistant varnish;
- It is necessary to leave a ventilation gap of at least 2 cm between the vapor barrier film and the lining;
- The frame of the sauna is covered from the outside with the same wooden paneling. However, in order not to disturb the overall style of the room, you can cover the sauna with plasterboard and put on it ceramic tiles or other material that is used to decorate the walls of your bathroom.
Stage 1 of work: frame assembly
Insulation with mineral wool slabs
The final stage is clapboard covering
Tips for choosing materials for heat and vapor barrier
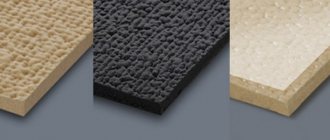
Experts recommend using slabs rather than roll materials. They are much more convenient to work with, they are denser, keep their shape and do not move down. However, you cannot use foam boards or extruded polystyrene foam boards for a sauna; their operating temperature does not exceed 75 ° C. Also do not install glass wool insulation. Even if you properly seal the insulation, microscopic pieces of glass cannot be completely cleaned from the bathroom after renovation. The fragments can get into the skin, eyes or respiratory system.
It is recommended to use aluminum foil as a vapor barrier. The heat-reflecting effect of this material reduces the time required to warm up the steam room. However, the thickness of the foil is only 50 microns; you must work with it carefully, since the sheet breaks easily. It is more convenient to use a two-layer film based on craft paper; it is much stronger. There are also special insulation for saunas, one side of which is already covered with foil. They need to be installed with the metal side facing the inside of the room.
How to make a floor
Just like the walls and ceiling, the floor in the sauna also needs to be insulated. Mineral wool cannot be used for this purpose, as it compresses under load, and the floor will “walk” and the tiles will crack. The best option is extruded polystyrene foam, which is placed under a layer of concrete and tiles, where it is not exposed to high temperatures. The operating procedure is as follows:
- Lay insulation boards on the sauna floor, pre-cut to the required dimensions;
- Glue the joints, fill the gaps with foam;
- Fill the surface with floor screed solution;
- After the concrete has hardened, lay the ceramic tiles on the adhesive.
There is no need to install waterproofing under the sauna floor, since polystyrene foam does not allow water to pass through. Wooden gratings are placed on the passages to prevent slipping. In places where water drains into the sewer, a trap receiver with a siphon is installed.
Laying insulation boards
Shelves and benches
Beds or seats are made from hardwood. The resin contained in pine or spruce lumber appears on the surface of the boards when exposed to high heat. Sitting on a sticky bench is unpleasant, there is a risk of getting burned or hopelessly ruining bath towels or mats. Linden or aspen lumber is considered the best for arranging a sauna; such boards do not heat up too much.
Shelves usually have two tiers, the first at a height of 50-60 cm from the floor, and the second another 40 cm higher. So that you can not only lie down, but also sit, the upper shelf is made removable, foldable or narrower than the lower bench.
Sauna shelves and benches made of hardwood
Sauna door
In order for the room to warm up faster and stay warm longer, it must be closed. A transparent door will allow you to avoid installing a lamp in the sauna. However, you cannot use ordinary glass; it is better to purchase a ready-made door made of tempered glass that can withstand high temperatures and not deform. If you installed light in the sauna cabin, you can install a solid wooden door.
The width of the doorway should be at least 60 cm, so as not to create unnecessary obstacles to exiting the sauna.
Sauna door with heat-resistant glass
Also, for safety reasons, do not install locks from the inside. In addition, the door should open outward and not interfere with leaving the room. Avoid metal objects in the sauna interior: the handles on the door should be wooden, they will not burn your hands. It is also useful to protect the stove with handrails to prevent accidental touching of it due to the small size of the room.
If the size of the apartment bathroom is small, there is often not enough space to open the sauna door. Consider alternative options, such as installing a sliding door. When there is no room for it, a hinged one can be the ideal solution: two narrow panels open on the sides.
Ventilation required
A channel for air flow is made below, near the floor. It is best to place a hole with a diameter of 5-6 cm as close to the stove as possible. For air outflow, a second hole is needed in the upper part of the opposite wall of the cabin or on the ceiling of the sauna. The area of the exhaust duct should be at least twice as large, that is, about 9 cm in diameter. Such circulation saves heat: hot air entering the bathroom from the sauna warms this room too. And not cold, but warm air enters the steam room.
Scheme of natural low-efficiency ventilation
Particular attention should be paid to the ventilation of the bathroom if you have installed a sauna in it. The exhaust duct should go outside, if possible, or into a common ventilation riser for the house. It is useful to install an electric fan that turns on when a certain air temperature in the bathroom is reached.
