Using stencils
If you do not have drawing skills, use ready-made templates, of which the market offers a huge number and variety, for every taste.
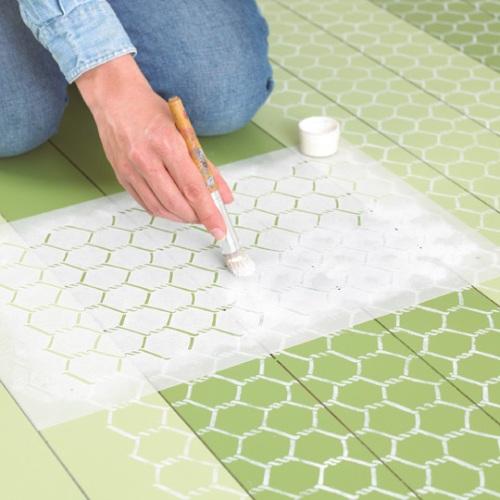
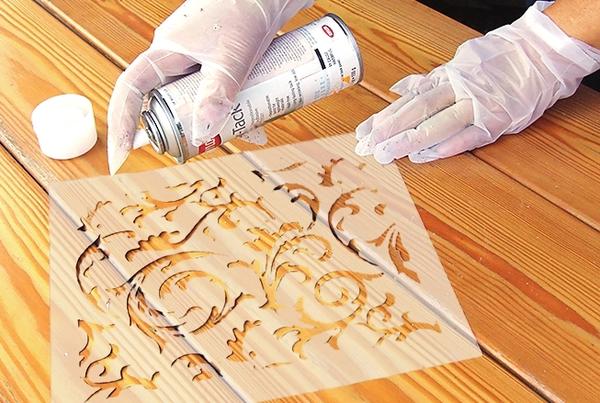
It is better to purchase stencils made of polymer film that are adhesive to the wall - they are the most convenient to use, they are easy to wash, and can also be used more than once. If among all the huge variety of templates you didn’t find exactly the one you wanted, it doesn’t matter: make a stencil with your own hands. To do this, buy lavsan film (mylar). First, cut out the stencil on paper, then place the milar on the glass, place the paper stencil on top, then use a utility knife to make the necessary cuts in the film. Or take a sheet of plastic or thick cardboard, draw the necessary contours on it and cut it out. Now attach the stencil to the wall and paint over it with a stencil brush. To create single-color patterns, use single templates, and to create multiple shades, a multi-stencil made from several combinable parts is useful.
Sometimes elements of a complex design created using a stencil must be applied separately. For example, transfer the silhouette of an animal to the wall using a stencil, and add its eyes or whiskers with a brush or another stencil.
The important final step is varnishing. Although acrylic paints do not get dirty, it is still better to play it safe and securely secure the finished wall painting. But if you used watercolor and gouache, you must varnish it
Apply the varnish carefully, using a spray bottle, in several thin layers.
Stencils for walls: rules of use
It’s not difficult to make stencils for interior decor with your own hands, but in order to insure against possible failure in the form of getting a picture of poor quality, it’s worth purchasing factory-made blanks.
For high-quality drawings, it is better to buy factory stencils for walls
Before you apply the stencil to the wall and begin to paint over it, make sure that the surface to be painted is completely clean and dry.
To more accurately apply the pattern and maintain symmetry, they resort to markings, which are made with a simple pencil. For orientation, it will be enough to mark the side, top and bottom points.
Before working with the stencil, make markings on the wall
If there is a need to select a shade, then do this on a draft sheet. In parallel with the selection of colors, you will gain experience working with a stencil.
You can choose the right color for the stencil using paper
When decorating a finished surface, do not be lazy to firmly attach the workpiece to it, doing this not with tape, but by placing it on special glue.
Special stencil adhesive for more precise drawing
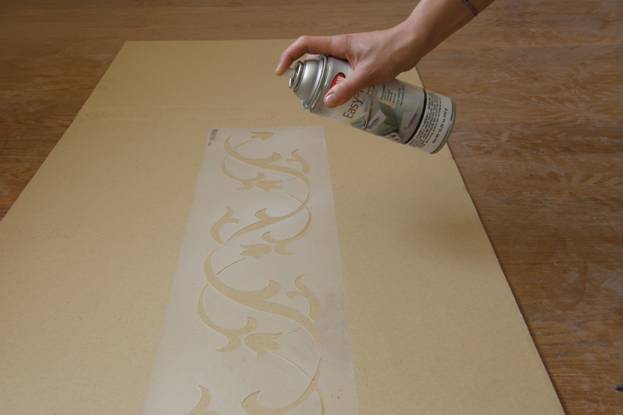
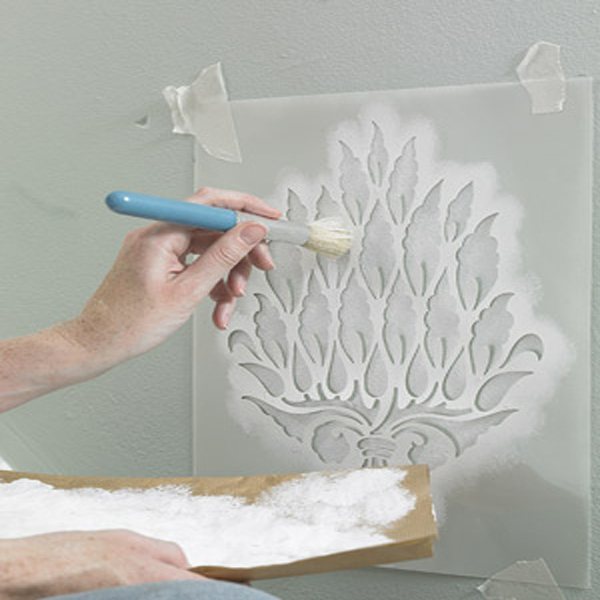
Spray paint is applied to the stencil from a distance of at least 30 centimeters. Only in this case will you avoid the appearance of drips. When using a sponge to work with wall stencils, get rid of excess paint on it by squeezing it out. When applying a drawing with a brush, do it with vertical strokes, moving your hand from top to bottom.
Painting with a brush is applied from top to bottom
For narrow stencils and when decorating walls in corners, never use a roller, even if the pattern is quite large.
When applying a narrow pattern, a roller is not used
Types of stencils
Stencils help out when applying repeating complex motifs, successfully replacing manual labor. Ready-made kits differ in their scope of application, and it is useful to understand their diversity in order to choose the appropriate option. The following types of templates are common:
- Simple. The most budget-friendly sets, with a set of simple elements for decoration. They are suitable if you want to depict something simple on the wall. As a rule, the set contains reusable templates of the same size (for example, A4 or A3).
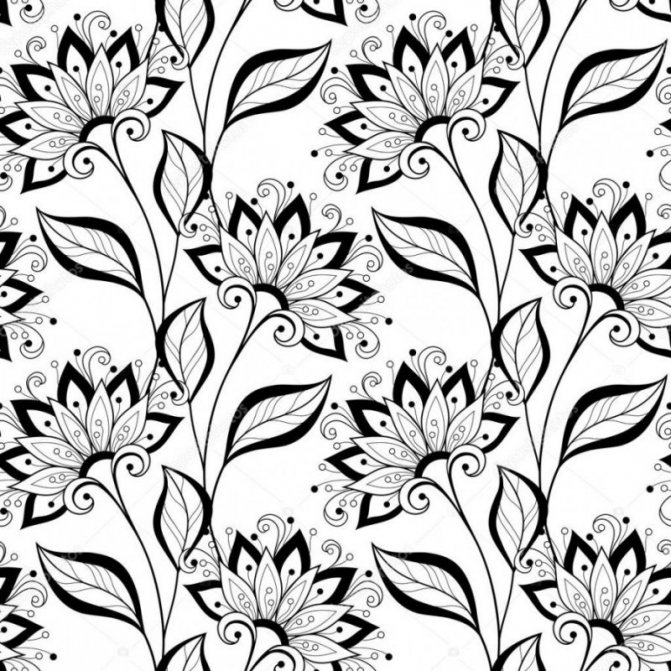
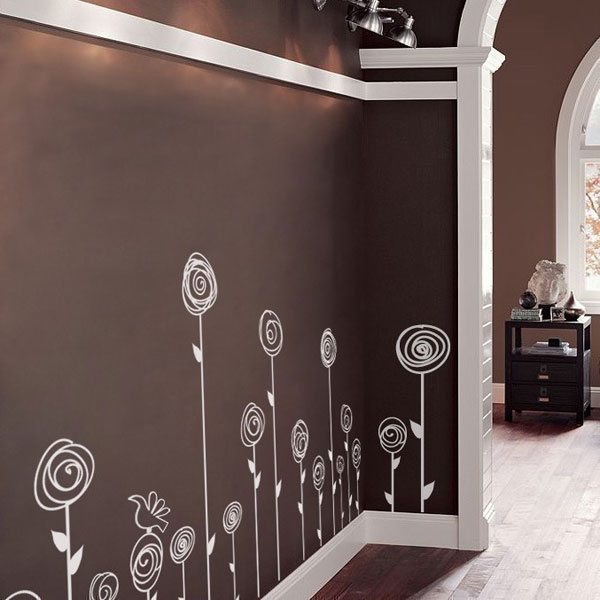
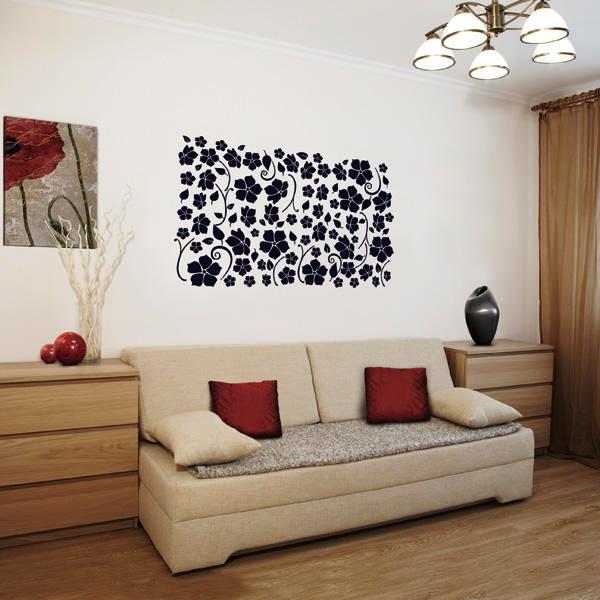
- Wallpaper stencils. They help create an imitation of wall wallpaper. The pattern is combined with itself in two ways: by repeating the pattern or by special alignment marks. The possibilities are varied: from painting flowers on the wall to abstract patterns, intricate ligature of oriental (for example, Indian) ornaments, classical curls and monograms.
Stencil with imitation wallpaperSource plentymarkets.com
Original designSource pinimg.com
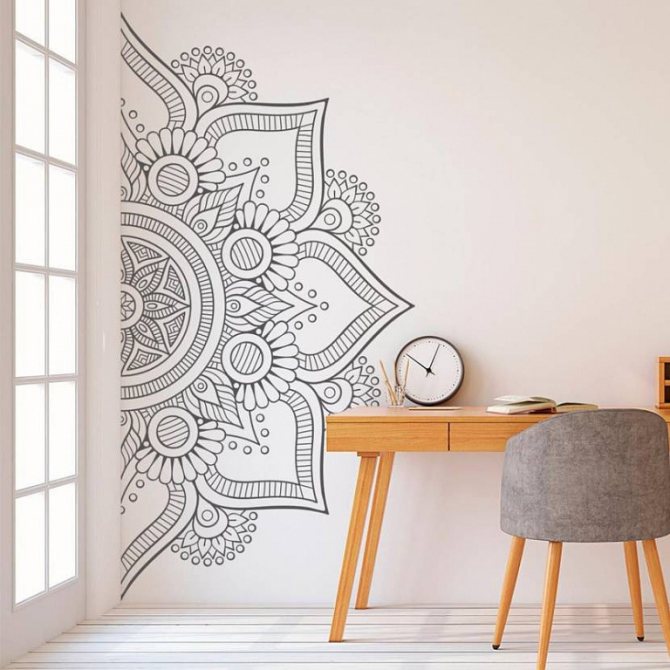
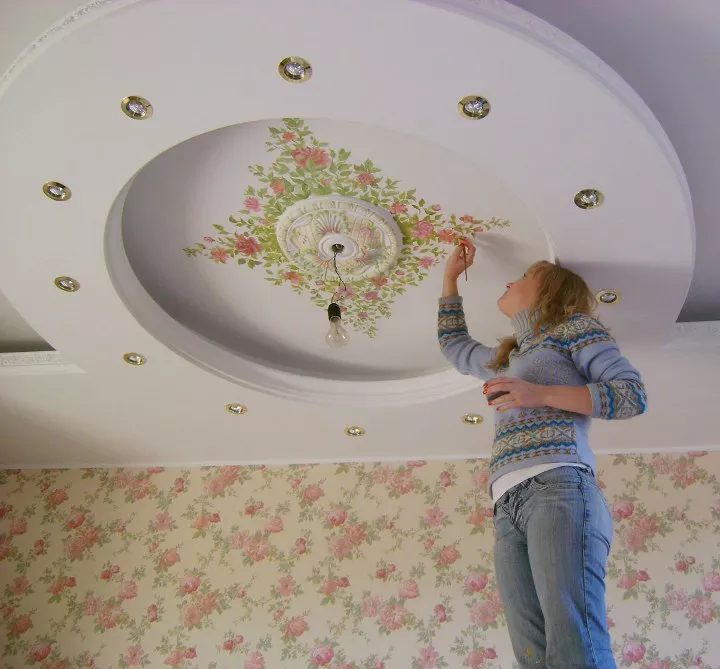
Round. The template can be made in the form of a circle or an ornament that fits into a circle. Round elements are used to decorate a medallion, ceiling decor (under a chandelier) or a watch dial. Sometimes the template is a quarter of the image. If it is reusable, then it is used 4 times to get a complete drawing. If it is disposable, you need to purchase 4 pieces.
Round ornamentSource pinimg.com
Types of stencils by material
The material for making the template can be any. The possibility of reusable or single use, frequency of use and, of course, the cost for the buyer will depend on its density and structural strength.

Today, manufacturers of stencils for wall decor offer templates made from the following materials:
- Paper of sufficient thickness.
- Vinyl records.
- Artistic contours made of PVC.
- Cardboard stencils.
Only the last three models from the presented list are considered reusable templates.
Paper contours, despite their density, do not allow surfaces to be decorated several times. For this reason, such stencils are less expensive.
Execution technique
The prototype of this technique is fresco. At the moment, many alternative options have appeared:
- Fresco.
- Airbrush.
- Painting with acrylic paint.
- Three-dimensional painting.
- Application of images with fluorescent paints.
Airbrush
Airbrushing is the easiest way to apply paint. When using it, a dense layer of paint is sprayed from a can under the action of compressed air. At the same time, you can achieve an interesting artistic painting of surfaces in any of the rooms with interesting decorative details. The main effect is a smooth transition of color, an image brought to photorealism, three-dimensional drawings. At the same time, you can imitate any of the textures, painting walls like wood.
Fluorescent finish
Artistic painting of a wall in a hall or living room with luminous paint allows you to achieve a unique effect in the interior. When using luminous wall paints, they will glow in the dark when exposed to ultraviolet light. By combining such paints with others, you can make decorative images for various natural phenomena, for example, lightning, sea foam, city lights at night, frost in a snowy forest.
Painting with fluorescent paints
It is not advisable to use fluorescent wall painting in the bedroom. Additional light sources will interfere with restful sleep.
Fresco
This is an ancient way of decorating walls. He's popular. In this case, paints are applied to the plaster. The main difference is the texture. The advantages of the fresco are resistance to wear and long service life.
When applying a fresco, you can stylize it as a modern painting or as an old painting disguised as an outdated texture. The process of obsolescence is due to the use of plaster mixtures that differ in structure and properties and patina techniques.
Volumetric painting technique
The technique of decorative wall painting with a three-dimensional pattern is popular due to its main feature - it breaks the space. At the same time, the room expands significantly, the ceiling height increases, several new objects can be added - a window overlooking the coast. When using the method, objects form a portal to another world.
Stencil technology
The stencil painting method is suitable for DIY wall decoration. Stencils or templates are ready-made images onto which paint is applied. They are bought in stores or made at home from wax paper and construction tape.
Stencil technology is suitable for owners who cannot allocate a significant amount of money for wall decoration, but want to diversify the decoration with unique elements.
Painting with acrylic paints
Painting apartment walls with acrylic paints is based on acrylic. These coloring compositions are characterized by drying speed, do not contain toxic substances, and have a fairly bright palette of colors.
There are many different effects on the finished acrylic wall painting. The painted surface is resistant to moisture and light. It has a long service life and does not require special care products.
Main types of stencils
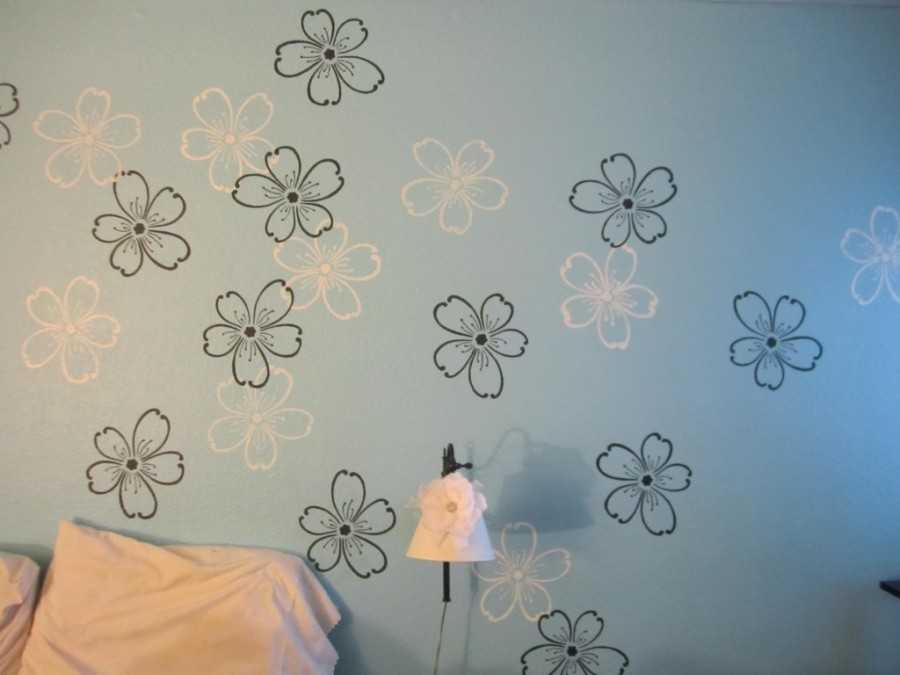
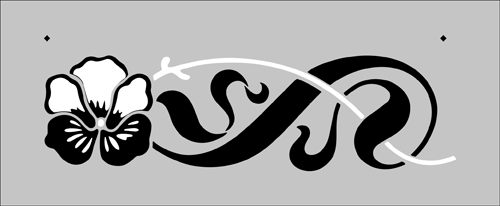
Depending on the method of application, color stencils on the wall can be direct or reverse. The latter type of stencils is used less frequently than the first. A straight stencil, or template, is a sheet with a flower pattern cut out on it.
Using a direct stencil you can create an elegant and beautiful design. It is pressed against the wall and paint is applied to the cut out part with a sponge, brush or roller , thereby transferring the pattern of flowers onto the surface of the wall.
A reverse stencil of flowers on a wall is the exact opposite of a direct stencil. In order to make a reverse stencil, you need to cut out the flowers strictly along the contour.
Drawings of flowers using a reverse stencil are applied to the wall very simply - we apply the stencil of flowers to the wall and paint the space around it with paint.
Then, when the paint has dried, it is necessary to remove the stencil, in the end we will get clear drawings of flowers, bouquets or floral patterns on the wall. The reverse color pattern is convenient to use over large areas.

Wall stencils can be complex or simple. Complex stencils are those where the design is created using paints of different colors, while simple stencils, on the contrary, are a design made with paint of the same color.
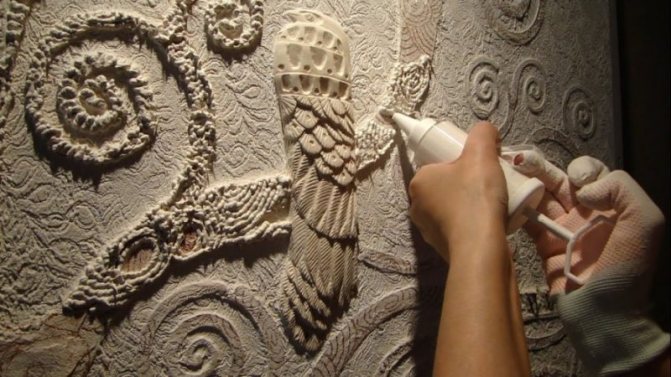
There are three-dimensional stencils that are made using putty or decorative plaster . In order to make a three-dimensional stencil, you should take a ready-made stencil of flowers and butterflies for cutting, putty (it’s better if you use decorative plaster instead of putty) and a spatula.
We select a place on the wall where the future three-dimensional drawing of flowers will be placed, and glue the finished cut out stencil of flowers and butterflies there with masking tape. Now, using a spatula, carefully apply decorative plaster to the fixed template and wait for it to dry a little.
Important! You should not wait for the plaster to dry completely, otherwise you will not be able to remove the stencil from the wall later.
After the plaster has dried a little, you should carefully separate the stencil of flowers and butterflies from the wall. Again we wait for the volumetric drawing to dry completely on the wall. After the decorative plaster has completely dried, it is necessary to sand the surface of the three-dimensional pattern using sandpaper.
If you want flowers and butterflies in a three-dimensional drawing to look more impressive, paint it with acrylic paints of different colors and shades.
Depending on the use, flower stencils for the wall can be disposable or reusable. Disposable are stencils that are designed to perform only one design, that is, at one time.
Disposable stencils of flowers for painting on walls can be purchased at any building and finishing materials store. This type of flower templates is produced on adhesive bases, so they are simple and easy to use and are in great demand and popularity.
Do you like to craft? We offer an idea: make curtains from beads with your own hands - an original and stylish accessory for any interior.
For modern ideas and photos of 2015 on wallpaper design for a teenager’s room, see this article.
Reusable stencils are designed to be used over and over again and can also be purchased at the store or made by yourself. Reusable flower stencils for cutting out on the wall are usually used to create a repeating pattern of flowers - repeat .
This type does not have an adhesive base, and is attached to the wall using double-sided masking tape.
Using disposable and reusable stencils of flowers and butterflies for painting on walls, you can create a wide variety of designs on the wall.
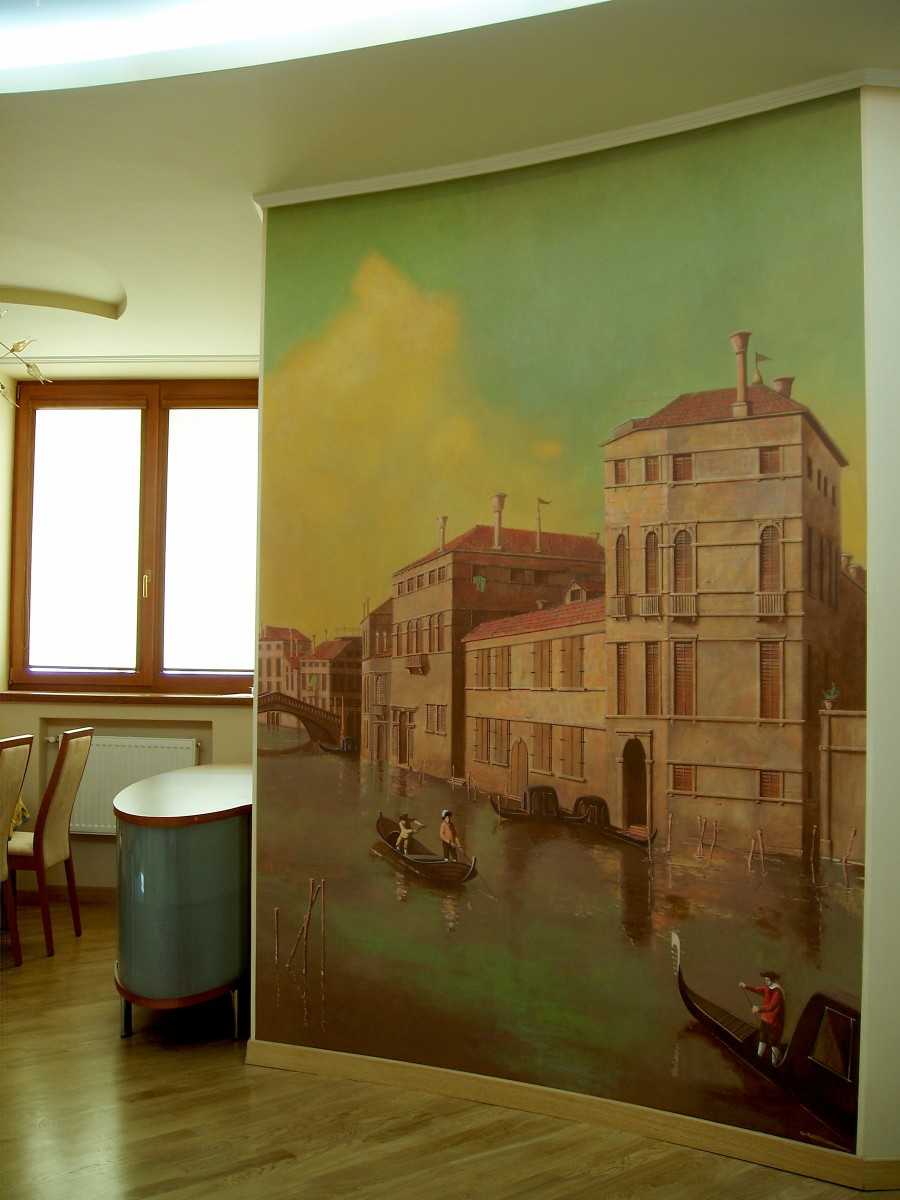
Modern artistic painting of walls in an apartment
A wide variety of stylistic trends allows you to introduce this original method of finishing into interior design. By painting walls, you can achieve a variety of effects. The latest techniques, tools, and materials make it possible to create unique works of art that can transform any room.
You can perform the necessary manipulations with your own hands. Using the services of professional craftsmen, it is possible to coordinate the sketches in advance. The format, theme, and color scheme may depend on specific factors: 1. Purpose of the room. In the kitchen or dining room, images of still lifes, ready-made dishes and drinks would be appropriate; for the bedroom, abstractions or landscapes would be the best option; in the nursery, excerpts from cartoons and fairy tales would be suitable. 2. Size and layout of the room
The location of the walls, the free space on them, and the number of door and window openings are important. A separate nuance is the level of natural and artificial light. 3
Stylistic interior design. Classic, modern, high-tech, Provence, baroque - each style must correspond to specific themes. This could be a marine theme, unusual combinations and landscapes, abstract images. 4. Features of application technique. Using encaustic, images are painted with wax. Sgrafitto looks original, where the walls are first primed with black, then white, and then certain places are scraped out so that the pattern appears. In the alsecco technique, paint mixtures are applied to dry plaster. 5. Individual preferences. When choosing themes, colors, and images, you should take into account the preferences of all family members or the specific owner of the specified room.
Wall painting can be done in different genres, contain a different number of shades, attract attention and surprise. Often, property owners prefer to use this type of artistic painting as a fresco
By applying images using water-soluble paints to wet plaster, you can get a real masterpiece with bright, rich colors.
Modern painting techniques also imply an original approach and an attractive appearance at the end. You can use fluorescent or acrylic paints, or create any pictures using stencils.
Paints for wall painting
- The fresco is applied to the wall with a special powder mixed with water. This material is most often used for ceiling painting. The paint is very durable, does not crack and does not fade.
- To decorate the ceilings of clubs and restaurants, fluorescent paint is used , which glows under the influence of ultraviolet radiation.
- Acrylic is considered the most practical. It is odorless, resistant to moisture and sunlight, which is especially useful for children's rooms and kitchens. Any surface is suitable for its application. The paint dries in about half an hour.
- Oil paints convey the depth and uniqueness of color. They are bright and not subject to cracking, although they dry slowly and smell unpleasant.
- Tempera paints are ground on yolks or glue solution. They are durable but prone to cracking.
How to choose a drawing?
The choice of painting theme should depend on the room in which the painting is planned.
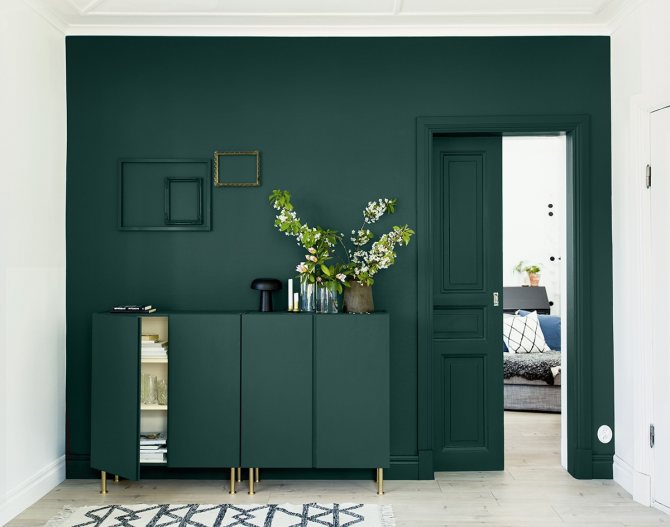
If you are painting a living room, then it is advisable to choose landscapes, beautiful flowers, trees. Of course, mountains and coniferous forests will look original, but a professional can draw them carefully.
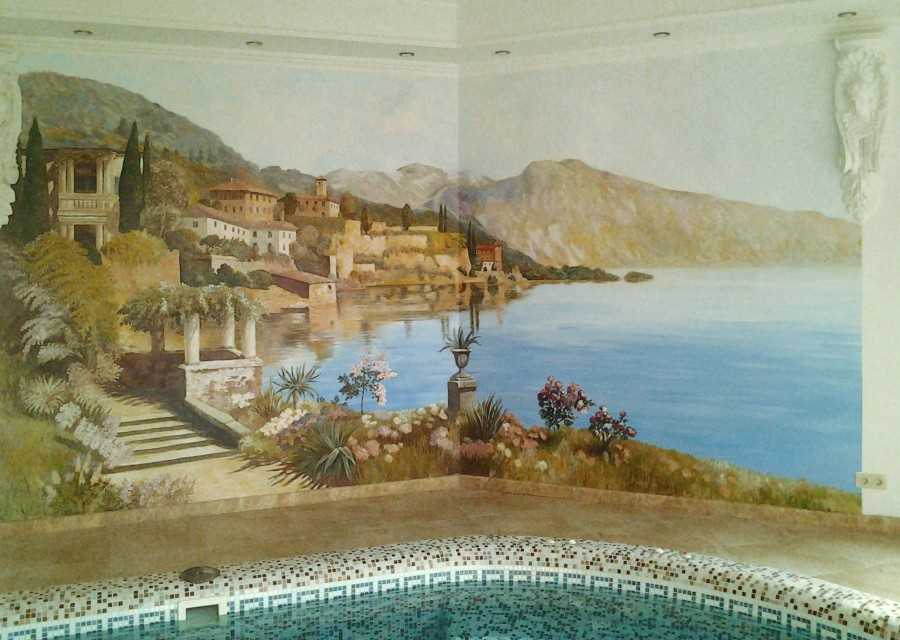
But it won’t be difficult to depict dandelions and lilies on the wall. To make the ornament truly interesting, it is advisable to use the above-mentioned stencil.
For the kitchen, the ideal option for wall decoration, given the vast majority of classic designs, is a still life made in the colors of bright vegetables. Most will be able to draw a plate of fruit and glasses of wine with sliced cheese with interesting patterns. The main thing is to settle on a drawing that is relatively easy to execute.
Have you seen a photo of a wall painting and are inspired by the idea of repeating the drawing yourself, but are you upset that you had no previous experience in fine art? No need to worry in advance
Just pay attention to the following techniques:
- Drawing made along the contour;
- Stencil;
- Drawing using slide projection.
Avoid common mistakes
What are the most common annoying mistakes that haunt beginners in decorating with stencils? This is displacement of workpieces and spreading of paint. Such incidents can be avoided quite easily. You need to use aerosol glue, which will securely fix the drawing blank on the wall, and put a small amount of paint on a roller, brush or sponge to draw the details. Accuracy and diligence will allow you to obtain wonderful decors.
When working with a sponge, do not pick up too much paint.
Important Rules
1. If you decide to play with contrast, then combine those colors that fit perfectly together.
2. Before applying a design to the entire surface or combining paints, test on a small surface or paper. Once you are sure that everything is working out perfectly, get to work.
3. Protect sockets, switches, baseboards and floors from paint. That is, those elements that you do not plan to paint.
4. Adhesive paint is used only in a warm form and is applied in no more than two layers. If you increase the number of layers, the paint will peel off.
5. To create a relief, use adhesive or glazed paint. You can work with such paints only after complete drying (it dries for seven days).
Tools and materials for work
When starting to decorate, you need to stock up on the following materials and tools:
- For the sketch you will need a variety of paper and tracing paper. For non-standard ornaments, use whatman paper.
- Auxiliary tools: two sizes of ruler, triangle, tape, scissors, etc.
- Charcoal and graphite pencils, markers, eraser.
- A variety of brushes: construction brushes, synthetic brushes, bristle brushes, flute brushes.
- Acrylic paints of different colors and shades. They come in glitter, pearl and silver. For painting large areas, they purchase construction acrylic, which is complemented with colors. There are façade and interior acrylics.
- To paint and create a three-dimensional panel, you will need spatulas and stacks.
- The work requires baths, rollers, sponges and a telescopic stick.
- Bucket, spray bottle for watering walls.
- To prepare the wall for work, you will need decorative plaster.
- Beads and glass for decoration.
- Fine-grained sandpaper for grouting and varnish for fixing.
Sometimes craftsmen use an airbrush and a spray gun to paint large surfaces.
Stencil of different colors - templates
Stencil of different colors - templates:
Stencil of different colors - templates Stencil of different colors - templates Stencil of different colors - templates Stencil of different colors - templates Stencil of different colors - templates Stencil of different colors - templates Stencil of different colors - templates Stencil of different colors - templates Stencil of different colors - templates Stencil of different colors - templates
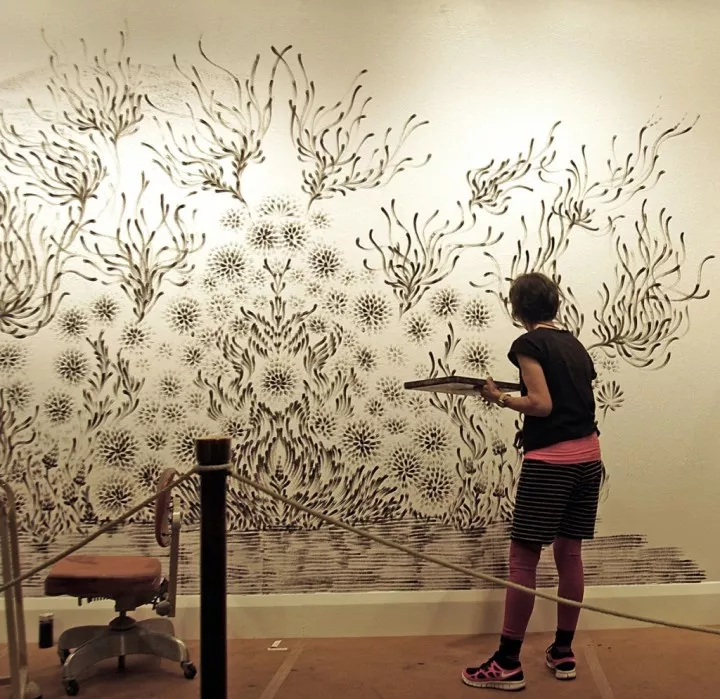
Artistic wall painting "by hand"
In order for a beautiful image to appear on the wall of your room, try to adhere to the following procedure.
Step 1. Select an image and decide on the size of the future drawing. It is assumed that at this point you already know exactly which part of the room this picture will be in and why it will be there. There is a huge selection of different images on the Internet, but try to choose something simpler for the first time, and the sketch will be easier to create. You’ll draw luxurious castles in the flaming distance later.
Step 2: Prepare the wall. Professionals really like to paint on a freshly painted smooth surface, so it is necessary to putty and paint in a color that matches the background of the painting. If the drawing is intended to make up for the mistakes made during the recent renovation, then you will have to draw according to what is there.
What colors are used to paint on the walls?
Step 3. We purchase all consumables: paints, brushes, etc. All experts recommend only water-based acrylic matte paints. They are easy to mix and apply; after drying, they are not erased with a slight movement of the shoulder, like gouache. True, some people cover the drawing with a couple of layers of façade matte acrylic varnish to be completely sure. To achieve the desired shade, the paints are diluted with white acrylic paint. To obtain the required liquid (the ideal consistency is similar to sour cream with 15% fat content), add water. Just don’t get carried away, otherwise when the too liquid paint dries, unpleasant stains will remain on the wall. You need to take two types of brushes: for large strokes, wide, large and flat ones (synthetic and bristles) are suitable, and for contours and small details - small round core ones. Professional decorators also use a foam roller to draw flower petals with dotted movements. Also prepare containers for washing brushes and mixing colors. If you don’t want to sacrifice dishes, buy a set of disposable ones.
Step 4. Print out 5-10 images in black and white to make it look like a sketch. Now you need to apply a background identical to the color of the wall, because the same shade looks different on a white and green wall. After drying, apply the contours until you reach automaticity. Now you need to choose such shades so that the whole picture “plays out”. If there are a lot of similar parts in the drawing (petals or leaves), it is better to prepare simple stencils. Only after this can you proceed to painting the wall.
Step 5. Now you need to apply a rough pencil drawing to the wall. Never use a black pencil; it is difficult to erase and leaves dirty marks. It is better to use soft colored pencils. All bad lines can be easily removed with a large and soft eraser. First, the boundaries of the drawing are indicated by a line, then the largest parts are drawn. Only after this do you move on to detailing and more careful drawing. Constantly step aside to immediately see imbalances in proportions and correct them. The better you draw the image, the easier it will be to apply the paint. For those who have problems with scale and spatial orientation, the cell marking method will help. The entire area of the drawing is divided into squares, which you then draw on, just like in a school notebook. Markings can be made either with a pencil or using pieces of string attached to the wall.
Step 6. Start painting with acrylic paints. The paint must be diluted and mixed immediately before application, because... acrylic dries very quickly. Paint in several strokes to achieve volume and naturalness of the drawing, just wait until the previous layer dries. Hold the brush perpendicular to the wall. Correct any imperfections with a thin brush. To achieve smooth movements and increase enthusiasm, play your favorite music. Take a break after you've finished drawing and filling in the basic outlines. Then, with renewed vigor, proceed to small details, and, if necessary, shade the edges of the image. At the very end, we work out all the smallest contours with a thin brush, achieving volume, glare from the Sun, etc.
If, after reading this, you realized that you are absolutely not an artist, then use another method.
How to choose the right stencils for walls
Naturally, each person has his own views regarding the design of the room
However, you need to take into account the overall style; the ornament should be harmoniously combined with your interior
Experts are ready to give some advice on choosing a stencil:
1.The drawing must be neat. If you create an element consisting of a large number of lines, the wall will look overloaded.
2.For each room you should prepare your own drawing. It should be combined with the interior of the room.

The drawing using a stencil must be combined with the overall decor of the room
3.Parts should not be too small. Such drawings are quite difficult to apply; they get lost in the general space.
4. It is necessary to provide for the presence of jumpers and lines, which will lead to a clear image.
5. Pay attention to conciseness. Initially, you should draw a project for future decoration
This preparation will allow you to correctly position the decorative elements.
Make a preliminary sketch of the future decor using stencils
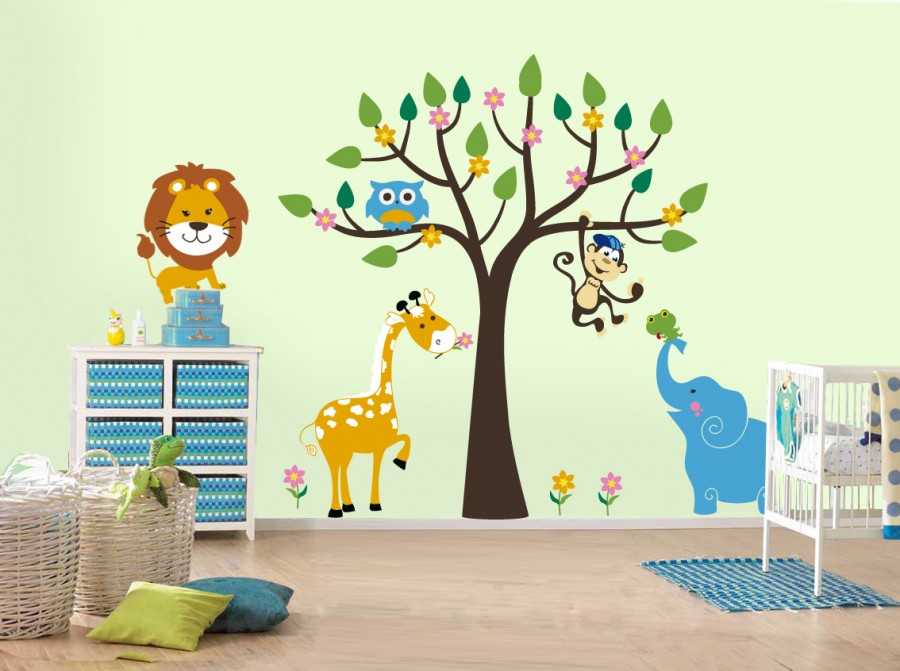
When choosing a design, you should consider the type of room you want to decorate. For example, for a children's room, characters from your child's favorite fairy tales and cartoons would be an excellent solution.
Stencil design for nursery decor
Strict lines will take their rightful place in the living room. Three-dimensional drawings are encouraged. You can create a unique design for your own apartment.
How to make a stencil
Stencils that you make yourself will help you decorate an original room.
The following materials can be used as a base:
- thick paper;
- cardboard;
- plastic folders;
- lamination film;
- any dense material.

The disadvantage of a paper base is that it can become limp and if you are going to apply a lot of similar images, you will have to prepare a lot of blanks. It is much more convenient to cut a stencil from a large plastic folder with a button - a cheap, reusable material.
Related article: Bright design of bottles and glasses for a wedding
Materials for work:
- stencil base: thick paper or film;
- stationery knife;
- paper;
- a simple pencil;
- scissors;
- masking tape;
- board;

Scene selection
The first thing you need to do is choose a picture or story for the children's room. You can find many original stories on the Internet. These are floral motifs, animals, images of balloons, butterflies, toys, cartoon characters, princesses, cars and much more. Stencils for children's rooms should be liked, first of all, by children. Do not choose pictures with very small details - they may be poorly painted and look sloppy.
Win-win options for a children's room:
- for girls - flying butterflies of different sizes and all kinds of cats;
- for boys - a school of dolphins or a beautiful elephant under palm trees.
An original solution could be a grower, however, its size is quite large and it is difficult to make it yourself. It is easier to work with small pictures at the stage of making a stencil and at the stage of decorating the walls.
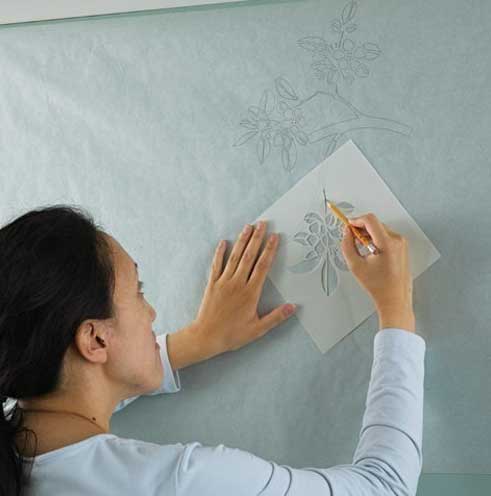
Making a stencil
We print the picture we like on a printer and attach the picture to the base using paper tape. Trace it with something that can be written on plastic, such as a disc marker. Place the film on the board and cut out the design with a stationery knife. You need to cut it so that you get a solid stencil in the form of your chosen picture.
It is much easier to cut from a paper base, but it will become limp in the first “battle”. The paper stencil can be laminated if possible.
Special cases
What to do if the drawing is complex and multi-colored? For example, Winnie the Pooh from a foreign cartoon should be divided into logical parts: ears, head, paws, clothes, etc. Moreover, the drawing on the wall will need to be applied in several stages - the head in one color, and then the eyes, nose and mouth. It is much easier to work with special blanks, of which there are many on the Internet.
Related article: Features of decorating rooms in an apartment
Stenciling
For decoration using a stencil pattern, a white wall is suitable, although it can also be other plain walls in pastel colors. The easiest way is to create single-color images consisting of one solid picture. It is better not to take on overly complex and time-consuming options, so that in the middle of work you do not give up the whole thing. Letters of different sizes and colors will help your baby learn the alphabet and will look very original. Numbers and geometric shapes in bright colors are perfect.
To work you will need:
- paint or acrylic spray;
- sponge or brush;
- masking tape.
If you have a multi-color plot, then it is cheaper and easier to purchase white paint as a base and several colors. Which paint is best for you, ask your wall paint sales consultant. Flowers are chosen that are suitable for the nursery: green, orange, lilac, blue and black contrasting with the white walls.
Practice applying paint on a piece of wallpaper, then you will be more confident when decorating the walls.
The stencil you created yourself must be attached to the wall using masking tape - the wall must be clean and dry. There are two ways to apply paint, depending on what material you have available.
Three paint application options:
- Acrylic spray paint is very easy to apply, but don't overdo it or it will bleed. Paint the surface evenly in several layers from a distance of at least 30 cm;
- Using a sponge you can quickly and evenly distribute the paint. Dip the sponge into the paint and remove excess paint by pressing onto a sheet of paper. Now start covering the area of the wall under the stencil. Repeat until high-quality coloring;
- paint is also applied using a brush, removing excess paint before painting the wall, as in the previous paragraph. A brush with even bristles is convenient for painting point details.
Related article: Types of stencils and their use for interior decoration
Carefully separate the stencil from the wall so as not to damage the design.
Anti-stencil
If you want something special, then use as a stencil the part that would be thrown away as waste for a regular stencil. Using a spray can, apply paint around the design and an unusual room design is guaranteed. The inside of the design remains unpainted, while the outside creates a glowing effect - an interesting idea for decorating a child's room.
An interesting move: a complete anti-stencil, when the entire wall is painted in the selected color, but the drawing remains unpainted. This approach allows us to embody unique stories. For this type of decor, a roller is used as a device for painting walls.
Stencils can be used not only to decorate walls in a nursery, but also to create designer wallpaper with your own hands. Applying a regular pattern can create a unique stylish pattern. It is quite possible that the idea of decorating walls using a stencil will not stop at the children's room.
Video gallery
Photo gallery
Master class No. 1: chiseled plate painting
Dot painting of plates (pique or point to point) is a technique of drawing and creating contours with dots, thanks to which you can achieve the effect of chasing, inlay with stones, colored rhinestones or bead embroidery. In the photo below you can take note of successful combinations of colors and patterns (scroll the photo to the right).

Here are ideas for decorating bowls using the pique technique.
To work you will need:
- Cotton pads for degreasing and cotton swabs for correcting unsuccessful patterns;
- Ethyl alcohol, nail polish remover or special degreaser;
- Contour acrylic paints in the desired colors;
- Aerosol varnish to fix and protect the design;
- A needle and paper for cleaning tubes.
Adviсe:
- If you want to use plates for their intended purpose, then choose baked acrylic paints labeled dishwasher ability or dishwasher resistant. Durable contour paints can be found in the Hobby Line brands Kreul, Decola, Marabu and Pebeo Vitrail.
- The paints should not be too thick or too thin. You can check this in the following way: press on the tube - if the paint comes out easily, but in a puddle, then the consistency is too liquid; if it is difficult to squeeze out, then it is too thick. Before starting work, you need to test each tube, since different colors of paint of the same type may have different consistencies.
- You can make dots with a small thin brush, needle or toothpick, using acrylic ceramic paints in regular jars if you find painting from tubes difficult.
Drawing technique
The first thing you need to do is degrease the surface well with alcohol or a degreaser using a cotton pad and only then start getting creative. Experienced craftsmen can draw directly on the plate, without using any sketches or markings, inventing patterns right in the process of work. You too can trust the free flight of thoughts and improvise. But if you want to realize a certain artistic idea, then it is better to first draw a sketch, template, stencil or marking, thinking over the colors and patterns.
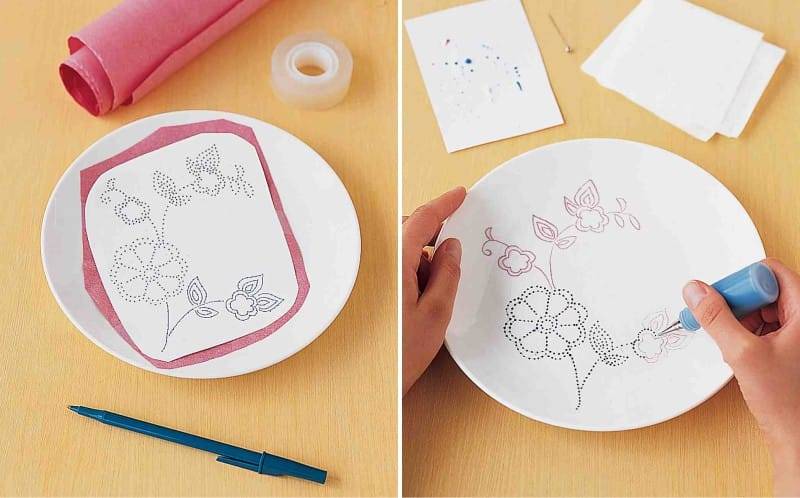
For painting on glass, it is convenient to use templates that can be glued to the back of the plate.
Tip for beginners: before painting a plate, practice placing small, medium and large dots on paper at the same distance from each other with the same pressure and pressure on the tube.
The main rules: in one line there must be points of the same size, and the same distance must be maintained between the points, and it is very important that it (the distance) be minimal, that is, such that the points are “readable”, but do not merge into a continuous outline ; Remember that the larger the dots, the greater the distance between them can be. And vice versa, the smaller the points, the smaller the indentation from each other should be; You need to draw according to the principle from general to specific, that is, starting with large contours and ending with drawing small details.. After work, the paint must harden
There are three ways to dry them:
After work, the paint should harden. There are three ways to dry them:
- Naturally for 1 day - if you want to use the plate rarely or even use it only as a decorative item.
- Dry with a hairdryer, and then leave the paint to harden naturally for 10-12 hours.
- Bake at a temperature of 150-170 degrees for half an hour, and then, without removing from the oven, let the dishes cool - in case you want to eat from painted plates. It is advisable not to wash painted dishes for 20 days after firing - this way the paint will last longer.
After the paint on the decorative plate has dried, you can seal it with varnish.
Stencils of flowers and butterflies - templates
Stencils of flowers and butterflies - templates:

Stencil of flowers and butterflies - template Stencil of flowers and butterflies - template Stencil of flowers and butterflies - template Stencil of flowers and butterflies - template Stencil of flowers and butterflies - template Stencil of flowers and butterflies - template Stencil of flowers and butterflies - template
Basic styles of wall painting
- Classic style
. It is always relevant, in demand and not subject to the whims of fashion. The pillars of classicism are simplicity, straightness of form and symmetry, harmony and restraint. Classics are able to organically convey national flavor, combine with non-standard modern materials and elements, without losing their “main line”, aimed at harmony of color and shape. - Baroque style
. It marked the next round in the development of classicism and became the embodiment of its time. The ornaments of this style contain ornate plant motifs: large flowers, tree branches or large leaves. No less in demand are images of half-naked bodies in physical effort, the tension of struggle or strong movement. The interior, designed in the Baroque style, is dominated by a rich play of bright colors, light and shadow, which gives the room luxury and pomp. - Empire style
. It harmoniously combines classical severity with impressive decor. The perception of color here is built on a combination of tones of Bonaparte’s symbolism: gold, purple and blue. The ornaments of the style are found in a combination of their conventional and naturalistic elements. When painting walls in the Empire style, flower garlands and triumphal and pompous wreaths are actively used. Some ornaments are taken from the culture of Egypt, so in the Empire style interior you can see sphinxes, winged lions or griffins. - Art Nouveau style
. It is easily recognized by its growing, living and breathing abstract forms. A characteristic feature of the style is a complex ornamental system with large flowers and curved wavy stems. Sometimes fairy-tale creatures are also depicted in modern art: mermaids, elves, as well as strange plants that form characteristic curved lines. The color scheme of the style is dominated by natural shades. Everything in modernity strives for rationalization and simplification, but without sacrificing elegance. The interior in this style is not distinguished by excesses and manifestations of status, but implies the unobtrusive presence of nature. Art Nouveau is characterized by a harmonious combination of functionality and decor. - Arabic style
. This is not just an interior, but a whole worldview formed under the influence of Islam. The main differences between wall painting in this style are: richness of color, unusual solutions, originality, magical and mysterious atmosphere. The style intricately combines stylized Arabic script, geometric shapes and floral motifs, resulting in bright and sophisticated patterns that are repeated on the walls in a certain rhythm. Thanks to a large number of complex patterns, the walls become like luxurious Arabian carpets. Rooms decorated in this style have a warm and cozy atmosphere. - Anime style
. It originated in Japan and quickly became popular not only in its own country, but also far beyond its borders. Japanese animation characters have become in demand among numerous fans of this genre. Anime style wall painting looks harmonious in Japanese room design. The combination of its functional and laconic forms with bright images of “cartoon” characters can become a source of special pride for any owner. Interior design in this style is ideal for a children's room.
Using wall paintings in the interior
The advantage of wall painting is its versatility of application. Drawings, well-chosen by theme, will be a worthy addition to the interior of any room in the house.
For a children's room, images of cartoon characters or fairy-tale characters would be an excellent design option.
A marine theme is appropriate in the bathroom interior, both landscapes and individual details in the form of funny dolphins or stylized jellyfish.
In the kitchen, wall paintings with an appetizing theme will be very appropriate. Beautiful still lifes or individual pictures on a kitchen theme will lift your spirits and allow you to make the interior of the room unique in design.
The main condition for success is the correct selection of the pattern. It must be in harmony with the design of the room and correspond to the style of the decor.
The use of wall paintings allows you to make your living space especially cozy and unique in design.
Stencil: variety of approaches
A stencil is a template that allows you to apply a design to a selected surface. Its main value is that it can be used to create a repeating pattern on any size wall area. You can make a template yourself, buy a ready-made one, or order an individual version from a printing house if you can’t find a suitable ready-made version.
Ready-made (purchased) stencils differ in several parameters. They are made from paint-resistant material; They are rigid and flexible, and according to the nature of application they are divided into two types:
Disposable. May have several layers. They are made of thin silicone, have an adhesive base and are used for drawing multi-color compositions.
In the recreation areaSource pinimg.com
- Reusable. Made from durable and more rigid material, intended for repeated use.
- According to the resulting effect, stencil images are divided into the following types:
- Single color. The ornament is applied in one color; No special skill is required from the performer; simple accuracy is sufficient. This method is the fastest, it is also suitable for obtaining silhouettes or inscriptions.
- Multicolor. The picture turns out to be multi-colored, with shades and transitions, but the work requires more accuracy. The image is applied in several stages, layer by layer; How many layers and stencils there will be depends on the number of colors.
Multicolor solutionSource pinimg.com
- Volumetric. To create a three-dimensional pattern, putty is used. A layer of plastic material is applied according to the pattern in a layer of 1-3 mm. The three-dimensional design looks unusual, the relief surface attracts the eye. When the stencil is dry, you can make it more expressive by touching up the protruding parts.
- Anti-stencil (shadow image). In a regular stencil, paint is applied inside the boundaries of the repeat, but here they do the opposite: they paint over the space around the boundaries, simulating a blurred shadow (or highlighting effect) around the silhouette of the design.
There is an alternative method of transferring patterns to the wall: you can draw using a decorative roller. On its rubber surface there is a convex pattern of varying degrees of complexity, which is printed on the wall. Everything is much simpler here: all you have to do is choose the paint (the image will be one color) and prepare the surface. There is also nothing complicated in drawing: the decor is applied using a standard movement.
Applying a pattern with a rollerSource blogspot.com
Types of stencils by color and volume
You can decorate the surfaces of walls, furniture and doors not only with paint, but also with gypsum stucco.
To work, you need multi-layered dense templates. The following types of stencils are distinguished:
- Monochrome and polychrome templates.
- Models for flat decorative images.
- Models for creating three-dimensional images.
The choice of stencil depends on the wishes of the apartment owner, the selected pattern and the finishing material used.