How to repair cracks in a concrete floor
Cracks from concrete shrinkage. If repairs are carried out without taking into account the nature of the damage, deformation may continue. To stop the deterioration, it is necessary to use materials according to the type of crack in the concrete. Classification is made based on the reasons that led to the deformation:
- Superficial - arise as a result of a violation of the technology for preparing the solution: if the proportions of the main components were changed, the drying time was not maintained, low-quality materials were used, or an insufficient amount of water was used. In this case, the coating is deformed on the surface, the cracks are shallow and characterized by a small width.
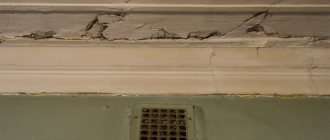
- Shrinkage cracks in concrete occur during the drying process, when the cement-sand mortar gains strength; this type of destruction may be the result of an uneven load on the coating or the use of a composition that does not meet the operating conditions. Deformations of this type are also called hairline cracks in concrete; they belong to the group of the most dangerous, in some cases they are the main factor in the destruction of the entire structure.
- The use of insufficiently reliable rods for reinforcement leads to the formation of holes that arise due to subsidence of the coating, since it is subjected to intense load. This type of destruction can be a consequence of developing corrosion of the metal inside the concrete structure, as a result of which it ruptures from the inside.
- Temperature-shrinkage gaps and cracks in the concrete floor appear during the hardening process. Such destruction is a consequence of the reaction occurring between cement and water. The main factor provoking their appearance is considered to be temperature stress; it occurs in the absence of freedom of deformation of the ceiling.
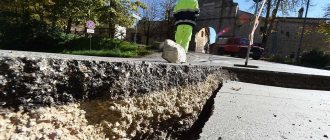
Destruction of concrete pavement on the street occurs due to contact with aggressive substances contained in soil and liquids. This also speeds up the deformation process. Other negative factors: temperature changes, freezing and thawing of concrete, exposure to ultraviolet radiation.
Deformation of such a material occurs frequently, as is the case with concrete. To restore the integrity of the structure, a number of manipulations are performed:
- Remove deformed areas of the coating, clean the surface from construction debris and dust.
- Apply a thin layer of primer. A mixture of PVA and water in a ratio of 1:3 is suitable for this purpose.
- To remove cracks in this type of concrete, you can pour any solution. This can be a special adhesive for aerated concrete or a cement composition.
The choice of mixture for sealing a crack is made taking into account its width. For example, for defects no larger than 10 mm, a porous adhesive composition is suitable. The gap is first widened to 20 mm. If the coating initially has damage of 20 mm or more, it is recommended to use an adhesive or cement composition with the addition of crushed aerated concrete.
When choosing a method for filling a gap, the type of structure is also taken into account: blind area, road surface, cement screeds, platforms, etc. The quality of the concrete and its susceptibility to destruction play a role. If deformation develops from inside the structure (the reinforcement rusts), major repairs will be required.
Concrete floor restoration may be required in a variety of situations. The coating is affected by various objective and negative factors, different defects may appear, and therefore the methods for eliminating them differ.
- Elimination of various defects - potholes, bulges, different size seams from formwork, minor cracks on the surface.
- Repairing serious cracks that have spread throughout the monolith.
- Implementation of major repairs of the floor screed before laying the finishing coating, polishing the concrete monolith, installation of a heated floor with waterproofing/insulation.
- High-quality dust removal.
Each of these types of repairs involves performing a specific technology. The most difficult and costly is repairing the surface under a clean floor. In this case, a major overhaul is performed.
Regardless of the technology used (with the exception of dust removal), after completion of work the floor must be allowed to stand for at least 20 days, periodically spraying with water or wiping with a damp cloth.
To know how to repair cracks in concrete, you must first determine what type it belongs to:
- Through cracks occur due to tensile forces;
- Surface cracks appear after the concrete has dried due to a violation of the mortar formulation;
- Cracks in the tension zone appear during bending and are directed transversely to the reinforcing bars;
- Cracks located at an angle to the reinforcement, which occur under the influence of shear force;
- Shrinkage cracks parallel to the reinforcement, which arise due to soil heaving, uneven shrinkage or improper anchoring. Due to such cracks, shrinkage and deformation of the foundation and the entire building occurs. Shrinkage cracks can also appear if the load calculation was not made according to the rules of SNiP;
- Small cracks that appear due to temperature changes;
- Hairline cracks occur for the same reason as the previous ones, but usually their depth does not exceed a few millimeters.
Having determined the causes and types of cracks, the type of repair work is determined.
Filling potholes in concrete floors, and even small cracks, requires additional labor and financial costs. It’s especially unfortunate to waste time on such work when deadlines are tight. And such a period in construction, even if it is done on its own, rarely passes.
Therefore, a reasonable question arises: is it generally necessary to seal holes in a concrete floor? This is not a finishing layer, but just a rough one, which will still be covered with several layers of coating.
An unacceptable defect that appeared as a result of mechanical impact
Therefore, any normal master will not only advise you to get rid of any defects on the base, but will also tell you how to repair a crack in a concrete floor of any complexity with your own hands.
To correct uneven floors, there are methods that are used most often in the household and separately in industrial use. These methods differ from each other in the surface area on which a certain mixture is applied, the composition of this mixture and other characteristics.
Ideal concrete surface
Despite this, sealing cracks in concrete floors with different compositions follows the same technology, and the differences are insignificant. Let us list the main characteristics of methods for correcting floor damage.
Industrial method
You can not only repair defects in the foundation yourself, but also hire specialists who will competently carry out all the work. Of course, the price for their services will be considerable. They are usually used for large damages in significant areas - shopping centers, industrial facilities.
It can be produced in several ways:
- Injection. This method in its structure resembles the mechanism of injection. So, polymer compounds are added to existing cracks, thereby sealing them. This allows you to not carry out a more serious replacement of floor or wall coverings for some time, but to limit yourself to the local effect.
The repair composition involves treating the defective surface with a mixture that includes cement, sand and polymer additions. After the applied layer has dried, an additional polyurethane sealant is applied on top.
- Shotcrete involves applying special solutions to areas prone to drying out and the formation of depressions. The ingredients of this solution are substances such as water, cement, fractionated sand and special organic additives. However, when applying the final layer of mortar, you need to take into account that it will begin to put more pressure on the foundation.
Shotcrete is not only a global repair of surfaces, but also a method of their manufacture
Of course, thinking about how to repair potholes in a concrete floor using shotcrete yourself is not a fruitful pastime. Such work is carried out with special expensive equipment, and the process itself requires the knowledge of a specialist in this field.
We invite you to familiarize yourself with a DIY pool made of concrete
If the foundation is damaged on a small scale, it is not necessary to call a team of concrete workers; you can deal with this problem yourself using different compounds:
- Special repair mixtures are actively used as a material for sealing large and small depressions.
- The cement-sand composition, or as they say otherwise, “dough” is suitable for miniature recesses, with a diameter and depth not exceeding three millimeters. In cases where cracks are larger than the designated diameter, a special mixture of Portland cement, water and sand 1:3 is used. PVA glue is also added to this solution.
How to fill holes in a concrete floor? It is best to use pieces of reinforcement for filling, or to make real concrete by adding crushed stone to the cement-sand composition. This will only strengthen the “patch”, preventing it from cracking.
How to seal cracks in a concrete floor yourself: a cement-sand repair composition is cheap, effective and easy to use
When preparing one of the above compositions, the main thing is not to overdo it with the addition of water, which, as already mentioned, causes additional cracking.
In order to bridge cracks in concrete surfaces, prepare the following necessary tools:
- grinding machine;
- metal iron;
- wire;
- wooden slats;
- trowel;
- paint brush;
- putty knife;
- special gloves;
- brush;
- chisel;
- hammer.
A few instructions to help you deal with sealing cracks:
- Prepare your workspace. Inspect not only the crack itself, but also the areas adjacent to it. Otherwise, the places near the crack may eventually turn into depressions that will disrupt the integrity and symmetry of the floor.
- Using a hammer and chisel, work into the defective space and widen the cracks. If, when inspecting the floor, you find a hidden chipped part, remove the damaged surface completely. Cracks can be deepened using diamond wheels for cutting reinforced concrete.
- Treat the floor near the defect. A vacuum cleaner will help clean the surface from dust, also clean it with a brush and soapy water. Next, rinse the floor with water and proceed to the next step.
- Make a deepening in the crack so that the new solution can penetrate firmly and deeply into all fragile places. In this case, the restored part will last a long time and without problems.
- Now start preparing the solution. Its components should be as follows: sand and water (3:1) with the addition of PVA glue. The resulting mixture should not be too thick, or, on the contrary, too runny.
- Using a trowel, place the prepared mixture into the recess and fill the resulting mass with water. If you purchased a mixture of polymer compounds, wetting with water is not required.
- If the cracks are large, the components of the reinforcement can be visible through them. In this case, you need to clean the surface with a vacuum cleaner and soapy water, and then pour a specialized liquid into the damaged elements to prevent corrosion. In addition, small pieces of wire can be placed in the recesses.
- Prepare the adhesive compound and distribute it evenly over the damaged floor surface. The layer of adhesive solution should not be too thick (about 3 millimeters).
- Continue filling the cracks until the liquid begins to dry. Fill the surface gradually, without rushing: in this case, the liquid will fall more evenly on the surface.
- Level off the top of the applied compound. Use a rack to skim off excess mixture.
To properly seal cracks in a concrete base, it is better to make them wider
Industrial method
- grinding machine,
- metal ironing board,
- wire,
- wooden slats,
- trowel,
- paint brush,
- putty knife,
- special gloves,
- brush,
- chisel,
- hammer.
Shrinkage cracks in aerated concrete
Cracks caused by water, or rather from its constant exposure
The photo shows a repaired crack in concrete.
Repair with cords and tapes
This is one of the most reliable, but quite expensive methods of concrete repair. Therefore, it is used mainly in swimming pool bowls, in underground parts of foundations and external surfaces of walls of buildings and structures.
Advantages of the method:
- The ability to select a material option for any defect;
- Complete tightness and durability;
- Possibility of installation in low ambient temperature conditions.
Required tools and materials:
- See the first two points of the previous method;
- Self-expanding repair: tape, cord or mat;
- Polyurethane sealant “for concrete”, mounting gun;
- Bench chisel, brush, paint brush, foam rubber.
The sealing technology is thorough, so before sealing cracks in concrete using a self-expanding material, carefully read the recommendations:
- Measurements are taken of the depth and width of the crack, based on the results of which an option for the type of self-expanding material is selected;
- The crack is widened and dusted using a grinder, chisel and vacuum cleaner;
- If the defect depth is up to 60 mm, you can use a self-expanding tape measuring 18x23 mm;
- Important! Self-expanding materials are not subject to caulking or other types of installation reinforcement;
- After installing the tape, cord or mat into the crack, the free space is filled with polyurethane sealant, and the protruding material is smoothed out with a spatula.
If you need to cover up cracks in a swimming pool or water tank, in an underground section of the foundation or on the external walls of a building where high-quality waterproofing is required, then the methods described above will not be enough to ensure the strength of the structure.
To treat the opening in such places, a special composition is usually used. The cost of such repairs is an order of magnitude higher than conventional methods, but in a humid environment it is completely worth it.
These materials ensure complete sealing of the crack, so the coating will last for many years.
Repairs are possible both indoors and outdoors, at any time of the year.
Repairs must begin, as in previous cases, by processing the opening. After all excess has been removed and the surface of the furrow has been cleaned with a vacuum cleaner, the width and depth are measured.
This is done in order to choose the right self-expanding cord for repair.
A cord is placed in the cut, which should lie without coercion, freely.
There should be 20-30 mm left to the bottom and top of the furrow so that the cord will expand further. Whatever type of cord you choose, you cannot force it.
Now polyurethane sealant is applied on top of the cord, the surface of which is smoothed with a spatula. The glue that has come out of the seam is removed with a sponge.
Usually it is written on the packaging which material is preferable for a given type of cord or tape; strictly follow the recommendations.
If you will use this material in relatively dry rooms, where waterproofing serves only for insurance, the finishing can be done using cement mortar.
Today the range of such products is quite wide.
This material consists of polymer resins and modified clay, and also contains bentonite material or its analogue, which binds the surfaces together and seals them.
As for the release form, they are as follows:
- Cord - the material is used for repairing shallow cracks of 30 - 50 mm;
- Tape - the material is placed in cracks 20 - 50 mm wide and up to 150 mm wide;
- Paste - sealant is used to treat small furrows;
- Mats hold together layers of concrete screed, and when the old coating is old, a new layer is laid.
We invite you to familiarize yourself with Concrete for winter pouring
Selection of repair mixture
Before repairing a crack or pothole in a concrete floor, you need to decide on the sequence of actions. First of all, the floor is carefully inspected and its condition is assessed, and the extent of the defects is determined. This stage can be carried out only after removing all debris and dust, which may interfere with adequately assessing the required degree of repair work.
- The floor is flat, but very dusty, there is one pothole or several small ones, small cracks/protrusions are clearly visible. In this case, you can fix it yourself without major expenses.
- There are cracks more than half the length of the short side of the entire floor, longitudinal-transverse or more gravitating towards the perimeter. In this case, self-repair is carried out using proprietary thixotropic mixtures.
- The floor is completely deformed - there are depressions and bulges throughout the entire area that require a serious approach.
- The presence of long gaping cracks located crosswise or diagonally - in this case, a major repair is carried out, having previously assessed the ceiling.
It is worth noting here that a carelessly poured screed can be leveled with a liquid leveler (only after sealing the cracks) or with a special milling machine. It is prohibited to use milling machines in residential areas - they create a lot of dust and operate loudly.
The simplest option, which involves a minimum of costs and actions.
- Using a grinder equipped with a diamond wheel, saw down the potholes in the shape of a rectangle with a minimum of 2 centimeters on the sides. The depth of the cut is equal to the depth of the pothole and 1-2 centimeters plus (if the floor is dusty, more, if dense, less). All protrusions must be knocked down manually or with a hammer drill to the depression.
- At the designated location of the pothole, use a hammer drill and a chisel to select a recess. If the defect is small, you can knock it out with a 200 gram hammer and a chisel tipped with carbide. It is forbidden to hit a dull chisel too hard: this will cause cracks to appear.
- Blowing out the pothole with a vacuum cleaner, removing residual dust.
- Coat the recess with a layer of any primer.
- After the primer has dried, the recess is filled with a thixotropic compound (made independently or purchased), leveled using a rule, and the required period is maintained.
The branded repair composition must be mixed with pre-sifted quartz sand; the proportions are indicated in the instructions on the package. Sometimes thixotropic mixtures in small volumes are supplied with a package of sand in the required volume.
All sawing work is carried out wearing a respirator, headphones, safety glasses, gloves, and closed work clothing. Windows should be open, doors to other rooms should be tightly closed.
Defects of this type are first sawed along the entire length with a grinder to a depth of 2-5 centimeters and a width of 1-2 centimeters. The minimum/maximum values for the width/depth of the cut are determined based on the condition of the floor. The cut is thoroughly blown and dust is removed.
To seal cracks in dense floors, you can use homemade repair solutions, but if the concrete is dusty and easy to cut, it is better to choose a branded thixotrope and primer. Small cracks are sealed by applying a primer and filling with a thixotropic compound. More serious cracks need to be repaired like gaping cracks.
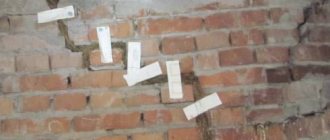
To check the depth and danger of cracks, you can do this: if possible, 2-6 months before repair work, stick paper strips on the cracks every 50 centimeters. If the paper is not torn by the time of repair, this crack can be considered a shrinkage crack and should be filled as a small one; if the paper is torn anywhere, the crack is deformation and must be treated as if it were a gaping crack.
A gaping crack is one whose width is more than 2 millimeters. Although, in this case, it is not the size that is more important, but the dynamics of the defect - whether the crack goes further or stands still. To determine the degree of destruction of the floor and the entire building, it is better to invite professionals. If everything is fine with the building and the problem is only a crack in the floor, everything can be fixed.
- I cut through the defect 5-6 centimeters deep and 2-3 centimeters wide.
- Knocking down the edges of the cut until a triangular hollow appears.
- Blowing the cut, removing dust, treating with a primer.
- When the primer has dried, markers are mounted in the cut. Each marker is held vertically by hand, the hollow is carefully covered with thixotrope, and leveled with a rule.
- When the thixotrope has set, the markers are removed, and a seam is cut along the holes from them to the previous width.
- A damper cord is placed in the seam (Vilotherm or similar is suitable).
- Seal the seam with polyurethane or silicone sealant.
We invite you to familiarize yourself with the proportions of concrete for floor screed, table, proportion diagrams
Thin metal rods act as markers; bicycle spokes are good for this role. Before installation, it is advisable to coat the markers with grease to make them easier to remove later.
A major repair of a screed is not just a reconstruction, but an almost complete replacement of the coating. This measure is considered extreme and involves a lot of labor, time and money. Major repairs are done when it is planned to install a new finished floor or underfloor heating system, and the moisture test gave a negative result.
If minor repairs are not urgent and a new screed needs to be poured, then the calculations must be carried out accurately. When carrying out repairs that are carried out in a room adjacent to other living rooms, you need to make sure that it is at the same level and make sure that the final coating does not exceed the height of the door threshold. Calculate the screed from the bottom up, leaving a margin on the larger side.
The base floor will be lower, but then its height can be compensated for by the finishing floor. Above the reinforcing mesh, the layer of mortar must be at least 8 millimeters thick.
- Waterproofing – 1 millimeter.
- One layer of expanded clay bedding - 25 millimeters.
- Mesh reinforcement – 6 millimeters.
- The thickness of the concrete above the mesh is 8 millimeters.
- Mastic – 1 millimeter.
- The plywood layer is 8 millimeters.
- The glue layer is 1 millimeter.
- Laminate – 16 millimeters.
The result is 66 millimeters - which means you can add a thicker layer of expanded clay or opt for more durable plywood.
Markers for screeds
The screed is leveled using plaster or pin rack markers. Both types are lined with a small volume of cement-sand mixture: prepared pins along the walls in increments of 50 centimeters and in the corners, plaster markers along the parallel of the short wall (the first at a distance of 30 centimeters from it, then in increments of half the width of the rule).
Pins are made from any available materials; plaster markers are usually purchased. It is more difficult to maintain a horizontal surface using pins, since it is not possible to use additional support for the rule.
The height on the pins is marked with a bubble level and a tightly stretched cord, starting from the corner closest to the door in the diagonal plane. Then a second diagonal is made along the primary cord, the cords are pulled along the perimeter, and marks are made on the wall markers. To speed up the elevation, you can use a laser level.
Before making major repairs to the screed, you need to carefully study all stages of the work. To do this, they use certain tools and materials, which also need to be taken care of in advance.
- Laying a layer of waterproofing (plastic film is suitable) with an overlap of 5 millimeters and an extension to the walls of 15 centimeters, taping the joints.
- Filling the floor with expanded clay and leveling it with a rolling roller. You can tamp with a manual, metal or wooden tamper.
- Installation of reinforcing mesh with an overlap of 1-2 cells, a distance of 4 centimeters from the wall.
- Priming markers. When using pin markers, after hardening the underlayment marks off the height.
- Mix a viscous cement-sand mixture in a ratio of 1:3 in portions of 10-20 liters. Thixotropic additives may not be introduced. With each portion, fill the space between the markers, level them using the rule, starting from the far wall (supported by adjacent markers or along a cord). The rule must be kept obliquely so that the excess solution is removed into the empty cell. The next portion is kneaded only after the previous one has been completely leveled.
- When the solution has hardened, the markers are removed and the grooves are sealed with concrete mixture so that the sealed and dried recess is not noticeable at all.
- Excess waterproofing is not touched, but is cut off only after installing the baseboard.
Instead of plaster markers, wooden joists may be used under the subfloor. They should be the same height and even.
Dust removal
If everything is in order with the floor, but due to surface wear it is dusty, you can quickly and efficiently eliminate the defect with special impregnations. If we are talking about a subfloor or coating in various types of outbuildings, then any domestic impregnation will be useful - Elakor-PU, Neomer-LP, also imported Ashford formula, etc., which provide a layer of 150 microns.
It is better to impregnate concrete finished floors in living rooms, workshops, and garages with the following substances: Elakor-ED, GruntElast-PU, Retroplate. Here a layer of 250 microns is created.
Repairing a concrete floor is a difficult task, but it can be done, especially when it comes to minor defects. When it is necessary to eliminate serious deformations, it is better to contact specialists who can assess the extent of damage and choose the most cost-effective and labor-intensive method of eliminating the problems.
Repair mixtures were developed specifically to carry out local repair of cracks and chips, waterproofing of damaged surfaces, without replacing the damaged area of concrete. All repair mixtures, including Ceresit, are capable of restoring the technical and operational characteristics of concrete in a damaged area to their original ones.
- Frost resistance.
- Immunity to contrasting temperatures.
- Vapor permeability.
- Long service life of the repaired area.
- High coefficient of penetration of the mixture into concrete.
- Antiseptic and water-repellent characteristics.
Repairing a damaged area of concrete surface
| Industrial method | |
| Injection | It is necessary to introduce polymer materials into cracks and voids, injecting them there using “injections”. This method makes it possible not to partially replace the concrete structure. It is often used when deciding how to repair cracks in a concrete wall. |
| Special repair composition for sealing cracks in concrete | In this case, the damaged surface is treated with a solution consisting of a cement-sand mixture and a polymer additive (furyl alcohol and sulfanol). After it dries, it is necessary to apply polyurethane sealant on top. |
| Shotcrete | Damaged areas are treated with the same material. An additional layer is applied to the surface, consisting of: · water; · cement; · fractional sand; · organic additives (bitumen, resin, latex). Remember, this method increases the mass of the structure, thereby creating additional pressure on the foundation. |
Acceptable crack sizes
Measuring the width of a crack in concrete.
There are standards that define the limiting parameters of the cracks that form in the concrete layer. It is important to take into account the operating conditions. Cracks in concrete require repair if they are characterized by a larger opening width than specified in the document DBN V.2.6-98:2009:
- deformation cracks, shrinkage up to 0.5 mm wide does not need repair if the concrete is not exposed to negative external factors (freezing, moisture, temperature changes, ultraviolet radiation, etc.), i.e. the structure should not be affected weather conditions, since it is located indoors;
- on the street, the concrete layer may deform slightly, the maximum crack size is 0.4 mm, in this case the coating is affected by negative factors: precipitation, ultraviolet radiation, etc.;
- if the concrete structure is operated in the most aggressive conditions, then repairs must begin when cracks 0.3 mm wide appear;
- restoration of the coating should be carried out if leaks formed as a result of concrete deformation have reached 0.2 mm in width; such restrictions apply to structures with reinforcement inside.
Failure to follow the rules for repairing concrete pavements can lead to accelerated expansion of cracks. Conversely, it is not always necessary to begin restoring a structure if it is not affected by negative external factors. If any deformation cracks appear, their parameters should be monitored. Until significant expansion has occurred, there is no risk of complete destruction of the coating.
We suggest you read: Is it possible to insulate a bathhouse from the inside with penoplex?
It should be borne in mind that horizontal cracks, which are characterized by minimal opening, do not require intervention. They are harmless and cannot lead to the destruction of the structure. However, there are conditions under which there should be no gaps in the concrete layer:
- operation at facilities with increased requirements for the quality and durability of coatings;
- when the structure comes into contact with liquids and gases, since it must be sealed and reliable.
Repair with epoxy resin
Epoxy resin and epoxy repair compound are also used to seal cracks in concrete.
First you need to open up the opening and remove loose concrete and chips. The width of the groove should be no more than 25 mm and no less than 4 mm.
Every 400 mm along the crack you need to make transverse grooves 150 mm long. Using a vacuum cleaner, collect all debris and dust and treat the seams with a primer.
Metal brackets for reinforcement are placed in the transverse grooves that were made earlier. Next, according to the instructions, dilute the epoxy solution and add a hardener to it.
The epoxy solution is sprinkled with sand on top, and after an hour the sand is removed with a vacuum cleaner.
Repairing a crack in concrete with epoxy resin is quite economical and takes very little time to dry. In addition, this treatment of cracks prevents their further movement.
It can be used for dry screed.
If you need to apply an epoxy resin coating to a liquid environment, you do not need to add sand to the mixture. You should also not sprinkle sand on top.
Features of sealing cracks in aerated concrete
When it is necessary to restore a concrete coating with a guarantee of a long period of operation without further destruction, resin-based compositions are considered. They are characterized by good adhesion, increased strength, and do not allow cracks to increase in size. In addition, such mixtures are versatile. Another advantage of sealing cracks in concrete floors and walls using this method is the rapid drying of the composition.
Prepare tools and materials:
- containers for preparing the solution;
- spatulas;
- grinding machine, diamond-coated discs;
- vacuum cleaner;
- primer;
- resin-based composition;
- fine sand.
Sequence of actions when repairing concrete pavement:
- The crack is being repaired. At this stage, use a chisel and a hammer to remove deformed areas of the coating along the crack. The recommended leak width is 5 mm or more.
- To strengthen the coating, transverse grooves are created in this area using a grinding machine and a diamond disc. They should be located in increments of no more than 400 mm. The length of each groove is up to 150 mm. Their width corresponds to the thickness of the diamond blade.
- Use a vacuum cleaner to remove dirt and construction dust.
- The grooves are fixed using special brackets.
- The side surfaces of the crack are treated with a primer. Without this material, sufficient adhesion strength will not be ensured.
- Considering that the epoxy resin mixture hardens quickly, it is necessary to prepare it immediately before use. The composition must contain sand and a hardener, in addition to resin. The ratio of components is indicated in the mixture manufacturer's instructions.
- The crack is filled with epoxy resin. Hardening time: 10 minutes.
- When the gap is filled, sand is sprinkled on top of the mixture. It is removed before finishing work.
Epoxy resins for sealing cracks in concrete.
If cracks in concrete need to be filled, higher strength materials should be considered. These include:
- epoxy resin ED-16 and ED-20, the kit does not include a hardener, so it is purchased separately (price up to 500 rubles), the cost of the base material is 2000 rubles. for 3 kg of resin;
- Epoxy 520 (manufacturer Spolchemie), price 3500 rub. for 5 kg;
- UZIN KR 416 is more expensive than its analogues (RUB 2,700 per 0.75 kg), but is characterized by increased reliability and is produced in Germany.
You can repair a cracked concrete floor with a mixture of cement and sand with the addition of styrene-butadiene latex. Small hairline cracks in concrete are covered with cement mortar. To eliminate wide and deep formations in structures, epoxy resins or sealants are used, and self-expanding tape and cord are used.
The cracks are reinforced with wire scraps. For concrete structures that are exposed to moisture, liquid glass would be suitable. It replaces epoxy resin in this age-old repair method.
Special compounds are used for repairs. The repair mixture for concrete includes cement-sand mortar, polymer additives made from alcohol and sulfanol. They can be replaced with PVA glue. Ready-made repair compounds are suitable - Reper, Lugato, Minuten Mortel, Constant Granito glue.
The above methods apply to production repairs. If you need to repair small cracks at home, then watery cement “dough” and proprietary repair mixtures are used for this.
Epoxy resin is also effective for cracks in concrete. Liquid “dough” is used for defects no more than 3 mm, and for larger ones a proprietary solution or a special mixture is used, which consists of 1 part Portland cement, 3 parts each of water and sand, as well as PVA.
Instructions for reproducing independent restoration work:
- Before starting work on sealing with cement-lime mortar, preliminary preparation is necessary. First you need to check the crack itself to see if there are any chips nearby, since in the future they can become shallow pits.
- Next, using a chisel and hammer, we go over the entire surface to make it wider. You can also use a grinder. If during this work a hidden chip appears, then this piece of concrete must be removed immediately.
- Then you need to clean the surface using water, a brush and a special product. In order to remove dust and dirt, you can also take a vacuum cleaner. Using a sponge, remove the remaining water.
Expanding cracks using an angle grinder
- To ensure that the solution for sealing cracks in concrete fills the entire area and holds strong and durable, we make the cracks deeper using a spatula up to 5 mm. The solution is diluted from 3 parts sand and 1 part cement. Be sure to add PVA glue. In this case, the solution is not liquid, but of normal thickness.
- You need to fill the cracks with the solution using a trowel, and then you need to wet the repair areas. Such actions with water are not necessary if you are using a polymer composition rather than a solution.
Freshly repaired crack in the floor
- If the opening width of cracks in concrete is larger and reinforcement is visible in it, it must be cleaned and treated with a solution that protects against corrosion. To secure it into the grooves, you need to lower pieces of wire of the same length, the diameter of which is approximately 4 mm. Then we apply the adhesive composition with a brush and spread it over the surface of our uneven surfaces. The layer thickness is about 3 mm. Then everything is filled with the solution; we don’t wait for the composition to dry. It is necessary to pour it in stages so that the solution fits tightly.
- Using a wooden lath, we level the surface, pushing it towards us and from side to side. When the hole is very deep and large, the solution must be poured in several layers, with the next layers softened with a little water. You can perfectly level the surface using a metal trowel or a regular trowel.
Repairing cracks in concrete - smoothing
- Afterwards, the excess solution is removed with a spatula.
- It should be noted that the layer of mortar should be approximately 0.5 mm higher than the floor surface, since the mortar will shrink after drying.
Elastic sealant
If you are wondering how to seal cracks in concrete more reliably and durablely, then know that it is better to use an elastic sealant. It is suitable for repairing both small and large splits. The repair process using this material is no different from that indicated above.
The advantage of elastic sealant is its tendency to dry quickly. However, when compared with mortar, this method of repair will be more expensive, since the price of the main material is high.
Cement mortars
When deciding how to repair cracks in concrete, such materials are most often considered. They are affordable, easy to prepare, and durable, provided the solution mixing technology is followed. With their help, you can fill shrinkage leaks, which are characterized by a small width. It is important to properly prepare the base surface. This will ensure high adhesion of the cement mortar to concrete.
Repairing a crack
Regardless of what materials you plan to use to fill the gap, the preparatory stage is always the same. Thus, it is recommended to joint the deformed area. If it is filled with a mixture for sealing cracks in concrete without preparing the base, then as a result the mortar layer will be deformed. You need to follow the instructions:
- Check the edges of the crack for strength. If the concrete in these areas has crumbled, it is removed. The jointing is carried out along the entire length of the gap. Its width after removal of exfoliated concrete should be 5 mm or more. Work at this stage is carried out using a chisel and a hammer. You can use a spatula.
- The surface is cleaned of dirt.
- Remove dust using water. In addition, moistening the crack will improve the adhesion of materials when applying the solution.
- Remove excess liquid.
- A cement-sand mixture is being prepared. You will need sand (3 parts) and cement (1 part). To increase the strength of the solution, PVA glue is added.
- Fill the crack with the mixture. It is important that the solution covers the entire surface of the concrete in the recess.
- While the cement dries, it is periodically moistened with a small amount of water.
We suggest you familiarize yourself with How to seal cracks in a brick oven
Filling the hole
To repair a large crack or hole in a concrete wall, follow the instructions:
- The resulting hole in the coating is cleaned of contaminants and the crumbling material is removed.
- An anti-corrosion compound is applied to the walls and bottom of the hole. This need is due to the fact that there is reinforcement inside, which will begin to oxidize upon contact with moisture.
- The wire is being laid (the diameter can be 4 mm or more). It is cut into pieces, the length of which must correspond to the diameter of the hole in the concrete.
- The surfaces are treated with a primer composition, which will ensure increased adhesion of materials. A layer thickness of at least 3 mm is considered sufficient.
- Filling of leaks is carried out immediately after treating the surfaces with a primer. Then the coupling will be the best. If the hole is shallow, it can be filled immediately. In cases where it is large enough, restoration of the coating is carried out layer by layer with breaks for treating the solution with water from a spray bottle.
- The surface is leveled. To do this, use a rail. Movements are performed from side to side.
- When the mixture has set a little, remove its excess.
- The surface must be covered with a plaster composition. This will provide additional protection. Deep holes are leveled with a grinding machine.
It must be taken into account that the cement mixture is subject to shrinkage during the drying process. This will lead to slight subsidence of the solution layer. To avoid such consequences, it is recommended to use a little more mixture when filling the crack. The described method is suitable only for cases where it is not necessary to ensure the tightness of the coating and there are no increased requirements for surfaces.
In addition, cement compositions cannot be considered as an effective measure providing long-term results. The coating will soon continue to deteriorate. This means that the cement composition should be used only as a temporary measure.
Injection
If there is a crack in the concrete, alternative options are also considered. Injection involves the need to introduce a high-strength solution (waterproofing mixture, epoxy composition) directly into the thickness of concrete, where the crack originates. This method is most effective if water comes out through the gap.
- To repair cracks in a concrete floor, prepare holes of sufficient depth. They should be staggered on both sides of the crack and at an angle of 45° relative to the crack.
- Packers are installed. This is the name of the special tubes through which the solution will be delivered into the thickness of the concrete.
- The mixture is poured into the holes.
- The tubes are removed.
- The surface is sealed with a solution.
Introduction of high strength mortar into the thickness of concrete.
Elastic sealant
To repair damage to concrete surfaces, silicone sealant is usually used. The sequence of work when using elastic sealants is the same as when working with cement mortar.
The advantage of using sealants is the increase in the speed of work due to the rapid drying of the material. Minus: the price of the material is noticeably higher.
An elastic sealant can also help seal cracks.
The most popular in this case is silicone glue - sealant. This sealant is used both for small cracks and for those whose width is quite large.
The repair process that requires the use of a sealant is no different from a repair that uses a concrete compound.
First you need to clean the crack from dirt, make grooves for better bonding of the material to the surface. When applying glue/sealant to the surface, it must also be moistened.
The sealant, unlike the cement mixture, dries in a short time, which makes this material much more convenient.
However, the sealant is noticeably more expensive, so not everyone can afford such repairs.
