Home / Design solutions / Ceiling design / How to lay parquet boards on a concrete floor?
Parquet boards have become a favorite material for decorating both private houses and apartments. If in your home made of logs or timber the process of laying flooring usually does not raise any questions, then not everyone knows how to lay a parquet board on a concrete floor in an apartment building. Meanwhile, installation technology has its own nuances, which we will consider in this article.
Materials and base - what should they be?
In order for the parquet board based on a natural floor to last the period stated by the manufacturer, it is important to adhere to certain rules regarding the preparation of the base and materials. We are talking about the following indicators:
- The norm of deviations of the subfloor surface from the horizontal plane. An important parameter, it assumes deviations of no more than 2 mm for every 2 meters of length, regardless of direction.
- The maximum inclination of the concrete floor surface to the horizon. It also has implications for the future use of parquet flooring. The permissible norm is up to 0.2% of the length of the room.
- Subfloor moisture level. The concrete screed must be completely dry before installing the parquet board. The permissible humidity level is up to 5% by the time the floor is installed.
- Temperature and air humidity level in the room where installation work is carried out. The parameters of the tree will depend on this indicator. Humidity should be between 40-60%, temperature - from 18 to 23 degrees above zero.
The quality of the base directly affects how long the parquet will not require repair
And the last no less important indicator is the compressive strength of the screed. The strength of concrete depends on it. The norm is 150 kgf/cm2, typical for concrete M150 and above.
It is worth considering that a damaged concrete screed will require mandatory renewal using self-leveling mixtures.
Laying out the coating
Before laying the parquet, it is necessary to keep it indoors for several days. During this time it takes on working humidity. You will also need a notched spatula for this work. The tooth size is 3-4 mm. The width is small - 2-3 rows of dies. You will need a piece of parquet flooring - a piece 10-15 cm long and a rubber hammer. This piece and hammer are used when joining block parquet. The piece is inserted into the installed board and hit with a hammer. This way the gap disappears and the parquet is not damaged.
When laying the parquet is finished, leave it until the glue dries completely. The exact time is indicated on the package, but it also depends on the room humidity and temperature. After this, we remove all the auxiliary parts - the bar at the first row and spacer wedges around the perimeter.
Options for flooring on concrete screed and technology
You can install parquet boards either directly on the screed or on wood materials - racks or joists. They do this in three ways:
- adhesive;
- floating;
- using fasteners.
In the first two options, before learning how to lay a parquet board on a concrete floor, it is worth paying attention to the construction of a continuous substrate. It will become the intermediate layer. In the latter option, the boards are attached directly to plywood laid on the base or joists with a distance of 0.3-0.4 mm.
The parquet floor is assembled on a pre-arranged base
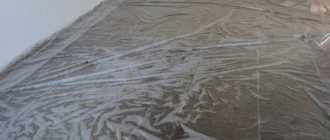
The peculiarities of installing boards on a concrete screed imply the mandatory installation of a waterproofing layer, for example, in the form of polyethylene film - the most affordable material. It is important that the film is laid with an overlap (at least 20 cm) and secured with tape, with an overlap of 10 cm from the wall.
The substrate mentioned above is laid as the next layer after the film. Polystyrene, cork or polyethylene foam are suitable. Just as in the case of the waterproofing layer, the strips of the substrate are fastened together with tape. The most convenient and safest material is considered to be cork as a substrate.
In the case when the choice falls on the adhesive method of fastening, it would be appropriate to use waterproof plywood as a backing. It is attached to the base using self-tapping screws. The device begins by moving from the walls to the center of the room.
Laying plywood backing with glue
An important step is calculating the amount of parquet boards. If it is necessary to trim the last row by more than 5 cm, then the first row must correspond to its width. The slats of the first row are fastened to the wall with a tenon. This is necessary to ensure a tight fit. In this case, the spike on the longitudinal side is cut off.
Three main installation methods
When understanding how to lay parquet correctly, you need to study the basic methods of laying it and choose the appropriate one, based on certain conditions. First of all, the compressive strength of the screed is taken into account - a figure of 150 kgf/cm2, which is demonstrated by a hardened concrete screed M150, is considered normal. Old damaged coating requires updating using self-leveling mixtures.
The main methods of laying parquet slats on a concrete screed are installing a “floating floor”, laying with glue and on logs. The first two methods involve the installation of a special substrate that acts as an intermediate layer. When installing on joists, they usually use plywood attached to the joists (in increments of 30-40 centimeters) or a base.
Features of methods for laying boards on concrete
As noted above, laying parquet boards can be done in several ways. Let's look at each of them in detail.
Installation using fasteners implies additional waterproofing and insulation of the concrete base. As for attaching the slats, the process has much in common with the floating fastening process. To achieve the result, lamellas are chosen with a thickness of 0.20 cm.
Prepared plywood floor on which parquet boards will be laid
The installation technology involves installing dies on logs or a plywood base mounted on logs. The structure based on lags must be leveled, and the elements are attached to the screed using dowels or self-tapping screws. The assembled planks on a plywood base are secured with nails or self-tapping screws, twice the length of the board. They are driven into the grooves of the dies at an angle of 45 degrees without disturbing the installation.
The floating floor installation method also has its own characteristics. The main one is the lack of fastening with a concrete base. The canvas is obtained from dies fastened together, not fixed to the base.
A tight connection can be achieved through a specially designed locking system that does not require additional fasteners. This flooring option is suitable for installation in rooms with normal or low levels of loads that cannot negatively affect the “behavior” of the boards during operation.
The easiest way is to lay the parquet board directly on the concrete base without using plywood or joists. This option is especially relevant when the main requirement for a parquet floor is rigidity.
If the concrete surface is without unevenness and differences, it is advisable to lay the parquet board directly on the concrete
In this case, the adhesive method will allow you to obtain a “blind” canvas, tightly fixed to the concrete screed. To do this, use a special polyurethane adhesive for parquet, avoiding water-based mixtures. For maximum strength, the boards are laid on the base, simultaneously working with the locking system.
In conclusion, we note that for the correct installation of parquet boards on a concrete screed, the main thing is the readiness of the base in compliance with the requirements listed above. As for the choice of mounting method, much depends on the purpose and area of the room. In spacious halls with an increased level of load on the floor, it would be advisable to lay parquet using the adhesive method with additional fixation of the dies with self-tapping screws for strength. In residential premises with a moderate level of load, the floating method will be sufficient, simplifying the repair of individual coating elements if necessary.
This is interesting: Hair styling spray for volume 2020
Flooring Tips and Tricks
If you lay a parquet board correctly, it will serve you for decades. But for this you need to know some small tricks of experienced craftsmen:
Stages of laying parquet.
- Be sure to store the purchased board in the room where you are going to use it. It should rest at room temperature. Then it will not “behave” during operation.
- Buy only high-quality material. Parquet boards are not something you can save money on when renovating. As a rule, parquet of poor quality very quickly becomes unusable. And competent installation cannot correct this deficiency.
- The parquet board should be laid parallel to the window. Then natural light in the room will make the seams almost invisible.
- The junction of different types of floor coverings can be covered with a decorative threshold. It comes in tone-on-tone with the floorboard or in a contrasting color.
- If you are going to change the floor covering in different rooms of the house and plan to join parquet boards with floor tiles, then it makes more sense to lay the parquet first, and then start finishing the kitchen or hallway. The layer of tile adhesive is much easier to control. And this will give you the opportunity to level both coatings in height.
If you follow these simple rules, the result will be a high-quality, durable and reliable coating.
Preparing for work
Requirements for materials and base
The beauty of natural wood is unique.
Parquet can turn your floor into a luxurious element of room decor, provided that the technology for laying parquet boards on concrete is followed. It includes a number of rules and requirements that must be taken into account.
Classic parquet boards are made from solid wood of a certain species:
And as we all know, wood is a rather finicky material, since it is more susceptible to climate change and temperature changes than others.
In addition, it is important to comply with the requirements for the foundation. In our case, the base is a concrete screed, so we will only talk about it.
The quality of the screed must be high.
Important! Regardless of the quality of the parquet board, the method of laying it, the glue used and the method of fixing the coating, the base must be smooth, durable and have acceptable humidity.
Based on this, we can list the basic requirements for materials and foundation:
- Norm of deviations of the base surface from the horizontal plane . This is one of the main indicators of the quality of coating preparation, on which the result of finishing the floor will depend. Maximum deviations of no more than 2 mm per two meters of length in any direction are allowed;
- Maximum inclination of the base surface plane to the horizon . This parameter is also important for ease of use and normal operation of the floor covering. A slope of no more than 0.2% of the length of the room in a given direction is allowed, however, no more than 50 mm of the total difference;
- Humidity of the concrete screed base . If the concrete has not had time to dry, it cannot be covered; in addition, moisture can penetrate into the wood and ruin its quality. Normal base moisture should not exceed 5% by the time work begins;
- Temperature and humidity of the room in which work is carried out . The microclimate affects the parameters of wood, and therefore it must also be standardized. Humidity from 40 to 60% and air temperature in the range of 18 – 23 degrees Celsius are considered optimal;
- Compressive strength of the screed material . This parameter determines the minimum strength that concrete must exhibit. A concrete strength of at least 150 kgf/cm2 can be considered acceptable, which corresponds to concrete grade M150 and higher.
To accurately determine the moisture content of materials, you can use a special device - a hygrometer.
Important! The screed must have time to gain its design strength, for which you must wait at least 28 days from the moment the floor is poured. It is impossible to speed up the process by heating or additional ventilation of the concrete.
Preparing the base
The photo shows an example of a smooth screed for parquet.
As already mentioned, special attention is paid to preparing the base for parquet. Therefore, we want to examine this topic in more detail.
There are two options - an old screed and a floor that requires concreting. In the first case, it is necessary to inspect the old floor and, if necessary, bring it into compliance with the requirements listed above. If there is no screed, you will have to build it yourself or with the help of specialists.
As a rule, rough screed is present in apartments. Now you need to check its quality and evenness.
The first step is to check the floor using the two-meter rule for level differences from the plane. To do this, the rule is applied to the floor in different places and different positions, measuring the gaps that appear between the ruler and the surface. We remind you that the norm is 2 mm per 2 meters.
Evenness is checked using the aluminum rule.
If abnormal changes occur sporadically and are caused by local bumps or potholes, then you can limit yourself to scraping or grinding the concrete surface in these places with a coarse abrasive. You can use a grinder with an emery wheel.
If there are numerous differences, then it will be more expedient and easier to level the floor using a self-leveling mixture, which can be purchased at any hardware store. Before using the mixture, the floor is cleaned of dust and dirt, primed with a special compound to increase adhesion, the solution is prepared according to the manufacturer's instructions and poured onto the floor, leveling it with a needle roller.
The minimum thickness of the layer, depending on the composition of the mixture, can be from 1 to 3 cm. The leveling layer must also have time to gain strength and dry. The ripening period of the material is indicated on the packaging and usually ranges from one to several days.
Self-leveling mixture is an effective way to prepare a screed.
It is also possible to level the floor using joists and plywood, but we are considering laying it on concrete, and therefore we will leave this method for another article.
Important! When the surface material has fully matured and reached its design strength, it is necessary to ensure that its moisture content does not exceed the permissible value. To do this, it is better to use a special hygrometer, and if you don’t have one, apply a piece of plastic film to the floor for a day, and then look at the surface that was in contact with the floor (the presence of condensation will indicate increased humidity).
The defective area is expanded and filled with repair solution.
If the old screed has significant defects - cracks, potholes, holes - they should be eliminated. Cutting reinforced concrete with diamond wheels will allow you to remove illicit areas of concrete around the defective area, which can then be filled with new mortar and leveled. If it is necessary to lay new pipes or risers, diamond drilling of holes in concrete with special crowns is used.
Preparatory stage of work
Any job, especially something as important as laying parquet, begins with preparation. And, first of all, the rough foundation is subjected to the preparation procedure. It is carefully leveled - for this you can use self-leveling mixtures that are poured into the screed. The easiest way to level a wooden floor is with sheets of plywood.
Leveling the floor with plywood
On a note! The permissible level of curvature of the subfloor cannot exceed 2-3 mm. It is easy to determine - just lay a long building level in different places of the base, finding out whether there is a gap between it and the floor, and how big it is.
Also, the subfloor must be cleared of debris and dried. Otherwise, the floors will eventually creak, “walk,” and excess moisture will ruin the coating itself.
Parquet laying
Let's move from theory to practice of laying the coating.
The price of a professional installer is quite high, and therefore we suggest installing the coating yourself.
Our instructions will help you with this:
- The prepared floor surface is cleaned of dust and dirt, foreign objects and furniture are removed from the room;
The floor is cleaned of dust and dirt.
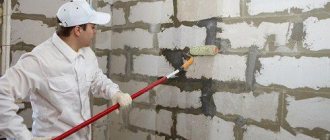
- The screed is primed with a special primer, usually adhesive. Often the optimal primer material is indicated on the adhesive packaging. The primer is applied with a brush or roller to the entire surface and wait for it to dry;
The surface is primed.
- Then you should prepare the glue according to the manufacturer's instructions. As a rule, a hardener is added to the oil substance and mixed;
Mix the glue components.
- The adhesive is applied to the floor surface with a notched trowel, as when laying tiles. Then the parquet board is pressed into the glue layer and leveled. For convenience, you can stretch beacons in the form of threads at a distance of one board thickness from the floor;
The planks are pressed into the layer of glue.
- After laying two to three rows, the glue is allowed to dry, then work continues. The boards should be adjusted to each other as tightly as possible, using a mallet and puffs;
This is interesting: Laying soft tiles with your own hands step by step 2019
The parts are adjusted with a mallet.
- A deformation gap of 10–15 mm should be left between the coating and the walls for future temperature expansion. After laying the covering, the gaps are filled with a cork expansion joint or elastic sealant;
A deformation gap is left between the wall and the coating.
- When the installation is completed, the floor surface is scraped, sanded and puttied with a special putty that will close the gaps between the boards;
The surface of the parquet is sanded and puttied.
- Finally, the floor is primed and sealed with three layers of varnish. Sometimes you can limit yourself to impregnating the wood with oil or opening it with wax, but varnish is considered more durable and resistant to wear.
At the end of installation, the coating is opened with varnish.
Important! The parquet board should be brought into the room in advance so that it has time to acclimatize. A few days or a week is enough for this.
How to lay block parquet?
Step 1. Traditional preparation of the rough foundation is performed. Work is underway to apply coating waterproofing and dry this layer. Next, the parquet adhesive is mixed according to the instructions. The best mixing can be achieved if you use a construction mixer.
Preparation of glue for parquet
A construction mixer is used for mixing
Step 2. Apply glue to a small area of the floor using a wide notched trowel. It is impossible to coat the entire floor, since it will be impossible to move on it, and the adhesive mass sets quite quickly.
A notched trowel is used to apply the adhesive.
Step 3. The first parquet boards are laid along the far wall in accordance with the selected pattern. In this case, a small gap of 10 mm remains between the coating and the walls.
The process of laying block parquet
Step 4. Parquet strips are laid in accordance with the selected pattern. When laid with glue, they are pressed well to the base. During installation, you must ensure that there are no gaps between the planks.
How to lay block parquet
Step 5. In this way, the parquet floor is laid out over the entire area. It is important to ensure that the glue does not get on the material itself - in case of such a disaster, it must be removed immediately.
Laying parquet boards on a concrete floor
Parquet has always been considered the height of chic. It is not for nothing that in all noble houses there was parquet on the floor. Merchants and nobles, and even the Emperor himself, paid tribute to parquet flooring. But before you admire it, you need to lay it correctly. There are a number of rules that need to be taken into account, otherwise the expensive coating will turn into an inconspicuous and unpleasant sight.
REFERENCE! Whatever parquet you choose, whatever the installation method, you must adhere to the technology.
The technology of such installation
The most important thing in all parquet laying technology is a high-quality concrete base. This requires special patience; this procedure takes a lot of time and effort. It turns out that laying parquet boards is easier than preparing the base. But alignment is very important. After all, parquet is not some kind of linoleum or laminate, which easily fits on almost any base. Why is the issue of making the base even and rigid so urgent? Parquet boards behave differently than regular boards. If the board is hard and large in size, but on an uneven surface it begins to “play”. As a result, shear and fracture processes operate at the joints, which will certainly lead to the lock collapsing and detachment from the glued base.
For parquet to last for decades, the following conditions must be met:
- We remove dirt and dust from the surface. We use a brush or vacuum cleaner, sometimes you have to work with a rag. Using a level, we determine the depressions and heights;
- Using sandpaper and an electric sander, we smooth out the bulges, and paint the areas with depressions with a primer. Apply the primer in four layers and let each layer dry. Next, we measure and align with the general floor;
- We clean the floor thoroughly and carefully measure it.
If the errors in the floor level are within normal limits, you can begin laying the parquet floor. If, despite all efforts, it was not possible to level the floor, then you should use a self-leveling self-leveling floor. If the base of the floor has been brought to the required quality, then you can lay the parquet directly on the concrete using glue. This will speed up the procedure, and the installation itself will be of higher quality than using a wooden backing.
IMPORTANT! There are two different types of glue for gluing parquet flooring. In the first, acrylic resin is used as a base, and the second is a polyurethane-based adhesive made of two components.
Both options have a high degree of adhesion, which will save on the purchase of expensive brands of glue. Before you start laying the first two rows, you need to insert stop wedges along the wall. They are designed to create a gap between the wall and the parquet board. Since the glue dries very quickly, it should be prepared in small quantities and used immediately. Apply the composition using a notched trowel. After this, the first board is laid with a tenon directed towards the wall. Not only must glue be applied to the supporting surface, but the lock itself must also be glued. This is necessary for gluing at the joints.
Subsequent rows should be trimmed. Make the layout offset by one third of the length in relation to the row in front.
Using glue
This technology differs in that the grooves with tenons are glued together. The main thing you need to know is that you cannot buy water-based glue, otherwise the material will soon deform.
Glue must be applied along the entire length of each groove. If diagonal installation was chosen, then work begins from the corner, and if longitudinal, then from the wall farthest relative to the entrance door.
Attention! Diagonal installation looks more aesthetically pleasing, but it is associated with more costs (therefore, it will cost more) and installation difficulties.
Prices for flooring adhesives
Flooring Adhesives
The coating may develop stains that cannot be washed with a damp cloth. To remove such stains, special means are used, but there are also traditional methods that are more gentle and no less effective.
Attention! It is unacceptable to use acetone in its pure form.
For a more detailed introduction to the installation technology, watch the video below.
Video - Do-it-yourself parquet installation
Let's consider the technology of laying parquet by a person who is doing it for the first time. Actually, the operating technology is almost always the same and was developed many years ago. But the result of its use, the quality of styling depends on the diligence, skills and skill of the person who does it.
Of course, it’s much better to hire specialists and go into your house or apartment only occasionally to look at the work with a master’s eye and make some comments. But still, you shouldn’t discount another option - when the person himself takes up the installation of a parquet floor in his home with his own hands. Let's try to figure out whether this process is so complicated and whether it is within the capabilities of most men, whose hands are not afraid of any new work.
Laying on plywood is good because it is not so labor-intensive and does not cost much.
Laying parquet planks on a subfloor is very similar to the option with plywood and saves money due to the low cost of the technology. But this can only be done in those rooms where there was already a plank wooden floor.
It turns out that in an old home it is optimal to lay parquet on the subfloor, if there was already a wooden floor before and it is still strong and in good condition. In a new apartment, the first two options are suitable. Moreover, if the concrete floor is flat, then it makes more sense to use parquet flooring on plywood sheets. If the base of the floor has significant unevenness, then only use a screed.
Laying on plywood
First, plywood sheets are laid in squares with a side of 750 or 400 mm. The plywood is chosen so thick that it is only one quarter thinner than the parquet strip itself. To do this, whole plywood sheets are cut into individual squares with an electric hand-held compass saw or jigsaw. The cutting should be planned so that no large waste is left.
Thermal gaps of 2 to 4 mm are left between the squares on the floor. But they should be at least 10 mm away from the wall.
Using glue or screws, the squares are fixed to the floor and left in this form for two to three days. Then, if unevenness occurs in the plywood covering, it is sanded.
This is done using a special machine for sanding wooden surfaces.
Then the parquet is laid out on the leveled plywood base in the form in which it will lie as a finished floor.
It will take a few more days (from 3 to 5) for the parquet board to “settle” correctly and for it to equalize the temperature and humidity with the plywood. Only after this the parquet is laid on an adhesive base. After about a week, when the glue securely holds the parquet floor together, final sanding is carried out with the same sanding machine. The subsequent putty prevents microcracks from developing in the wood material. The final operations are priming the floor and covering it with wood varnish.
Before varnishing, you need to give the primer time to dry thoroughly. Moreover, the varnish is then applied in several layers with intermediate drying. This technology makes the varnish coating especially reliable and durable.
Laying on a concrete screed
Before taking on such a difficult and difficult job, it is necessary to draw up a list of materials that will be needed to complete the entire job. This list will include not only materials, but also the necessary tools.
To work from small beginnings to complete completion of the work you will need:
- A container for stirring the solution with a shovel (you can use a concrete mixer);
- Laser or long construction level;
- Stationery knife;
- Long ruler or tape measure;
- Trowel;
- Knitting wire;
- Screwdriver with self-tapping screws;
- Metal reinforcing mesh;
- Profile for aligning the required length;
- Putty knife;
- Rope
To this list, as a matter of course, we should add cement with sand and special additives for the strength of the mortar. There is one big inconvenience in this method - after pouring, the cement mortar screed will have to dry for a long time until it hardens completely. It will take about a month
. Drying time is calculated based on the thickness of the screed. For every 3 cm of mortar layer thickness, about 30 days of drying are required.
Cement mortar screed
To equalize differences in height, it is poured onto a polyethylene film. This is done to waterproof the wood from the concrete and to prevent the solution from leaking downwards. The waterproofing layer will not allow water to escape or be absorbed down from the screed layer, otherwise the solution will not gain the necessary strength. The edges of the film are left so that they rise against the walls. Subsequently, these edges will be covered with skirting boards.
The video provides a master class on laying parquet on a concrete screed. The master’s dexterity and swiftness invite you to take up the task yourself!
Floor layout
We pull the cords along the screws screwed into the floor. We check the horizontalness each time with a long building level.
Alignment by beacons
This step is required! After all, with the help of beacons, the cement mortar can be leveled to almost ideal horizontality. Profile slats are set at the zero level and secured to the floor with self-tapping screws. We install profiles for leveling with suitable spacing.
Reinforcement
Before pouring the solution, it is necessary to lay steel wire reinforcement on the floor. Usually a mesh with a cell of 15x15 cm is used. Adjacent rows of the mesh are laid overlapping and tied together using knitting wire. The reinforcement will further give the cement mortar and the entire floor structure the required strength.
Fill
The first thing when pouring a screed is mixing a solution of cement, water and sand to the desired viscosity. The proportions of cement and sand depend on the brand of cement, but usually 1:2 or 1:3 is used. Details about the proportions of the solution are written below. Viscosity is controlled by the amount of water in the solution.
Then we take the solution from the container with a shovel and apply it to the first span between the profiles so that it is slightly higher than the level of the beacons, with a slide. Using a level lath, using a sliding motion, we level the floor surface exactly along the profiles.
If voids or gaps form below the marked level, add new portions of the solution. Smooth out any unevenness with a spatula. Then we remove the beacons. After everything has worked out with the desired accuracy, let the screed rest for at least 12 hours. After curing, to gain strength, we moisten the solution on top with water. Repeat watering several times.
The video shows the technology for laying block parquet. Craftsmen first make a plywood base and then lay parquet. At the same time, auxiliary machines and tools, and methods of working with them are shown here.
There are several options for obtaining a mixture for concrete screed. The first is to buy a ready-made mortar at a concrete mixing plant, having discussed the required strength with the foreman. The second is to buy a ready-made dry mixture in the store and then stir it, adding water in the right amount. The third, cheapest one is to prepare a solution yourself from cement, water and sand according to the suggested recipe.
Mainly two types of solutions are used:
First:
- We take cement and sand in a ratio of 1 to 3;
- Lime dough at the rate of 1/10 of the amount of cement-sand mixture;
- Water as the required solution viscosity is obtained.
Second:
- Cement and sand in a ratio of 1 to 2;
- Fine crushed stone;
- Water as the solution thins.
The amount of water cannot be indicated in the proportion of the finished solution. Each time its quantity is different. Therefore, water is poured until the desired consistency is obtained “by eye.”
Laying on subfloor
This type of work can be considered one of the most time-efficient. The existing plank floor must be strong, without rot or sagging. The board material is usually pine or spruce.
Let's consider the advantages of this method:
- It does not require much effort or expense to prepare a concrete screed;
- There is no need for prolonged holding at the concrete hardening stage;
Preparing the rough base
Before you begin installation, you need to work on the subfloor. Basic requirements for the existing plank base:
- The boards must be tongue-and-groove and lie on dry joists that are impregnated with an antiseptic;
- Deviations from horizontality of more than 1 mm per linear meter of floor are not allowed;
- The floorboards should not creak when walking, height changes are excluded;
- The floorboards are firmly nailed or screwed to the joists.
If the existing floor meets all these conditions, then you can begin work on laying parquet.
Rules for preparing the base
First of all, the plank layer must be impregnated with an antiseptic composition. Then sheets of plywood are laid over the glue. It is screwed to the floor with screws. The screws should not be located further than 25 cm from each other, and the screws should be screwed in so that their heads sink into the plywood.
Temperature gaps between plywood sheets are usually at least 2 mm. Plywood defects are eliminated, and differences between sheets are removed with a grinding machine.
Premises requirements
The temperature in the room is set to be between 16 – 25°C with a total relative air humidity of 40 to 60%. The absolute humidity of wood floors and walls is not allowed above 7%.
Further work is carried out in the same order as laying parquet on plywood.
You can and should take on the task of laying parquet at home with your own hands! But this matter is not so simple. To succeed, you need at least basic construction skills. Only someone who has dealt with a level, a spatula, a brush and a sander more than once, and who knows how to handle these tools, can do the job well.
Parquet is a classic finish. Many new materials with imitation have appeared, but classic piece parquet is still used. And this despite the fact that it will take a lot of time - without experience, laying an area of 15-20 square meters will take a couple of weeks. And you will spend this time on your knees. And sanding and varnishing also takes a lot of time, there are a lot of nuances - from the choice of varnish to the method of application. In general, this is not an easy task, but it is possible. It’s just better to understand all the difficulties before laying parquet in order to enjoy the process, because this is, after all, creativity. Different people assemble different coverings from the same board. So parquet is truly an individual and unique covering.
Parquet can be different, but we are talking about laying piece parquet. This is the one that is assembled from numerous planks. They are sized so that the length is a multiple of the width - this allows you to assemble different designs. The simplest installation methods are flooring, which is called a “deck”. These are dies that are laid one after another, and the joints of the next row are offset by some distance. Most often the offset is 1/2 the length of the board or 1/3, and the third row is 2/3. The choice depends on the length of the slats. If they are short, then 1/3 will not be enough.
This is the simplest parquet laying scheme - offset decking
The second common installation method is herringbone, but it is too difficult to start learning how to lay parquet. There are also squares and all sorts of different braids, but mastering them is also a difficult thing. Obviously not the first time, when you have no idea what or why you need to do, and in modern interiors, parquet decking is more in tune. This is in classic interiors, and complex schemes are appropriate in large areas, but not in small rooms.
There are two ways to install parquet: with glue and with glue + nails. Laying parquet with your own hands for the first time is easier and faster using glue. And then it will take you two weeks or more to build a small room. And if you nail each board with nails, it will take even longer. You need 2-3 of them per riveting (along the long part) and one at the end. And also tamp each plank so that there is no gap, drown the caps - in general, this is a task for the patient. And the glue holds the parquet no worse than nails. Nails are only needed at the initial stage to achieve good contact with the base and until the glue dries. Then they do not have any functional role. If you press each board well and do not walk on the parquet until the glue has completely dried, then laying the parquet without nails for the first time is the best choice.
How to properly lay a parquet board on a concrete floor, features of laying the material
Parquet boards are one of the popular types of flooring, installed not only in residential premises, but also in offices. The presentable appearance of wood allows you to add luxury and warmth to the interior, creating a special cozy atmosphere. If you will be laying parquet boards on a screed yourself, it is important to learn how to do it correctly. Strict adherence to the recommendations will increase the service life of the floor covering and significantly simplify the maintenance process.
Parquet board on concrete
Features of parquet boards
Sometimes parquet boards are confused with parquet. In fact, these are different materials, and therefore they are laid differently. Parquet consists of wooden planks of relatively small size. Installation is carried out using glue and special fasteners.
It is not recommended to lay parquet on a concrete screed. Natural wood is used for its manufacture, and therefore there is a high probability that the laid coating will attract excess moisture and then become deformed or swell. That is why parquet is always laid only on a subfloor made of plywood, chipboard or OSB boards.
Parquet board structure
Parquet board is a high-tech multilayer material. Each layer has unique characteristics that determine the performance properties of the floor covering as a whole. The thickness of the top layer is on average 6 mm. It is made from valuable wood veneer and then coated with a layer of varnish or oil, which increases its resistance to external loads. Coniferous wood is used to make the bottom layer. You can also purchase parquet boards made entirely from solid wood.
This is interesting: Laying linoleum on plywood 2020
Manufacturers offer parquet boards in various sizes. Its length can reach 2.2 m, width 25 cm, and thickness 14 mm. The boards are connected to each other using special Click system locks. Self-tapping screws or glue can be used to secure the covering to the subfloor.
Attention! While parquet may become deformed when laid on a concrete screed, parquet boards are not afraid of temperature fluctuations and high humidity.
Preparing the foundation
Before laying parquet boards, it is necessary to carefully prepare the concrete base. The service life of the concrete base will depend on how well the base is leveled.
There are a number of requirements for the subfloor:
- There should be no holes or cracks on the screed; it should be fairly level. The permissible deviation for every 2 m is 2 mm;
- The slope of the plane should be a maximum of 0.2% of the length of the room. At the same time, regulatory documents regulate the maximum value: 50 cm;
- The concrete base must be dry. It is unacceptable to lay a decorative coating on a screed that is not completely dry. Optimal humidity is up to 5%. Laying should begin only after the concrete has reached its design strength. This usually takes 28 days.
Attention! To create an optimal microclimate in the room, installation work should be carried out at a temperature of 18 - 23 C and humidity - 40-60%. To control the quality of installation, you should use a level. If the concrete base has cracks and bumps, as well as signs of wear, a self-leveling mixture should be used.
After the concrete screed has completely dried, it should be cleaned of any existing dirt and dust. Then a primer is applied to the surface to give optimal properties. The primer is allowed to dry, otherwise it will effectively protect the boards.
Let's start installation
Before you begin installation, you should decide on the installation method. Preference may be given to:
- Zamkovoy;
- Glue;
- Mechanical;
- Combined.
Attention! Each option has its own characteristics and advantages, which should be carefully reviewed during the selection process.
Castle
This method has a second name – “floating”. The connection of boards is carried out exclusively through grooves and ridges. The use of additional fasteners is refused.
This method makes the flooring repairable. If the parquet board is damaged, the floor can be disassembled to replace the damaged panel. You can do the same if you need to move the parquet board to a new location. Installation work in this case is carried out quite quickly and has the lowest cost.
Adhesive
If you decide to use glue to fix the parquet board, you need to select a composition with suitable characteristics. Preference may be given to:
- Dispersive. This adhesive composition is characterized by rapid hardening at a relatively affordable cost. It takes 5 days to dry completely;
- Solvent based composition. The glue takes some time to set. If the parquet board was initially laid incorrectly, the situation can be corrected within 25 minutes;
- Reactive hardening. The composition is quite expensive, the basis of which is one- or two-component polyurethane glue. This gives the composition sufficient strength and ensures a high hardening speed. Can be used for gluing boards made of a wide variety of materials.
To apply the adhesive composition, you should use a special notched spatula, which allows you to apply the adhesive fairly evenly. In this case, there is no need to worry about the formation of excess in some places.
Installation with glue
Mechanical
Involves the use of various fasteners. Preference can be given to nails, screws or self-tapping screws. In this case, it is possible to quite firmly fix the parquet board to the base. However, in the case of a concrete base, it is quite difficult to perform mechanical fixation, and therefore when performing installation work on one’s own, this option is practically not resorted to.
Combined
A widespread solution involving the simultaneous use of adhesive and locking joints. Allows you to fix the parquet board on the base quite well. Thanks to the presence of a locking connection, the required spatial arrangement of the panels relative to each other is ensured.
Sanding, putty
It is known how to lay parquet, but there is still a lot of work to be done. About a third more. The next stage is sanding the parquet. They do this with special machines. Moreover, they usually use two different ones - for the middle and under the walls. You can hire a professional or rent a sanding machine. In the second case, it is worth knowing that grinding takes place in several stages. Sandpaper with different grain sizes is installed on the machine. The first pass is 40, then 80, 100 and finally 120. By the way, do not throw away the wood dust from sanding, but carefully collect it. It will be useful in making putty. In any case, the dust that remains when passing 100 and 120 sandpaper.
Several passes (about five) are required with sandpaper of different grits
The next stage of laying parquet is putty. No matter how hard you try to lay the dies tightly, there will still be gaps between them. It is at this stage that they are sealed up. Stores sell parquet putty liquid (Lobadur EasyFillPlus, Bona Mix-fill, Ecofill 2010, Parkettgrund and others). Add the collected wood dust to it. The amount of dust is to the point of a thick paste.
Mix the composition with a wooden or plastic bar or stainless spatula. We do not use ordinary metal. The putty is applied to the parquet using a stainless spatula. Moreover, it is recommended to take a wide spatula, and not try to fill only the seams, but go over the entire surface. The process goes faster, the method does not affect material consumption, and defects in the dies are also filled.
This is how parquet is puttied - apply the composition to the entire surface, removing excess with a spatula
A very cheap option for parquet putty is carpentry PVA with the same mixed dust. But this option is not suitable for water-based varnishes, as the wood will darken. Darkening will not be noticeable under solvent-based varnishes. Or rather, not so - solvent-based varnish itself makes the wood darker. Due to this, the darkening of the PVA primer will not be so noticeable.
If you decide to putty PVA parquet, do not use a metal spatula, but a rubber or plastic one. PVA darkens very quickly from contact with metal, and this will make the parquet even darker.
Putty parquet can also be sanded by hand, but this takes a lot of time.
After the putty has dried, the floor is sanded with a belt sander with sandpaper of 100 and 120 grit. After leveling, the dust is removed with a vacuum cleaner. The surface is ready to apply varnish.