Advantages and nuances of self-production
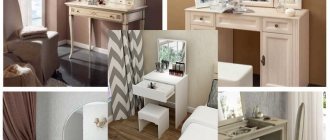
The main advantage of making a table with a mirror and lighting yourself is the great variability of designs and a variety of materials. Regardless of the specifics of a particular model, the structure of the product always consists of three basic elements: a work surface made of wood or chipboard, a large mirror, and a place to store cosmetic accessories (a drawer or a bedside table). Possible modifications:
- Two mini chests of drawers connected by a tabletop.
- A cabinet of three sections, to which is attached a narrow table in the shape of an L.
- A table in which four drawers are allocated for storing cosmetics; they are arranged in pairs in two tiers.
- The surface of the bedside table simultaneously functions as a tabletop.
The latter option is especially convenient for small apartments and is also easy to manufacture. This model can be safely placed in the hallway. But in this case the mirror will need to be hung separately. The remaining models are more complex, but functional and look interesting in the interior.
The complexity of the design and the choice of material should be calculated based on experience in creating furniture and the availability of tools. A DIY dressing table with a mirror is the best gift for family and friends.
Great variability of designs
Variety of materials
Required functionality
Materials and tools
The most popular materials used to make a makeup table are wood and MDF. Some craftsmen, continuing the traditions of Soviet times, work with chipboard and laminated chipboard. The drawers and back wall are usually cut from sheets of plywood. What you will need for the work is indicated in the table.
| Tools | Set of screwdrivers, tape measure, square, drill and screwdriver, electric jigsaw, sandpaper for sanding surfaces |
| Accessories | Hinges and handles for bedside tables, decorative elements for shelves |
| Fastenings | Nails, self-tapping screws, Euro bolts, metal corners, drawer guides |
As a mirror, a rectangular, elongated panel with a semicircular end is placed on a women's or children's dressing table. Its width in the middle is 50 cm, the height can vary depending on the wishes of the master. To create the backlight, you will need to drill several sockets around the perimeter of the glass frame; the socket and switch will be located at the bottom. For makeup mirrors, any suitable size diode lamps are used. You can make a dressing table with your own hands without lighting.
Chipboard is considered one of the cheapest and most accessible materials. However, if the stoves are made from low-quality raw materials, they will constantly release dangerous toxins into the air.
Materials
Fastenings
Accessories
Remaking an old wall: changing the design
Covering old furniture with self-adhesive film is the easiest option for changing the decor. Today, film is available both plain and colored, in different colors, textures and shades. There is no point in gluing a film with a wood pattern; otherwise, it is in trend today. But plain or patterned ones are what can turn an old wall into new furniture. The steps are simple, but the work requires accuracy. But the result is excellent. See two photos. The first one shows an old Soviet chipboard wall before renovation, the second one shows it after.
Popular articles Decorating a mirror from a powder compact
Updating an old furniture wall - before and after
Now about how it was updated. Compacted furniture self-adhesive film was used, cream color, matte surface. The open part of the old wall was closed with glass doors; a translucent matte film was used for the glass. The edging is furniture layout (also self-adhesive) chrome color. The order of work is as follows:
- Everything that can be removed, you remove and disassemble. Remove old fittings.
- Surfaces must be clean and free of grease. This is easier to achieve with a soft cloth soaked in dishwashing detergent. Then everything is washed off with warm water and a small amount of vinegar. Wipe with a dry cloth.
- Cut out the details. It is better to cut the film 8-10 mm larger. The remains are then cut off with a paper knife.
- Spray the part to be glued with water from a spray bottle. On a wet surface, the film can be moved if something goes wrong. You can even peel it off without damaging it.
- After removing the protective layer from the film, carefully lay it out. Having leveled it, begin to smooth it with a soft cloth from the middle to the edges. Try not to have any bubbles. To do this, you need to move gradually, without jumping from place to place.
- If there is still a bubble, you can pierce it with a thin needle approximately in the middle. Then expel air from the edges of the bubble to the hole and rub the puncture site.
- Having glued the film, take a clean thin cotton cloth, spread it on top and iron it with a warm iron (medium heat).
- We glue the trim and install new handles.
This is the sequence of work with every detail. It’s the same with glass, you just need to glue it to the inner surface. After assembly you have a renewed wall. This technique can be used for any item: chest of drawers, bedside tables, wardrobe, kitchen set, etc.
With lighting, the updated wall looks magical
For example, after a successful experiment with a wall, we remodeled an old cabinet in the same way and added it to the right. Now the entire wall is occupied. You can update your kitchen set in the same way: apply self-adhesive film and replace the handles.
There is a second way. It is a modification of the proposed method, but it is simpler and not so labor-intensive. Only the doors are covered, not with film, but with non-woven wallpaper. The wallpaper is glued with PVA glue. To prevent the edges from riding up, the parts are cut 5 mm smaller on all sides. It turns out a kind of edging. Everything looks good (example in the photo below).
A simple renovation of an old Soviet-era wall: paste suitable non-woven wallpaper on the doors
What's good about this method: it's easy to change the decor. Tired of the old appearance, they tore off the wallpaper and put on new ones. Despite the fact that the method seems frivolous, the appearance is maintained for several years. Its author even tried it on a kitchen set. Only the wallpaper on top is coated twice with PVA glue. In this case, the cabinets can be washed
It is important to apply a layer of varnish evenly, without sagging, there are no other difficulties
Sometimes wallpaper is varnished. But before you do this, try it on a scrap piece: see how they react to it.
When choosing a varnish, you need to remember that acrylic and cellulose varnishes remain transparent after drying, while polyurethane varnishes turn yellow after time. Also, polyurethane is almost not softened by solvents: it can only be removed mechanically (from wood - cleaned with sandpaper).
You might be interested in reading how to make a bar counter in the kitchen yourself (several options)
Drawing selection
A dressing table for a girl or woman is made according to the diagram. Detailing for cutting the basic elements of the product can be done manually or using computer programs. The first option is suitable for craftsmen without experience, the second - for those who have made furniture on their own more than once. When choosing drawings and diagrams, you must consider:
- Design dimensions.
- Its complexity, number of components.
- The presence of a sufficient number of places (sections, drawers, shelves) for storing cosmetic accessories.
- The material for which the drawing is being developed.
You should also consider the presence or absence of backlighting. You can choose a ready-made drawing with dimensions or draw it yourself. Another option is to adapt the dimensions of the finished diagram to the area of the room in which the table will be located. On many thematic forums you can find practical advice on how to assemble a dressing table for a beginner.
If you decide to use a professional computer program, it is better to choose the Russified version, because Western graphic editors may not meet domestic furniture manufacturing standards. Because of this, confusion with sizes may arise, which will significantly complicate the work.
Backlight installation
Installing LED lighting for your makeup table is necessary so that you can find something in your nightstand without turning on a bright chandelier. This is especially true if you plan to place furniture in the bedroom. The main thing is to strictly follow the step-by-step work algorithm:
- Make a frame for the makeup mirror according to the shape of the glass. You can buy ready-made.
- Drill holes around the perimeter for cartridges.
- Insert LED lamps.
- Install a push-button switch with a socket at the bottom.
After this, the dressing room mirror is installed in its place: attached to the tabletop or hung separately. If the frame is square, the number of lamps is 10: 4 on the sides and two on the top. For round glass, the illumination depends on the diameter.
Before you make a dressing table with your own hands, you need to think about the shade and intensity of the lighting. The color of the illumination is chosen at the discretion of the future owner of the furniture. But it’s better to stick to white lamps; with this light it’s more convenient to do makeup. Multicolor LED lamps that can be controlled using a smartphone are suitable for the bedroom. They can change the brightness and color of the glow, which is very convenient.
An original product made from scrap materials will become a worthy decoration for any interior. A homemade makeup table will last much longer than a purchased one. The main thing is not to overload it with cosmetics and other things, so that over time the tabletop does not bend. Interesting furniture made in vintage style will create a unique atmosphere at home. You can place a table with a mirror and lighting in the hallway or in the bedroom, depending on the availability of space.
Make a frame for a makeup mirror
Drill holes for sockets, insert LED lamps
Install a push-button switch with a socket at the bottom
Set in place
Ready
Painting the product
First, mix 1 part chalk paint with 2 parts water. Then use light brush strokes to apply the paint to the surface of the nightstand. Try to leave small brush marks so that the wood can be seen in some places.
If you get sharp lines during the painting process, you can smooth them out a little
To do this, take a damp sponge and wipe the entire surface, paying special attention to the places where you need to even out the tone. Repeat the process until you are satisfied with the end result
Popular articles Scorpio
One hand is clean, the other is dirty: how to avoid getting infected in a public place
Mironov’s words, which became his last in his life (he said them on stage)
The husband figured out how to decorate the veranda and made tall flower pots
After this, the paint should dry completely in the fresh air. This process may take 48 hours before you can move or touch the product.
