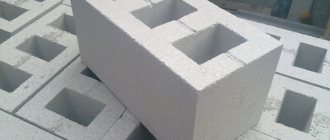
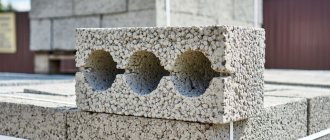
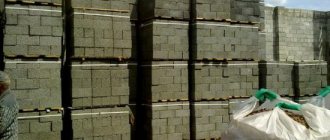
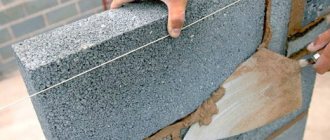
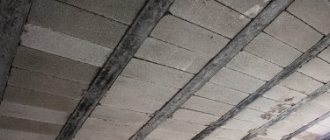
Advantages of expanded clay concrete block
A permanent garage structure must be durable and warm (see How to insulate a garage from the inside quickly and efficiently). Construction of a garage from expanded clay concrete blocks is much faster than from conventional brick, and the cost of materials is much cheaper. The main advantages of expanded clay concrete are its price and technical characteristics.
The main component in the manufacture of blocks is fine expanded clay. Expanded clay has a small specific gravity with a large volume.
It is made from ordinary clay, which undergoes heat treatment, as a result of which it acquires high strength and foams. An expanded clay ball has a porous structure consisting of small air bubbles separated from each other. This feature of the material makes it frost-resistant and significantly reduces heat transfer.
The main qualities of expanded clay concrete blocks are:
- Low material cost;
- Small specific gravity;
- Fire resistance;
- Low temperature resistance;
- High thermal insulation and sound insulation characteristics.
For your information. High-quality expanded clay is produced with the addition of cement and expanded clay sand, which significantly increase the strength of the granules.
No special skills are required to work with this material. It is enough to purchase the required amount of material and prepare the tool.
Below we will present step-by-step instructions for action, if you follow which you will be able to build a full-fledged garage yourself.
Advantages of expanded clay concrete
The use of expanded clay concrete blocks can be considered a rational option for the construction of various structures. In no way inferior in quality to brick, these blocks even surpass it in many nuances.
And this is not just a cheap replacement for a more valuable material, but a modern product of technical progress with improved qualities and at the same time low cost.
Moreover, the use of blocks not only significantly reduces the cost of construction, but also significantly reduces its time. For example, a garage made of blocks will be erected in a relatively short time and will be endowed with two important requirements for any construction - reliability and strength.
Construction of a garage
The entire construction process must be divided into 5 main stages:
- Preparation and marking of the site;
- Creating a foundation;
- Walling;
- Roof installation;
- External and internal decoration of the premises.
Let's look at each stage of construction in more detail.
Preparation and marking of the site
Before building a garage from expanded clay blocks, you need to select an appropriate site with the possibility of comfortable access for a car. The surface of the site must be cleared of stones, vegetation and any other foreign objects.
If there are pronounced unevenness of the soil in the form of bumps or depressions, they must be leveled until a flat plane is achieved.
Important. The next step is to create a project for the future garage on paper with all dimensions clearly marked. The project will also help you accurately calculate the required amount of consumables for walls and roofing.
Creating a foundation
For a structure made of expanded clay blocks, you can use a strip or monolithic foundation (see How to pour a foundation for a garage: doing it right). For complete tightness of the room and in the presence of soft soil, it is better to use a monolithic foundation.
To do this, you need to mark the area using rods with a thread stretched between them according to the dimensions. Then you need to select a layer of soil 30 cm deep and carefully compact the base.
Formwork is installed along the perimeter of the pit, which should be 10 cm above ground level, since the foundation plane must be higher than the ground plane.
Then a layer of crushed stone 10-12 cm thick is laid on the surface of the pit, on top of which a reinforcing mesh of steel rods with a diameter of 6-8 cm is laid. The cell width of the reinforcing mesh is 15-20 cm.
Before pouring the concrete, the mesh is raised to a height of 10-15 cm and installed on the bricks, as shown in the photo above. The final stage is pouring concrete to a level of 10-15 cm above ground level.
Important. If the weather is hot outside and the foundation is exposed to direct sunlight, then it must be covered with construction film and periodically moistened with water. In hot weather, the top layer will harden much faster than the bottom, which will lead to cracks in the screed. For this purpose, periodic wetting is carried out to level out the humidity.
Walling
The construction of walls begins only after the foundation has completely hardened, after 3-4 weeks. When we build a garage from expanded clay concrete blocks, between the first row of blocks and the foundation it is necessary to lay a layer of waterproofing in the form of a strip of ordinary roofing felt.
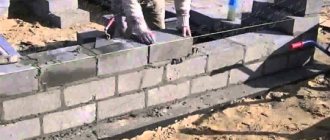
Metal stakes are driven in around the perimeter and a thread is pulled, which will mark the outer edge of the wall and will allow you to visually control the evenness of the installation.
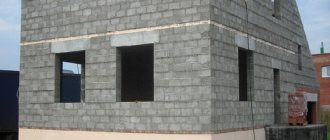
First, the first row of blocks is laid on a cement-sand mortar and the diagonal is measured to make sure that the first row is laid correctly and the room will be symmetrical. After the first row is laid, begin building the corners of the garage, which should be 3-4 blocks higher than the general row. An example is shown in the figure above.
Important. When laying each block, control its position using a level horizontally and vertically. This will save you from having to use thread and plumb lines when constructing the next rows. When laying 2-3 rows of expanded clay concrete blocks, start building corners again several rows higher.
Making a roof
Once the installation of the walls is complete, you can begin creating the roof (see Installing a garage roof). Roofing felt is laid on the top row of blocks for waterproofing, then the Mauerlat is installed and secured to the blocks with anchors.
Mauerlat is a board that distributes the weight of the roof evenly over all walls. An example is shown in the figure above. For a garage, a shed roof will be sufficient, with a surface slope of at least 15 degrees for a good slope of water.
At the next stage, the transverse beams are laid, which are secured at each edge to the Mauerlat using metal corners. Then the frame is covered with sheets of plywood, chipboard or fiberboard.
Next, install a mounting film to protect the wood from moisture and cover the roof with corrugated sheeting or any other type of roofing at your discretion (see How to cover a garage roof: choosing an option).
Important. Before covering wooden sheets with film, they must be additionally treated with special impregnations that protect the wood from moisture.
After installing the gate, the construction of a garage made of expanded clay concrete blocks can be considered complete.
External and internal finishing is carried out at your discretion. A room made of expanded clay concrete stone can be additionally insulated from the outside using polystyrene foam, and plaster or siding panels can be used for decoration.
Garage foundation made of expanded clay blocks
Let us immediately make a reservation that expanded clay concrete blocks are not suitable for building a foundation. Due to the lightness of the wall material, a permanent foundation is not required. The foundation can be strip or block. Depth - at least 0.5 m. Construction of a block foundation takes less time. The monolithic foundation is poured from concrete, which can take about a month to completely dry. In contrast, a block foundation does not require curing.
For the construction of a block foundation, it is recommended to use solid foundation blocks (FBS).
They are made using vibrocompression technology from concrete with the addition of special additives that give the finished material valuable performance qualities: resistance to temperature fluctuations and aggressive substances. Cement mortar is used as a binder. It is recommended to reinforce the joints with reinforcement with a diameter of 14 mm.
The procedure for arranging a strip foundation made of concrete
It is recommended to make the width of the foundation equal to the width of the expanded clay concrete blocks. Otherwise, the wall blocks will have to be cut. The work order is as follows:
- We dig a pit. We level the bottom and compact it thoroughly.
- We fill in layers: 20 cm of gravel, 20 cm of sand.
- We install the formwork. We fix it firmly, otherwise the structure will shift under the pressure of concrete.
- We assemble a frame from reinforcement with a cross-section of 12 mm. We fasten it in such a way that it does not touch the bottom of the pit and the formwork. Also, the frame should not extend beyond the height of the formwork.
- We pour concrete. To achieve maximum solidity, the supply of concrete must be constant.
- The foundation is left for 3 weeks until completely dry. To prevent cracking of the upper part, the surface is periodically moistened with water and covered with a wet cloth.
Advantages of expanded clay concrete blocks
Perhaps the most important advantage of the material is the fact that it is environmentally friendly, unlike panels or cinder blocks, which can emit harmful fumes at high temperatures.
The composition of the material includes expanded clay of a fine-grained porous structure, sand and high-quality concrete. Such a connection does not lead to negative consequences for human health, and is a strong foundation for a garage that will last for decades.
Other positive properties are cost-effectiveness and the possibility of rapid construction. Laying blocks is two to three times faster than building with bricks; in addition, blocks are much cheaper than bricks.
Expanded clay concrete has excellent heat, hydro and sound insulation properties . If you properly seal all the cracks during construction, the garage will be warm even at low temperatures outside. And additional thermal insulation will create an ideal, comfortable atmosphere. An expanded clay concrete garage will withstand any test, be it acid-base rain or sudden temperature changes.
The advantage of the blocks is their light weight , which significantly facilitates the construction process, while at the same time they are able to withstand heavy loads.
Unlike wood, expanded clay concrete is not subject to rotting , and corrosive processes also do not damage the structure of the blocks.
Where to begin?
How to build a garage from expanded clay concrete blocks with your own hands? First of all, when starting construction, you need to decide on the project of the future garage , then you need to strictly follow the plan, without deviating a single step from it.
It is better to carry out construction work from May to September, when the snow and groundwater have already melted, and the ground is ready for digging the foundation. Then the foundation will be a strong, reliable support for the structure.
Having dealt with the project, it's time to prepare the necessary equipment and materials . We will need the following:
- Blocks.
- Adhesive mortar for laying, cement, crushed stone and sand.
- Fittings.
- Boards for the construction of formwork.
- Wall chaser.
- Shovel.
- Level.
- Hacksaw.
- Any container that can be used for diluting the solution.
- Hammer.
Walls
Wall masonry
The walls need to be erected after the foundation has been “settled”. Before you start laying a block on it, you need to protect the future walls from dampness. To do this, waterproofing is laid on the surface of the foundation, for which roofing felt is perfect. Next, the blocks are laid out so that the diagonals of the building are equal. First, the first row of wall blocks is laid, after which the corners are driven out.
Using a level and a plumb line, it is not difficult to build garage walls if you pull a cord or fishing line from corner to corner. The block is laid on a cement-sand mortar in a checkerboard pattern. Mortar is also applied between the blocks. As already mentioned, expanded clay concrete blocks are lightweight and do not place a large load on the foundation. When the walls are finished, you can begin installing the roof.
Garage dimensions
In order to correctly calculate the number of blocks for building a garage, you first need to measure the dimensions of one block . Blocks come in several varieties, but the most popular dimensions are as follows: 200x300x600 and 100x300x600 cm. The first is suitable for the construction of external walls, the second - for the construction of internal partitions.
In order to make a correct count of blocks , for example, for a 4 by 6 garage, you need to use the following calculation:
For example, we chose blocks of 200x300x600 cm for construction. For the convenience of further calculations, we convert this unit of measurement into meters, we get 0.2 x 0.3 x 0.6 m (1000 cm in one meter).
We get the volume of one block if we multiply its length by width and height:
Now let’s determine the perimeter of the garage walls by adding up the lengths of the sides:
Let's calculate the area of the room by multiplying the perimeter by the height. Since the standard garage height is 2.4 m, we multiply the resulting figure by this dimension: 20 * 2.4 = 48
After these calculations, it is necessary to determine the correct area of all door and window openings, and then calculate the area of all openings from the area of the walls, that is, from the number 48. Thus, we will obtain a reliable area of the wall masonry.
But that's not all. Counting blocks is a complex procedure that requires maximum responsibility, care and basic knowledge of algebra. As soon as we determine the area of the masonry, we need to multiply this number by the thickness of the block, from this calculation we will get the number of expanded clay concrete blocks that we will need for the masonry. As a result, it turns out that about two hundred blocks will be needed to build a garage.
Calculation of materials for the construction of a 3 by 6 garage is carried out using the same formula.
Garage walls made of expanded clay blocks
Before starting to lay blocks, the horizontalness of the foundation is checked. If differences in height are detected, defects are corrected using cement mortar.
The procedure for installing walls
- The foundation must be protected from water. To do this, lay a layer of tar on top, then lay roofing felt.
- First, the blocks are laid without mortar. The corners between the walls are laid out. The correctness of the calculations is checked using a cord and level. Only after making amendments, if any, does capital masonry begin.
- Lay out the first two rows. Important! The second row and all subsequent ones are shifted horizontally by half a block relative to the previous one.
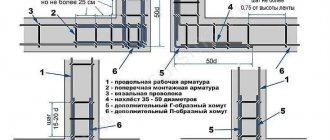
- To prevent the walls from cracking, the masonry is reinforced with steel reinforcing mesh. It is laid after each even row of expanded clay concrete blocks.
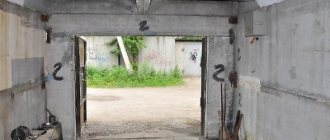
- Reinforced concrete lintels are installed where windows and doors are installed. A significant difference in heights is leveled with a solution of expanded clay concrete.
- To avoid lateral displacement of the wall when the building shrinks, a steel frame is made along the upper edge.
- We cover the top of the wall with a layer of waterproofing: traditional tar and roofing felt.
- For the interior cladding of garage walls, it is recommended to use non-flammable materials that are resistant to chemically active substances. For example, drywall, plaster, ceramic tiles.
- To insulate walls, a three-layer protection against cold is recommended, consisting of polystyrene foam (can be replaced with fiberglass), polyethylene (protects against moisture) and facing material, such as plasterboard.
- A simple option for finishing external walls is façade plaster. An alternative option is steel or plastic siding.
Technology
Before starting construction, it is worth making a little effort to clear the space for the future garage. We cut down bushes, uproot stumps and roots, mow the grass so that nothing interferes with further work.
What should be the foundation for a garage made of expanded clay concrete blocks?
When the site is prepared, we will begin digging a trench for the foundation around the perimeter. The length of the trench is calculated based on the layout of the garage. The next step is to lay plastic film along the walls, and fill the bottom with a bed of gravel and sand.
In order for the pillow to grab a powerful grip and become a reliable support for the foundation, which would stand for many years, it is filled with water . The combination of gravel, sand and water creates a monolithic base, which is what we need.
The pillow is laid out in several layers, the height of each should be at least 10 cm. The pillow is left to dry, and then filled with concrete, and again we wait for the mixture to dry to continue work.
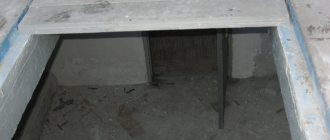
Inspection hole
Of course, when building a garage, it would be wise to immediately build an inspection hole in it.
This provides huge advantages : firstly, you can carry out some simple repair work yourself and save a lot on car service, and secondly, you can get additional space for storing equipment.
To construct a pit, you must first decide on its dimensions. The width of the pit is determined by the wheelbase of your swallow. The width of the pit should be 20 cm narrower than the wheelbase. (on average, this is 75-80 cm).
The depth of the inspection hole is calculated from your height, to which 15-20 cm is added in order to make it comfortable to work.
It is not easy to make an inspection hole in a finished garage, but at the initial stage of construction, when the foundation is just being laid, this work will not take much time.
So, we need a pit at a selected depth, which is filled with several layers of clay and gravel. Clay is a natural waterproofing material, reliable and environmentally friendly. A film is spread over the pillow, on which concrete is already laid.
Now a wooden formwork is built (for additional strength, it is advisable to use spacers and reinforcement, which could well be a simple chain-link mesh).
Then the finished formwork is filled with concrete mortar.
The foundation (pit/cellar) is ready. But there is still a lot of work ahead of us. So, what do we tackle first? Of course, for the arrangement of the floor.
The load on the garage floor is many times greater than the load on the floor of a living room, so here you need to make every effort and spare no materials and time . We arrange the floor according to the same principle as the foundation.
First, carefully compact the soil , after which it is necessary to cover the film and cover it with several layers of cushion (gravel + sand).
If you want to give the coating even more strength, then lay the reinforcement and then fill it with concrete. It will be even better if, when pouring the reinforcing mesh with concrete, you add crushed stone to the mixture.
When the floor is completely ready, you can begin the next stage of work - the walls and roof.
When laying walls, the construction technology is similar to bricklaying , only in the case of blocks, it will be much faster and easier.
To create a solid foundation , reinforcement is laid around the perimeter of the foundation and poured with concrete. Then the first block is placed, then the second. The third is placed at the junction. Don't forget to apply the solution every time.
When laying walls, it is necessary to offset each row by half a block . This is done so that the load on the walls is distributed perfectly evenly. This determines whether the garage will last.
During laying, half blocks are needed from time to time. What to do in this case? If necessary, you should use a simple grinder.
Perhaps for some, the appearance of a garage made of expanded clay concrete will not seem aesthetically pleasing. No problem! You can sheathe it with any material . The best cladding option is siding; here you have the widest choice of colors, structures, sizes, and besides, it is not so expensive.
Well, the floor and walls are already there, now all that remains is to cover the roof.
The roof for a garage is as important as the foundation, and it should not only be aesthetically pleasing, but also reliable.
There are many roofing options : flat, pitched, embossed, corrugated sheet, soft roof, etc., etc., but the most economical, versatile and therefore popular option is a flat roof.
As for the foundation, for the roof you need to build a wooden frame, on which roofing material, which is hydro- and thermal insulation, is already laid, and then the roof.
The boards must first be treated with a special antiseptic to prevent rotting.
Thermal and waterproofing
In order for the garage to provide reliable protection for your car from heat and cold, and especially from autumn rains, you need to carry out hydro- and thermal insulation.
What can be done to prevent the expanded clay blocks of the garage from getting wet? The modern construction market is replete with waterproofing materials. Here you can choose, as they say, according to your taste and wallet. We can distinguish three options for waterproofing :
- bitumen based;
- polymer membranes;
- penetrating type of insulation.
Each option is interesting in its own way, has its own nuances, pros and cons. Thus, penetrating insulation can be applied even to a damp surface. Its advantage is that its liquid structure is able to penetrate even tiny cracks, creating reliable protection against moisture, cold and noise.
Polymer membranes are popular for their harmonious combination of price and quality. And finally, bitumen is an old proven method that our fathers and grandfathers used to build garages. Bitumen is relatively cheap and quite reliable.
The optimal choice of insulation is a three-layer flooring: the first layer is polystyrene foam, the second is polyethylene, which prevents the penetration of moisture, and, finally, the final layer, the finishing material is plasterboard, which not only creates a comfortable atmosphere of warmth and coziness in the room, but also evens out uneven walls .
When all stages of work are left behind, the last thing left is to hang the gate. The following gate options are currently known:
- Swing design . This is the simplest, most economical option. Another advantage of the design is its simplicity and durability. The frame is mounted from steel corners, the doors are made from corrugated sheets. The entire work takes no more than 3 hours.
- The sliding mechanism consists of a garage wall and a sash, which rides along a special roller along the wall. The design is aesthetic, but it is difficult to make on your own, in addition, it is much more expensive than the previous version.
- Lifting mechanism . The design comes in several types, but in any case it consists of a lifting element and a canvas.
Interior decoration
There are many ways to decorate a garage, but the most universal and popular are the following :
- Cladding with clapboard . This is the most economical method that will suit even the minimum budget. If you wish and have a good imagination, you can make an original design from the lining.
- Plastic panels . Their advantage lies in their inexpensive price, attractive appearance, and speed of plating. But there is a significant drawback - the material is not environmentally friendly. And here you have to choose what is more important.
- Ceramic tiles are the most luxurious of all existing, but also the most expensive methods of interior decoration.
- You can also mention plaster , which comes in dozens of types, to suit every taste and color.
Examples of garages made of expanded clay concrete blocks: photos.
Now you know everything about building a garage from expanded clay concrete blocks with your own hands, how to pour the foundation, build walls, cover the roof and install gates. Arm yourself with our detailed instructions, the necessary equipment, and may good luck accompany you !
Inspection hole
Of course, when building a garage, it would be reasonable to immediately build an inspection hole in it.
This provides huge advantages: firstly, you can carry out some simple repair work yourself and save a lot on car service, and secondly, you can get additional space for storing equipment.
To construct a pit, you must first decide on its dimensions. The width of the pit is determined by the wheelbase of your swallow.
The width of the pit should be 20 cm narrower than the wheelbase. (on average, this is 75-80 cm).
The depth of the inspection hole is calculated from your height, to which 15-20 cm is added in order to make working comfortable.
It is not easy to make an inspection hole in a finished garage, but at the initial stage of construction, when the foundation is just being laid, this work will not take much time.
So, we need a pit at a selected depth, which is filled with several layers of clay and gravel. Clay is a natural waterproofing material, reliable and environmentally friendly. A film is spread over the pillow, on which concrete is already laid.
Now a wooden formwork is built around the pit (for additional strength, it is advisable to use spacers and reinforcement, which could well be a simple chain-link mesh).
Then the finished formwork is filled with concrete mortar.
You can make a cellar in the garage in the same way. Arranging a cellar will take even less time than a viewing hole, because there is no longer a need to build such a large-scale structure, and the depth of the cellar is much less, but the construction principle is the same.
The foundation (pit/cellar) is ready.
But there is still a lot of work ahead of us. So, what do we tackle first? Of course, for the arrangement of the floor.
The load on the garage floor is many times greater than the load on the floor of a living room, so here you need to make every effort and spare no materials and time. We arrange the floor according to the same principle as the foundation.
First, we carefully compact the soil, after which it is necessary to cover the film and cover it with several layers of cushion (gravel + sand).
If you want to give the coating even more strength, then lay the reinforcement and then fill it with concrete. It will be even better if, when pouring the reinforcing mesh with concrete, you add crushed stone to the mixture.
When the floor is completely ready, you can begin the next stage of work - the walls and roof.
How to build a garage from expanded clay concrete blocks
You bought a car, and when the euphoria of a successful purchase slowly wears off, the question of storing it arises, because very often this is the last thing remembered. You can actually buy a garage, or you can try to build it yourself.
After determining the construction site, the second question arises: what material should this structure be built from? There are a lot of building materials, as they say, for every taste and budget. In this article I would like to talk about working with expanded clay blocks.
Advantages of expanded clay concrete blocks
Expanded clay is a convenient material for construction, and giving it an advantage, it is worth getting acquainted with its advantages:
- Cost. If we compare the cost of one cubic meter of expanded clay concrete masonry and brick, then the cost of the latter will be almost twice as high and this says a lot.
- Universal masonry. For some materials, for example, gas silicate blocks use only special glue, while expanded clay, just like brick, is placed on a classic cement mortar or adhesive composition.
- Simplicity of installation technology. The dimensions of the factory material are the same and have a relatively small weight, about 25 kg with dimensions of 390 * 190 * 188. But difficulties may arise with cutting blocks - here a saw with pobedit teeth will come to the rescue.
- Breathable material. The blocks are vapor-permeable, which means that in such a building it will be quite easy to maintain the microclimate at a constant level.
- Environmentally friendly. Expanded clay is environmentally friendly, as it contains only natural ingredients. Concrete, fine expanded clay, sand and other clean materials are an excellent basis for work.
- Durability. The blocks are durable and massive, do not require maintenance and hold up well under temperature changes.
- Endurance. Walls made of this material do not rot; you can drive any fasteners into it and hang even very heavy objects on it.
There is an opinion that expanded clay concrete is good at soundproofing a room, but studies show that the high dynamic modulus of elasticity does not allow it to do this successfully.
Sequence of work when installing the roof
When installing the roof, roofing felt is laid as the first layer. It acts as a waterproofing agent. A beam called a Mauerlat is mounted on top of it. It serves as the extreme lower support for the rafters. With its help, the weight of the load on the roof and walls is distributed evenly. In addition, this beam connects the frame with the structure itself, so the Mauerlat must be firmly attached to the wall.
When assembling the frame, it is necessary to take into account the angle of inclination of the roof; it should not be less than 15? to ensure free drainage of rain jets from the roof plane, and in the spring, during the period of snow melting, the slope will eliminate the likelihood of leaks at the joints. The frame is covered with sheathing, on which the roofing covering is laid.
The garage, one might say, is ready. There are still some improvements remaining, such as finishing work. The advantage of expanded clay concrete blocks is that, with their porous surface, they are “friendly” with almost all types of finishes.
Where to begin
To begin with, you need to decide on a construction project, draw the necessary drawings and strictly follow the written plan.
Construction work should be carried out in the warm season, no earlier than May, but no later than September. At this time, the snow will have melted and the groundwater level will drop, which will make it possible to freely dig a foundation pit for the foundation of the future garage.
So, the project has been approved, the time of year is ideal, it’s time to start preparing tools and building materials.
For work we will need:
- expanded clay concrete blocks;
- concrete or adhesive mortar;
- reinforcing bars;
- wood for mounting formwork;
- furrower;
- shovel;
- vertical and horizontal levels;
- hacksaw;
- solution reservoir;
- hammer.
Without having special construction skills, you can actually build a garage from expanded clay concrete blocks with your own hands in a few months.
Garage dimensions
Let's give an example of a calculation for a 3 by 5 meter garage made from a 200x300x600 block. For ease of calculation, it is necessary to convert all dimensions of the material into a single measurement system, in meters. So, it turns out 0.2x0.3x0.6 m. Let's determine the volume of the block by multiplying the length of all its faces:
Next, we find the perimeter of the future garage by adding the length of its sides:
Find the area of the garage by multiplying the perimeter by the height. We take the standard height for an average room, equal to 2.4 meters.
Then, from the result of the garage area, subtract the dimensions of the window and door openings and the result will be the net area of the garage made of expanded clay concrete blocks. The resulting number should be multiplied by the thickness of the block, and we get the required number of units of material per masonry.
Start of construction: design and foundation
Before starting any construction work, it is necessary to create a project. This also applies to building a garage. Then, according to the project, you need to dig a trench corresponding to the size of the garage. Even diagonals will guarantee the correct rectangular shape.
Then the bottom of the trench must be filled with crushed stone and compacted. You will get a “pillow” of the foundation. To fill the concrete floor of the zero level, formwork is installed. One part of it should be buried 5–7 centimeters into the ground, and the other should rise above the ground to the planned ceiling height. The formwork is placed around a connected frame made of reinforcement. If you neglect to create this grid, the concrete will not have sufficient strength and will quickly collapse. The metal is positioned in such a way that the concrete below and above it has a thickness of 2–3 cm. That is, the reinforcement must be inside the poured mixture and in no case stick out from it.
The foundation must be made in one monolith, so it is recommended to pour concrete within one day. In this case, the formwork must be strengthened so that the solution cannot move it in different directions during pouring.
When performing work in hot weather, it is necessary to water the foundation base with water. This action will prevent the structure from drying out. After pouring the foundation, a break of three weeks is required. This time is required to consolidate its strength.
Technology
First, you should prepare the area for the start of work, clear it of debris, growth, grass, in general, make sure that nothing interferes with the work. And then you can proceed to the foundation.
Along the perimeter of the finished site, you should dig a ditch for the future foundation, line its walls with polyethylene, fill the bottom with a cushion of sand and crushed stone and compact it well. It is necessary to pour water onto the compacted cushion so that the crushed stone, sand and water set, forming a strong slab - a guarantee of the durability of the structure.
Inspection hole
The dimensions of the pit should be determined based on the size of the car. The width should be 70-80 cm less than the distance between the left and right wheels. The depth is calculated based on the owner’s height plus 10-20 cm for comfortable work.
A pit of the required size is dug and filled with a bed of gravel and clay. A film is placed on the cushion, and the concrete mixture is poured onto it. Clay waterproofs the foundation and is an environmentally friendly material.
Next, the wooden formwork is installed and filled with concrete. After time, the solution will dry and you will have a finished foundation with an inspection hole.
The principles of constructing a viewing hole remain the same when arranging a cellar. A cellar is made even faster than a pit, since it is shallower in depth and does not need such a powerful foundation.
The floor in the garage should be made powerful and durable, because the load on it will be much greater than on the floor in an ordinary residential building. First, you should compact the soil under the future floor well, cover it with polyethylene and fill it with several layers of sand and crushed stone cushion.
For a more powerful structure, we recommend placing reinforcement bars on the cushion, forming a grid along and across the space, and then filling it with a concrete mixture with crushed stone added to it.
When the solution hardens, you will get a beautiful, strong floor that can withstand shock and just heavy loads. Next, you can begin building the walls and roof of the future garage.
First, you need to lay reinforcing bars around the perimeter of the base and fill them with concrete. Then place two rows of expanded clay on top of each other.
The joints are always lubricated with concrete mixture and adhesive. The third row is laid in its middle at the junction of the blocks of the bottom row and so on, shifting each new row relative to the previous one by half a block.
The external appearance of expanded clay concrete blocks, of course, is not as attractive as that of brick, but you shouldn’t be upset here either, because it can be sheathed with any material you like. Very often, owners cover their facades with siding, which has an amazing choice of colors and structures and is quite low in cost.
The roof is no less important element of the building than all the others, and the fate of the entire building depends on its strength.
The configuration of the most commonly used roofs in construction is as follows:
- single-pitched;
- gable;
- hip;
- tent;
- dome;
- flat and many others.
Each type has its own advantages, but most often in construction they use a single slope or, the most economical, flat.
Warmth and waterproofing
Expanded clay concrete blocks need heat and waterproofing, and the modern market offers a variety of materials, among which I would like to note the following:
- Bitumen mastic. Plastic and viscous mastic penetrates deeply into the pores of expanded clay blocks and remains on them in the form of a waterproof film. This is a classic and frequently used material.
- PVC membrane. The material is quite young and is a film of elastic polyvinyl chloride. The seams between the sheets are sealed with hot air, which does not give a single chance for moisture to penetrate.
- Penetrating waterproofing. The substance enters the pores of expanded clay and crystallizes, forming a reliable shield against the penetration of moisture into the room.
The choice of gate should be taken seriously, since this is a rather vulnerable element of the garage and it is they that attackers will break into when trying to rob the premises.
Quite a lot of types of gates are now known, but let’s focus on the most common ones:
- Swing gates. Simple and economical A classic option found in the vast majority of garages. The frame is welded from the corners, and a sheet of metal is welded on top. The work happens quite quickly.
- Sliding gates. The design consists of a sash on slats that moves along the wall. It’s possible to make it yourself, but it’s quite difficult. Moreover, this option is not cheap.
- Lift gates. It is extremely difficult to do it yourself, so it is better to order them from the manufacturer.
Interior decoration
Everyone is free to do whatever they want inside their garage, but the following interior decoration options are very often used:
- Lining. An aesthetic and inexpensive option.
- Plastic panels. Cute, inexpensive, but not environmentally friendly material.
- Ceramic tile. Expensive and chic option.
- Plaster. Will satisfy all wishes in terms of color and texture of the walls.
Expanded clay concrete blocks are an excellent option for building garages and low-rise houses. The material has minor problems with appearance, hydro and thermal insulation, but with the availability of modern tools and materials they can be easily eliminated.
Building from expanded clay is simple and possible to do it yourself, without resorting to the help of construction companies, which will significantly save money.
Construction technology
First, we clear the necessary space, get rid of bushes, stumps and small trees.
Foundation and floor
A trench is dug around the perimeter of the proposed garage, 30 cm wide, and a film is laid along the even walls of the trench. A sand and gravel cushion is laid out at the bottom of the trench in layers and filled with water, the height of each layer is about 10 cm. At the final stage, the concrete mixture is poured until it dries completely.
The floor must support the weight of the car; it is laid in almost the same way as the foundation. To begin with, the soil is compacted, covered with film, and a sand and gravel cushion is poured. To increase strength, a reinforcing mesh is laid and filled with a sand-cement mixture, preferably with the addition of crushed stone. Walls and roof When constructing garage walls, the technology for laying expanded clay concrete blocks is almost the same as for bricks.
A cement-sand mixture with a reinforced mesh along the width of the wall is applied to the finished foundation; the mesh is necessary to ensure that the solution does not flow beyond the block. Next, a block is placed, the mixture is applied at the junction with another, and so on. The next row is placed offset by half a block so that the pressure of the wall mass is distributed evenly. Particular attention should be paid to external seams, distributing the mortar evenly between the blocks.
To cut blocks, it is better to use specialized equipment, for example, a grinder. Holes for windows should be reinforced with wooden boards. If desired, you can insulate the expanded clay concrete walls of the garage with polystyrene foam from the inside, and the outside can be covered with a cement coat. You need to make a hole on the back wall for natural ventilation. The roof is installed according to the provided design.
To begin with, load-bearing beams are installed along the walls, then the frame itself, which is covered with boards and roofing felt on top to prevent water from entering. Garage insulation The most optimal insulation option is a multi-layer system, which involves laying three layers. For the first layer, foam or fiberglass is used. The second layer is polyethylene, which protects against moisture. And the third layer is a finishing material, for example, plasterboard. The final stage of building a car garage from expanded clay concrete blocks is the plastering process, after which detailed finishing is performed, for which all kinds of materials are used and the most daring creative ideas are embodied.
