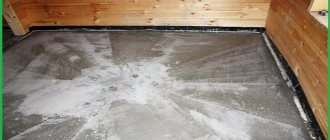
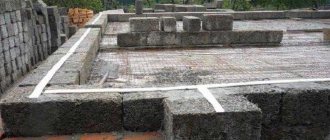
A flat floor is not only aesthetic beauty. It's just a pleasure to walk on it. To achieve an ideal surface, preparatory work is required, namely the installation of a screed. It serves as the basis for a reliable floor. High-quality work is the key to saving money and effort during further installation of the finishing coating. When making repairs yourself in order to save money, many people have a question: how to make a floor screed in a private house with your own hands? It's not that difficult, the main thing is to do all the work step by step.
Where to begin?
The technology for installing floors on the ground is available, but requires strict adherence to the rules, which will be discussed below. The choice in favor of this method is due to the following advantages:
- Floors on the ground in a private house can be made with your own hands, without using expensive lifting equipment to install reinforced concrete floors.
- Available materials are used, the acquisition and delivery of which is not difficult.
- Economic benefit. The cost of installing a floor on the ground using this method can cost the owner of a future home significantly less than using other methods.
- High quality. When designing, the desired characteristics of a concrete floor on the ground in a private house are laid down.
- There is no need to attract additional labor.
- Having general construction work skills, you can do all the work yourself.
When starting construction, one of the most important conditions for many homeowners is a reasonable estimated cost. For this reason, many try to do affordable operations in a private home with their own hands. Detailed step-by-step instructions will help you realize this desire. In this case, the recommendations will allow you to avoid typical mistakes and achieve optimal performance characteristics.
Using a ready-made reinforced concrete floor, the labor intensity of the process is reduced, but its costs for the purchase, transportation, and payment for lifting equipment increase sharply. Many people try to avoid a significant increase in costs by working independently.
The main stages of creating a screed
Filling up the foundation
Before starting the process of pouring concrete onto the soil surface, the foundation should be properly prepared. First of all, it is necessary to strengthen the soil. This operation eliminates possible subsequent cracking of the floor even if the soil subsides. Floors on the ground surface are usually installed together with a strip foundation. The depth of the depression must be at least a meter. Sand should be poured inside this depression. This scheme is not suitable for areas based on clay. As you know, clay is not capable of allowing water to pass through. Thus, if sand is poured on top of the clay, inside the foundation, then water will accumulate in it, which will lead to the formation of areas with high humidity under the house. Therefore, if construction is carried out on an area with clay soil, it is necessary to organize drainage. The sand placed at the bottom of the pit must be compacted as thoroughly as possible. If the tamping is not of good quality, voids will form, which will subsequently lead to cracking of the floor surface.
Creating a filter pad
To create a filter pad, perform the following operations in the order shown:
- Place a layer of gravel on the surface of the prepared soil and compact it as thoroughly as possible.
- Place a layer of sand on top of the gravel, then compact it and smooth it out.
The thickness of the filter pad should be selected taking into account the characteristics and density of the local soil.
Determining the finished floor level
The finished floor level will be the level of the interior door openings. A continuous line must be drawn along the entire perimeter of the building at the level of the finished floor. It will act as a beacon during further work. Next, from this line on the inner surface of the strip foundation, it is necessary to mark the levels of each concrete-based floor layer and also draw horizontal lines along the entire perimeter. Looking from top to bottom, the final markup should show the following levels:
- finishing coating;
- cement screed;
- heat and sound insulation;
- bedding;
The lowest point of the resulting marking should be the ground level.
Creating waterproofing
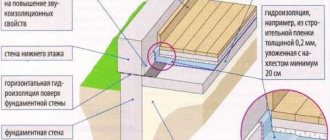
The first layer following the soil should be waterproofing. For waterproofing, bitumen-polymer membranes or PVC-based waterproofing materials are used. As the most accessible and cheapest option, you can consider using ordinary polyethylene film. At the same time, the thickness of the polyethylene film must be at least 250 microns, and it must be laid in two layers. Installed waterproofing materials should be bent above the zero level, along the walls, within the entire perimeter of the building. Particular attention should be paid to careful installation of insulation in the corners of the house. If roll materials of a certain width are used as insulating material, adjacent strips must be overlapped and then secured with construction tape.
Creating a heat-insulating layer
Laying insulation is one of the most important stages in creating a concrete floor on the ground. As insulation, it is necessary to use a material that has sufficient strength, high fire resistance and low thermal conductivity. Mineral wool, polystyrene foam, and extruded polystyrene foam have similar characteristics. The thickness of the installed thermal insulation should be directly dependent on the climatic conditions in which the further operation of the structure will take place. So, for central Russia, the thickness of the layer of polystyrene foam to be laid should be at least 10 cm, for more northern regions - at least 20 cm. A polyethylene film should be laid on top of the insulation layer. This will allow you to organize an effective vapor barrier, and will also eliminate the possibility of concrete flowing into the cracks between individual sheets of heat-insulating material.
Laying reinforcement
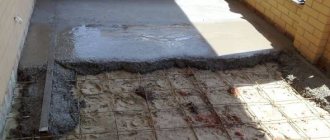
The creation of a reinforcing layer is necessary in order to give the concrete increased strength. For reinforcement, a road mesh is used, the diameter of the rods is 5-6 mm, and the squares of the cells are 10-15 cm long. The reinforcement will not allow the concrete to crack and will prevent its shrinkage. It is very important to lay a layer of reinforcing material at a level of at least 2 cm from the surface of the thermal insulation. Such installation will allow the reinforcement to be embedded in the thickness of the concrete. In the event that the floor will experience significant loads, it is necessary to create a reinforcing frame.
Pouring screed on the ground
Installation of formwork Before pouring the main layer of concrete, guides and formwork should be installed. This will allow you not to deviate from the previously marked zero level. First of all, you should complete the necessary markings. To do this, all rooms should be divided into equal sections, each of which will have a width of 2 m. Then, these sections must be divided by guides made of boards or timber. The height of the installed guides must necessarily coincide with the zero level. The resulting structures must be fixed with thick cement mortar. Next, you need to install the formwork between the created guides. As a result, the perimeter of the room will be divided into rectangular sections called “maps”. In the future, these areas will be filled with concrete. Just like the guides, the formwork must be leveled and also leveled horizontally. This will ensure that the floor being constructed is horizontal. To ensure that formwork boards and guides can be easily removed from the concrete in the future, they should be coated with a layer of special oil. In order to protect the formwork elements from walls and other vertical structures, insulating material should be installed between them. Isolon can be used for this purpose.
Filling the screed
It is recommended to fill in no more than two stages. This will allow you to obtain a monolithic structure with sufficient strength. It is best to start pouring from the corner located opposite the door opening. After filling several “cards” the mixture needs to be leveled. Next, you can begin rough leveling the surface of the future floor. To remove excess concrete, use special rules established on the ribs of the guides. The rule must be moved in its direction. In areas where leveling is completed, the formwork must be urgently removed, and the resulting voids should be filled with concrete. To remove all voids, it is best to use a vibrator. After the screed has been laid over the entire surface and leveled, a polyethylene film should be laid on the floor and the concrete should be allowed to completely harden over the next month. At the same time, we should not forget about the need to periodically wet the concrete surface with water. After the period required for the concrete to harden, they begin to create a leveling screed, the height of which must be at least 20 mm. For this purpose, concrete is used, the grade of which should not exceed 100. The final finishing is carried out after the leveling screed has completely hardened.
Necessary materials for a concrete floor on the ground
It is advisable to purchase everything needed for work at a time. Professional builders know that transportation costs can exceed 10% of the estimated cost of the project. Sometimes paying for delivery of missing materials can cost more than the materials themselves. Therefore, it is important to correctly determine the list of components and calculate the required number of all of them.
One of the key questions is how to insulate a concrete floor in a private house? The best solution today is the use of polystyrene foam boards. Mineral wool is used much less frequently because it is too elastic and flexible. In exceptional cases, its use is allowed, but only when laid in the cells of a specially prepared sheathing or in the space between the joists. Then a subfloor is made from boards and sheet materials.
The work becomes more labor-intensive if you decide to use this material on floors. Insulation on a concrete floor that can withstand the planned load without additional operations is preferable.
In addition, the estimated cost increases significantly without a noticeable improvement in performance characteristics. The only indicator where there is a clear advantage is sound insulation. But the ground is not a source of noise, so when choosing insulation for the floor, you shouldn’t think about it.
This advantage is completely devalued. In the vast majority of cases today, concrete floor insulation is done with foamed polystyrene. This is justified by the following characteristics:
- economic benefit;
- sufficient strength;
- reliability of the material;
- long service life;
- environmental Safety;
- resistance to rotting, corrosion, mold, moss and other microorganisms;
- Expanded polystyrene insulation for concrete floors is easy to process, which makes it convenient for independent work.
Such a thermal insulation layer is not hygroscopic, but slight surface and capillary penetration is still observed. Floor insulation in this situation will lose its effectiveness over the years. Repeated seasonal freezing cycles can damage the material.
Thermal insulation of a concrete floor needs to be protected from moisture entering it, both ground and water from the solution when installing the screed. A wide selection of waterproofing materials will create a reliable barrier to liquid. Rolled and sheet products of this category on a polymer or bitumen basis are used. The quantity is calculated taking into account overlaps and waste during cutting.
The main consumable material by weight is concrete mixture. You can accurately determine the number of required components in a simple way. Without delving into the essence of complex professional formulas, experienced craftsmen use the following technique - 1 m3 of the following grades of concrete contains cement:
- M 150 - 260 kg (cement M 300);
- M 200 - 290 kg (cement M 300), 250 kg (cement M 400) and 220 kg (cement M 500);
- M 250 - 340 kg (cement M 300), 300 kg (cement M 400) and 250 kg (cement M 500);
- M 300 - 350 kg (cement M 400) and 300 kg (cement M 500);
- M 400 - 400 kg (cement M 400) and 330 kg (cement M 500);
When preparing a dry mixture, it is recommended to use mass rather than volume values. So, cement having a high specific density should weigh less than sand and crushed stone in the solution by about 3-5 times.
However, in terms of volume, this value can reach a difference of 6-7 times. Depending on the brand of cement, as well as the desired quality of concrete, crushed stone is imported at the rate of 4 to 7 tons per 1 ton of binder.
Features of screed in a private house
Unlike laying flooring in an apartment, similar work in your own home has some differences. The main thing is the type of foundation. In a suburban building, this is the soil, which leaves an imprint on the formation of the “pie” or layers of screed. During the calculation, it is necessary to take into account the need to conserve heat, soil characteristics, and the level of groundwater.
For your information! Before starting work, it would be a good idea to familiarize yourself with the SNiPs, which establish the rules for installing screeds.
Laying the floor is carried out in 8 successive stages, at each of which a separate layer is formed:
- Prepared clay that serves as a barrier to the escape of groundwater.
- Sand layer.
- Crushed stone having a fractional size of 4 to 6 cm;
- Polyethylene film.
- Rough screed. The thickness of this layer must be at least 80 mm. The pouring mixture consists of concrete, sand and small crushed stone.
For your information! This layer does not need to be reinforced. The maximum amount of fiber allowed is added.
Soil compaction
The most important stage of work, on which the final quality and long service life of the floor depend. In cases of high soil density and low groundwater levels, this operation can be ignored. Compacting the soil simply won't work. If the site was graded with the movement of layers of soil, trees were uprooted, and other vegetation was removed, then compaction must be done.
The manual process is extremely labor intensive. To perform the operation efficiently, a special device is made - a manual tamper. Weight and size are selected based on your own capabilities. It is advisable to use this method for small amounts of work or to use it in hard-to-reach places.
The optimal solution would be to use an electric or pneumatic rammer. The speed of work and its quality increase manifold. The next stage - insulating a concrete floor in a private house will be easier to do. A smooth, dense surface is an ideal basis for a thermal insulation layer, the integrity of which during operation will determine the comfort in the home and protection from the penetration of cold.
The quality of soil compaction will increase significantly if, between operations to physically compact the soil, the area is watered abundantly. The number of voids is minimized. Soil softened by moisture requires less physical effort when performing the operation.
If an underground floor is planned, then it is done first. In a private home this is always the desired room. It is convenient for storing food, storing tools, equipment for cultivating land, and items used seasonally.
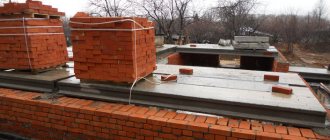
Even if it is not possible to make a full-fledged basement under the entire house, a small volume of a few cubic meters can be completed without difficulty. A convenient entrance is designed, walls are made using masonry or monolithic pouring. As a base for further layers of coating, you can install a wooden ceiling, or make a concrete floor using the formwork.
Stage 7. Preparing the solution and pouring
Fill the solution in a maximum of two passes, although it is advisable to do it in one. For this purpose, you can order “factory” concrete (it will be delivered immediately in large quantities) or prepare it yourself (it will cost less). If you resort to the second option, you will need:
- shovel;
- concrete mixer (you can rent it);
- “four hundredth” or “five hundredth” cement;
- crushed stone;
- sand;
- one assistant.
| Concrete grade | Mass composition, C:P:SH, kg | Volumetric composition per 10 liters of cement P/Shch, l | |
| 100 | 1: 4,6: 7,0 | 41/61 | 78 |
| 150 | 1: 3,5: 5,7 | 32/50 | 64 |
| 200 | 1: 2,8: 4,8 | 25/42 | 54 |
| 250 | 1: 2,1: 3,9 | 19/34 | 43 |
| 300 | 1: 1,9: 3,7 | 17/32 | 41 |
| 400 | 1: 1,2: 2,7 | 11/24 | 31 |
| 450 | 1: 1,1: 2,5 | 10/22 | 29 |
| Concrete grade | Mass composition C:P:SH, kg | Volumetric composition per 10 liters of cement P/Shch, l | Amount of concrete from 10 liters of cement, l |
| 100 | 1: 5,8: 8,1 | 53/71 | 90 |
| 150 | 1: 4,5: 6,6 | 40/58 | 73 |
| 200 | 1: 3,5: 5,6 | 32/49 | 62 |
| 250 | 1: 2,6: 4,5 | 24/39 | 50 |
| 300 | 1: 2,4: 4,3 | 22/37 | 47 |
| 400 | 1: 1,6: 3,2 | 14/28 | 36 |
| 450 | 1: 1,4: 2,9 | 12/25 | 32 |
Video - How to mix concrete mixture or how to make concrete
To prepare the solution, pour cement, sand, crushed stone and water into a concrete mixer in a ratio of 1:2:4:0.5 and mix everything until a homogeneous mass is obtained. Pour the prepared solution from the corner opposite the front door. After filling several “cards”, level the solution with a shovel and distribute it around the perimeter. To compact concrete, use a vibrator - it will not only compact the mixture, but also remove air bubbles from it.
Having processed the filled cards with a vibrator, proceed to leveling. To do this, you will need the 3-meter rule - place the tool on the guides and pull it towards you. This will remove excess solution. In the leveled “cards”, dismantle the formwork and fill the resulting voids with concrete. When the entire floor is filled, cover it with plastic wrap and leave for two to three weeks to dry completely, do not forget to periodically moisten the surface with water.
After this time, you can apply a self-leveling mixture to the finished floor, which can smooth out minor defects and make the surface perfectly flat. Wait another three days for this mixture to dry.
This floor is distinguished by the presence of a layer of air between the soil and the screed, which is advisable in areas where the level of soil moisture is high, that is, if groundwater is closer than 2 meters from the surface. This technology can also be used when the site is located in the northern region of the country, and the heating system will operate periodically.
Note! It is very important that the ground level is at least 10-15 cm below the concrete floor. If the gap is large, heat loss will increase, and if it is smaller, ventilation will be less effective.
Let's look at how the flooring technology in this case differs from that described above.
Stage 1. Preparation
First prepare the soil.
Step 1.
Remove the plant layer and replace it with regular soil. Pour water over the soil and compact it so that the resulting layer height is approximately 15 cm.
Step 2.
Fill the top with gravel and tamp again.
Step 3.
Cover the finished base with a crushed stone-lime mixture (although it can be replaced with broken bricks or, for example, construction waste).
Next, at the same distance from each other (about 70-100 cm), install brick columns under the logs. Use red brick for this, but in no case silicate brick. Having installed the posts, cover each of them with roofing felt for waterproofing, and on top of it attach 3-centimeter thick bars, pre-treated with an antiseptic.
Stage 3. Lags
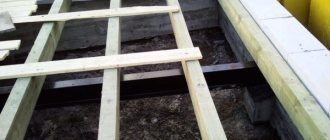
To make logs, use log halves, also coated with an antiseptic. The joints between the joists should be located above the columns, but place the outer joists 2-3 cm from the surface of the walls. Check the level of the joists and, if necessary, place wooden blocks under them. Remember: the maximum permissible horizontal unevenness in this case is only 3 mm.
Note! Instead of bricks for posts, you can use metal pipes.
Stage 4. Next steps
Nail the floorboard to the joists. Try to ensure that the boards fit as tightly as possible. If you wish, you can use a more reliable scheme:
- 1st layer – uncut boards;
- 2nd layer – waterproofing;
- 3rd layer – floorboards.
The subsequent stages of filling are no different from those described above.
Note! The underground requires high-quality ventilation, so make ventilation windows measuring 100x100 mm in the corners. Cover the windows with metal bars. Equip special vents in the basement (at least two per room).
Video - Arranging a floor on the ground
This set of rules applies to the design of floors in industrial, warehouse, residential, public, administrative, sports and domestic buildings. Download for free
Some may say that concrete screed is not particularly reliable and always remains cold. And its advantages include, perhaps, cost-effectiveness, environmental friendliness and fire resistance. This was the case before, but the use of modern materials and advanced technologies makes the service life and reliability of the screed much higher, and heat insulators ensure a comfortable surface temperature.
Laying a concrete screed on the ground is not always a rational solution. There are certain restrictions that must be taken into account:
- lack of a basement or ground floor;
- the occurrence of groundwater at a depth of at least 4-5 meters;
- the presence of heating in the house, since freezing of the soil can lead to deformation of the screed due to the higher load on the foundation.
Having decided to create a concrete floor on a soil foundation, you need to make sure that the house is not in danger of flooding. You can start arranging the screed only after the walls and roof of the structure have been erected.
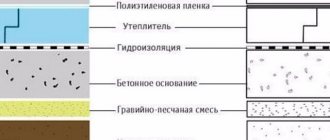
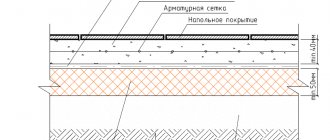
Concrete pavement on an earthen base consists of several layers, each of which performs an important function. Layers are created from various materials; as a rule, the “pie” includes the following components:
- sand layer;
- crushed stone or gravel layer;
- waterproofing material;
- rough concrete floor;
- steam and heat insulation layer;
- clean concrete floor.
The role of the finishing floor covering can be any commercially available material that matches the stylistic direction of the interior and fits most harmoniously into the design of the home.
Under no circumstances should you start pouring concrete directly onto the ground, because the first two layers of the “pie” prevent the penetration of moisture from the soil into the floor covering, which can occur by capillary action. Creating a concrete screed is not the easiest or fastest process. The main difficulty is that the work takes place in several stages. There is no need to cut corners, because the end result should be a high-quality coating that is not prone to dust formation, is sealed and can withstand loads.
The layered structure is the key to a long service life of the screed and its wear resistance. Modern technology for creating a concrete screed can be divided into two large stages: preparatory work and the actual construction of the concrete surface. Each of these stages consists of several parts.
Video - Floor screed on the ground
Sand and gravel layer for concrete floor
Might be interesting
Thermal insulation
Distinctive features and variety of ceiling tiles…
Thermal insulation
How to insulate the ceiling in a wooden house?
Thermal insulation
What is a heating cable?
Thermal insulation
Warm “pie” for a metal chimney duct
It is not recommended to skip this step. Dense soil cannot be considered a guarantee of the final quality of work. A layer of sand and gravel compensates for the natural movement of the soil and relieves the internal stresses that arise. The scope of work largely depends on the quality of the soil. In some cases, on rocky soil, it is enough to add sand about 10 cm thick.
If the soil is clayey, then it is advisable to supplement the layer with gravel or crushed stone. Soil used for agricultural purposes or with developed natural vegetation requires a different approach.
For example, black soil must be completely cleared of roots. After compaction, gravel is laid. Then sand is poured onto it. After spilling water, tamp again. Another layer of crushed stone is laid. The final leveling is carried out using sand level. Such a multi-layer base completely eliminates possible problems when operating housing on soft soils.
The final stage of the work will be to check the entire area horizontally, inspect for the absence of sharp stones and other objects that could damage the waterproofing layer laid on the prepared sand and gravel base under load. The method of laying a rough screed on top of crushed stone, which is then waterproofed and insulated, looks more reliable and of higher quality.
It is recommended to carry out this and the next stage as carefully as possible. The mobility of the sand and gravel layer is high. The best way to protect its integrity is to anticipate the laid boards or sheets. The load is distributed evenly over a large area and will remain flat for subsequent installation of insulation.
Waterproofing layer
The main purpose of the operation is to protect the insulation from moisture. The layer is located above the soil freezing level. If water gets in, it will begin to deteriorate and reduce its performance.
The film is laid with the necessary overlap. Then the joints are sealed. Bitumen-based waterproofing insulators are generously treated with a ready-made adhesive solution or, in the case of using the fusing method, the material is liquefied with a burner to the required state. Good waterproofing will protect the insulation layer for the concrete floor from unwanted exposure to moisture, and most importantly will allow you not to worry about the condition of the insulation under the concrete layer.
Laying insulation
A layer of 8-10 cm is considered sufficient to effectively protect your home from the cold. The main rule of this stage is the creation of a single area, without cracks and gaps. How to insulate a concrete floor in a private house, observing the recommended characteristics?
You should know that gaps of even a few millimeters increase heat loss by 10-30%. There are several effective ways to fix this problem:
- cut out parts as accurately as possible, achieving a tight fit;
- use special adhesives to create a sealed layer;
- lay insulation boards using polyurethane foam, which, having a porous structure similar to the base material, ensures maximum thermal protection efficiency.
Experienced craftsmen can easily remove large chips and cracks in the insulation coating with crushed polystyrene foam mixed with an adhesive composition. With this method, the effectiveness of thermal protection is practically not reduced, since the mixture has characteristics identical to the base materials.
Floor screed in a house on the ground. Preparatory stage
All of the above points, up to pouring, can be combined into a single category - the preparatory stage.
Naturally, you need to start by calculating the floor area in order to understand how much and approximately how much time will be spent on pouring. If we are talking about how to properly fill a floor in a private house, then the calculation of purchased materials is made according to the following scheme (using the example of a room measuring 5x5 meters):
- The floor area is calculated using the standard formula: length multiplied by width (5x5=25 square meters);
- the volume of the solution to be poured is calculated by multiplying the floor area by the estimated thickness of the screed. Based on a layer of 10 centimeters: 25 square meters multiplied by 10 centimeters - 2.5 cubic meters of screed.
Taking into account the calculations made, materials should also be purchased.
For a high-quality screed you will need the following components:
- ordinary quarry sand;
- cement grade of at least M150;
- medium-sized crushed stone;
- mesh for reinforcing screeds with a cell size of 5 to 10 square centimeters;
- metal profiles for display as beacons.
From all of the above, we can conclude that before properly pouring floors in a private house, it is necessary to purchase the main components for pouring the screed in accordance with the calculations made. Regarding the height of the floor, it is necessary to know the thickness of not only the screed and bulk layers, but also all the materials being laid: steam, hydro and thermal insulation.
Pouring floors in a private house begins with cleaning the workspace. Naturally, it is necessary to remove dust, dirt, and debris from the subfloor using a broom, or even better, a powerful household or industrial vacuum cleaner. After cleaning, you can begin a process such as filling the floor in the house with your own hands, which is not the easiest.
It is worth considering the difficulty of creating the required amount of solution. If you knead manually, it will take a lot of time to prepare one portion. It is best to use a concrete mixer with a large capacity. Only with automatic mixing can a correct, uninterrupted supply of solution to the floor be ensured.
If we are talking about how to properly fill the floor in a house, then the worker should have the following tools with him:
- a long measuring device (a tape measure is best);
- building level, long wooden strip (rule);
- shovel and trowel;
- circular electric saw (grinder);
- large volume concrete mixer.
Waterproofing before pouring concrete
In order for concrete floors in a private house to provide reliable protection for housing and serve for a long time, it is necessary to prevent moisture from getting into the insulation. To do this, a waterproofing layer is made on top of the polystyrene boards. The optimal material for this operation is special films. Their strength characteristics allow you to pour screed of the required thickness. The material is elastic and easily takes the desired shape.
The use of bitumen-based surfacing materials is highly discouraged at this stage. The temperature of such compositions is high and can damage polystyrene foam. Burner operation is completely eliminated.
The joints are carefully taped with a special tape or the recommended composition. Waterproofing films with a layer of adhesive applied to them are popular today. It is enough to remove the protective paper or polymer material, lay the waterproofing, pressing it tightly to the surface, observing the overlap dimensions specified in the instructions.
Base
The first step is to prepare the base. The first step is to determine the level of the finished floor. Doorways serve as reference points. You should take into account the total thickness of the “pie” and add another 50 mm to this.
To prepare the base, you need:
- cut off the top layer from the soil;
- moisten the surface with a mixture of water and liquid glass;
- lay out a layer of clay;
- thoroughly compact the site;
- wait a day for the clay to react with liquid glass.
Pouring screed and reinforcement
The last stage of work before finishing the floors. The solution is prepared using traditional technology. Depending on the brand of cement and the desired characteristics of the screed, it may have a different composition. However, experimentation is not recommended to avoid loss of quality.
Too much cement will make the concrete too brittle and prone to cracking. If its percentage is less than the norm, then the screed will turn out to be too loose and fragile. When installing a heated floor, the design will be very efficient, since there will be virtually no energy loss.
There are several ways to reinforce a screed. The work can be done in two stages. First, the soil layer is laid. Reinforcing elements are mounted on it. Then the final pouring completes the process. It should be remembered that the metal must be located in the body of the screed.
If you lay reinforcement directly over the waterproofing layer, the strength of the layer decreases. Concreting can be carried out in one operation, when the metal is knitted on specially placed spacers that lift the layer above the base to the required height.
To reinforce the concrete layer, you can use metal products available on the farm. For example, angles, channels, other types of rolled products left over after the construction of utility structures, old water supply and heating pipes, etc.
Having followed all the recommended rules for installing a floor on the ground in a private home, conditions are created for the use of any finishing method. All types of floor coverings can be laid.
