It is necessary to have initial skills in preparing a mixture for masonry, to know how it is used and what are the methods for mixing it. After all, the proportions must be chosen extremely accurately. Experienced masons sometimes do not always cope with this procedure.
Advertisement
The reason for this is that the main element holding the blocks together for construction is clay, unlike mortar for masonry walls, where this function is performed by cement.
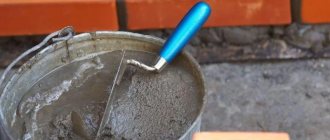
Proportions of ingredients for preparing mortar for bricklaying.
Based on this, it is necessary to carefully select the components for the construction of furnaces. Taking into account average statistical calculations, the required proportion for the construction of a furnace structure is: 200 bricks per 6 buckets of clay solution, which in its physical and chemical properties is similar to the composition for making red brick, which gives them the same ability to withstand thermal loads when firing the furnace.
There is an opinion among professionals that it is necessary to use clay for masonry as little as possible. Joints in masonry should be no more than 5 mm. This fact suggests that an increase in brick space will first lead to overheating of the clay, its cracking, and subsequently critical damage, which will result in a malfunction of the kiln structure.
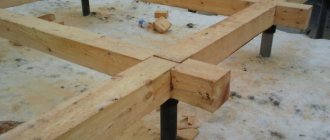
Using clay for laying stoves
On average, to build a sauna stove , you need three buckets of clay mortar per 100 bricks. Clay mortar is used because its chemical composition is not very different from red brick and together they tolerate high temperatures above 1000 degrees. The clay mortar creates seams with a thickness of no more than 4 mm.
This is an important point, since the seams between the bricks are too thick and cannot withstand very high temperatures and gradually begin to crumble. In the best case, the seams will become covered with cracks, through which air will begin to flow into the bathhouse, causing deterioration in traction and increasing fuel consumption. In addition, the risk of carbon monoxide getting into the room rather than into the chimney increases.
In the process of laying a stove, it is necessary to adhere to the main rule - the less clay is used during its construction, the better the quality of the future structure will be. In addition, clay is considered the most noble building material, as it gives the worker the right to make mistakes. For example, masonry made from cement mortar cannot be dismantled without loss, but a stove laid using clay mortar can be disassembled simply and without waste.
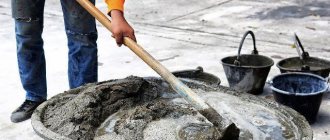
PREPARATION OF CLAY SOLUTION.
On average, when laying stoves, three buckets of mortar are required per hundred bricks.
Ideally, clay mortar and brick are almost the same in composition and can withstand heat of more than 1000 degrees. Professional stove makers determine the quality of the clay for the mortar by touch and carry out the laying with a joint thickness of 3-4 mm. With thicker seams, the clay between the bricks does not withstand high temperatures and crumbles, cracks form into which air is sucked in, which means traction worsens, fuel consumption increases and there is a danger of carbon monoxide escaping into the living space.
The golden rule of kiln work is that the less clay in the kiln masonry, the higher its quality.
One of the basic rules of a stove maker, inherited from our ancestors: the less clay, the better the quality of the masonry. And yet, clay is the most noble building material, since it gives the right to make mistakes. If masonry with cement mortar cannot be disassembled without loss, then stove masonry with clay mortar can be disassembled easily and without waste. During renovation work, bricks and facing materials laid on clay mortar can always be preserved.
There is an opinion that the strength of clay mortar can be increased with the help of various additives. For example: for 10 kg of clay - 100-150 g of table salt or 1 kg of cement.
However, our great-grandfathers hardly used cement, and their furnaces stood for a hundred years or more.
If the components are correctly selected, the clay solution does not require any additives, and all kinds of recommendations are just a safety net.
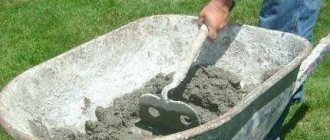
The mortar for masonry should be plastic, moderately greasy, or, as they say, normal. The greasy solution dries, decreases in volume and cracks. Skinny does not provide sufficient strength. Clays for preparing mortar come in different fat contents or plasticity. There are clay deposits from which a solution of normal fat content is prepared without adding sand. Sometimes you have to mix two or three clays taken from different places, and strictly dose them.
First they are mixed dry, then mixed with water. If the clays turn out to be oilier, then sand is added to them, the amount of which can range from 0.5 to 5 parts by volume. The most common ratio of clay and sand in the finished solution is 1:1 or 1:2. The amount of water is approximately 1/4 of the volume of clay. Fatty clays will require more sand, which should be fine-grained and free of foreign impurities. The sand is first sifted through a fine sieve with a mesh size of 1.5×1.5 mm, at least. Very thin clays have to be washed by removing excess sand.
There are many ways to test the quality of clay
.
One of the simplest: form a ball from the prepared solution and throw it on the floor. If the ball crumbles, it means there is a lot of sand and little clay in the solution; if cracks appear in the resulting cake, it means there is still a lot of sand. If the ball does not show a single crack, the solution is normal or greasy.
Or, as A.M. Shepelev recommends
First way.
Take 0.5 liters of clay, add a little water to it and knead it thoroughly with your hands until it completely absorbs water and sticks to your hands. Having prepared a stiff dough, roll a ball with a diameter of 40-50 mm and make a flat cake with a diameter of 100 mm from the same ball. Dry them under normal conditions for 2-3 days. If cracks appear on the ball or cake during this time, it means the clay is oily and requires adding sand. If, after drying, there is no crack on the ball or cake, and the ball, falling from a height of 1 m, does not crumble, then such clay is suitable for preparing a solution. Lean clays do not crack, but do not have strength; fattier clays must be added to them. Sand or clay is added in several stages, each time checking the quality of the resulting solution.
Second way.
Take 2-3 liters of clay, place it in some container, fill it with water, knead the lumps and mix with a paddle. If the clay sticks strongly to the funnel (completely envelops it), then it is oily. Sand must be added to such clay. If individual clots remain on the jig, then such clay is considered normal, and a solution is prepared from it without adding sand. If the oar is covered with a thin layer of clay, it means that it is skinny and requires the addition of fatty clay in certain quantities.
Third way.
This is the most accurate way to determine the quality of clay needed to make bricks. 0.5 liters of clay is kneaded until the dough becomes thick and thoroughly kneaded with your hands, as indicated in the first method. Roll the prepared clay dough into a ball with a diameter of 40-50 mm by hand, place it between two smooth (planed) boards and gently press on the top one, gradually squeezing the ball. The compression is repeated until cracks form on the ball. In this case, the degree of fat content of the clay depends on the amount of flattening of the ball and the nature of the cracks that form.
A ball made of lean clay (loam) breaks into pieces with slight pressure on it. A ball of clay slightly fatter than loam will crack when compressed by 1/5-1/4 of its diameter. A ball of normal clay cracks when compressed by 1/3 of its diameter. A ball of oily clay gives thin cracks when it is compressed by 1/2 of its diameter.
The same clay dough as the ball is rolled out by hand into flagella 10-15 mm thick and 150-200 mm long. The flagella are stretched or bent in the shape of a ring around a round and smooth wooden rolling pin with a diameter of 40-50 mm.
A flagellum made of fatty clay stretches smoothly, gradually becomes thinner, forming sharp ends at the point of rupture, and does not form cracks when bent. A flagellum from normal clay stretches smoothly and breaks off when its thickness at the break point becomes 15-20% less than the thickness of the flagellum, and small cracks form when bent. A flagellum made of lean clay stretches little, gives an uneven break, and when bent, forms many cracks and tears.
Two or three times repeated testing by crushing the ball, stretching and bending the flagellum allows you to select normal clay suitable for making raw bricks or mortar for laying stoves.
When testing, you have to mix two or three clays, adding sand or, conversely, removing it. Only with this selection can you find the best proportions of certain materials
Still, it is better to err on the side of the fat content of the solution. This is not significant for the operation of the furnace. Conversely, excess sand in the solution can affect the strength of the masonry. The fattier the solution, the more cracks the plaster will produce, but they can be eliminated by grouting with a leaner solution (with more sand added) and whitewashing in several stages.
After the sand and clay have been selected, all that remains is to properly prepare the solution
R.
First way.
To prepare the solution, the clay is soaked for 2-3 days in a large wooden box lined with tin, or in a special iron “trough”. Then they put on rubber boots and, gradually adding sand, trample it until not a single lump of clay remains. You can also break up clay lumps using a special tamper. Then the solution is felt with your hands and the remaining pieces of clay are crushed (or removed). A well-mixed solution, where sand and clay are in the right proportion, should slide off a steel shovel or trowel, and not stick to it. If you apply an even layer of mortar (3-4 mm) to the brick, put a second brick on top, pressing it (knock), and after about five minutes try to lift the top one, then if the quality of the mortar is good, the bottom one should not come off. If you dip a stick (the handle of a shovel, etc.) into a normal clay-sand solution, then an insignificant mark will remain on it. A very greasy solution will leave a kind of film on the stick; skinny - will leave no traces at all.
Second way.
When the clay is normal in fat content and does not require the addition of sand, then do this. They make a boardwalk or shield measuring 1.5 x 1.5 m, called a striker. It is not recommended to mix clay on the ground, as soil and various impurities will get into it. Layers of clay are poured onto the firing pin and moistened with water. As soon as the clay softens, it is shoveled several times and raked into a pile in the form of a narrow bed 300-350 mm high. The length of the bed depends on the amount of clay. Then blows are applied to this bed with the edge of a wooden shovel, as if cutting off slice by slice of the plate from the bed. The impacts cause the lumps to break and become crumpled. Round stones and foreign impurities are removed during operation. Then the clay is shoveled again, raked into a bed and crushed again, striking with a shovel. This operation is repeated 3-5 times until all lumps are broken.
If sand is added to clay, then do this. They pour sand in the form of a wide bed, make depressions in it, pour clay in layers, moisten it with water and fill it with sand on top, wait the required time until the clay softens. Then it is shoveled repeatedly with sand, collected in a bed and crushed with a shovel exactly as described above. You need to knead the clay for so long until it is completely mixed with sand and becomes homogeneous. In this case, there should be so much clay in the solution that it can only fill the gaps between the grains of sand.
A well-mixed solution with the right amount of sand and water should slide off the steel shovel, but not spread over it. To the touch it is a slippery mass, uniformly filled with sand, without clay or sand clots. This solution has one drawback: large particles often remain in it, making it difficult to make thin seams and also injuring your hands. While working, you have to constantly probe the solution with your hands, removing all kinds of foreign particles, and this makes the work difficult and slow. It is best to strain this solution through a fine sieve.
Third way.
If clay of normal fat content is used, which does not require the addition of sand, then it is poured into a box or barrel in layers, moistened with water, and poured on top. The clay soaks for several hours. Then it is thoroughly mixed and filtered through a sieve with 3x3 mm mesh. By adding water at the workplace, the required density of the solution is achieved.
When sand is added to clay, all components are measured in the required doses. The materials are sifted separately. After the clay is soaked, it is filtered, sand is added, mixed and filtered again.
Clay solutions should be stored in a closed container so that foreign objects do not accidentally get into the solution. Time spent sifting materials or straining mortar pays off handsomely when laying stoves.
Optimal solution composition
Many builders claim that the strength of clay mortar can increase if various additives are used . For example, if you add one kilogram of cement or 100 g of salt to a mixture consisting of 10 kg of clay, then the finished stove will be strong and durable. However, with correctly selected components that are added in the required proportions to the solution, no additives are required.
The finished composition of the mortar for laying the furnace should be:
- moderately fat or normal;
- plastic.
After drying, the greasy solution begins to wrinkle quickly, which leads to the appearance of a large number of cracks. And too dry cannot provide the necessary strength. Therefore, clay of oily or normal plasticity is distinguished. Sometimes builders mix two or three types of clay that are mined in different places. But in this case, you should approach the moment of dosing and mixing them with all responsibility.
They do it this way: first, this building material is taken and mixed in dry form, after which water is added. If the clay is oily , then river sand is added to the mixture. The most common proportion of sand and clay in the resulting solution is 1:1 or 2:1. The volume of water in this case should be a quarter of the clay volume. Oily clay requires more sand, which must be clean. To do this, it is sifted through a fine sieve.
Features of preparing solutions for other parts of the furnace
As has already been said, to lay a good sauna brick stove, in addition to clay, you will need two more mortars: with fireclay for the firebox and with cement or lime. for pipe and base.
How to prepare a solution with fireclay
To prepare the mortar for laying the firebox of a sauna stove, you need to choose clay from the lowest layers - very fatty. It is usually almost white, light gray or slightly yellowish. Fireclay sand or mortar is added to the soaked and rubbed clay (must be purchased at the store). You will need a lot of sand, and it costs a lot. To save money, it can be mixed with quartz (white) in a 1:1 ratio.
Fireclay mortar is sold in stores
Since the clay is obviously oily, test batches are made by adding a large amount of sand at once - from 3/4 or more. When mixing this solution, high demands are placed on the quality of water - it must have a hardness of no higher than 8 points. When preparing fireclay mortar, you only need to determine the required amount of sand. Strength tests are unnecessary - fireclay is a guarantor of the required qualities.
Is it possible to use a ready-made mortar for laying a firebox with fireclay? It is possible, but it costs a lot of money, and you will need quite a lot of it.
Lime or cement-lime mortar
The base of the furnace and the fluff of the chimney are made from a solution with increased mechanical strength - with the addition of lime and/or cement.
To prepare a solution using lime, you need lime dough. Not self-slaked fluff, but a paste-like mass made by professionals. This is the material on which it is better not to skimp. It is advisable to buy it ready-made, packaged in airtight containers (check the expiration date). When you extinguish fluff yourself, particles of quicklime remain in the paste. During operation, they absorb water vapor, are extinguished, and tear the seams. Therefore, it is more advisable to use ready-made lime dough, and of good quality.
Lime dough does not have to be bought in buckets, you can buy it in bags
To prepare lime mortar, self-extracted sand, sifted through a sieve with a mesh size of 1 mm, is suitable. There is no need to rinse it, since lime will destroy all microscopic living creatures, and alumina impurities will not affect the strength of the solution either. If the sand is purchased, then its fraction is 0.7-0.9 mm. You can use any drinking water, including tap water. There are no requirements for hardness, but process water with impurities still cannot be used.
Preparing lime mortar for the stove
Open the container and knead the dough using a smoothly planed wooden paddle. You begin to add sand in portions, achieving its uniform distribution throughout the entire mass. The “starting” amount of sand is 1/2 of the volume of lime. After mixing everything, look at the fun. A solution is considered normal if the layer of solution on the surface is 2-3 mm, with possible small tubercles and streaks. If a very thin, almost transparent layer remains on the surface, through which even the wood is visible, the solution is thin (too much sand). If the layer is large and loose, there is not enough sand, the solution is too greasy.
Veselko, which is used to determine the fat content of a solution
Lime mortar can be kneaded using a drill, but the fat content must be tested using planed wood. This is how fat content is determined most accurately.
When determining the proportions of lime mortar, we take more sand, but the plasticity rate remains. Experts first bring the solution to a slight “fattiness” by adding up to 5 parts of sand to 1 part of the dough, and then bring it up to standard by adding clean paste. In this case, the strength of the seam is ensured precisely by the grains of sand, and the lime only glues them together.
We check the viscosity (amount of water) using two bricks. We lay about 3-4 mm of mortar on one, the second brick on top, tapping lightly with the handle of a trowel, we level it. A bead of mortar about 1-2 mm thick should form on the sides. If it stands and does not drain, everything is fine. The solution was mixed properly. If there is no roller, the solution is not squeezed out, you need to add a little water. If, on the contrary, the roller floats down, there is too much water, add paste (sand, as agreed, was placed along the maximum border within the limits of plasticity, so a small amount of paste will not hurt).
Cement-lime mortar
The proportion of cement in this solution is very small. For one part of cement, take at least 9 parts of lime paste (and no more than 15). Cement grade - from M200 to M600. The higher it is, the less this component is required, but the strength of the mortar increases when using high-quality cement. You can use a ready-made adhesive composition for ovens as an additive. Its main component is high-quality cement.
The whole difficulty is that this solution has a short shelf life - it must be used within 45 minutes from the start of mixing. Therefore, it is necessary to conduct experiments with the amount of sand and water on a test batch (all actions are similar to determining the lime composition). When mixing the working cement-lime mortar for laying the furnace, all pre-measured components are quickly mixed in a certain order. The finished material is immediately taken to work.
Lime-cement mortar must be used quickly
You can mix the solution with the same paddle, or you can use a drill with an attachment. The mixing procedure is as follows:
- First, add water to the lime (if this is necessary according to the test results), stir until smooth. Mix with a mixer for about 2-3 minutes, manually for 10-15 minutes.
- Continuing to stir, add the required proportion of cement in a thin stream. Having achieved homogeneity of the composition, stir several more times.
- Continuing to stir, gradually add sand. Having poured out the entire required volume, stir a couple more times. The solution is ready for use.
All these subtleties were developed experimentally. The technology is different from that used by our ancestors. They beat clay. For laying a simple cooking stove, just broken clay will do, but a sauna stove with its temperature conditions requires a good, strong mortar.
Methods for testing clay quality
There are ways by which you can check whether this building material is suitable for laying a stove. The most common is to form a ball from a clay solution and throw it onto the floor with all your might. If the result is that the ball falls apart, it means that the mixture contains a lot of sand and not enough clay. If cracks appear, we can say with confidence that there is a lot of sand. If the ball has completely retained its structure, then the solution is mixed perfectly. Here are the most popular methods for determining the quality of a clay mixture for laying a stove.
First way
Take 0.5 liters of clay, add a small amount of water to it and mix the mixture with your hands until the solution stops absorbing water . A ball with a diameter of 5 cm is made from the resulting mixture and dried for three days under normal conditions. If it cracks during this time, then sand should be added to the clay. But if there are no cracks and the ball does not fall apart when dropped from a height of 1 meter, then this clay is ideal for mortar.
Second way
Take 3 liters of clay, place it in any bowl , fill it with water and knead it with a paddle. If the clay sticks to it very strongly, it means it is greasy and sand should be added to it. If individual grains stick to the oar, then such a solution is normal and can be used for laying stoves. But if the oar is covered with a thin layer of clay, it means that it is thin and fattier clay should be added to the solution.
Third option
This is the most accurate way to determine the quality of clay that will be used to create a brick oven. You need to take 0.5 liters of clay and knead it with your hands until it becomes stiff. From the resulting solution, roll a ball with a diameter of 5 cm and place it between smooth boards, with which you must carefully squeeze the ball. This must be done until the ball cracks.
If such a ball is made of thin clay or loam, then with a slight push it will fall into pieces. A ball made from richer clay cracks 1/5 of the diameter during compression. Normal clay, when compressed, will crack only 1/3 of the diameter, but oily clay is covered with small cracks by half.
From the same solution you can also make flagella having the following dimensions:
- length 20 cm;
- thickness 10 – 15 mm.
After this, they are stretched or bent into a ring around a pin or a rolling pin with a diameter of no more than 5 cm. Now you need to monitor what will happen to the flagellum. If it is made of fatty clay, it begins to stretch smoothly and slowly, forming sharp ends at the break site, and when bent, cracks do not appear.
made from normal clay will stretch smoothly and evenly, and the thickness at the break points will differ slightly from the original, and cracks may appear when bent. If the flagellum is rolled out of thin clay, it will practically not stretch, and when bent, an uneven tear will occur with the formation of numerous cracks.
Determining proportions
You need to work with the selected clay samples - select the amount of sand, check them, reject the worst ones, leave the best ones. Too many samples can confuse you. If the kolobok tests give different results, leave the one in which cracks appeared after it was compressed by a third. In this case, there is a high probability that you have found deposits to which you will not need to add anything. You just need to dilute it with water to the required consistency. The time savings are huge.
If you can’t decide exactly, leave two, maximum three samples. This will already be a large number of batches and many tests.
How much sand is needed in the mortar for laying a stove?
Since we brought normal or oily clay from the quarry (if everything was done correctly), we need to determine how much sand needs to be added to it. This can only be done experimentally. The procedure is as follows:
- We divide the existing batch of clay (5-6 kg) into two parts. We divide one of the halves into 5 approximately equal pieces (you can weigh them), each of which is placed in a separate container and filled with soft water. About 1/4 of the volume of clay is needed.
- Leave for a day until completely limp. We determine the readiness of the clay by taking a little and rubbing it between our fingers. If you don’t feel any lumps, it means it has become soggy enough. If the lumps (not grains of sand) continue to roll, it means we are still waiting. Please note that it is better not to stir it. Leave it as it is.
Pouring clay with water
- We press (grind) the soaked clay through a sieve with a mesh size of no more than 3 mm.
- Let it sit for a day.
- Drain off the released cloudy substance (dissolved impurities).
- Add the prepared sand, noting to which batch how much was added. We measure based on the volume of clay:
- leave it “as is”;
- add sand to 1/4 of the volume of clay;
- 1/2 volume;
- 3/4 volume;
- as much as clay.
- Add sand gradually, dividing the portion into parts (from 3 to 8-9 depending on the quantity). Mix each well until smooth.
- From each resulting mass we make: two sausages about 12-15 mm thick and 30-40 cm long;
- flat cake with a diameter of 15-17 cm and a thickness of 12-15 mm;
- ball with a diameter of 4-5 cm.
From each sample we make two sausages, a ball and a flat cake
We leave everything to dry, not in a draft, without access to sunlight. After 2 days, we wrap one rope from each batch around the handle of the shovel and look at the number and depth of cracks that appear. In a normal composition, the dried out crust and the slightly inner, still wet part should crack. In a skinny person there are many cracks and they are very deep, in a fat person they are mostly superficial. So we choose formulations with normal fat content.
How to determine the appropriate clay mortar composition
To confirm our assumptions, we test the second clay sausages. We pull them by the ends to the sides, tearing them apart. For a normal composition, the thickness at the break point should be approximately 1/5 of the original (if the thickness was 15 mm, then the diameter at the break will be 3 mm).
These tests usually yield two or three suitable compounds. Having rejected those that are not suitable, the buns and cakes are left to dry. This takes up to 20 days. Then we drop them from a meter height, see which composition turns out to be the strongest - it will be the best.
For a long time? Yes. But this is the only way to find the most durable mortar for laying a stove. If you really don't have time, you can skip these tests. But you will definitely need to check whether the fat content of the solution is chosen correctly. This is done after dilution with water (described in the “Quality Control” paragraph).
How much water
In the stove business, it is important that the mortar for laying the stove also has an optimal viscosity, which depends on the amount of water. We make a test batch from the half that was set aside. Soak it, rub it through a sieve, add sand according to the proportion found. If you can’t stir properly, add a little water.
They mix the clay with a board or a “veselka” - a board planed in the shape of a small oar. Once we have achieved homogeneity, we perform a simple test.
How to determine the amount of water for clay mortar
We take a trowel and run it along the surface of the solution with its edge. If the mark remains “ragged”, add a little water, stirring thoroughly. If the edges of the furrow left float, a lot of water has been poured. You must wait until the water settles and appears on the surface. Then it can be collected. The second way is to knead some more of the obviously “dry” solution and mix everything. With normal consistency, the clay solution under the trowel has a smooth surface, the edges of the grooves keep their shape.
Quality control and storage
After you have mixed a test batch of clay mortar for laying the stove, we test it again:
- Take a trowel, put a little solution on it and turn it 180°. A normal solution hangs calmly in this position, a thin solution (lots of sand) falls.
- Rotate the trowel with the solution 90° (edge down). A normal solution slowly slides down and falls, leaving a thin, almost transparent film of clay on the metal. If the solution is greasy, it hardly slides off, or leaves a thick layer on the metal.
- We take two bricks. We apply a 2-3 mm layer of mortar on one, put the second one and tap it with a trowel, as when laying. Leave for 7-10 minutes. We grab the top brick and lift it up. If the second brick hangs and does not fall even with active shaking, then the mortar was made well.
If all tests went well, you can mix a large amount of clay mortar according to the proportions found. The finished clay solution can be packed in buckets or poured into barrels and closed with a lid. In this form, without changing the quality characteristics, it can be stored for months.
The use of refractory mortars for laying brick stoves
More than 20% of the volume of masonry in the kiln is made up of masonry mortar. Extreme operating temperatures of more than 1000°C in the furnace place special demands on the formulation and component composition of building mixtures. Fire-resistant and fire-resistant clay-sand mortars (GPR) meet these requirements to the greatest extent. The binder for the solutions is lump or crushed clay. It comes in different colors, which change during the firing process. Light gray clay turns white when exposed to high temperatures. Red, due to its color due to impurities of iron oxide Fe2O3, brown when wet. There is Cambrian gray-blue and clays of other colors.
Instead of a natural component, derivative materials from raw clay - fireclay powder and mortar - are widely used. Ordinary quartz sand is used as a filler. The mixture for laying a brick stove is diluted with softened water; it is better to use water from wells or rainwater. During the work, you will need suspensions of different densities: solutions with a pasty, creamy and milky consistency.
Clay quarry.
Heat-resistant and fire-resistant masonry or facing compounds are not used everywhere. They are only used for masonry and plastering of oven parts with temperatures above 400°C. The firebox, the heat-storing part of the stove and the chimney are exposed to high temperatures within 1600°C. For their construction, special clay is used for laying stoves. Lime or cement mortars for general construction purposes are suitable for laying the remaining parts of the furnace - the foundation, chimney flare and pipes.
How to make clay mortar for the stove?
There is an important point here. There are no clear proportions of components for mixing the solution; you need to determine them yourself. The fact is that the clay already contains sand in a certain amount; if there is little of it, then it is considered fat, and when there is a lot, it is considered skinny. Accordingly, the proportions can be different - from 1: 2 to 1: 5 by volume.
A solution of natural clay and sand is used for laying stoves with low temperature conditions - up to 1000 ºС. When a higher temperature is envisaged in the firebox, fireclay clay is used for masonry, and the walls of the combustion chamber are made of refractory bricks. By the way, the latter is made from the same fireclay (kaolin) clay.
In this case, the working solution can be prepared in two ways:
- purchase dry kaolin clay and mix according to the instructions;
- take fireclay sand and mix it with natural clay, as described below.
Stirring a solution of fireclay clay, sold in bags, will not be difficult, you just need to monitor its fluidity so as not to overdo it with water. To prepare using the second method, you need to purchase fireclay (mortar) in the form of sand and white or gray refractory clay. The proportions are as follows:
- refractory clay – 1 part;
- ordinary clay - 1 part;
- fireclay – 4 parts.
Otherwise, fireclay clay for masonry is prepared in the same way as simple clay. The main thing is to maintain the normal fat content of the solution so that your oven does not crack.
The mixture will contain three components:
- Clay.
- Water.
- Sand.
Many people are interested in the proportions of clay and sand for laying a furnace. No one can say in what proportions to mix these components in your case, since the quality of clay in different places is completely different.
The finished composition should be plastic, but not too greasy, and not too dry (skinny, with too much sand). The greasy solution, when dried, decreases in volume and cracks. Skinny can crumble, it is not strong enough.
The properties of clay are determined by its proportional composition (sand, SiO2, Al2O3 and other impurities).
The fat content of the clay and how much sand will need to be added are determined experimentally.
The test is very simple.
Take a lump smaller than your fist, knead it with wet hands and roll it into a ball.
The ball is placed between two smooth boards (metal or planed boards) and begins to be slowly compressed.
This is done until cracks appear.
Ideally, cracking should appear when the ball is compressed by no less than 1/3 of its diameter. After a couple more tests, which also show a positive result, you can lay bricks on such clay! However, such luck does not happen often.
If the clay ball cracks almost immediately, it contains a lot of sand. If it smoothly shrinks by more than half, the clay is too oily.
Flagella
The thickness of the bundle is 15-20 mm thick and 200-250 mm long. A freshly rolled rope is wrapped around a stick 40 - 50 mm in diameter. The normal result is that small cracks will appear on the surface. It won’t crack at all – it’s oily. And it will crack with deep cracks - skinny.
Roll a ball and make a small cake (4-5 cm in diameter). Both samples are completely dried, this will take 2 - 3 days.
If during this time the edges of the cake become very cracked, the clay is oily (add a little sand and repeat). A sign of a thin composition will also be the fact that the cake crumbles when pressed.
The ball is dropped to the floor from a height of 1 m. If it completely falls apart, there is a lot of sand in the raw material (skinny). The best samples do not break at all (an acceptable result is if the sample breaks into 2-3 large pieces).
Skinny clay is the most inconvenient material to work with. Making it fat is quite difficult. To do this, the raw materials need to be tortured. The procedure involves stirring in water repeatedly and draining after the solids have settled. Sometimes stove makers mix several clays. By mixing clay with normal or high fat content to a lean sample, you can obtain a satisfactory composition.
So, let's look at how to prepare clay for laying a stove. Cooking steps:
- Soak.
- Straining.
- Kneading
It is best to soak and mix the composition in a large tub using a wooden paddle.
For straining, a sieve with a wire mesh is used (the total mass is collected in buckets and delivered to the work site). Large impurities remaining on the sieve are removed. The viscous mass is pressed through with your fingers.
The water that is best suited for this work is soft (artesian, rain or snow).
A large amount of clay raw material is mixed with a paddle. It is inconvenient to use a trowel, and it is not recommended to use mechanization methods (such as a concrete mixer), since vibration can cause small spaces filled with liquid to form in the solution, and uniformity is very important for stove masonry.
A test batch is made. All proportions are fixed so that when a successful option is obtained, the recipe can be reproduced on a larger scale. A thoroughly mixed mixture of clay, sand and water is tested for plasticity, or fluidity.
We suggest you read How to prepare plum filling for pies
Run a trowel over the surface of the clay, as if removing the top layer. If the surface under the trowel is torn and “dry,” you need to add water.
On the contrary, it happens that the solution floats, and if you leave it for a while, water comes out. This excess water is drained and measured.
By comparing its volume with the one that was initially filled, you can get a fairly accurate amount of water that is actually needed.
A trowel is dipped into the prepared solution. Ideally, the layer remaining on the surface should be thin and flow in wagging streams, through which the metal will be visible. If the layer is continuous, there is still a lot of fat content.
Another way: add enough clay to water (10 l) to make a creamy solution. A wooden board is lowered into the solution, the clay is stirred with it, and then removed.
If a layer of about 2 mm has settled on the surface of the wood, the plasticity of the clay is just right. A thin layer, less than 1 mm, indicates that the solution is low-plastic (oily clay is added). And a thickness of more than 2.5 mm indicates excessive plasticity (sand is added).
Clay mortar has been used for laying stoves since time immemorial.
Advantages:
- Environmentally friendly. All components are of natural origin and do not emit substances harmful to human health.
- Availability. The components can be obtained, prepared by hand, or purchased at a reasonable price.
- Easy to dismantle. If it becomes necessary to move or replace a section of the furnace, the work will not require significant effort. The mixture is easily removed, and the bricks remain clean and intact.
But obtaining the necessary positive properties will require serious effort and time.
To determine the fat content of the main ingredient, do the following:
- A small amount of clay (about 1 kg or one liter plastic jar) is thoroughly cleaned. To do this, you can pick out large debris with your hands, and to remove other contaminants you will need to soak the substance in water several times. The liquid is constantly drained to remove all suspension. Before use, the clay is cleaned and soaked for several days.
- The resulting mass with a normal structure is divided into 5 equal parts: nothing is added to the first part, 25% of sifted sand to the second, 50% to the third, 75% to the fourth, 100% to the fifth.
- Each element is mixed separately. Water is added in small quantities until a paste-like consistency is obtained. You can judge the readiness of the solution by whether the mixture sticks to your fingers: if not, then no further stirring is required.
After the experimental batch of the composition is ready, it must be tested.
The fat content of the clay is determined by the plasticity of the samples.
Method 1
This technology is not particularly difficult. Each of the five parts is rolled into a small ball and kneaded into a flat cake. This is easy to do by placing it in the center of your palm and applying pressure with the fingers of your other hand. All resulting cakes are marked with appropriate pieces of paper on which the proportions of sand are indicated.
It will take 2-3 days for the fragments to dry. Initially, a visual inspection is carried out: the cake should not have cracks and collapse when compressed. If you drop it on the floor, it should remain intact. Based on the results of the experiment, the correct ratio of sand and clay is determined.
Method 2
Balls with a diameter of about 3 cm are rolled, each of which is placed between two carefully planed boards. Gradually, without unnecessary effort, pressure is applied, and the result is periodically checked. If the ball immediately began to crack, then it is a lean mixture; if cracking occurred when squeezing halfway, then the composition is too fatty. The optimal ratio of the components is when most of the ball is flattened and does not collapse.
Checking the fat content of the composition by squeezing a clay ball
There are other methods, but the general principle is the same for all.
Based on the experimental results, appropriate conclusions are drawn. If the fat content is high, the amount of sand should be increased by at least 1.5–2 times; if it is low, on the contrary, it should be reduced.
The ideal proportions of clay and sand for laying stoves are 1:1; this solution is plastic and heat-resistant. But it is necessary to dilute the mixture, focusing on the intermediate result. The classic recipe involves adding ¼ liquid, but depending on the specific situation, the amount of water can be increased.
The quality of the solution can be determined by the number of cracks in the dried sample.