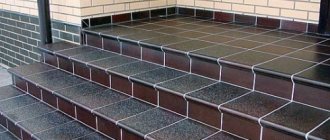
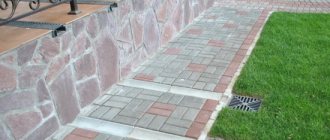
Recently, paving stones have become a very popular material for laying on the ground. This is due not only to its high wear resistance, but also to the fact that paving stones can impart special architectural sophistication and a certain character to the surface. It is invariably associated with good taste and style.
Recently, paving stones have become a very popular material for laying on the ground. This is due not only to its high wear resistance, but also to the fact that paving stones can impart special architectural sophistication and a certain character to the surface.
It should be noted that many people love it, and therefore it is placed in city squares (as a sidewalk), and in suburban areas, and in many other places.
If you think logically, then all these places have different conditions for laying this material, and therefore today we will talk about what the bases for it are. In addition, the process of laying this unique material will be revealed. But still, the main emphasis will be on landscape construction and landscaping of suburban areas with paving stones.
Laying on different types of substrates
It may seem to some that there is nothing complicated in this matter. Indeed, if you look at it, everything becomes clear. But laying paving stones is difficult physical work that is very exhausting. Also here it is necessary to observe all technological conditions very precisely. Let's figure out what is needed to lay paving stones under different foundations:
- shovel;
- material for paving stones;
- watering can;
- curbs;
- liquid solution M-100;
- rubber mallet;
- tamping;
- road network;
- dry mixture;
- wooden boards;
- concrete.
Preliminary preparation
First, preparation must be made. There are several ways to lay paving stones. It all depends on the foundation that will be under it. Can be laid with or without curb stones. However, most professionals still prefer to lay paving stones with curbs. But this is nothing more than a matter of personal taste. It is important to take time to prepare the base for laying paving stones.
To begin with, select the place where the paving stones will lie. It is also necessary to determine the location of the water drain.
One way or another, preliminary markings need to be done before installation. To begin with, select the place where the paving stones will lie. It is also necessary to determine the location of the water drain. It should go away from the building or away from the road to special places or at least onto the lawn. This is an important stage in preparing the base for laying paving stones.
In addition, it is necessary to make a slope. It can be longitudinal, transverse or transverse-longitudinal. But it is worth considering that the slope must be at least 5 mm per 1 m. It is advisable to use drainage channels as the main components of drainage. The simplest option is a storm drain, which consists of water receivers and grates. Such channels are usually 1 m long. You need to start from this value.
Road pavements covered with paving slabs are classified depending on the loads:
- class N1
- designed only for pedestrian loads; - class N2
- designed for loads from pedestrians and the arrival of harvesting equipment weighing up to 3.5 tons; - class N3
- designed for loads from pedestrians and from the arrival of large sidewalk cleaning equipment with an axle load of less than or equal to 5 tons/axle. - Category IV (4) highways
are designed for loads from vehicles with an axle load of 100 kN and a wheel load of 50 kN.
When paving a suburban area, you should be guided by the rules for constructing a base for road pavements of load classes N1 and N2
. Paving installation begins with breaking out the area to set heights and determine paving levels.
To avoid stagnation of rainwater, it is necessary to set slopes for paving - at least 1 cm per linear meter
.
At the first stage of foundation preparation, soil is excavated
if necessary, backfill the area with sand using an excavator.
Universal geotextiles with a density of 150 grams per m2 are laid
on top of the laid sandy soil . This measure is necessary to maintain the integrity of the subsequently laid pie when the groundwater level fluctuates. Geotextiles are laid with an overlap of adjacent fabrics of at least 30 cm.
Curbs are installed along the perimeter of the paving
to separate the boundaries between paving and lawn. Another function of the curb is to prevent the paving slabs from spreading. The border is installed on the mortar and secured with it at the ends.
Next, they fill it with granite crushed stone using the “hands-on” method without driving onto the open surface.
. The most suitable fraction of granite crushed stone in this case is 20-40 mm. The poured crushed stone is distributed evenly around the perimeter of the site and leveled with a rake.
After this, the material is pre-compacted using a vibrating plate weighing 90-120 kg
, wedging it with a smaller fraction of crushed stone with an average grain size of 5-10 mm and re-compaction. The optimal thickness of the crushed stone cushion for a pedestrian area is 15 cm, in the case of automobile paving - 25 cm. In general, the choice of the thickness of the crushed stone layer depends directly on the stability of the soil and the designed loads. Layer-by-layer compaction of crushed stone creates a special layer, thereby preventing the upper layers of the pie from “leaking” into the underlying layers of the road pavement.
After thorough compaction of the crushed stone cushion, a layer of grating is distributed, which also needs to be compacted and leveled along the beacons
to achieve uniform surface thickness. Gartsovka is a mixture of cement and sand without adding water. The convenience of the prance is that it provides a solid foundation and at the same time allows water to pass very well into the crushed stone and into the ground.
Installation of paving slabs is carried out directly on the edge
. The installation principle depends on the size of the paving slabs and the chosen laying pattern. When all the tiles are installed, it is necessary to sprinkle and brush the seams with dry seeded quartz sand. Dry sand, unlike wet sand, will spill out to the entire depth of the seam, which will save you from repeated sweeping.
The final stage is tamping the tiles with a vibrating plate through a rubber pad
, which allows you to even out all the unevenness of the tiles, and at the end get a high-quality, uniform coating.
The schematic diagram of the pie for paving slabs (paths on the site, blind area, recreation area) looks like this:
- paving stone 40-60 mm thick,
- installation (underlying layer) thickness in a compacted state of 30-50 mm, made of cement-sand mixture (gartzovka) or sand.
- seams filled with sand or binder-based mortar.
Tsemsis-Park landscaping specialists
:
Laying on a sand base
Next comes the turn of paving stones. She lays herself out on the wet sand. The distance between each pavement tile should be 2-3 mm. You cannot lay paving stones without gaps.
Structure:
- paving stones;
- sand layer 10 cm;
- the soil is dense.
The first step is to prepare the so-called “bed”. The depth of excavation should be at least 15 cm, but not more than 40 cm. Then sand is poured in a layer of 15 cm. A spare 5 cm is needed, since the sand layer will definitely settle down and “shrink”. It needs to be leveled using, for example, an ordinary rake. After this, the sand is watered with water from a watering can. For 1 sq.m. there should be 10 liters of liquid. At the end, the wet sand must be compacted by hand. You can use a tamper for this. The base must be strong.
After some time, you need to install curbs. This is done using a liquid solution M-100. Next comes the turn of paving stones. She lays herself out on the wet sand. The distance between each pavement tile should be 2-3 mm. You cannot lay paving stones without gaps.
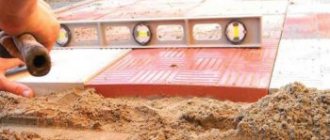
The next step is to level the surface of the path using a mallet. The gaps between the tiles are filled with dry sand.
Laying paving stones on a concrete base
Structure:
- paving stones;
- a mixture of sand and cement;
- reinforcing mesh;
- concrete;
- sand layer 10 cm;
- a layer of gravel 15 cm;
- the soil is dense.
The next step is laying the mesh. It is also filled with concrete. After this, the base levels and slopes are formed.
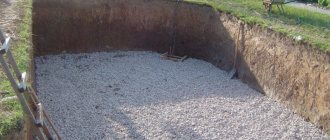
The soil is dug to a depth of 40 cm. First of all, a gravel layer is laid, the thickness of which should be approximately 15 cm. It must be leveled and compacted. The same must be done with a 10 cm layer of sand.
It's time to make a kind of frame from wooden boards. This is followed by a 10 cm layer of concrete. If the area is large, then it is better to leave expansion joints. This will help avoid cracks when cold weather sets in.
The next step is laying the mesh. It is also filled with concrete. After this, the base levels and slopes are formed. Then the curbs are installed using a liquid solution.
This is followed by a sand-cement mixture, the thickness of which should be 2 cm. It is poured onto a damp surface. Technology requires this.
At the end, the expansion joints are sealed with filler.
Water drain and insulation
It is very important to provide the base with protection from water, which can over time wash away some of the material and lead to destruction of the site. Among the entire list of modern materials for laying paving slabs, geotextiles should be highlighted. This material provides reliable waterproofing. It is also used for arranging garden ponds. It does not rot and is highly durable, and it also prevents plants from growing in the joints between the tiles.
In order for the waterproofing to be carried out according to all the rules, and for moisture to not accumulate in the structure of the sidewalk after precipitation, it is important to provide for a slope for water drainage. On average it is 2 degrees per meter of track. You need to plan such a slope at the stage of removing the soil layer, but if you forget about this, the situation can be corrected by laying gravel in a layer of different thicknesses.
To drain water, it is also necessary to additionally provide for the presence of drainage grooves; they are mounted together with the tile itself.
To prevent moisture from accumulating under the tiles, it is necessary to provide a waterproofing layer and water drainage

