Individual construction of houses is almost never complete without the use of stairs. The main requirement for all types of these structures is the safety of movement on them.
Stair structures must be strong and stable. Therefore, the question of how to attach a staircase to the ceiling is very relevant in any private home. Let us consider in more detail the various options for fixing stair structures depending on their type.
During operation, the staircase structure is subjected to various types of permanent and temporary loads. In addition to its own weight, it must also withstand the weight of a person and objects moved along it. Therefore, the issue of durable fastening of such structures in the house is very important.
Stair structures are usually fixed to:
- Semi;
- Top floor slab or beam;
- Inter-march platforms;
- Walls
– it is recommended to attach the structure only to load-bearing walls made of concrete, timber or brick. The wall thickness must be at least 25 cm.
Important! Products cannot be fixed to asbestos-cement, plasterboard walls, or partitions laid out in one brick.
The method of fastening largely depends on:
- Type of staircase structure;
- The material from which it is made;
- Product weight;
- Its dimensions;
- Floor, ceiling and wall materials.
The main types of staircase structures are:
- Marching
- can consist of one or several marches. - supported by bowstrings, stringers, support pillar or bolts
. Most often, combined supports are used. - Complex structures
- a combination of flights and spiral sections, several flights with turns at different angles.
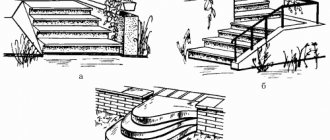
The method of fixing the structure depends on many factors - photo
The most common in private homes are marching structures made of wood. A single-flight product can have the simplest fastening - to the floor and ceiling. It is a very reliable and stable system that does not require additional intermediate fastenings.
If there are two or more marches, then additional fixation of the structure is necessary. Complex models may have combined fastenings, depending on the shape and type of support.
Openings for installation of staircases
An opening for stairs in the ceiling must be provided at the design stage of the building.
Its dimensions depend on:
- Dimensions of the future design;
- Type of stairs;
- Type of overlap.
The hole in the ceiling under the stairs must have a width equal to the width of the flight with the addition of gaps necessary for fastening the structure and its finishing. The length of the opening largely depends on the angle of inclination of the product.
But for safety purposes, the hole in the ceiling for the stairs must allow the descent and ascent of a person to his full height. Openings are made in rectangular, square or round shapes.
Fixing stairs to various types of interfloor ceilings
The quality of the material of the staircase structure is of great importance for its reliability and safety. But the strength of fixation of all its elements among themselves, as well as the correct fastening of the staircase to the ceiling, inter-flight platforms, floor and walls play a much larger role.
The interfloor ceiling when installing stairs can be made of various materials:
- Wood – the most common type of flooring is wooden beams.
- Reinforced concrete slabs.
- Steel beams are rarely used in private construction.
Depending on the type of load-bearing structures of the floor, various methods of fixing staircase structures to them are possible.
Interfloor ceilings on wooden beams
If the floors in the house are made on wooden beams, then the flight of stairs should be laid on the beam without distortions. Its fixation is carried out using special fastening systems, depending on the material of the staircase and the type of its supports.
The supports of the staircase structure in the form or stringer are directly adjacent to the floor or platform between the spans, transferring all the loads to them.
- If fastened incorrectly, cracks may form in the wooden elements of the supports. This quite often happens when fixing a bowstring or stringer with beams and slabs into a lock.
- Both vertical and horizontal loads act on the lower support of the structure. The same thing happens when the support is tightly fixed to the ceiling.
- If the bowstring or stringer rests on the ceiling only with its horizontal part, then the upper support will only be subject to vertical loads from the stairs. Consequently, the risk of cracks in the march is minimized.
- A gap of about 1 cm is required between the vertical end of the supporting element and the load-bearing structures of the floor.
Fixing wooden stringers to longitudinal or transverse wooden beams can be done with a notch on the staircase support, or on the beam element.
There are a lot of options for fixing stair structures to wooden beams. Often the choice of a specific method depends on various nuances of the product itself and how the opening in the ceiling under the stairs is made.
Features of fastening stairs with metal stringers
Staircase structures on metal supports are stable and durable. If the interfloor load-bearing structures are made of reinforced concrete beams, then the metal support can simply be welded to them.
But another option is also possible:
- The edge of the stringer, with which it will be attached to the beam or ceiling slab, is cut at the required angle.
- Steel plates or corners are welded to the ends of the support.
- The stringer is attached to a reinforced concrete structure using bolts or anchors.
To fix a steel ladder to a wooden beam, you can install a special metal plate with through holes on the upper end of the stringer.
- The support is attached to it through these holes. The thickness of the metal must be at least 5 mm.
- To ensure that the plate does not interfere with the decorative finishing in the future, it must be recessed into the beam. This can be done by cutting a rectangular groove in the beam material to fit the plate.
- You can do this kind of work with your own hands using a chisel and a hammer, but the process will be very labor-intensive. It is much easier to cut a groove using a router. The width and height of the seat should be 3-5 mm than the dimensions of the plate.
- When choosing suitable hardware for fastening a metal stringer, it is necessary to take into account permanent and temporary loads. Constant load is the weight of the staircase structure itself, variable loads are the weight of a person and objects being moved.
- For example, the mass of a metal product is 140 kg, the average weight of a person is 90 kg. Therefore, the minimum load will be 230 kg.
If you use self-tapping screws measuring 10 x 120 mm as fasteners, each of which can withstand a load of 100 kg, then the use of 8 hardware allows a maximum load on the fastener of 800 kg. A sufficient safety margin is provided with this fastening.
Due to the wide variety of options, the most suitable fastening of the stairs to the ceiling should be selected taking into account all the individual characteristics of the structures. If you are not confident in your abilities, then it is better to entrust such work to professionals.
The price of their services will largely depend on the complexity of the product being installed. But you shouldn’t skimp on this - the safety of the entire structure plays a very important role. More information on the topic “Correct installation of stairs to various types of floors” can be obtained from the video in this article.
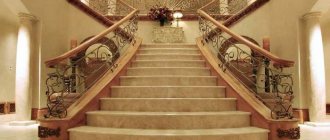
Simple but elegant design will fit into any interior
Despite the wide variety of staircases, in the modern world most people prefer the classic staircase options. Indeed, classic is time-tested quality, and here you can be confident in the convenience and reliability of the design. Therefore, in private houses one can often find staircases on bowstrings.
The bowstring ladder has a fairly simple design. A characteristic feature of this type of stairs is the mortise steps installed in special grooves.
That is, recesses are made in the side load-bearing beams into which the steps are inserted. In fact, this is the main difference from products on stringers, when the steps are placed on a supporting beam, and not inserted into grooves.
The principle of attaching stair steps to a bowstring
To avoid divergence of the strings (guides of the stairs where the steps are installed), special fasteners are used. The following are usually used as fixatives:
- wooden strands (less reliable);
- metal cords with a wide gasket.
Scheme of fastening ladders on a bowstring
Due to the design features, they are most often found. However, recently plastic models have begun to appear. Also in some cases, combined varieties are used. For example, plastic load-bearing beams with wooden steps, or vice versa. Due to their ease of manufacture, staircases with mortise steps are used everywhere. In most cases, they can be found in private homes or in small country houses.
The popularity of wooden ladders on bowstrings is also due to the fact that assembling such a ladder is quite simple, and it looks great
True, not everyone can make such exquisite spiral staircases
Creating such ultra-modern compositions from metal and glass is the prerogative of professionals
But, enough general points, it’s worth moving on to an overview of the positive and negative sides.
Wooden steps on a concrete staircase: how and what is best to make them from
Concrete stairs are poured not only in public and industrial buildings, but also in residential buildings. They are strong, durable, and this manufacturing method allows you to create a variety of design shapes. But they look unpresentable and require decorative finishing.
In this article we will talk about how to install wooden steps on a concrete staircase, what is the best material to make them from and what are the advantages of using this material.
Advantages and disadvantages
- Quality of construction. Despite the prefabricated design, with a careful approach and unhurried work, such products can last for decades.
- Variety of shapes. Depending on the free space and height of the room, a staircase on bowstrings can be spiral, rotary (L or U-shaped), rounded, or have a classic straight look.
Turning stairs on one bowstring and bolts look very impressive
- Wide possibilities for design. In addition to the variety of shapes, there are many design solutions. For example, free placement of balusters (“posts” of railings) or the manufacture of steps without risers.
Combining materials allows you to create beautiful and original designs
Perhaps the only drawback of string ladders is the high requirements for accurate calculations and quality of work. Incorrect design or poor fastenings can reduce the reliability of the connection. As a result, the supporting beams may separate, and the steps may fall out of the grooves.
Advice!
If you have a complex design in mind (like an ornate spiral staircase), we recommend turning to specialists. It is quite difficult to design and build such a staircase with your own hands without experience.
Types of docking
To produce staircases on a bowstring, several options for joining the steps and the bowstring are used. However, before studying the types of fastenings, you should determine what a tread and riser are:
- tread is a horizontal part of a step on which a person’s foot rests when descending or ascending;
- a riser (or riser) is the vertical part of a step, which gives additional rigidity and strength to the structure.
The structure of steps on bowstrings
Flights of stairs can be made without treads and cannot be done without. Based on this, it is worth highlighting several options for attaching the steps and the bowstring - the supporting beam:
- solid step - grooves are made in the string for the tread and riser, which together form a right angle;
- one-piece step with an overhang - recesses are also cut out in the supporting beam for both parts of the step, but for greater rigidity, the horizontal part protrudes slightly above the vertical one;
- one-piece version with wedging - wedges are inserted into the recesses for steps and treads for better fastening;
- free option - step without riser;
- free step with wedges - similar to the previous version, but using wedges.
Recently, steps without risers have become increasingly popular.
How to attach the stands to the bowstring?
The racks must be secured to the surface of the support beam with studs. To do this, you will need a regular drill and a miter saw. The materials you will need are the bowstring itself, fencing posts, galvanized studs with a thread of at least M6, and PVA glue in a tube. Typical work sequence:
- It is necessary to mark the places for attaching the railings in the form of racks. If a complex design is chosen, it is recommended that the project be checked by professionals;
- It is recommended to securely fasten the stand and cut off its lower corners, maintaining the angle of the inclined beam;
- Make holes with a diameter of 12 mm for a length of 80 mm;
- Drown the pins in the adhesive and insert them into the holes, leaving 7 centimeters out;
- Make holes in the bowstring; to do this, the drill bit needs to be secured to 14 mm. Work depth – 10cm;
- The balusters are inserted with pins, and the fixation process starts from the outer pillars.
The step is attached to the string of the staircase by insertion or mounting on supporting parts. These include special bars that are attached to the beam using screws on the tread. The tread itself is attached to the supports with the same screws.
Some experts recommend merging the step. In this case, short bars are used for gluing, which makes the surface not solid, but with longitudinal and transverse seams. You can join them in a checkerboard pattern, which is reminiscent of parquet joining.
The option of arranging a staircase with steps embedded in the bowstring with grooves 2 cm deep is allowed. It is necessary to first mark them, retreating from the edge of the edge, and then insert a tread with a riser inside. The easiest way is to screw the board in from the end with a screw.
The staircase and its string will be reliable and safe if the strings are joined on the balusters. In this case, the beam has several sections, the fastening of which is made in the baluster grooves.
The entire incoming load from the top of the stairs is transferred to the fence posts, so during operation the entire structure becomes a single system. The balusters, step and string will be interconnected. The choice of step type does not affect the strength of the structure, but if the steps are joined together, the surface characteristics will be significantly improved.
Methods for attaching steps to a string ladder
Mortise mount
You can make a mortise-type fastening yourself using a drill and a hand router, a chisel and a jigsaw, and a screwdriver. It is also worth preparing screws, plywood, wood slats, risers and treads.
- The string needs to be marked with a plywood template, in which the tread is cut with or without a riser to the size of the march;
- Draw a reference line with a 50mm indent from the edge edge;
- Make a fastening for guide rails that slide along the top of the board. The template is moved along the material so that the tops of the zigzag steps are located along the reference line;
- Grooves are made in the bowstring, with the obligatory observance of the angle to the location of the fibers of the material. A reliable way to make the correct groove is to use a stencil with a hole in the plywood. In this case, you can use a jigsaw and a drill to make the desired hole size;
- The beam is placed on the trestles, a stencil is placed on top of it so that the tread matches, and a fastening is made;
- Using a router in a clockwise direction, cut a groove 20 cm deep, after which the corners are processed with a chisel;
- Having made the required number of grooves, the staircase is assembled, each step in the groove is coated with glue;
- The risers and treads must be secured with a screw, each step from the outside is attached with screws to the string. A decorative plug is installed on top of the fastener.
Fastening with supports
Fastening steps using metal supports does not require milling. The only tools you will need are a hammer and a drill, nails, screws and metal corners. You need to mark the tread according to a plywood template, then fasten the support block with nails. The metal corners are secured with screws using prepared holes. Each step is connected to the supporting element with a screw.
A staircase with a one-sided string, when the function of the second is performed by the wall, is made as a fastening for steps and balusters. To do this, you need to make a bowstring in which to cut mortise grooves with a router. Treads and risers are assembled into steps. The bottom of the step is attached to a groove on the support beam on one side, and to the baluster on the other.
The lower racks are secured to the floor with bolts, connecting the base of the lower step to them with screws. The second stage is installed, fixed to the fence post (handrail). The back of the bottom step is needed to support the front of the next step, and the middle is fixed to the posts. This principle works for all steps in the ladder.
Material used
The variety of modern materials opens up enormous possibilities for creating staircases on bowstrings. However, wood is most often used as a material for this type of stairs.
The reason for this popularity lies in the good resistance of the material to loads and negative influences. For some people, a significant advantage is that working with wood does not require complex and expensive equipment, and the cost of the material itself remains low.
Experienced craftsmen make luxurious staircases from wood
But, more often than not, simpler designs are found.
The most popular types of wood are:
- deciduous varieties (for example, oak, cherry, beech) - expensive, but beautiful and durable species;
- Coniferous varieties (spruce, pine or cedar) cost less, but due to the release of resin, problems arise with painting.
In addition to wooden products, the following types of staircases are also used:
- metal – especially durable, but not suitable for every interior;
Most often, spiral staircases on a bowstring are made of metal.
Stairs made exclusively of metal are often used in public buildings and industries
Building such a staircase is not easy, but the result is worth it
The combination of wood and glass looks quite original
And, of course, the spectacular “duet” of glass and metal
Instructions for creation
Despite the simplicity of the design, when making ladders on a bowstring, certain rules must be followed. Otherwise, due to poor stability or lack of strength, the flight of stairs may break. Therefore, in order to avoid additional costs and injuries, it is necessary to work strictly according to the instructions.
Design
The main difficulty in creating a flight of stairs on bowstrings is the design. First of all, you should calculate the length and height of the structure, taking into account the following points:
- the height of the step should be from 15 to 20 cm;
- the optimal tread width is 30 cm;
- comfortable span width – from 90 to 110 cm;
- so that you don’t have to bend down during descent or ascent, the clearance height should be at least 200 cm;
- the slope of the flight of stairs should be from 30 to 40°;
- the best fence height is 90 cm;
- The minimum bowstring height is 30 cm, thickness is 4 cm.
Your drawing should show the future staircase in 3 projections
In addition to general points, the type of step, as well as the type of connection to the string, is of great importance.
“Crib sheet” for designing a staircase
Manufacturing
To create a flight of stairs on bowstrings, no specific skills are required. The main thing is accuracy and accurate calculations. However, this matter cannot be done without special tools:
- ruler (preferably metal or engineering);
- level;
- jigsaw;
- hand milling machine or chisel with hammer;
- drill or screwdriver;
- several metal corners
The process itself is as follows:
- on two strings make markings for the steps;
- use a milling machine or chisel to make recesses for the steps;
- install load-bearing beams and secure them to the floor using metal corners;
- cut and sand the steps;
- lubricate the grooves with wood glue and install steps in them;
- make several through holes in the bowstrings;
- insert steel or wooden rods into the holes and secure them with nuts and wide spacers;
- at the beginning and end of the span, install a vertical beam on which the railings will be attached;
- treat the flight of stairs with a primer to prevent rotting or fire.
The process of making a turning staircase on a bowstring At first glance, creating a staircase on a bowstring is not an easy task. However, this is one of the simplest and most uncomplicated designs that does not require extreme skill.
A staircase is a real construction set that can be assembled in several ways from different or identical elements, using different fastening methods and materials. And in most cases, the “constructor” can be assembled independently.
Bowstring as the base of a staircase structure
It is quite simple to understand what a stair string is; just look at the end of the product. This element is a support beam with grooves of certain sizes, into which steps will then be mounted. According to most experienced builders, it is the bowstring that is responsible for the strength and durability of the marches.
The bowstring serves as a kind of foundation for the staircase structure. The photo below shows the external differences between two popular options for attaching steps (on a bowstring and on a stringer).
Staircase on bowstrings and stringers
As you can see, a stringer is a curved beam that secures the steps from below. To increase the strength of such fixation, special cuts are made. This option is best suited for small spaces, as it has a large load-bearing capacity and saves free space. Flights of stairs on bowstrings are more massive, but thanks to the design features, they are easy to manufacture and absolutely safe to use.
Please note that there are different types of strings for stairs: straight, curved, spiral. When choosing, you should take into account the operational characteristics of the future march.
Material and dimensions
The first stage involves selecting lumber in accordance with the established dimensions of the future structure. To do this, a construction work plan is drawn up in advance and a project is created. You should end up with a solid beam without splicing. To make the base of a staircase structure, various types of wood, metal and reinforced concrete can be used.
The preferred material for making your own stairs is wood; a variety of species are used:
- Softwoods such as pine, cedar or spruce. These are budget and reliable options. But the main disadvantage of such materials is the gradual release of resin, which can interfere with uniform painting and subsequent varnishing of the span.
- Hardwoods such as cherry, beech and oak. This is the best option. Oak products are considered the most reliable; they also do not require special care. With careful use, such stairs will serve your family for several decades.
If you are just planning the production of a staircase structure, then you can determine the length of the string based on the flight of stairs. The width of the bowstring should be about 30 cm, thickness - 4-5 cm.
String markings
Marking can be done in two ways:
- using a construction angle or a ruler (there is a high probability of error);
- using a special template.
At the beginning of work, it is especially important to determine the preferred arrangement of steps in relation to the base of the structure.
You can choose the classic marking method - without a reference line (then the groove remains open), or make the nests closed (that is, reproduce the reference line at a distance of 4-5 cm from the edge of the workpiece). Both methods are great for assembling a staircase yourself, so the choice of one or the other depends only on your personal preferences.
Option for making grooves in bowstrings
On the video: marking the bowstring with your own hands.
It is worth noting that when making a wooden staircase with your own hands, you need to know how to avoid the divergence of the bowstrings. For this purpose, certain fasteners are used.
Bowstring fasteners include:
- Metal bands with wedges. They are reliable, durable, and not suitable for compact structures.
- Wooden cords with wedges. Such elements wear out quickly, but are easy to manufacture.
- Screw bands with fixation on nuts. They are considered the best option for fastening bowstrings.
Assembling the stairs (options for fastening strings)
Calculation
When making calculations for the design of a future product, the following features of the staircase design should be taken into account:
- The angle of inclination of the march should be within 30-40 degrees;
- the depth of the steps should not be less than 30 cm;
- The average foot height is 20 cm.
The parameters of the individual components of the staircase are calculated using a formula based on the step length. The average length of a human step is 63 cm, when applying the formula we get the following results: 63 ± 3 cm (2 step heights + step depth).
Attaching and installing the bowstring
After all the necessary measurements have been made and calculations of the finished structure have been carried out, the process of manufacturing the flight of stairs begins. Before this, you need to purchase all the materials and tools that may be needed during the work process.
To attach and install the bowstring you will need the following equipment:
- hammer with rubber tip;
- electric jigsaw and drill;
- manual milling machine;
- tape measure, ruler;
- building level and square.
If you are going to attach the bowstring to the wall, and this is the best option possible, then you need to measure the wall beam in advance and cut off the lower part. This will allow the string to lie flat on the floor. As a result of the actions taken, it will rest on the transverse beam of the opening, which will increase the strength of the entire structure.
To better understand how to fit a bowstring to a wall, watch the video, which clearly shows the whole process.
In the video: installing the bowstring against the wall.
When making a staircase with your own hands, the most difficult question remains - how to attach the steps and make them fit to the string of the staircase. To avoid mistakes at this stage of work, we recommend that you use the following instructions:
1. The march is assembled, after which it is placed so that the bowstring is at the bottom. Next, you need to draw a straight line along the inside of the top step and riser.
2. Another line is made from the back of the frieze tread to the level of the plinth (most often its length is 7.5-8 cm).
3. The next step involves removing the top riser (and remember that the installation of the steps is carried out only after all adjustments are completed).
4. If you are attaching the string along the floor line, then at this stage mark a line parallel to the bottom tread; the bottom of the beam will be sawed along it.
5. Immediately before installing the stairs, experts recommend making a notch on the support post (this will allow the base to fit tightly onto the top floor).
Please note that the installation process for a staircase structure with bent strings is somewhat different. Before starting construction work, we recommend that you study the features of fastening the steps and watch the video below.
On the video: features of installing a spiral staircase on bowstrings.
Stair elements
The main and mandatory components are supports, steps and railings. The shape of the elements is noticeably different.
- Stringer is a sawtooth-shaped supporting inclined beam to which treads are attached. It can be one or several, the steps on it are installed from above.
- The bowstring is an inclined straight beam, but the tread is fixed between two supports.
- A step is a flat element of a staircase on which one rests while moving.
- Railing - stair railing.
The methods of fastening elements to each other may be different, therefore, for example, load-bearing beams, despite their role as support, may be absent altogether.
- Wall – treads can be installed in a load-bearing wall. On the opposite side of the stairs, the steps are fastened together with bolts.
- Modules are a connecting element that fastens the treads together and acts as a support beam. For this design, the support on the wall is partial.
- Frame - a metal structure consisting of a supporting beam of minimum width - 12–18 cm, and stepped bases
Attaching steps to stringers and bowstrings
Load-bearing beams are an indispensable component of wooden stairs, therefore connection methods are described for wooden elements.
Fixing the tread on the beam depends on the method of its manufacture.
- Zigzag protrusions are cut out in a board of the appropriate size according to calculations. Holes are made in the treads, then the stepped elements are installed on stringers and secured with screws. The screws are covered with wooden plugs on top. The photo shows the traditional method of installation on a stringer.
- You can do it differently: attach rectangular supports to the support beam on spikes, and then mount treads on the supports.
Other methods are used to secure elements to the string.
- On the inside of the board, grooves 2–3 cm deep are cut for steps and risers, if they are provided for in the project. The product is assembled and then completely installed in the opening. The groove may have open edges. In this case, the stepped element is pushed to the required depth into the bowstrings already in place. In both cases described, a screed is recommended.
- On the inside of the beam, additional supports are first installed - wooden blocks, a metal corner, and then treads are attached to the supports.
Installation of steps in the wall
The main condition is that the wall to which the installation is made must be load-bearing. Installation on partitions is unacceptable.
- Sealing - grooves of the required depth are knocked out. Treads are inserted into the recesses with the end side and sealed with cement. This is the most reliable method, although it has one drawback: when using the stairs, vibration is transmitted to the wall, so the sound of footsteps is heard throughout the house.
- Installation on brackets - holes are made for special anchors, steps are mounted to the latter through the brackets. The photo shows a version of the cantilever staircase.
- Installation through a wooden beam - used for wooden structures. A beam is attached to the wall, which essentially acts as a bowstring, and then treads are placed on it.
On the opposite side, the edges of the elements are connected using bolts - threaded metal rods. This design looks very lightweight, but is also reliable.
Installing steps on a metal frame
- Metal treads are used extremely rarely. The installation technology itself is simple - the metal product is laid on the base and welded, but it requires experience in working with a welding machine. If this method is implemented in a private house, it is advisable to trim the stairs with soundproofing material.
- Wooden treads can be attached directly to a metal base. But since wood, unlike metal, shrinks, it is recommended to use a substrate during installation. A fragment of plywood 10–12 mm thick is bolted to the frame, and then the wooden surface is fixed to the substrate with liquid nails. In the video, the method of attaching the tread to the frame is demonstrated in more detail.
Modular stairs
When planning a house of two or more floors, it is necessary to calculate and design the location of the stairs in advance. This design is not only a necessity, but can either be a decoration of the building or a problem for it. It is advisable to think about how the steps will be attached: to a bowstring or stringer.
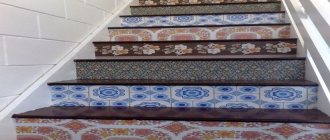
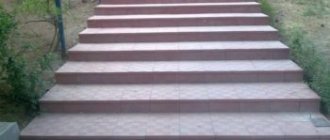
Finishing concrete stairs with solid wood
Despite their reliability and durability, concrete stairs have a huge drawback in terms of aesthetics - unfortunately, they are not attractive in appearance. Concrete is not afraid of moisture and cold, it is fire resistant, and the strength of the structure is ensured by a metal frame, thoroughly hidden from environmental influences inside the reinforced concrete product. Decorative finishing of concrete stairs will help to give the design individuality and originality. Its options depend on the installation location, the style of the room and the flight of fancy.
What can you use to line the stairs?
In administrative and public buildings, on staircases and in basements, the question of decorative design of stairs, as a rule, does not arise. But in residential buildings and apartments, a block of concrete in the middle of the room will look gloomy and unpresentable, no matter how large the room is. There are a lot of methods and materials for decorating steps, but the most popular are:
- tree;
- plastic;
- laminate;
- ceramics;
- porcelain stoneware;
- artificial or natural stone, including marble.
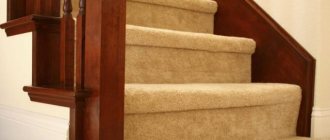
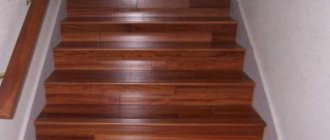
Also, finishing of concrete stairs is made from glass, rubberized materials, carpet, metal, cork, linoleum, etc. You can often find combined options that look great in various interiors.
It is worth noting that concrete cladding is a labor-intensive process, in particular due to the fact that monolithic structures are difficult to make identical with a perfectly flat surface. Therefore, you don’t need to think that a staircase with steps finished with wood will cost less than a solid wooden structure, and it will take more time to finish it.
As for stair railings, their style should be combined with the material of the steps. Most often, balusters and railings are made of forged metal elements, wood or plastic.
It is important to know that the finishing of the steps of a concrete staircase should be done after 2-3 months after its casting, since concrete, even after hardening, continues to give off excess moisture. If this condition is neglected, the steps may deform over time, the concrete may crumble, and when facing with wood, the elements will first absorb moisture, swell, and when dry, most likely, dry out. The best option would be to leave the ladder “unclad” for one heating season.
What you should pay attention to
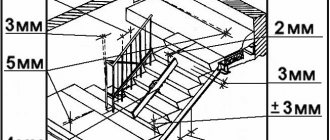
The choice of finishing for the stairs should be done at the design stage, since the calculation of the size of the steps should be made taking into account the thickness of the finishing material.
The installation of formwork should most accurately correspond to the calculated dimensions of the stairs. The height of the steps should not differ from each other by more than 9 mm. Otherwise, the cost of fitting them will increase.
For formwork, it is better to use moisture-resistant plywood with a smooth surface, rather than boards, which leave a lot of unevenness on the surface of the concrete after removal.
By following these simple tips, you can significantly facilitate the work of cladding the staircase structure.
Let's take a closer look at the option of cladding the steps with solid wood.
Preparatory work
The finishing of concrete stairs begins with leveling the steps. After pouring and drying, they almost never have the same height. But the building codes stipulate that within the same flight or interfloor rise, the steps should not have different heights. To meet this requirement, it is necessary to measure all steps and select the highest of them as a basis. Then all other steps are adjusted to its size using a self-leveling mixture.
If the difference is small, the composition is simply poured from above, and if the difference is large, formwork is made of moisture-resistant plywood. Its top edge should be flush with the intended tread surface. It is recommended to fasten plywood to concrete using dowels to a vertical plane.
Do not forget that before pouring the steps must be thoroughly cleaned of debris and construction dust, and the surface must be primed to improve adhesion.
The next stage of preparatory work is laying the plywood. In the design it will serve as a moisture-proofing gasket. Necessary:
- purchase sheets of plywood 1-1.5 cm thick;
- cut out the required elements precisely to size;
- prime the dried surface of the leveled steps;
- alternately apply ready-made or locally mixed adhesive;
- lay the appropriate piece of plywood and check with a level that its position is correct;
- secure the plywood with dowels (at least on both sides).
Wood finishing of steps
The finishing of the steps is made from hard wood, which ensures their long service life. To begin with, risers and treads are made from solid wood to the required size. Finishing work begins from the bottom step, gradually rising to the top.
Three long bolts with a diameter of 6 mm are screwed into the lower end of the first riser so that their ends protrude 6-8 cm. In the design, they play the role of anchors. The caps must be cut off or “bitten off”. Then the riser is placed at the end of the first step and the places where the anchors rest are marked on the floor. Holes are drilled according to the marks and epoxy resin is poured into them.
The plywood on the riser is coated with “liquid nails” type glue, and the prepared element is applied to it, inserting screwed anchors into the holes on the floor.
To install the tread, a groove of appropriate depth is cut into it at the junction with the upper end of the installed riser. From the other end, a second riser is attached to the first tread with self-tapping screws. Next, coat the plywood and groove with glue, after which the first step is installed. It is recommended to temporarily place a weight on top of the step. This is how the entire structure is assembled.
Finishing the steps requires care and patience. Only in this case the result will be predictable!
semidelov.ru
Bowstring mount
Bowstrings are inclined beams that are load-bearing. The steps can be attached to the string between two beams or between the string and the wall. For such stairs, the treads are always hidden between the supporting elements and their ends are not visible.
When a corner or U-shaped structure is being designed, laying steps on beams is a rather problematic task. This is due to the fact that on a winder (without a platform) staircase, each string can have its own size and must be calculated separately for each step. This complicates the mounting task. The corner span with the platform has boards of the same length, which simplifies work during installation.
Attaching the tread to the string
This is done in two ways:
- The first method is mortise steps. To perform it, uniform grooves are cut out in the beam on a machine or manually sawed into which treads are inserted. For an object without risers, grooves are cut only for the steps. When a staircase with risers is installed, separate vertical grooves are cut for them. To install a structure with insert steps, it is assembled in separate spans and only after that they are installed one after another.
- Another method is carried out using sliding steps that are inserted into the groove of the bowstring with open edges. In this case, a small part of the tread protrudes beyond the bowstring. This design can be made by first installing the string, and then simply sliding the steps into the slots.
Installation of mortise steps requires a certain skill and precision. If the groove is not cut accurately and does not correspond to the required size, then wedges will have to be inserted into it under the tread itself. Objects with mortise steps have slightly lower strength than sliding ones, so it is better to strengthen the string with additional threaded steel rods. These rods can be hidden by placing their bolts inside the step. On the bowstring, you can also mount treads on wooden blocks or metal corners.
You should pay attention to detail at the design stage to avoid possible problems in the future during installation.
Finishing stages
Even before pouring the form of a concrete staircase, the cladding material, the gap for leveling mixtures and the use of plywood are taken into account. These nuances affect the final height of each step. Work on the installation of wooden coverings is carried out after the installation of the stairs and the final hardening of the concrete. This is one of the final stages of renovation and decoration of the room.
Surface preparation
At the first stage of installation of the coating, concrete is prepared for subsequent work. The surface is cleaned of dust and dirt using a vacuum cleaner and wet cleaning. The steps are treated with a special primer; in case of strong absorption, a double application is made. This is a simple process that will ensure the fixation of the top layer of concrete and its subsequent adhesion to other materials. After the primer has dried, the errors in the height of the steps are measured. To level the surface of the stairs, make a screed or install logs (if the height difference is more than 1 cm). Wooden steps are laid directly on concrete or a plywood backing is used, which additionally eliminates remaining errors after leveling and protects the stairs from moisture accumulation.
Installation of wood cladding
This is the main stage of processing a concrete staircase. When the plywood has adhered to the base, it is thoroughly washed. Wooden cladding elements are secured with polyurethane glue and self-tapping screws. Although builders claim that with a high-quality adhesive solution, the mechanical method of fastening may not be used. The wooden cladding of the stairs is installed in stages:
Installation is done in stages, starting with the riser, which is attached with glue and self-tapping screws.
- First, the riser is secured with glue and self-tapping screws.
- A groove is cut out on a wooden step and filled with sealant. The fragment is glued to the plywood, and the groove is placed on the lower riser.
- To ensure that the glue is distributed over the surface, the wooden part is pressed tightly and moved left and right.
- To completely bond the coating to the base, place a load on the step for at least a day.
Finish coating
The tree needs a protective coating. To do this, use varnish or paint. If the task is to preserve the natural pattern of wood, then choose a varnish coating. It is almost invisible, but gives extra shine. At the same time, the varnish does not hide the flaws of the cladding. In this regard, paint is better. To change the shade of the steps, stain is applied under the varnish.
Attaching the tread to the stringer
Before solving the problem of how exactly to attach the steps to the stringer, you need to decide what it will be made of, wood or metal. But the main thing is that the staircase fits harmoniously into the interior of the building. The steps are attached to the stringer by laying them on top of the supporting blocks. In this case, the edge of the tread is completely open. Structures mounted in this way are more common.
For stairs on a stringer made of wood, pine is the best choice in terms of price and weight. You can use oak boards because of their strength, but they are more expensive. The main thing is that all parts of the wooden march are made from the same type of wood. It is advisable to carefully calculate the number of steps, their weight, the width of each flight and the total rise of the stairs.
Metal stringer stairs are more popular for their variety. Such elements lighten the entire structure and help save space. They are stronger and more durable than their wooden counterparts. Another advantage is that they have the ability to be “broken” and straight. Lightness is often achieved by the absence of risers.
When deciding to attach steps to a metal stringer with your own hands, you need the ability to perform welding work.
Installation of wooden steps on such a structure requires the installation of metal frames attached to the timber, into which each step is placed.
Fastening the balusters
Balusters are vertical posts that stand in the fencing of a staircase structure at a short distance from each other. In architectural design, figured and carved types of these elements are used. They both decorate the entire object and serve to strengthen its strength.
Attachment to steps is carried out using several methods. The installation of balusters on the string of a flight of stairs is carried out on beams. You can fasten them either to the outer side, but then the bolts will be visible, or to the top edge. In order for the staircase to look aesthetically pleasing and for the fasteners to not be visible from the balusters, you need to drill holes in the beams, insert a rod and close it with a dowel.
Mounting to the top edge is carried out in two ways:
To install balusters on a string with your own hands, milling work is necessary, because sawing by hand will take a lot of time.
Attaching posts to steps
Fastening directly to the steps is possible when installing treads on stringers. This is easy to do for both wood and metal objects. How to attach balusters to steps is shown in detail in the video. First of all, you need to decide how many columns there will be and at what distance from each other. The bottom and top strips should be larger to enhance the strength of the entire staircase.
To make the fastening reliable, they are placed on pins, which are wedged with glue into the holes made in the tread and in the post. Since special questions are usually not asked about metal steps, this type of staircase structure is the most common.
With the modern pace of life, most of the population dreams of building a country or private house. But often when building a house with 2 floors or more, the problem of installing wooden stairs arises.
When building a two-story private house, the question arises about installing a staircase. The most suitable material for its construction is wood.
Of course, you can get out of the situation by purchasing a ready-made design or ordering it, but this will be much more expensive. You can make it yourself, but you need to study the nuances of the work.
Preparatory work
First, the tools are prepared. Mainly:
- hacksaw;
- roulette;
- level;
- brushes;
- plane;
- pencil and other tools depending on the design (for example, a screwdriver).
Before starting, you need to make a drawing and make an estimate, where the height and width are calculated, the shape of the steps and the method of their fastening are designed. But the design takes into account the space that the staircase should allow, the configuration of the structure and the lifting height, as well as the aesthetic appearance.
According to their design features, stairs are:
- screw;
- marching.
Screw structures are rarely used even if the area of the room in a wooden house is very small. The small demand for this type of ladder is due to the fact that it is inconvenient to use, for example, for lifting or lowering massive things. It performs a single function - descent or ascent. Due to its design, which consists in the fact that the support is a single pillar, it is necessary to calculate everything down to the smallest detail, since if even a minor mistake is made, the unexpected can happen.
Marching stairs are installed quite often.
Its appearance in a wooden house consists of marches consisting of steps and platforms. In turn, they are single-flight and multi-flight. Using this type of model, using all your imagination, you can create stairs to suit any design.
Flight stairs can be straight, they can be made with either one flight or two, which are separated by platforms. The disadvantage of these stairs is that they are very massive and their use in a small room is unreasonable.
They mainly use rotating double-flight staircases, since this design saves space. You can install marches with a curved design, which has a convenient approach angle, where the steps are rotary. When making multi-flight stairs, you can not use platforms, but make turning steps.
To choose a suitable design, firstly, you need to select a space into which the staircase will fit and will not create inconvenience during use. Secondly, you need to make measurements, calculations and draw a drawing with the location of all elements.
What kind of wood to make steps from?
You can decorate the stairs with different types of wood. Its choice is influenced by price, appearance, and quality characteristics.
Advice. In case of self-finishing, pay attention to the density and hardness of the wood. Some varieties are very difficult, almost impossible to process without special tools.
The most popular types of wood used to make steps are shown in the table.
But soft pine wood quickly wears out, losing its attractiveness and strength. Such a finish cannot be called durable.
It is important! When choosing a material, first of all pay attention to its quality and the strength requirements for the staircase and the conditions of its operation.
You can order the production of steps from a specialized company, and then simply install them. But a wooden staircase on a concrete base will cost less if you buy an array and cut out all the parts yourself.
In any case, you will have to make some measurements and calculations to determine the amount of material needed, or transfer the necessary data to the manufacturer. This amount depends on the design of the staircase. After all, even an ordinary straight span can be designed in different ways.
You will need the following information:
- Number of treads and risers;
- Tread dimensions (thickness, depth, width);
- Same riser sizes.
Note. If the staircase is spiral, with winder steps or different tread depths, to determine the required amount of material, dimensions are taken along the larger side of the step.
After casting the structure, at least 2-3 months must pass (depending on temperature and air humidity) before the installation of wooden steps on a concrete base can begin. Ideally, you need to withstand the entire heating season.
This is due to the fact that even hardened concrete releases excess moisture into the environment for a long time and continues to dry. If you finish the staircase before this time has elapsed, the moisture will destroy the base itself, and the wooden elements will begin to absorb it, swell and deform.
Also, remaining water in the concrete can lead to the formation of mold under the finished coating, which will grow.
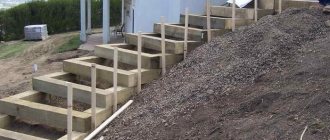
Preparing the base
Before attaching wooden steps to a concrete staircase, it must be prepared for installation by carefully leveling the horizontal surfaces. They bear the maximum load. Vertical planes (risers) without obvious defects can be left untouched.
There are two alignment options:
- If there are no serious flaws or differences in level on the surface, and all steps are approximately the same height (differences within a few millimeters are allowed), then the planes are leveled with special self-leveling mixtures.
- If there are noticeable differences, plywood formwork is attached to each step, the upper edge of which should set the required level. The same mixture or concrete solution is poured into it. If the layer is thick, it can be reinforced with metal mesh.
Advice. Before leveling, be sure to clean the stairs from dust and prime them to improve the adhesion of the surface to the solution.
Again, the laying of wooden steps on a concrete staircase is delayed until this layer has dried. But not 2-3 months, but several days. This depends on the thickness of the screed and the air temperature.
Substrate device
Plywood is used as a waterproofing and shock-absorbing layer between concrete and wood. It absorbs moisture much worse than solid wood. Also, plywood finally smoothes out all the unevenness of the base.
For reference. You can do without a substrate, but then the concrete must be treated with liquid rubber or another waterproofing agent. And make the steps at least 4-5 cm thick.
There are also certain requirements for plywood:
- It should be dry;
- It should not have holes, cracks, knots, dark spots or other defects;
- The thickness of the substrate for treads should be at least 10-15 mm. Risers that do not experience serious loads can be lined with thinner material.
The following are instructions for installing plywood pads on stairs.
Components of the structure
A stringer is a load-bearing structure that performs the supporting function of steps and risers, and also bears all the loads.
The bowstring also performs a supporting function. It is a beam with recesses into which the end sides of the steps are installed. Due to the fact that the bowstring cannot withstand heavy loads, it is rarely used.
Steps. The design of these elements consists of horizontal (treads) and vertical (risers) beams. If desired, the stairs can be built without risers, and the gap between the steps will not be closed. In this case, the ladder is considered fragile.
The shape of the steps is made rectangular, rotary, and to give the design originality - radius.
Railings are wooden trim elements such as balusters and handrails. They come in different shapes. Usually the shape depends on the customer's wishes, since they can be made to order.
With a multi-flight structure, a support pillar or several pillars are additionally installed at turns.
The main advantages of wood paneling
In addition to the aesthetic component, this decision also has a number of very practical positive consequences. After finishing with wood, concrete stairs become:
- cozy - because natural wood remains warm enough even in a cool room;
- comfortable - it’s pleasant to walk along such an interfloor passage barefoot;
- fragrant - natural wood fills the premises with a pleasant smell of forest freshness for a long time after covering;
- structurally flawless - professionally made concrete staircase covering based on accurate measurements allows you to level out the unevenness that inevitably arises during the process of pouring cement steps and hardening the composition.
Installation of wooden stairs
Before installing the stairs, all parts are pre-painted.
To install the stringer to the wall, it is necessary that the walls are perfectly smooth.
After preparing and painting all the elements of the future staircase in a wooden house, you can begin assembly and installation.
First of all, they begin to install those elements that will later be difficult to approach. If the house is two-story, first install the fence on the top floor, since then it will be difficult to install facing boards. When the fence is installed, begin marking the locations of stringers and intermediate posts on the walls. Problems may arise when performing this work due to uneven walls. To avoid problems, before starting to install the structure, you need to take care of leveling the walls, but this is required if the stringer is attached directly to the wall. If the project included fastening to the upper wall stringer and to auxiliary pillars with an indentation from the wall, then alignment is not necessary.
To avoid mistakes when drilling holes, it is best to do them directly on site in elements that have already been painted in advance. The evenness and accuracy of the structure depends on correctly made holes.
In order not to make a mistake, you first need to make a hole in the stringer or in the post for the pin, then attach the element to the location and make a mark through the hole. Such work may not be possible for one person, since some parts are very heavy. A cross is drawn on the mark, the length of the strips is 3-4 cm, which will later help to align the hole. The stringers are attached using blind plugs and dowels, which are installed about 3 pieces for every 2 m of the structure.
Next, you can begin the process of attaching the steps. First you need to mark the places where the steps will be located. To do this, you need to rely on previously made calculations and drawings. When marking, a level is used to draw horizontal lines to avoid unevenness. It is necessary to take into account that the fastening mark is first made on one stringer or bowstring. After this, the step is installed and the level is checked, and only then can markings be made on the second stringer. To avoid mistakes, it is not recommended to fasten the steps immediately, but only after all the markings have been completed.
The steps are marked from bottom to top, and when it comes to the last step, you need to check its size. If it does not match, then the marking is adjusted. Only after all the markings have been made correctly can you begin to drill the steps and fasten them.
Along the drawn lines on the bowstring, a corner is installed using self-tapping screws, and steps are subsequently installed on it, which are secured with self-tapping screws. To fasten the step you will need 4 self-tapping screws, two on each side, but if you increase their number, you can eliminate the creaking. The flight of stairs is ready.
Installation of a spiral staircase: a brief description
Since the shape of the screw structure differs from the marching varieties, the installation principle here is different. It is recommended to install such a staircase to the next floor in the following order:
- a drawing is drawn up;
- Based on the calculations, structural elements are manufactured;
- in the selected location, the lower support unit is installed and secured to the floor;
- a vertical stand is inserted into the unit;
- the steps in the tripod are pinched (or placed on it);
- a platform is installed at the floor level of the second floor and a support rod is secured;
- Balusters are inserted into the holes on the steps, onto which the railings are placed.
Installation of a finished spiral staircase
Requires a careful approach and attentiveness from the master. Incorrect calculation or poor quality fixation of elements can negatively affect the strength and durability of the structure. For this reason, the assembly of the staircase structure must be carried out with special care.
|| Simple stairs || Stairs with bowstrings || Stairs with stringers || Spiral staircases || Side-less (hanging) stairs || External stairs || Railing for stairs || Finishing stairs || Staircase lighting || Staircase repair || Use of the under-staircase space
|
|
|
|
|
|
|
There are several ways to attach your feet to the bowstring. In the simplest way, the steps can be secured using support bars or corners (see Fig. 66, c, e). To do this, along the tread line, wooden blocks or metal corners with holes for screws are nailed or screwed to the bowstring. The steps are attached to support bars or corners using screws. Despite the fact that this method is the simplest, it is rarely used in practice. A flight of stairs made using this method looks rough and can be placed in utility rooms or other places where high aesthetic requirements are not imposed on the stairs. In our opinion, the implementation of this method is accessible to a home craftsman without high qualifications, so we will not dwell on it in detail. Sometimes the steps are simply attached to the bowstring and secured with screws screwed in from the front side (Fig. 66, d). This method is called end-mounting. But in this case, the fastening strength is low, since the steps are held in place only by screws. Therefore, this method can be used only in exceptional cases when other fastening is impossible. The loads on such steps should be minimal. The fastening method using a secret groove made in the bowstring helps to avoid this drawback (Fig. 66, b). In this case, the step receives additional emphasis on the edges of the groove and the possible load on such a step increases.
Fastening in groove with remainder
(Fig. 66, a) is quite reliable. To do this, two counter grooves are cut out in the string and the steps, with the help of which fastening is performed. The advantages of this method include its greater reliability. In addition, the strings of such a ladder will never come apart during operation. Essentially, this method is a transitional option from a ladder with bowstrings to a ladder with stringers. The appearance of such a staircase will be more reminiscent of a staircase with stringers. The disadvantages of this method include the artificial lowering of the load-bearing capacity of the step and string due to counter-grooves. When loads are applied to the step from the groove side, the wood fibers may peel off, and half of the step may break off. To prevent this from happening, it is necessary to additionally secure the front edges of the steps. Therefore, despite the apparent advantages of the method of fastening into a groove with a remainder, it is not used very often. The installation of railings in such a staircase is carried out according to the methods of fastening to stairs with stringers (that is, not to a bowstring, but to a stringer, which will be discussed later).
Fastening steps using various tenon joints
are shown in Fig. 74. Such connections are called middle knitting. Despite the complexity of manufacturing, these connections are durable and have improved aesthetic qualities compared to the methods described above. Let's look at them in more detail.
Rice. 74.: a - in a wide groove; b - in a narrow groove with one shoulder; c - in a narrow groove with two shoulder pads; g - award with one shoulder pad; d - reward with two shoulder pads; e - reward with flat spikes; g - using dowels
Connecting steps using dowels
(Fig. 74, g) is considered the least labor-intensive. But in this case, the load-bearing capacity of the steps will be determined only by the strength of the dowels and walls of the sockets in the steps. Therefore, this method can only be used when large loads will not be applied to the steps of the stairs. The diameter of the dowels in this case should be maximum (8-10 mm), and their number on one side of the step should be at least three. Dowels should extend into solid wood at a distance of at least 20 mm.
Connecting steps using spikes
(Fig. 74, e) more durable. But difficulties in accurately marking spikes and sockets impose certain restrictions on its use. The strength of the steps in this case will be determined by the strength of the spikes made in their sides and must comply with regulatory requirements.
Connected to the award with one or two shoulder pads
(Fig. 74, d, e), made in the form of a beveled solid spike (dovetail type), holds the bowstrings so that they do not diverge in different directions. With this method, there is no need to perform additional fastening of the flight of stairs to prevent possible divergence of the bowstrings. However, the use of the award fastening method is limited by the fact that the step tenon can only be inserted into the bowstring groove from the side position. Therefore, this method can only be used in flights of stairs made without a reference line of bowstrings.
Narrow groove joints with one or two shoulders
(Fig. 74, b, c) are quite effective. But they are used less frequently due to the fact that it is necessary to perform additional work on the manufacture of shoulder pads, which also weaken the strength of the steps.
Wide groove connection
(Fig. 74, a) is devoid of all the previously mentioned disadvantages and therefore is used most often. Therefore, in the future we will talk about this connection, calling it simply a groove connection. With this method, the end of the step fits into a groove made in the string, providing a sufficiently large load-bearing capacity of the flight of stairs.
So, if you decide to attach the steps to the groove, then you should make precise markings. The boundary of the groove should be taken as the line of the tread made when marking the bowstring. A piece of board with a width and thickness equal to the corresponding dimensions of the steps can serve as a template for marking. For it, you can use the segment obtained during the manufacture of steps. To mark, the template is applied to the line of the bowstring obtained during preliminary marking, and traced with a pencil, obtaining the contours of the groove.
A flight of stairs can be made with or without risers. In this case, the riser is not a mandatory part of the flight of stairs and its manufacture is dictated by the following conditions. If children use the stairs, then between the elements of the flight of stairs there should be no gaps exceeding 10-15 cm. Therefore, in order to prevent the child from sticking his head between two steps, the space between them is completely or partially covered with a riser (Fig. 75) (called sometimes muted).
Rice. 75.: 1 - riser; 2 - tread; 3 — bowstring (kosour); 4 — railing post; 5 - connection of the riser with the tread (in a narrow groove)
In addition, a solid riser can serve as an additional reinforcement of the step against sagging if the thickness of the board from which the step is made is insufficient. The presence of a solid riser makes the flight of stairs closed, so accidentally fallen objects and debris cannot fall through the gaps in the flight. But most often the installation of risers is dictated by purely aesthetic considerations. If you decide to make a staircase with risers, then their marking and fastening can be done using all the methods we have listed for steps. If the strength of the steps is sufficient, then to simplify the design of the stairs, you can omit the grooves for the risers, limiting yourself to attaching them to the step and to the “end” with a bowstring. The length of the riser in this case will be less than the length of the step by twice the distance at which the step enters the groove of the bowstring. Such a riser should be placed symmetrically relative to the step.
A country house cannot do without a staircase; this element of the interior allows you to properly zone the room and facilitate access from one room to another. There are two main types of staircase structures: on bowstrings and stringers. The choice of one option or another depends on many factors (room area, financial capabilities of residents, personal preferences, design specifics).
The first type is a classic model and that is why it has a number of undeniable advantages. In this article we will look at why it is better to choose a ladder with bowstrings, how to make it yourself and avoid mistakes during marking and installation.
Installation of railings for stairs: features
The installation of railings must be taken very seriously. They must be cut at the same angle, which creates difficulties when sawing by hand, as there is a possibility of error. In this regard, the cut is made on a special machine. Fence posts are secured to the floor with hardware.
To attach the handrail, a recess with a smaller diameter than the rod is drilled in the string, balusters and in the handrail itself. Then the structure is installed on the pins and secured with self-tapping screws. To ensure stability of the fence, the lower end of the handrail is attached to a post, and the upper end is attached to a wall or a wooden post. The fastening must be strong, since a large load occurs in these places.