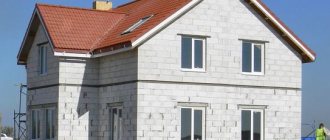
Currently, aerated concrete is very often used in the construction of buildings. It has low thermal conductivity and high strength, therefore it is used in the construction of one-story and multi-story buildings.
Installation diagram of aerated concrete walls.
Aerated concrete has a porous surface. It deteriorates from moisture and aggressive environmental influences, so walls made of aerated blocks are covered with cladding.
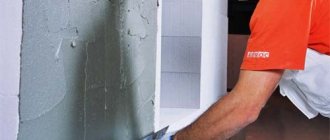
Puttying aerated concrete walls is part of these activities. Before performing it, it is necessary to carry out preparatory work.
Features of aerated concrete
Aerated concrete, gas silicate and foam concrete - all these materials belong to cellular concrete. Foam concrete is made from a mixture of cement, sand, water and foam. Aerated concrete blocks are made from quartz sand, lime, cement, water and aluminum powder. Gas silicate is one of the types of aerated concrete. Its main difference is that it contains less cement than aerated concrete, and more quartz sand with lime.
Installation diagram of aerated concrete walls.
Since water is used in the production of aerated concrete and gas silicate blocks, when leaving the manufacturing plant they have a humidity of 26-30%. After completing the construction of the house, you need to wait at least 6 months so that the gas block laid in the walls is completely dry and the final shrinkage of the lower part of the base occurs. Only after this can you begin finishing and puttying the aerated concrete.
In addition, for applying primers, plasters and putties, the air temperature at the place of work must be at least + 10˚ C. This automatically postpones the time for applying cosmetic finishing to the spring-summer period.
How to plaster aerated concrete video
It’s worth saying right away that plastering work on aerated concrete is neither simple nor cheap.
If you have already firmly decided to carry out plastering work in a house made of aerated concrete, then use only suitable materials for this. Don’t forget, this is the guarantee that the work you perform will be of high quality, and the plaster will delight your eye for many years.
Interior renovation is carried out in several stages. When carrying out repair work, it is important not to forget about plastering the concrete walls from the inside. Plaster for aerated concrete plays an important role, even when it comes to carrying out work in modern panel buildings. As a rule, concrete slabs have an uneven surface, and this defect cannot be corrected with putty alone. Block covering is necessary for a number of reasons. These include the smoothness and cleanliness of the wall surface.
Various finishes
One of the purposes of cosmetic finishing is to smooth out irregularities, joints and seams. But the aerated block, due to its structural features, when laid, produces a smooth wall, the joints of which are almost invisible. And what is noticeable can be easily removed with a special grater. Therefore, if desired, you can do without plaster.
For aerated concrete and gas silicate walls, 2 types of finishing are used:
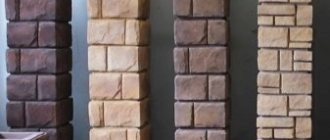
The most common method of cladding aerated concrete walls is brickwork.
- Classical, when plaster is laid, reinforced with mesh, and then putty is applied on top of it.
- Lightweight when limited to a double layer of putty.
The classic version, supplemented with plaster mesh, is the most durable and durable. This finish does not crack and does not require frequent updates. However, it is more labor-intensive and expensive to implement.
The lightweight version is easier to implement. When using high-quality types of putty, such a finish will faithfully last for several years - albeit not as long as the classic one.
Procedure for plastering aerated concrete walls
Before starting work, it is better to familiarize yourself with the video in this article.
Tip: Building blocks made of cellular concrete are quite smooth with almost invisible seams. There is no need to use plaster mortars to level surfaces. It is enough to apply only a thin layer of the mixture.
The instructions for plastering walls suggest the following procedure:
- Surface primer. A composition specially designed for aerated concrete, the surface of which actively absorbs moisture, is applied with a brush or roller.
- A reinforcing mesh is mounted, which is attached to the surface with self-tapping screws (see How to attach a plaster mesh to a wall).
- The walls are finished with a thin layer of plaster.
Correctly selected plaster mixtures for aerated concrete blocks allow you to make your home not only beautiful, but also warm, retaining all its positive characteristics for a long time.
Recently, aerated concrete has been used in the construction of private houses. The material has earned wide recognition due to its positive qualities. This material is produced in fairly voluminous blocks of light weight, so construction is carried out at a rapid pace.
Materials and tools
Like all construction work, wall finishing should begin with calculating how much materials and what tools will be needed to complete the task.
In addition, you need to understand the difference that exists between plaster and putty. Plaster is a load-bearing layer that smooths out potholes and becomes the basis for subsequent layers of finishing. Leveling the plaster is only possible when it has not yet “set” and hardened. Putty is the top, decorative layer or layers on which paint is applied or wallpaper is glued. Putty, unlike plaster, is trimmed only after drying using special graters.
- tools that will be required for classic finishing of aerated concrete walls;
- clean containers for diluting plaster and putty;
- roller for applying primer;
- painting rule 2 m long;
- laser or bubble level;
- plane for leveling aerated concrete walls;
- metal trowel for plaster;
- spatula for applying putty;
- a small metal tray for laying out putty;
- drill with a circular attachment for kneading mixtures.
Performing a classic finish
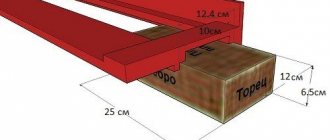
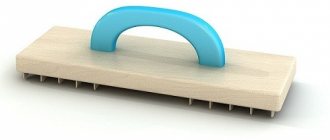
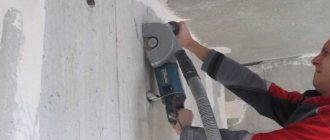
First of all, you need to smooth out the unevenness and protrusions on the seams using a special aerated concrete plane or float. Then the wall is thoroughly swept, removing dust and flying pieces.
Irregularities that may remain on the seams due to uneven masonry should be filled with mortar for aerated concrete blocks. Then you need to let the solution harden and check the evenness of the wall with a level. If necessary, you can go over the surface with a grater again.
Diagram of the composition of a wall made of aerated concrete.
After this, the wall is swept again and covered with a primer. And wait until the primer dries completely. After the primer has dried, a beacon profile is attached to the blocks, if one is planned.
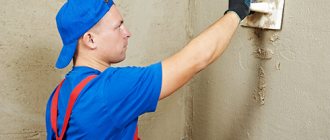
After this, powder plaster is diluted in a container. You can use a drill with a circular attachment for this, setting it at low speed. And they begin to apply the bottom layer of plaster to the wall using a trowel. Level the surface with the same trowel until the mixture “sets.”
Then they lay out a plaster mesh on the walls, pressing it with their hands and a trowel into the plaster. Now you should wait 24 hours until the plaster dries. After this, the top layer is treated with a primer. Then time is given for the primer to dry, and the top layer of plaster is applied flush with the ridges of the beacon profiles, if any.
The evenness of the coating must be checked all the time using a painting rule and a level. After laying the top layer of plaster, you need to wait another 24 hours, cover the walls again with primer and only then start covering them with putty. Putty usually takes the same amount of time to dry as plaster – 1 day.
Why plaster......?
Recently we were asked the question: “Is it possible not to plaster the foam concrete from which the cottage is made?” In particular, we will try to answer this in the article “ Why plaster…. ? ", where instead of the ellipsis we substitute
Why plaster - why does this question arise? Out of a desire to save money. After all, plaster, especially smooth and professional plaster, is not cheap. And, since polystyrene foam, etc. themselves smooth, then, in theory, it would be possible to do without plaster.
They say that plaster is needed for decoration. But it’s easier to decorate with just paint. They say you need to level the wall with plaster. But it can also be leveled with drywall. They say that plaster protects against moisture. But neither brick, nor foam block, nor wood concrete, nor polystyrene foam allow moisture to pass through.
So, why do you need plaster?
Now, if the house were made of straw (“Geo-dome made of straw” and “Frame and frameless straw house”), an adobe house or a house made of bags of earth - everything is clear here. Plaster really protects against erosion by rain.
Oddly enough, the reasons why you should use plaster are different for different materials. Moreover, there are many conditions under which plaster is/is not needed for these materials. Let's start in order.
Is it necessary to plaster the brick?
If the wall is built in such a way that there are gaps between the bricks, and if you do not want warm air to blow out in winter, then plaster is needed.
If the wall is so crooked that it infuriates you, then plaster is needed. If the curvature of the walls is not noticeable, then you don’t have to plaster.
If you want to glue wallpaper, then plaster is needed. Although liquid wallpaper can be applied without plaster.
If you like the look of brick, you can simply sand it and varnish it. You can also make a floor out of brick (Brick flooring is an alternative).
If the brick wall is thin and you want to strengthen it, then plastering on both sides using reinforcing mesh will correct the situation.
Light version
As can be seen from the above description, finishing with plaster, mesh and putty takes a lot of time. You can cheat and apply only putty to the walls. The best choice for this case is Glatt+Full putty from the German company Pufas. It evens out and fills uneven areas, creating a thick layer thanks to its composition - Glatt+Full consists of cellulose mixed with gypsum.
Work with putty must be done quickly, as it sets very quickly. After just 60 minutes this putty hardens. Once cured, Glatt+Full can be floated in the same way as regular putty.
Before applying the composition, you should first treat the wall with a primer. In this case, it is better to choose Ceresit CT 17, a water-dispersed primer that does not reduce the vapor permeability of the base. After the primer has dried, a layer of putty is applied to it. The mixture is leveled with a grater. After a day allowed for final drying, the putty is wiped off with a grater.
Methods
For plastering the internal surfaces of a building in the construction of which aerated concrete was used, two methods are used. The first method is that plastering on aerated concrete is carried out in such a way as to achieve vapor permeability in concrete walls due to the unique qualities of the material. Builders do not recommend using cement and sand mortar for finishing blocks indoors. Aerated concrete blocks instantly absorb liquid, after which they become covered with cracks. It will not be easy to disguise the emerging irregularities even after priming the vapor-permeable wall.
Some specialists plaster aerated concrete blocks using another method - vapor barrier. In this case, the indoor microclimate will be the same as in reinforced concrete buildings. The only difference is that such plastering will be more reliable.

